Email Notifications and Confirmations via Airtable Automations
🔴 On2Air Forms has been shutdown to focus on our On2Air Backups Airtable app Learn more about automated Airtable backups - on2air.com
You can set up email notifications and confirmations for your form entries or form updates via Airtable automations.
There are multiple ways to set up the automation and your table, but here’s one way you can accomplish receiving emails when a new form entry is created.
In this article
-
Setting up the On2Air Form
-
Setting up the Automation
Setting up the On2Air Form
Section titled “Setting up the On2Air Form”-
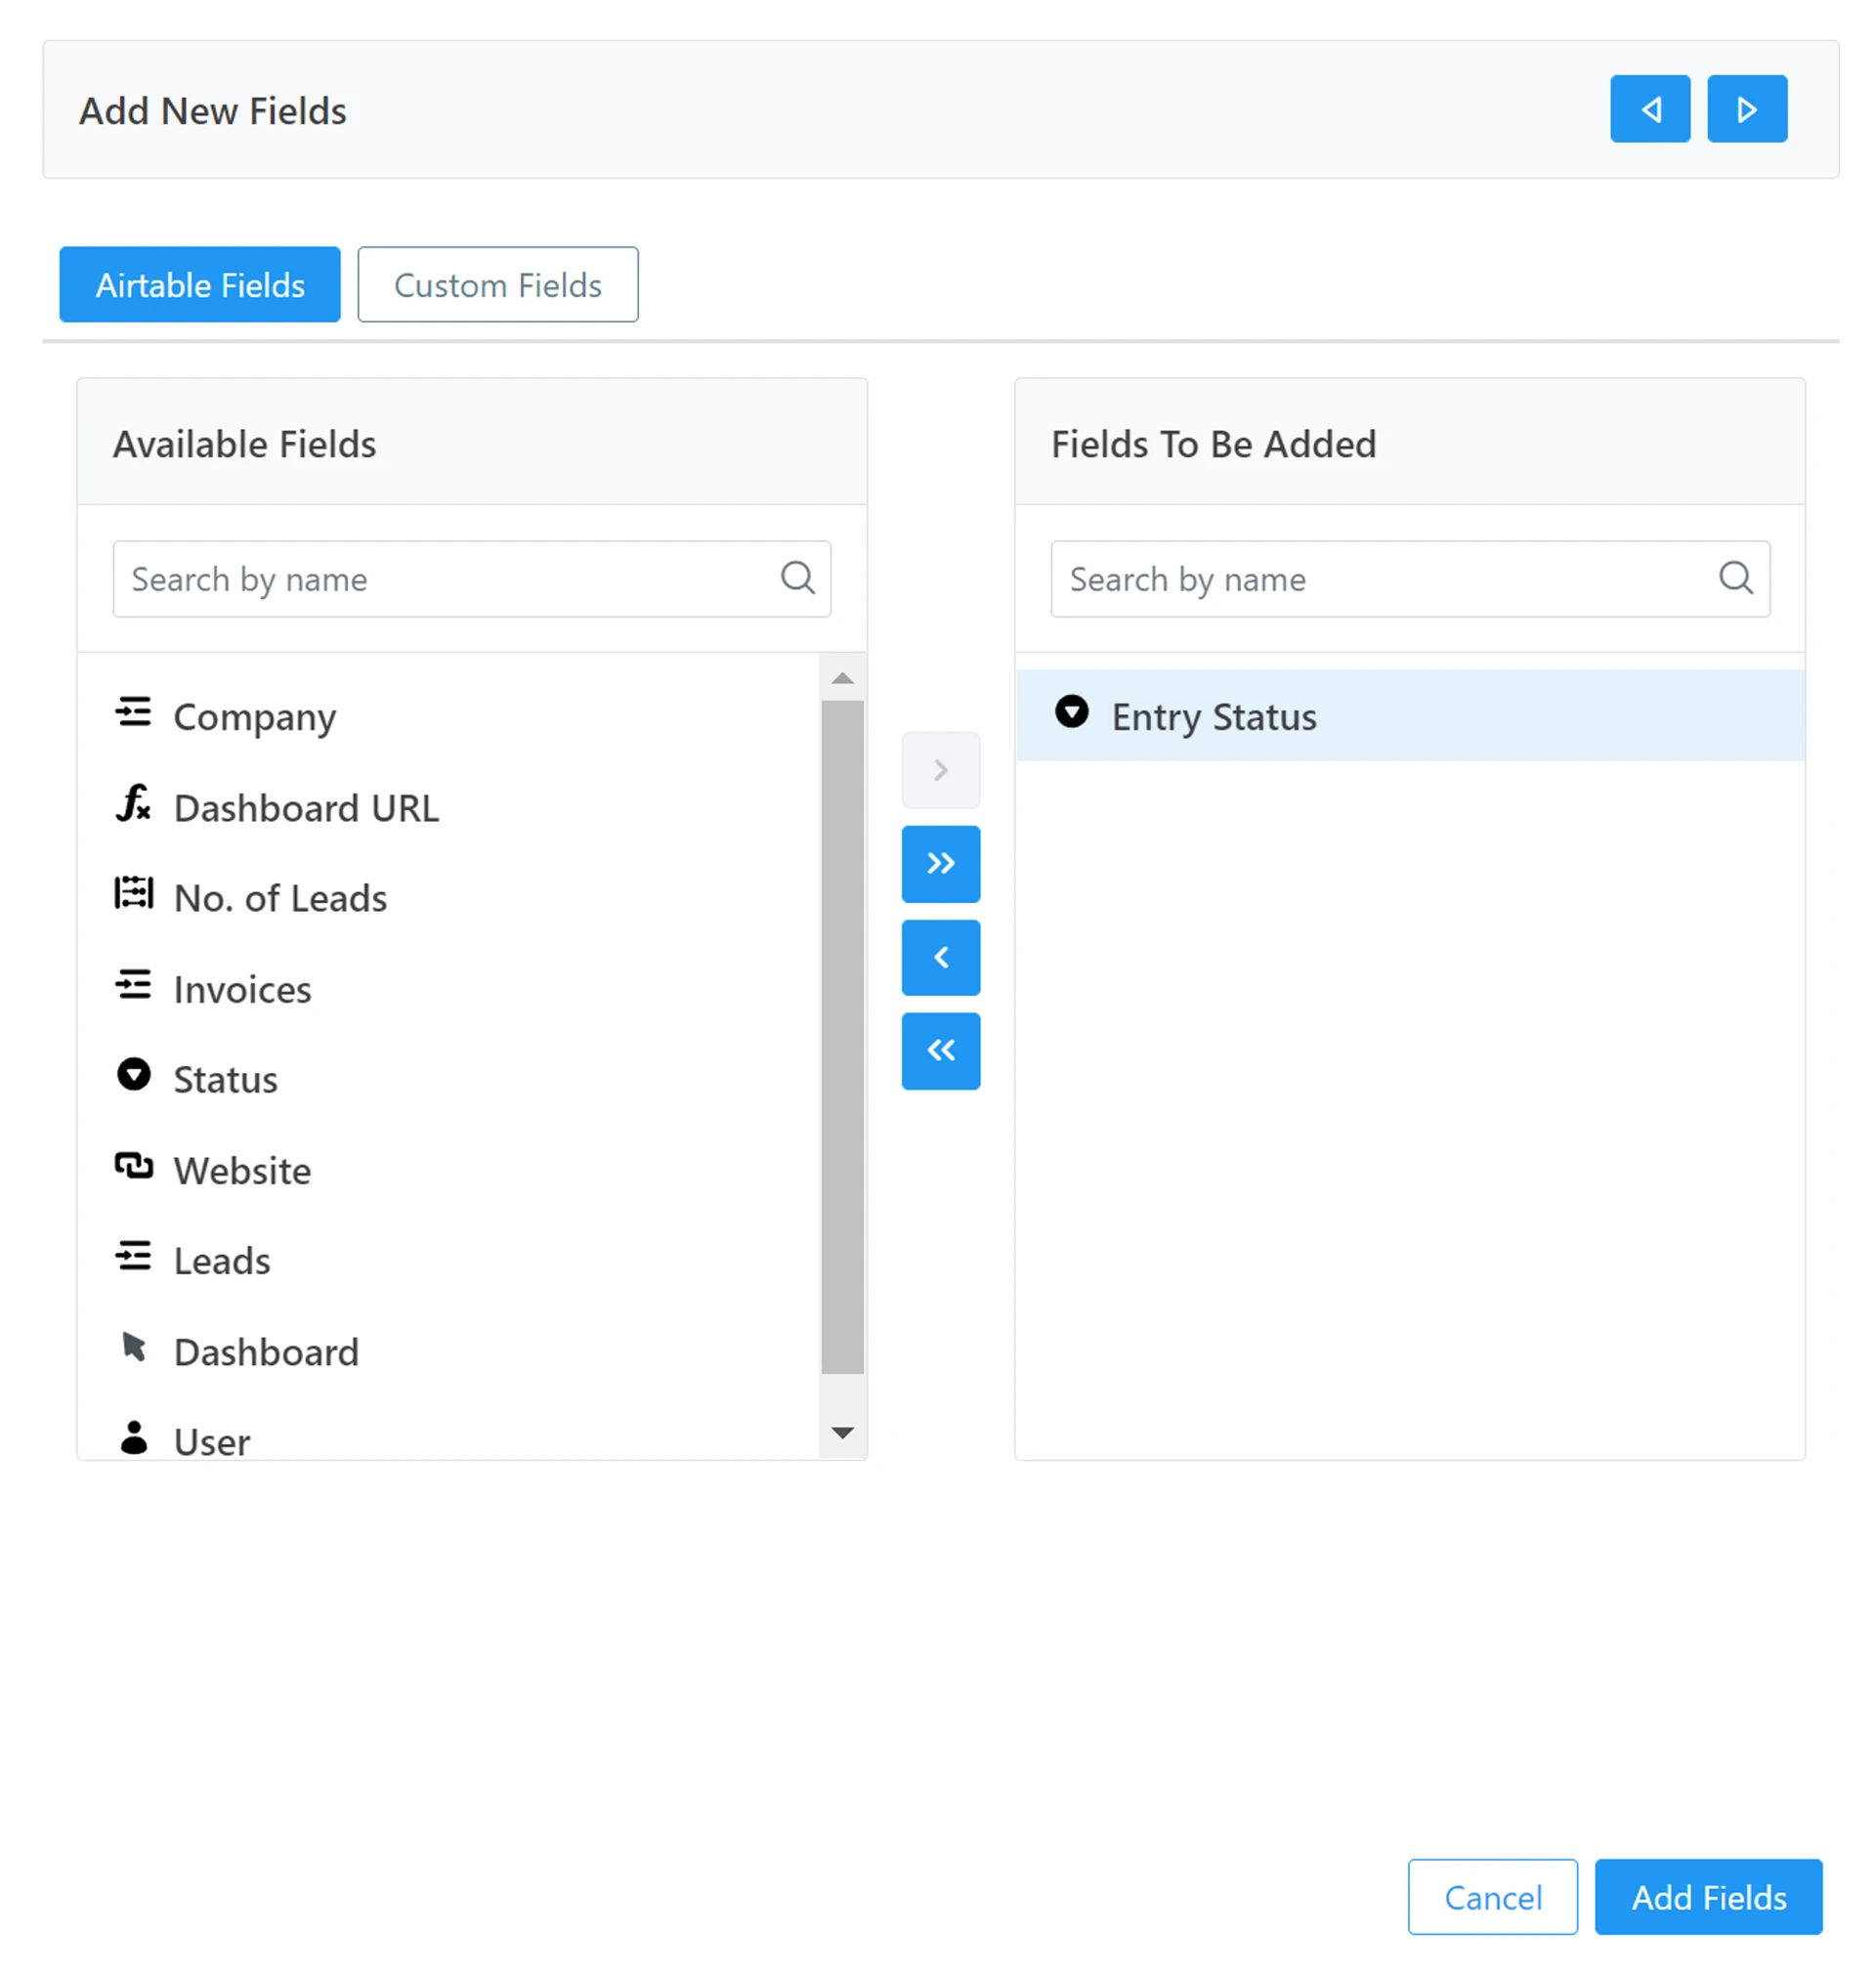
Create a Single-Select field in your table and label it Entry Status
-
Add select options of New Entry
-
In your form, add the single-select field as a field on your form
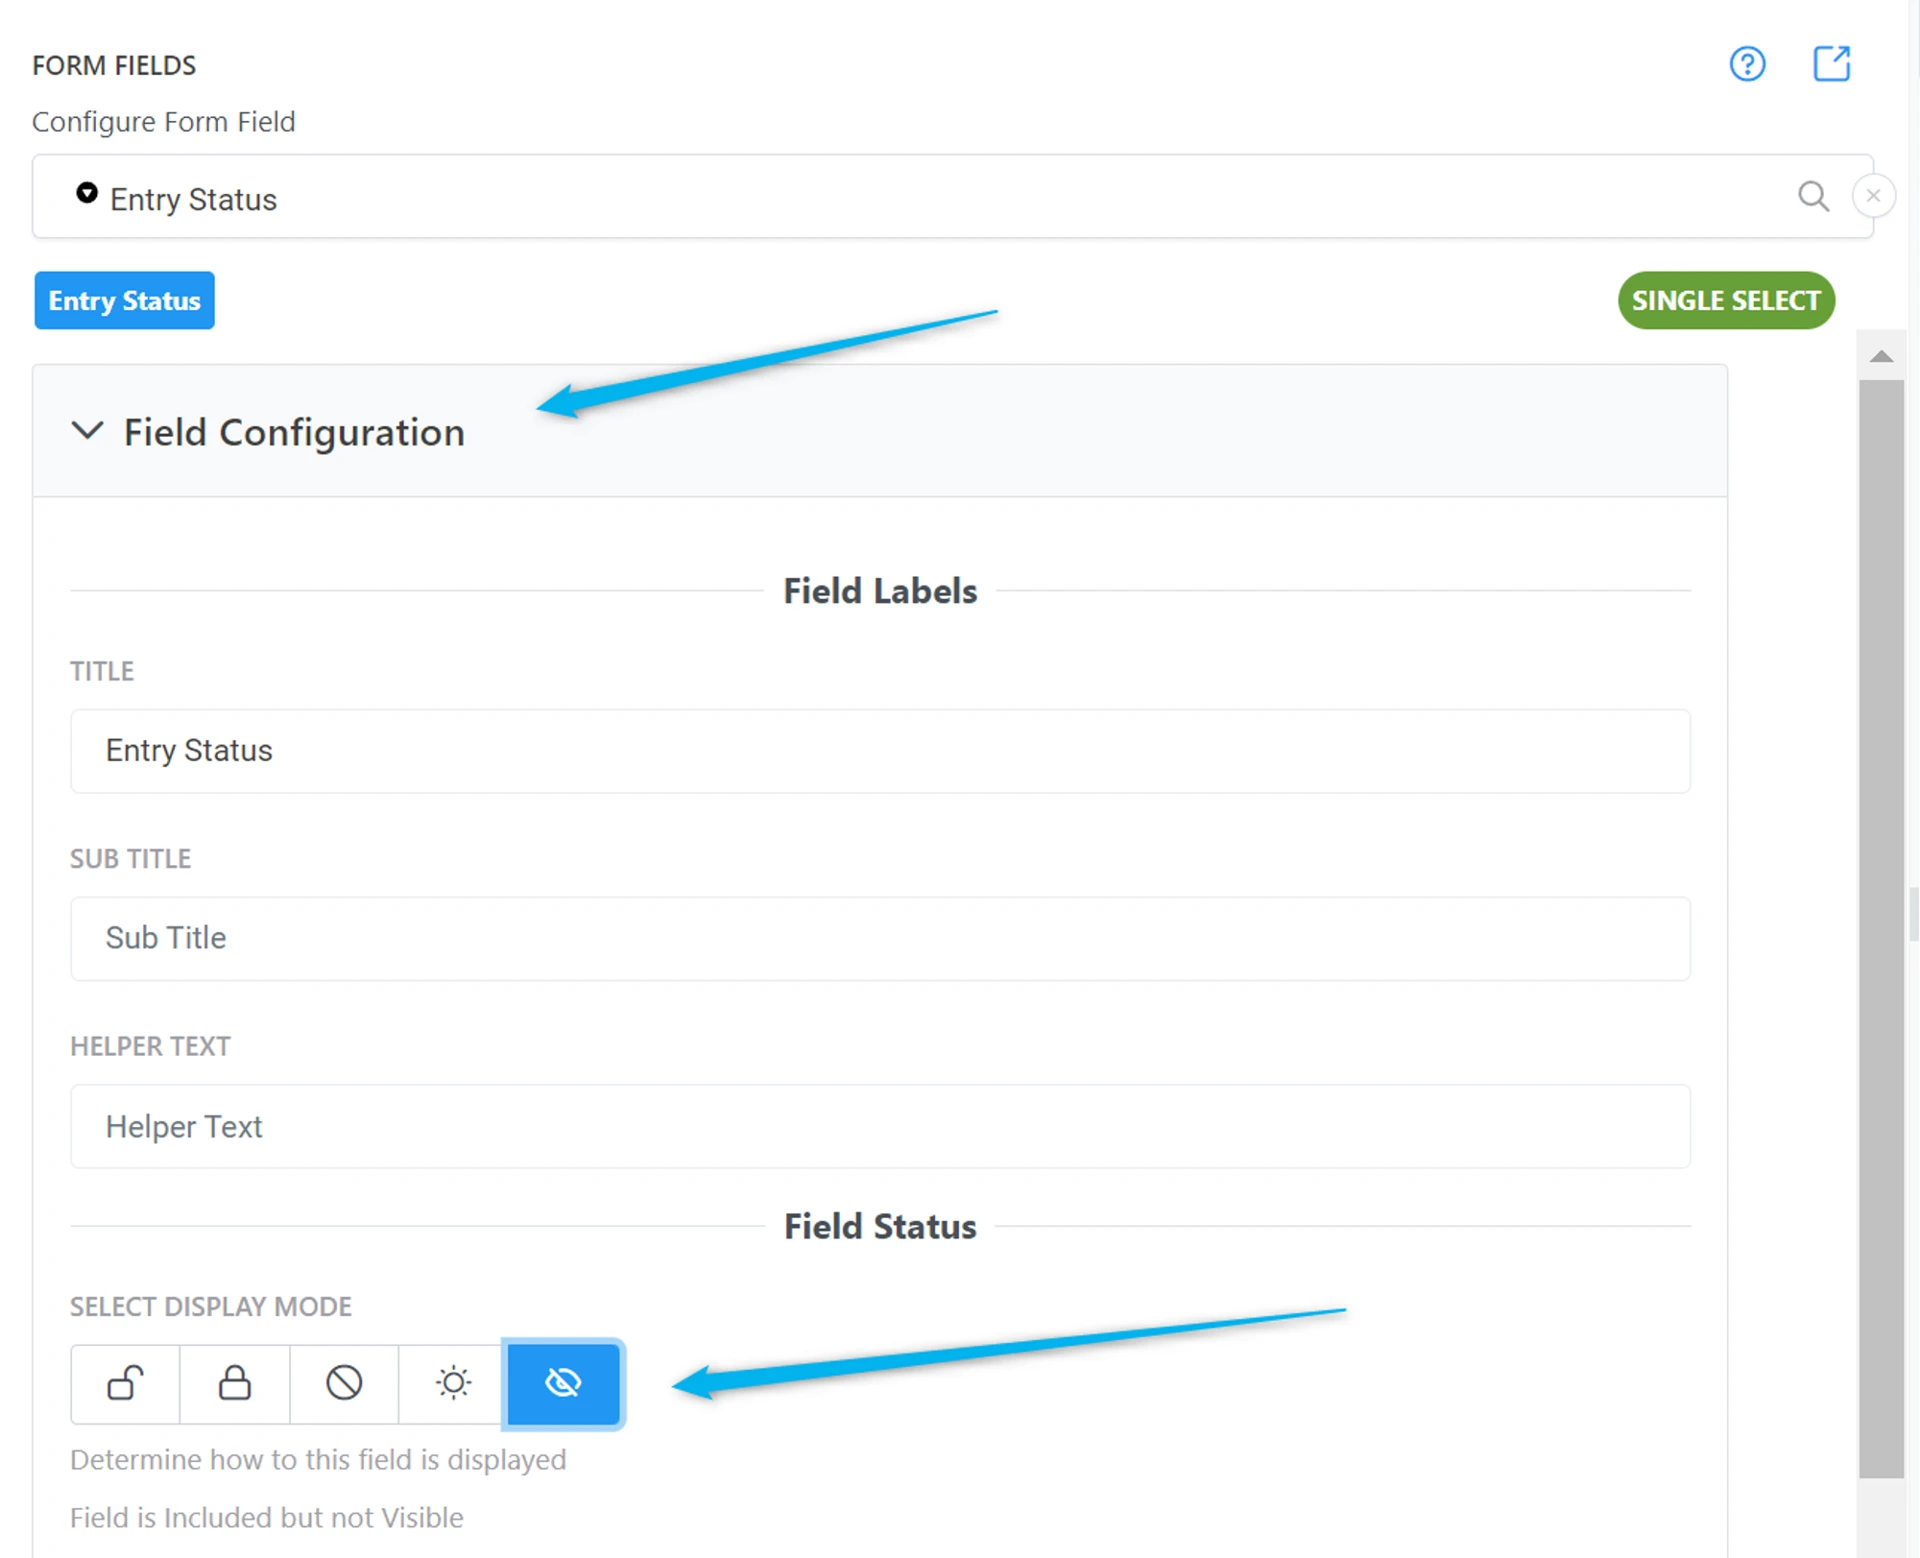
- Go to Field Configuration and select the Display mode as Hidden - this will hide the field on your form where the user won’t see it
- In Field Defaults, set the Default Value as New Entry

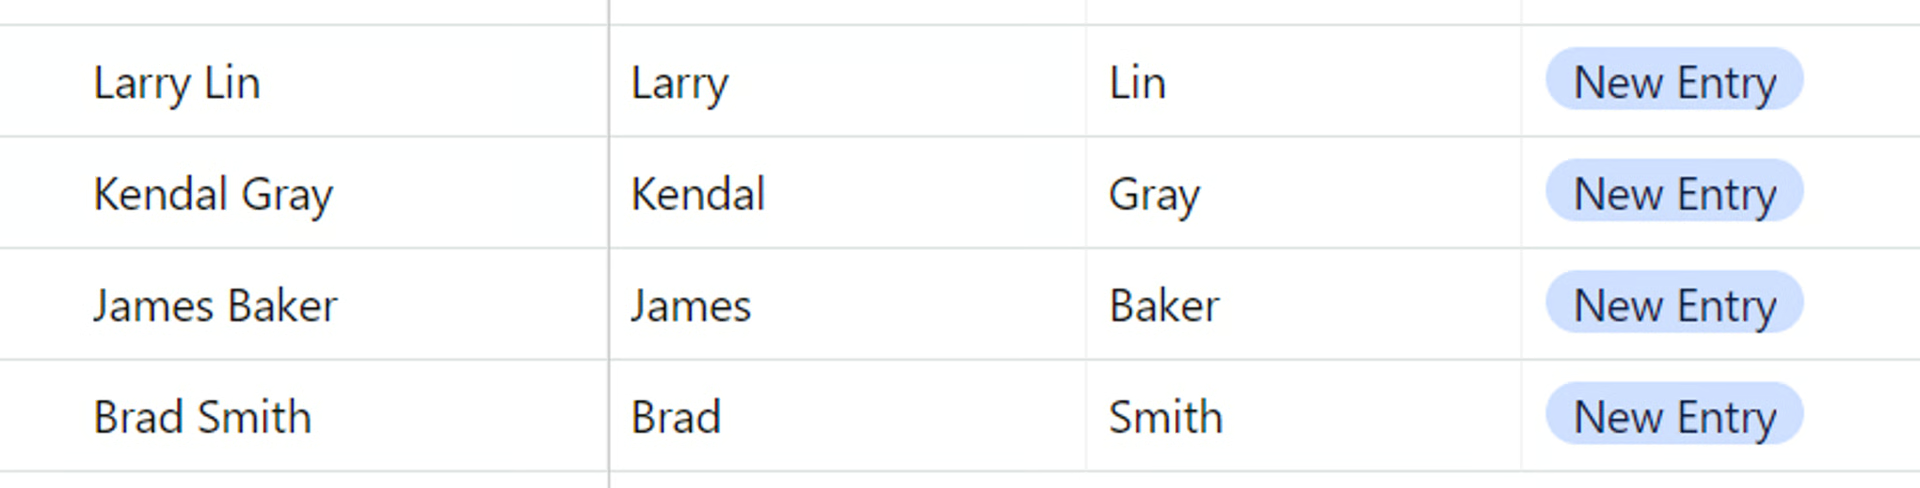
- When a new entry is created, the New Entry tag will be added
Setting up the Automation
Section titled “Setting up the Automation”- In your base, click Automations

- Click Create new automation
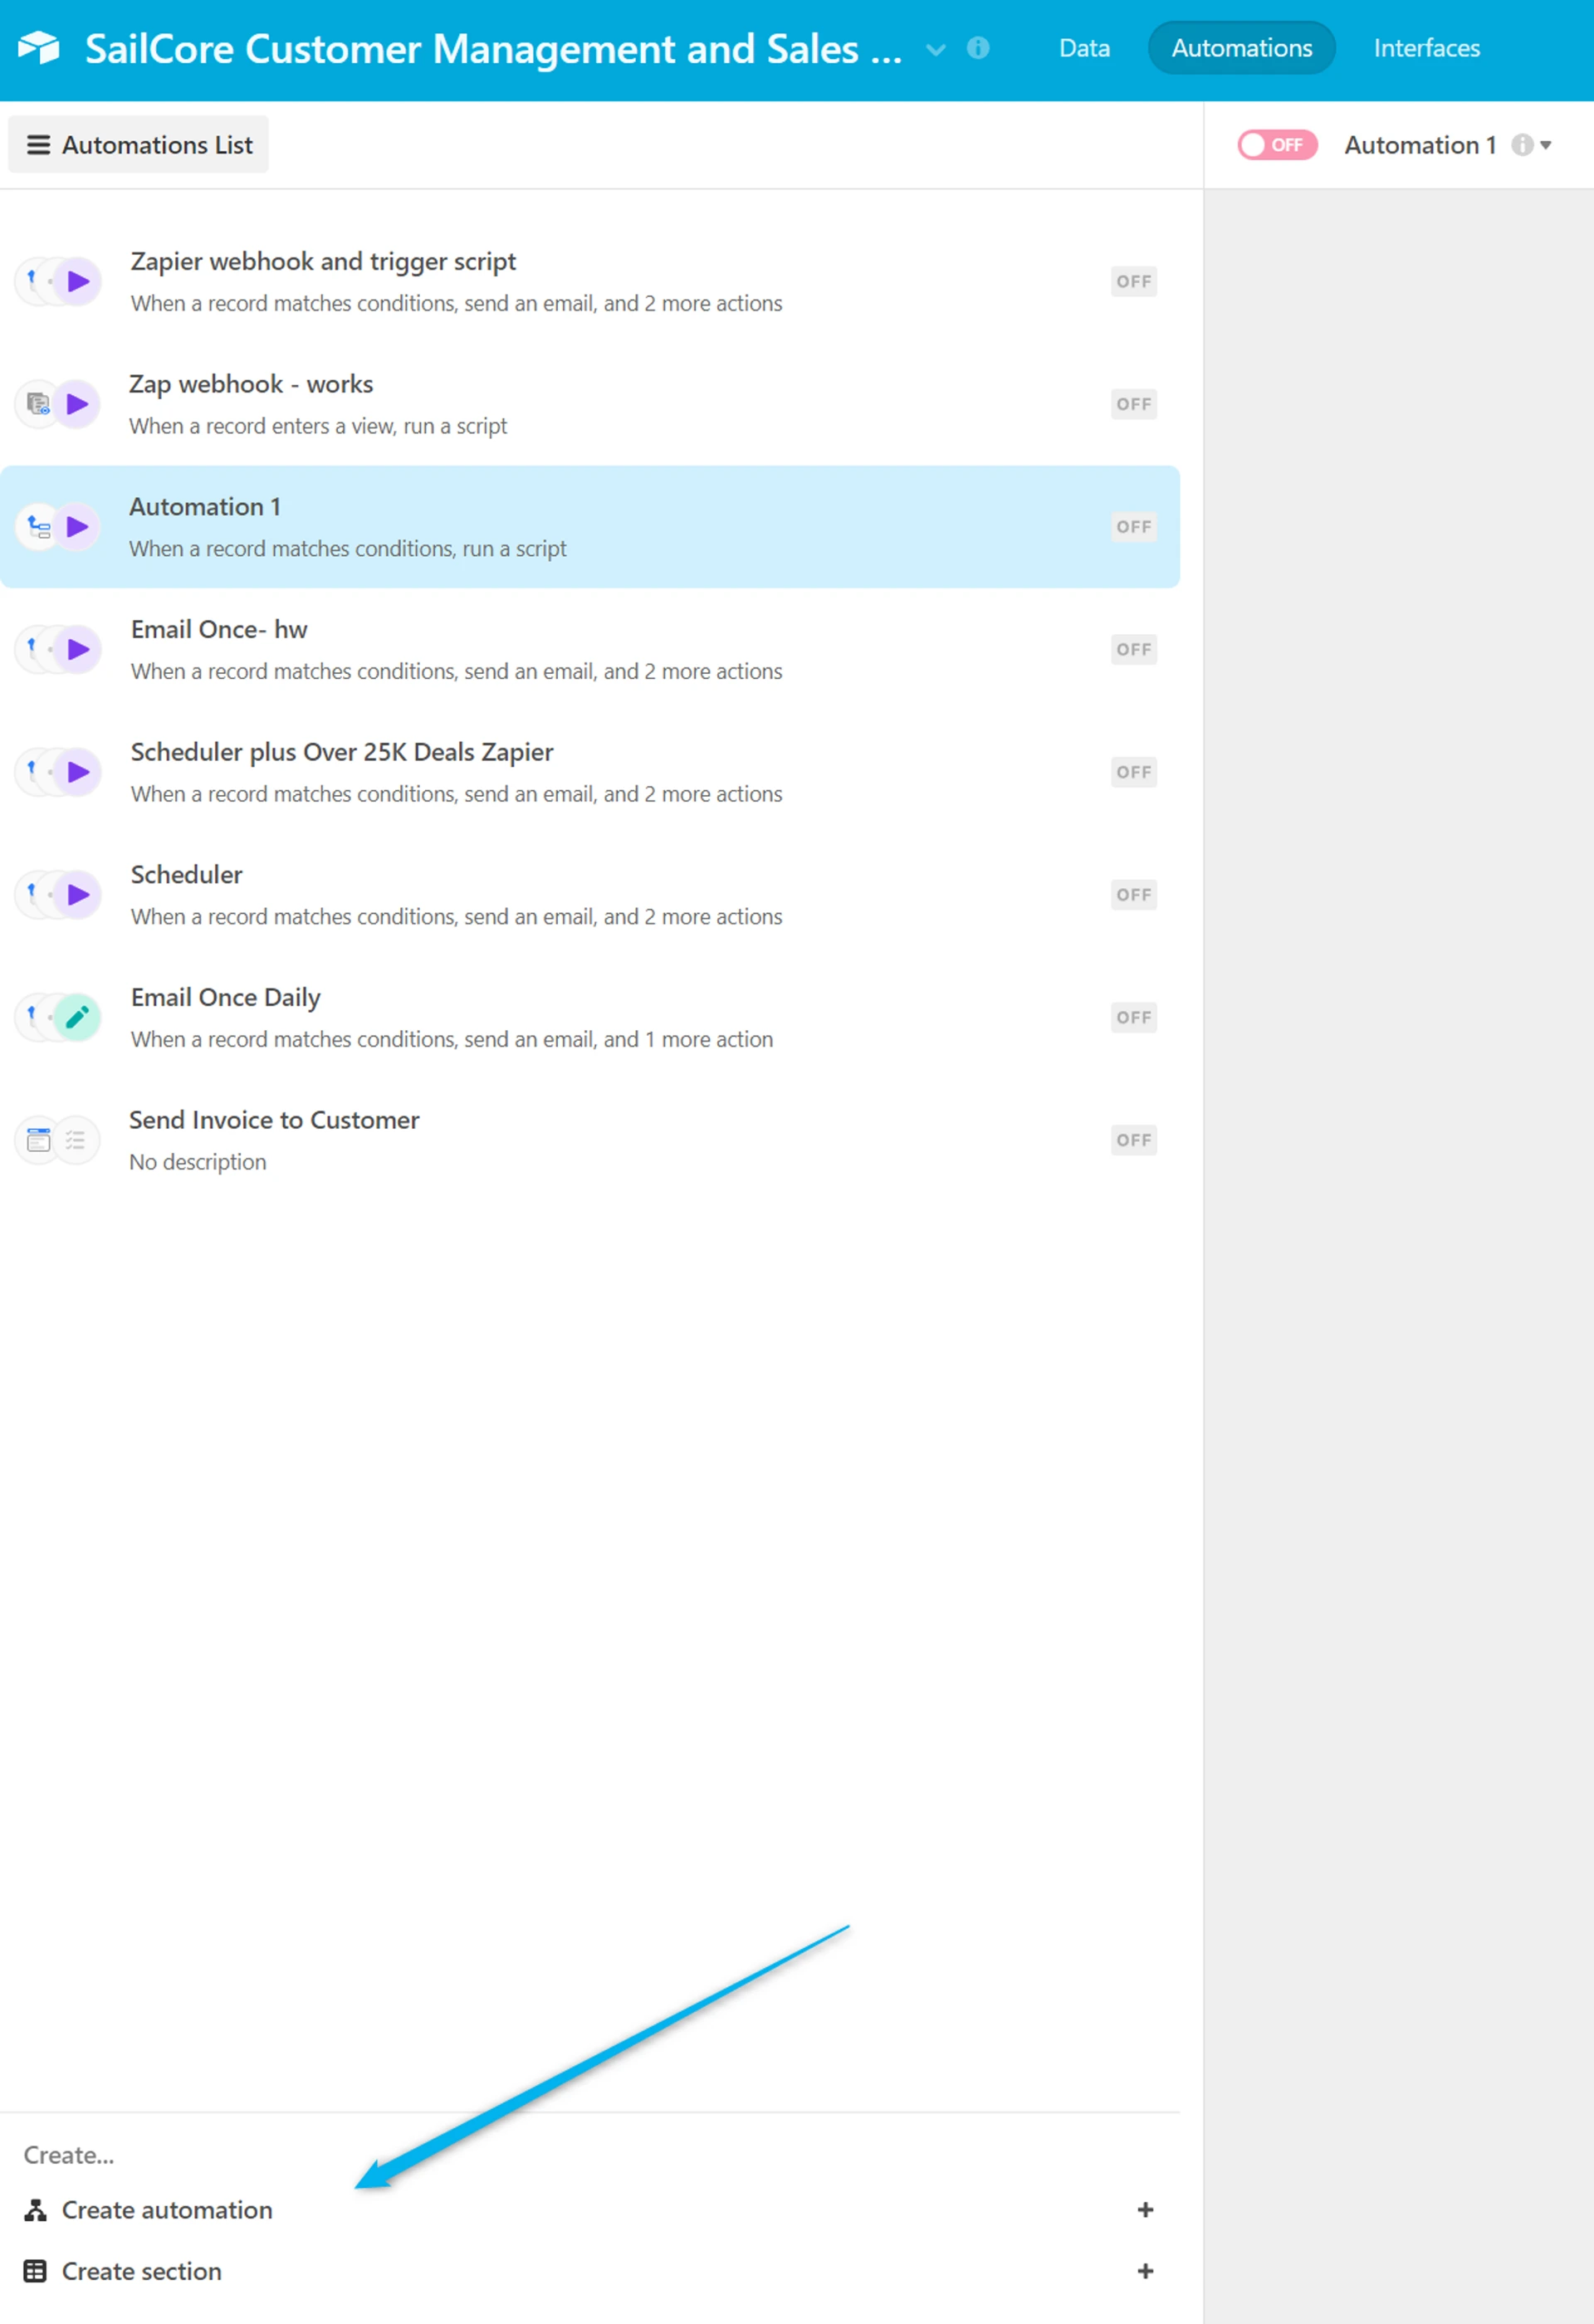
- For the Trigger, choose “When record matches condition”

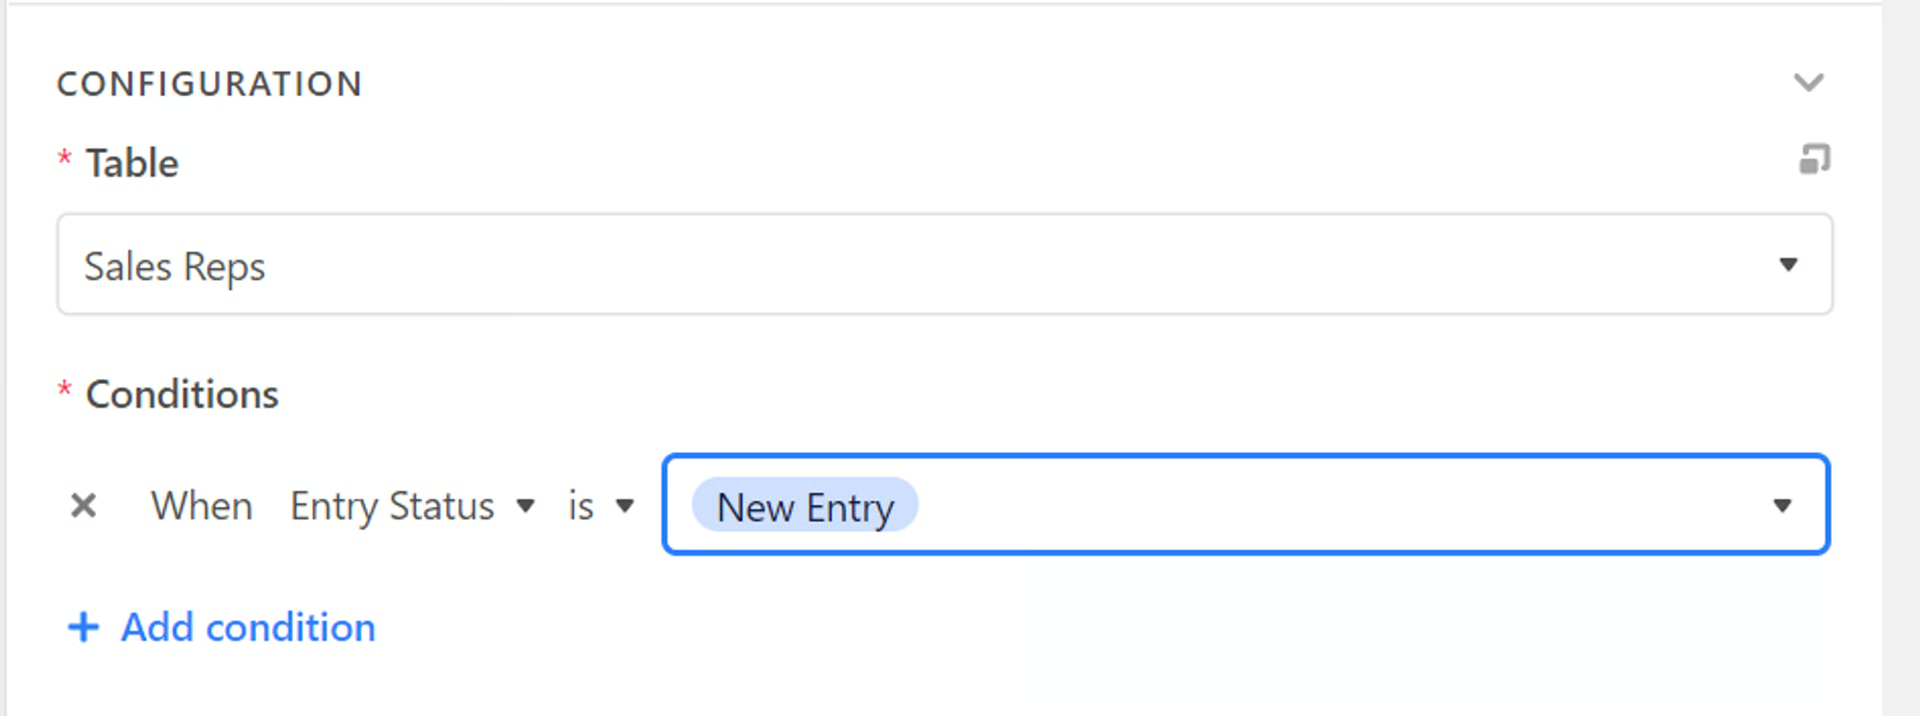
- Choose your table that contains the Entry Status field
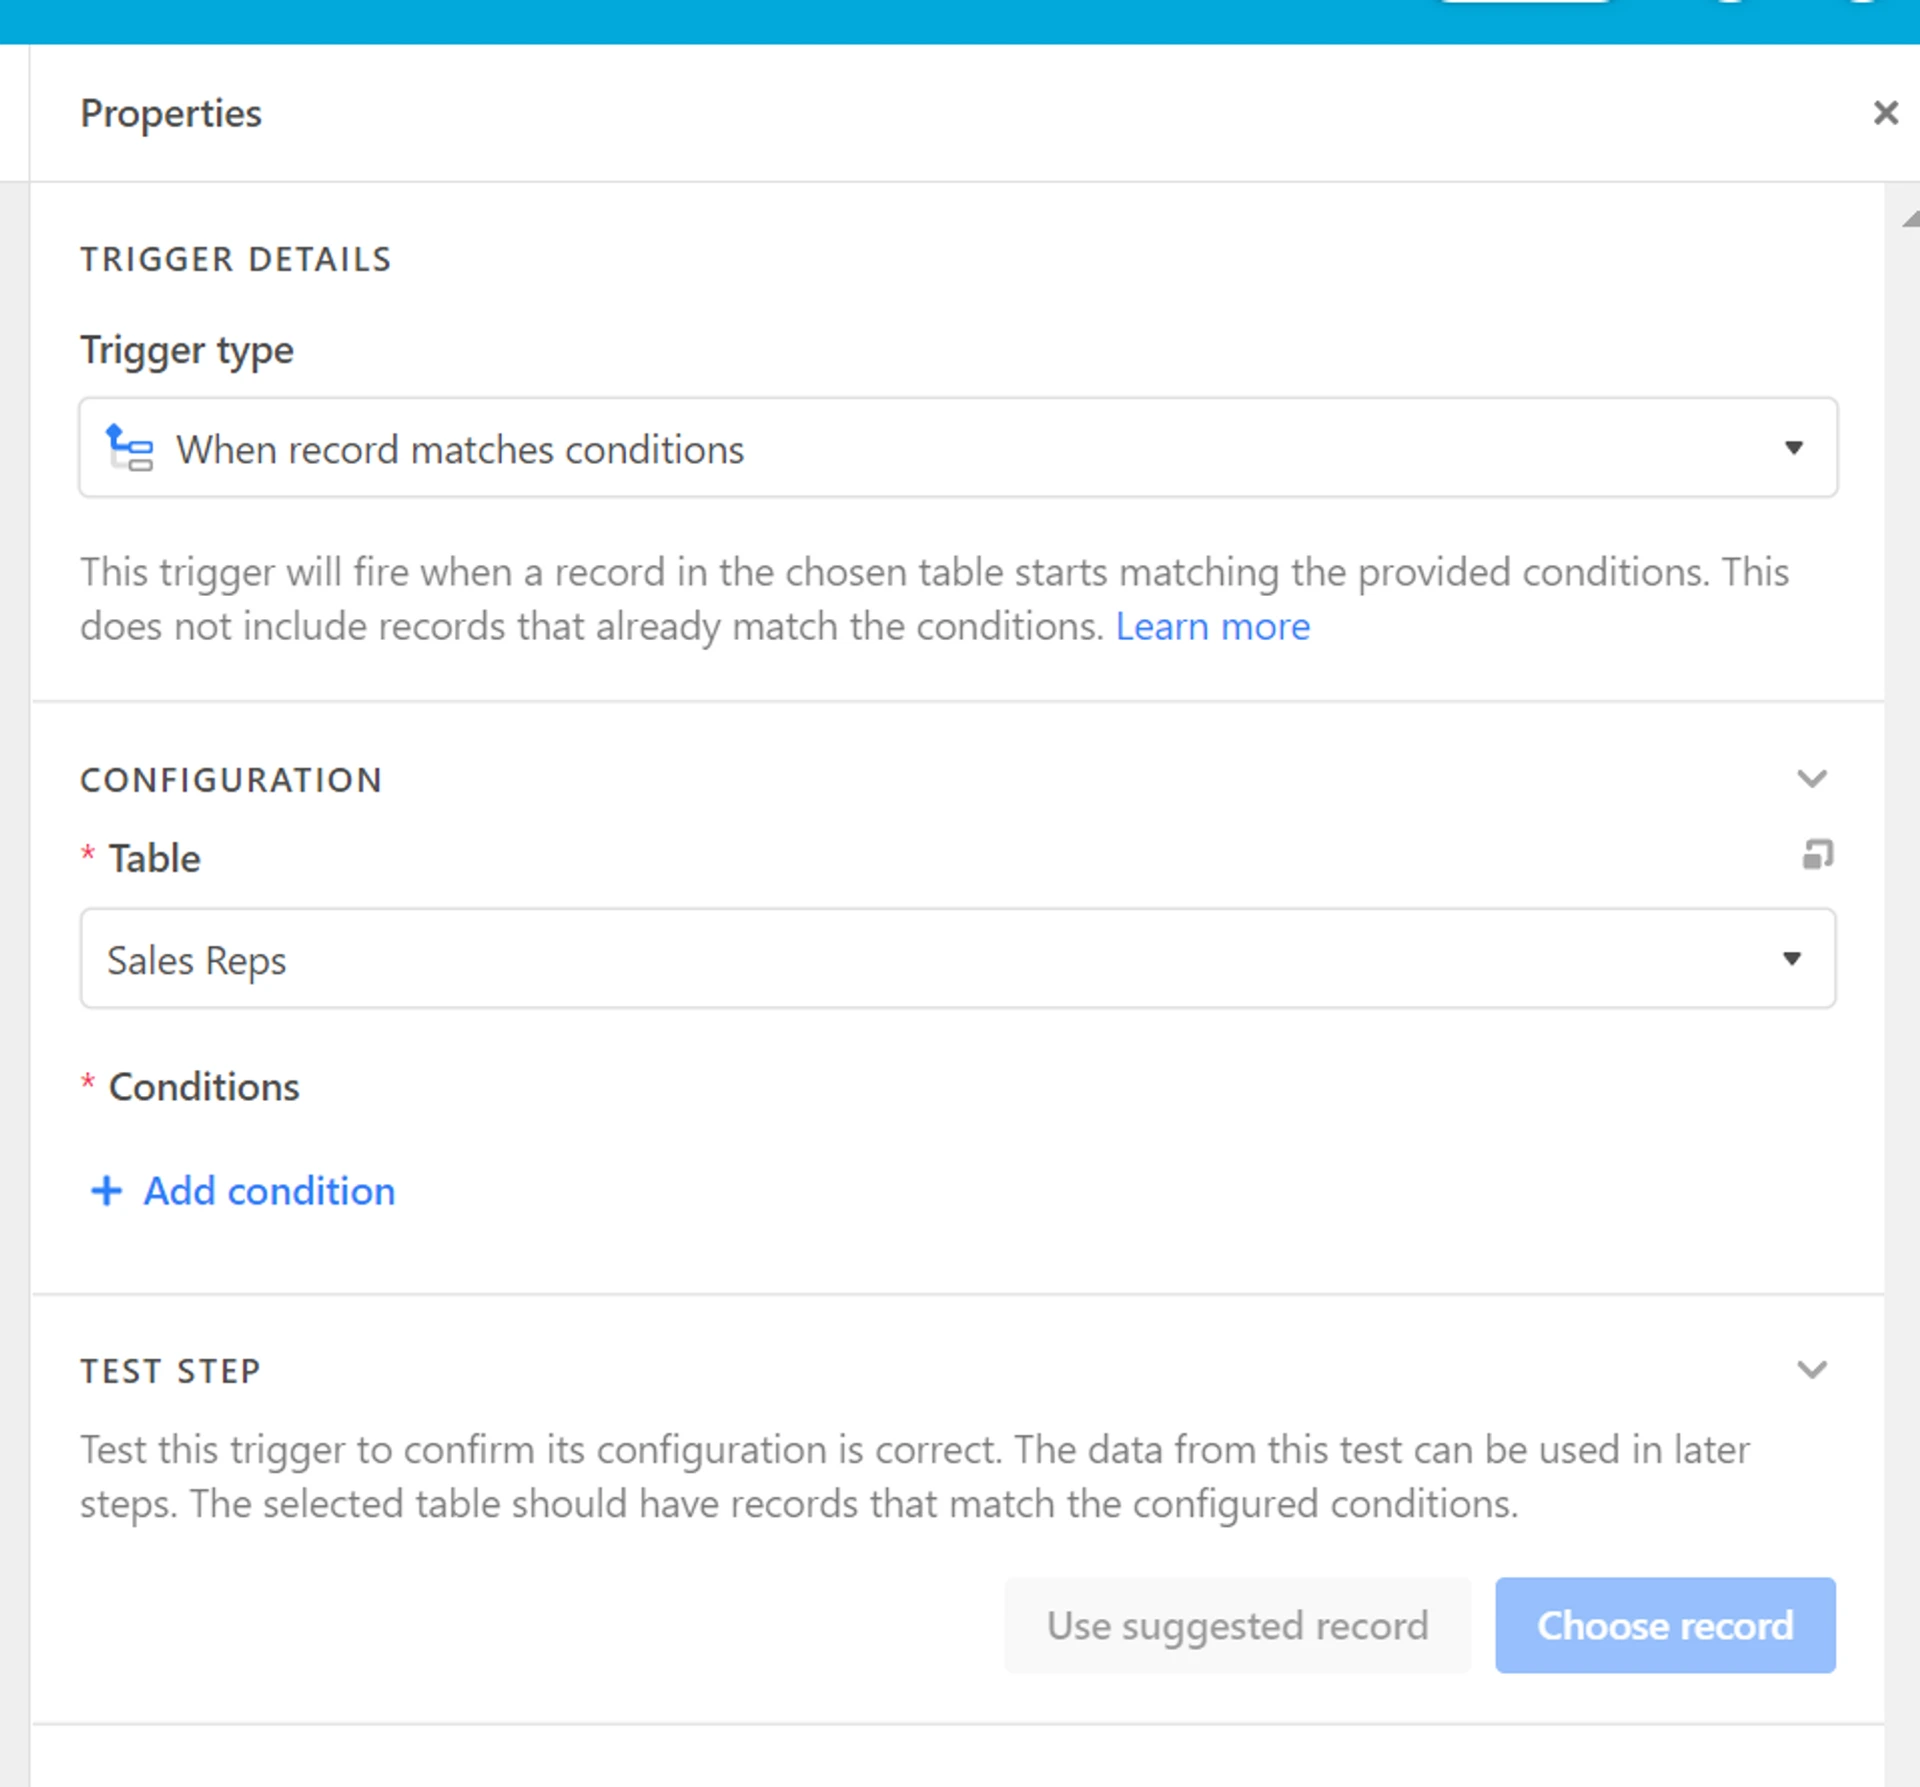
-
Click Add condition
-
Choose ‘When Entry Status is New Entry’ as your condition
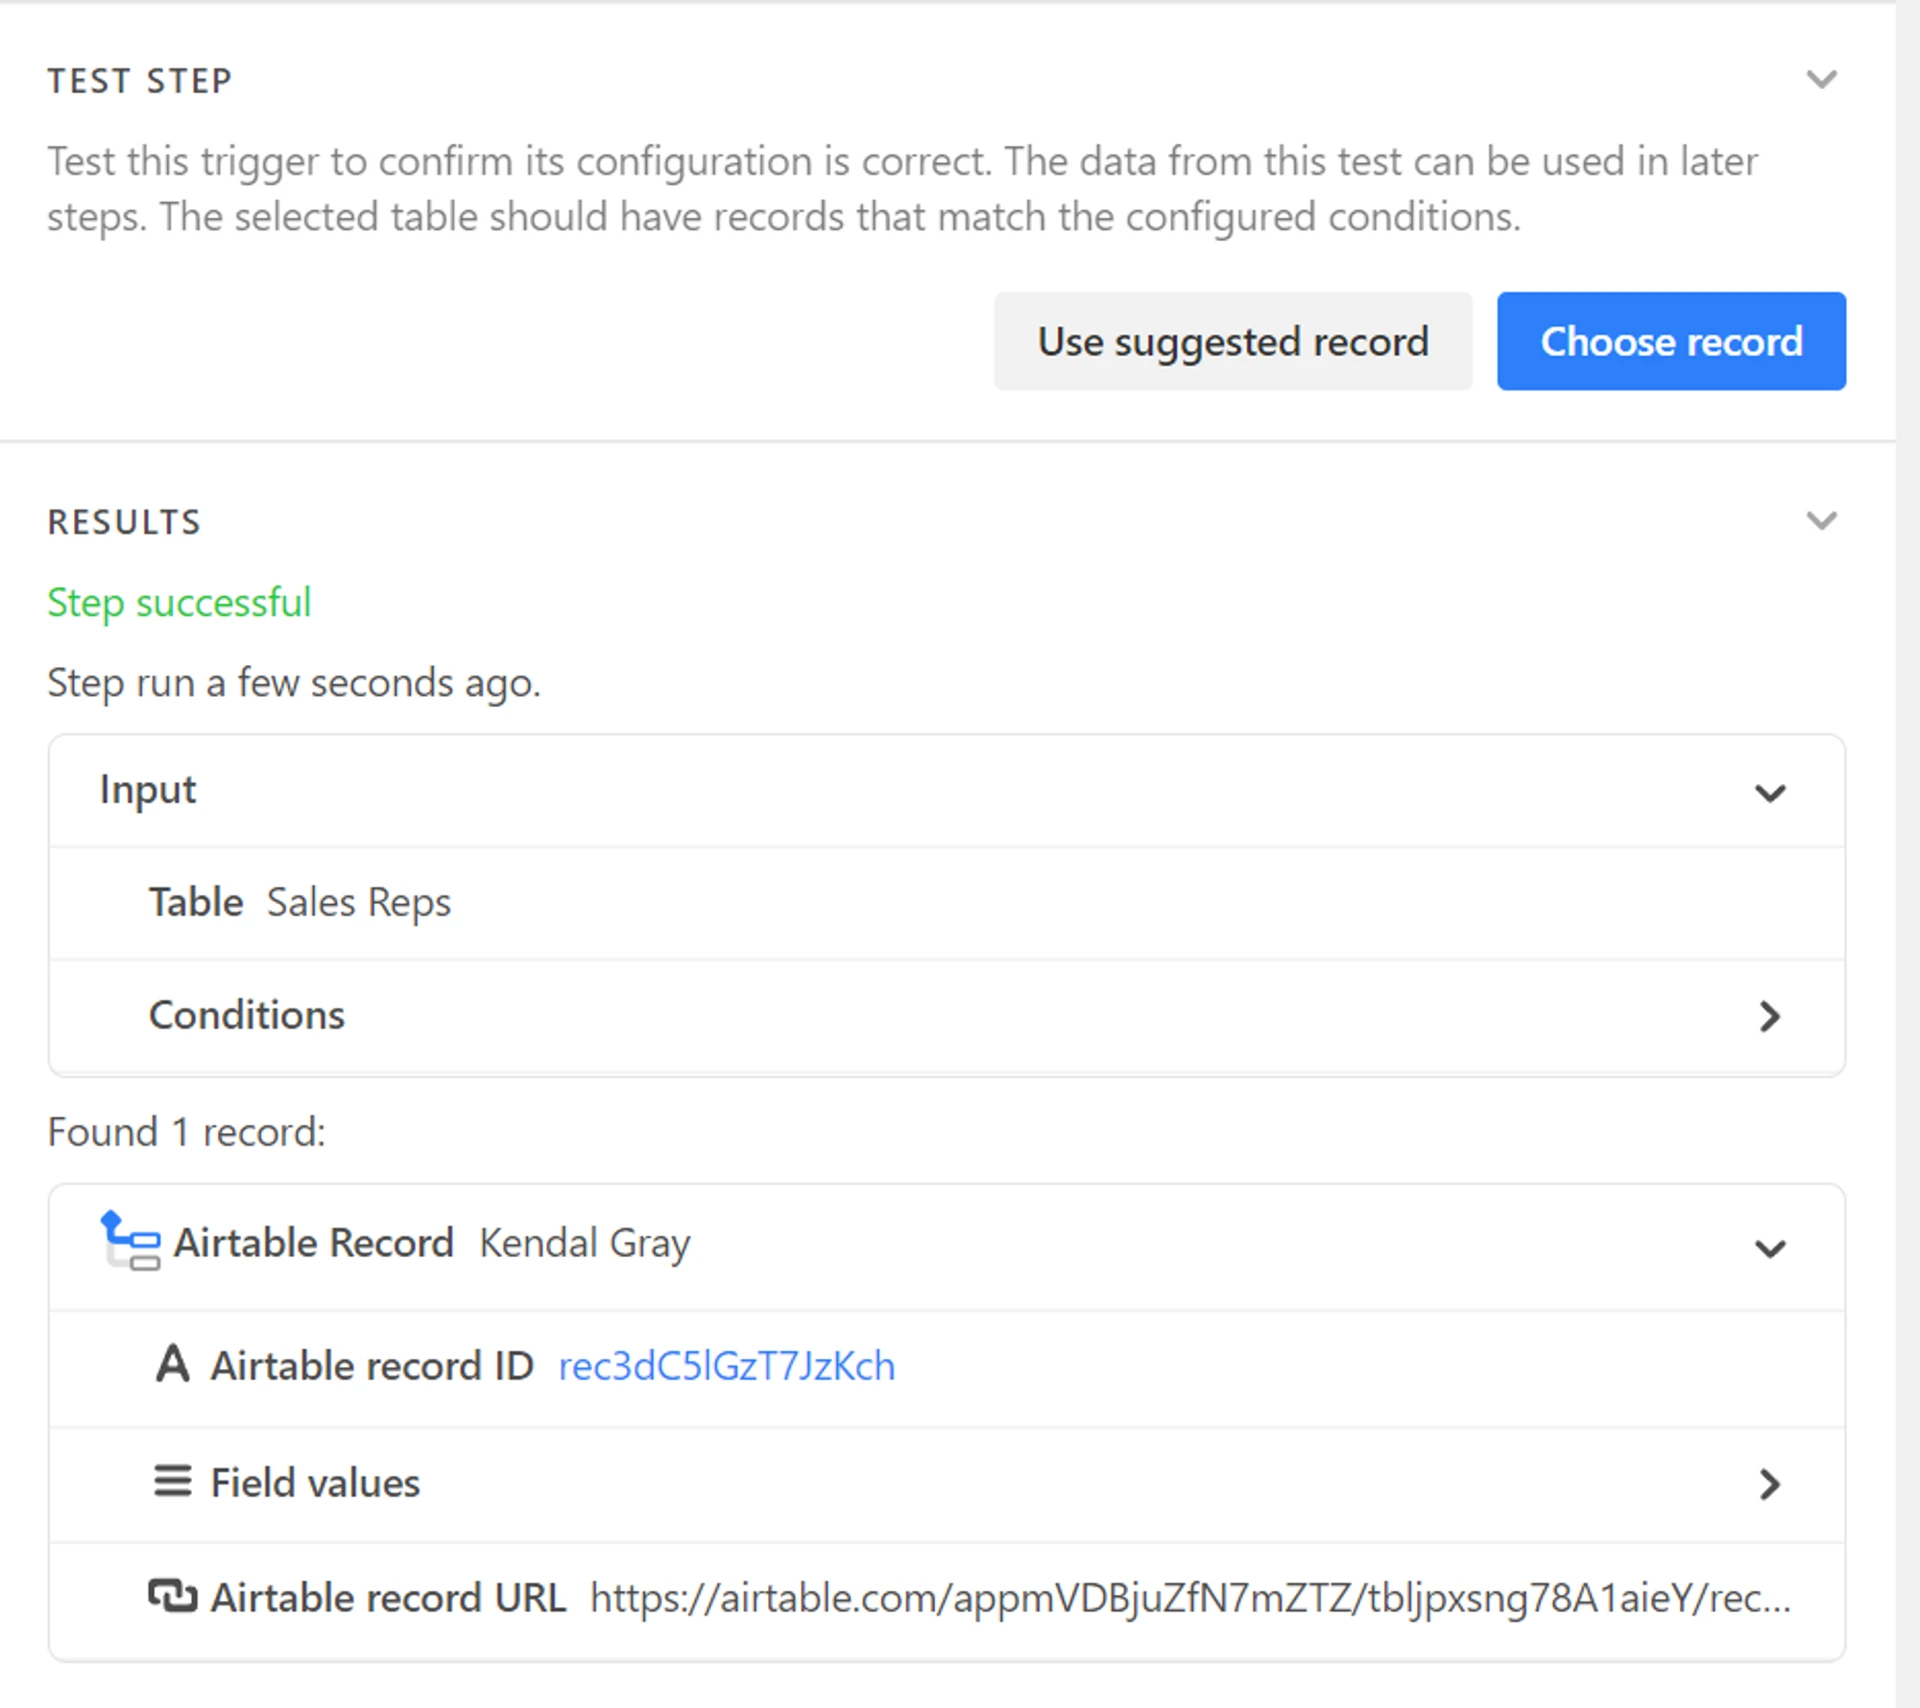
- Click Use suggested record to test your trigger and ensure your test is a success
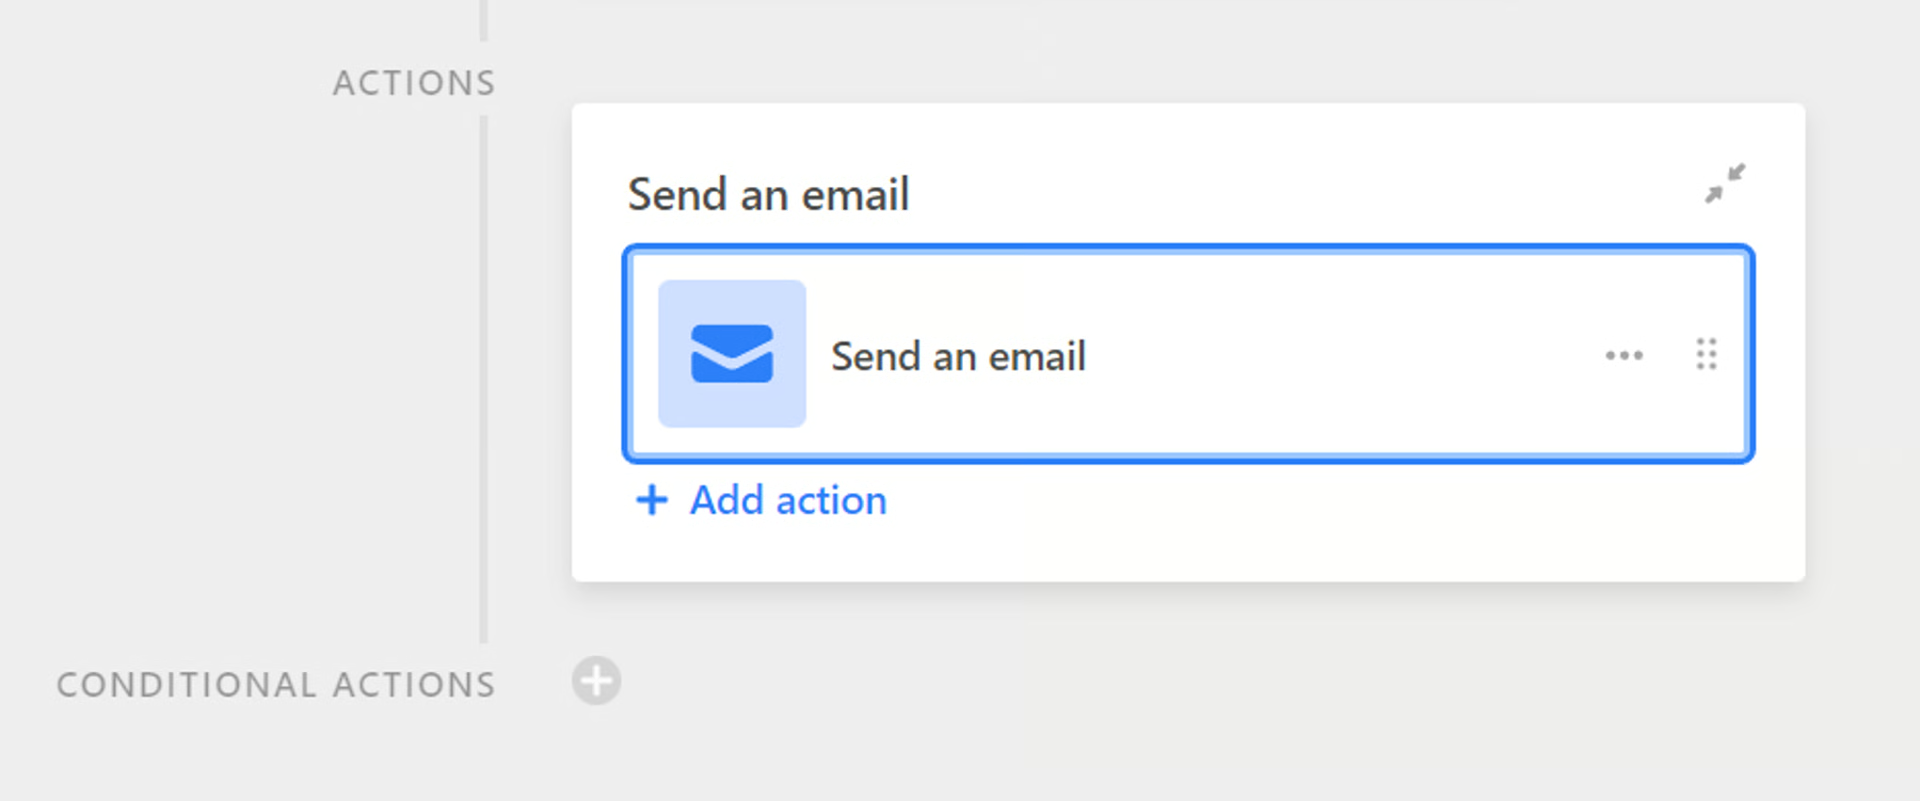
- Choose Send an email as the Action
-
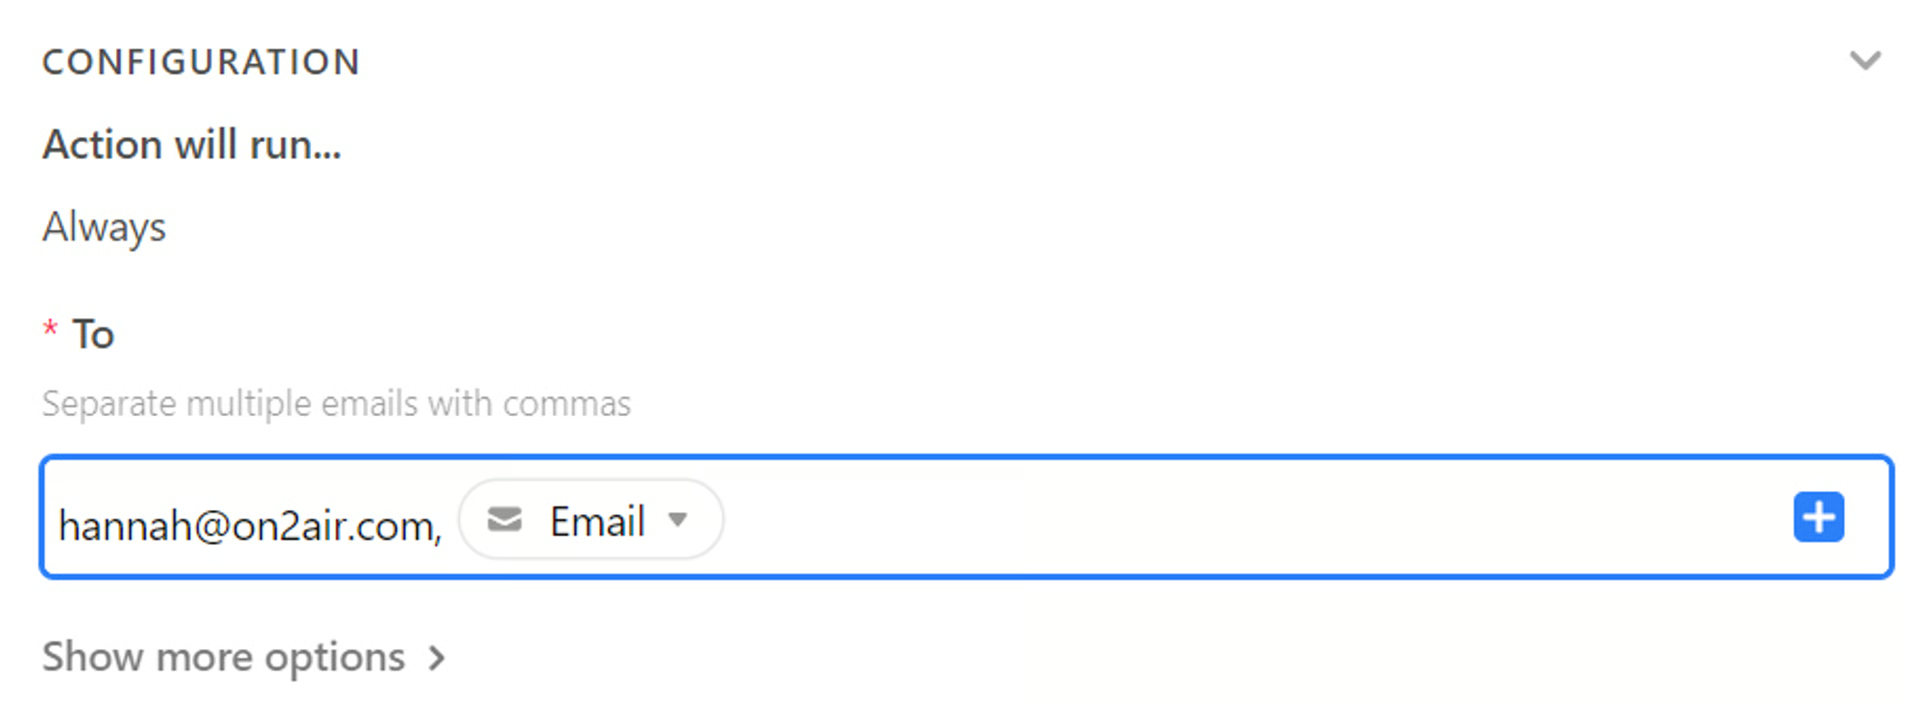
In the email configuration, add an email in the To field.
-
To use an email from the form entry and send it to the form user, click the + icon and choose the Email field. Separate multiple emails with a comma.
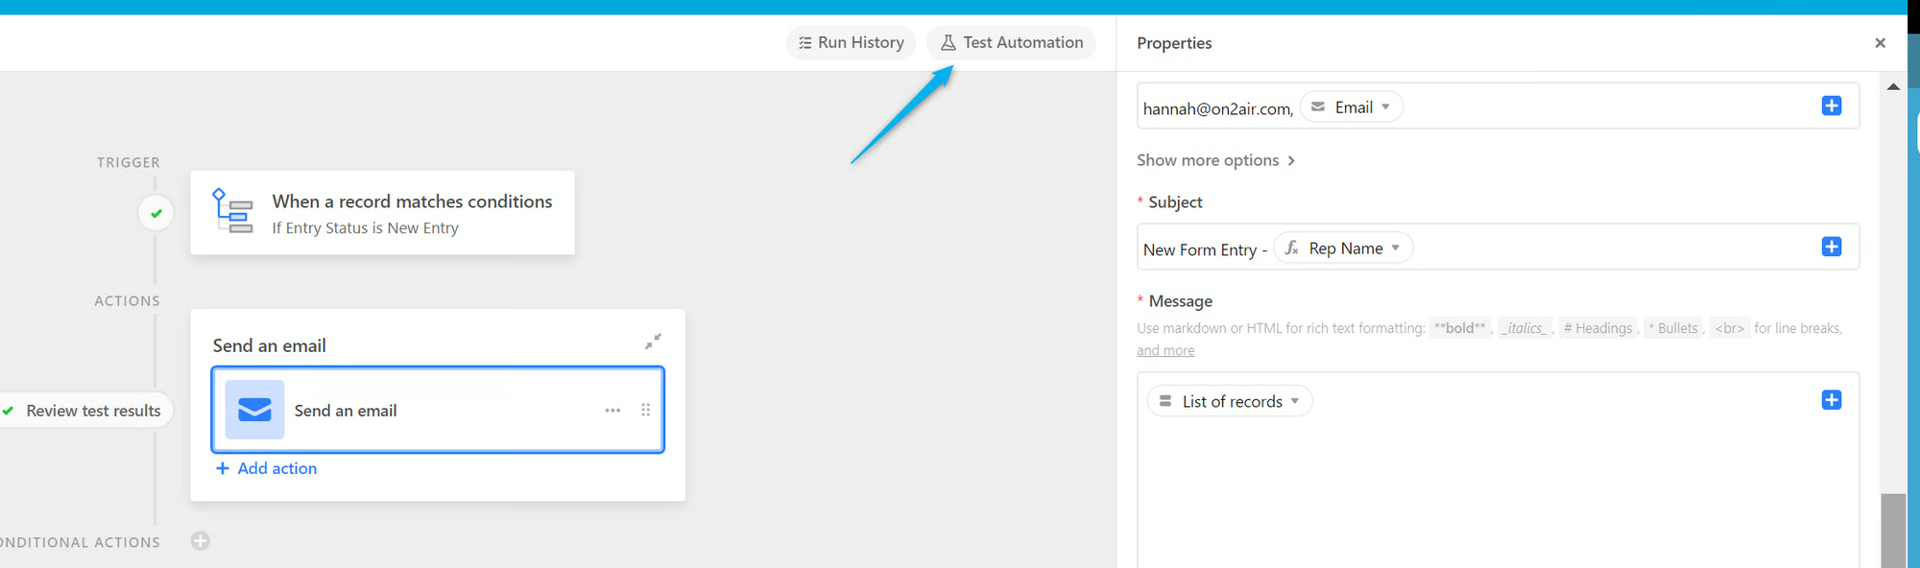
- Customize your Subject line as needed. You can use the + icon to add data from the form

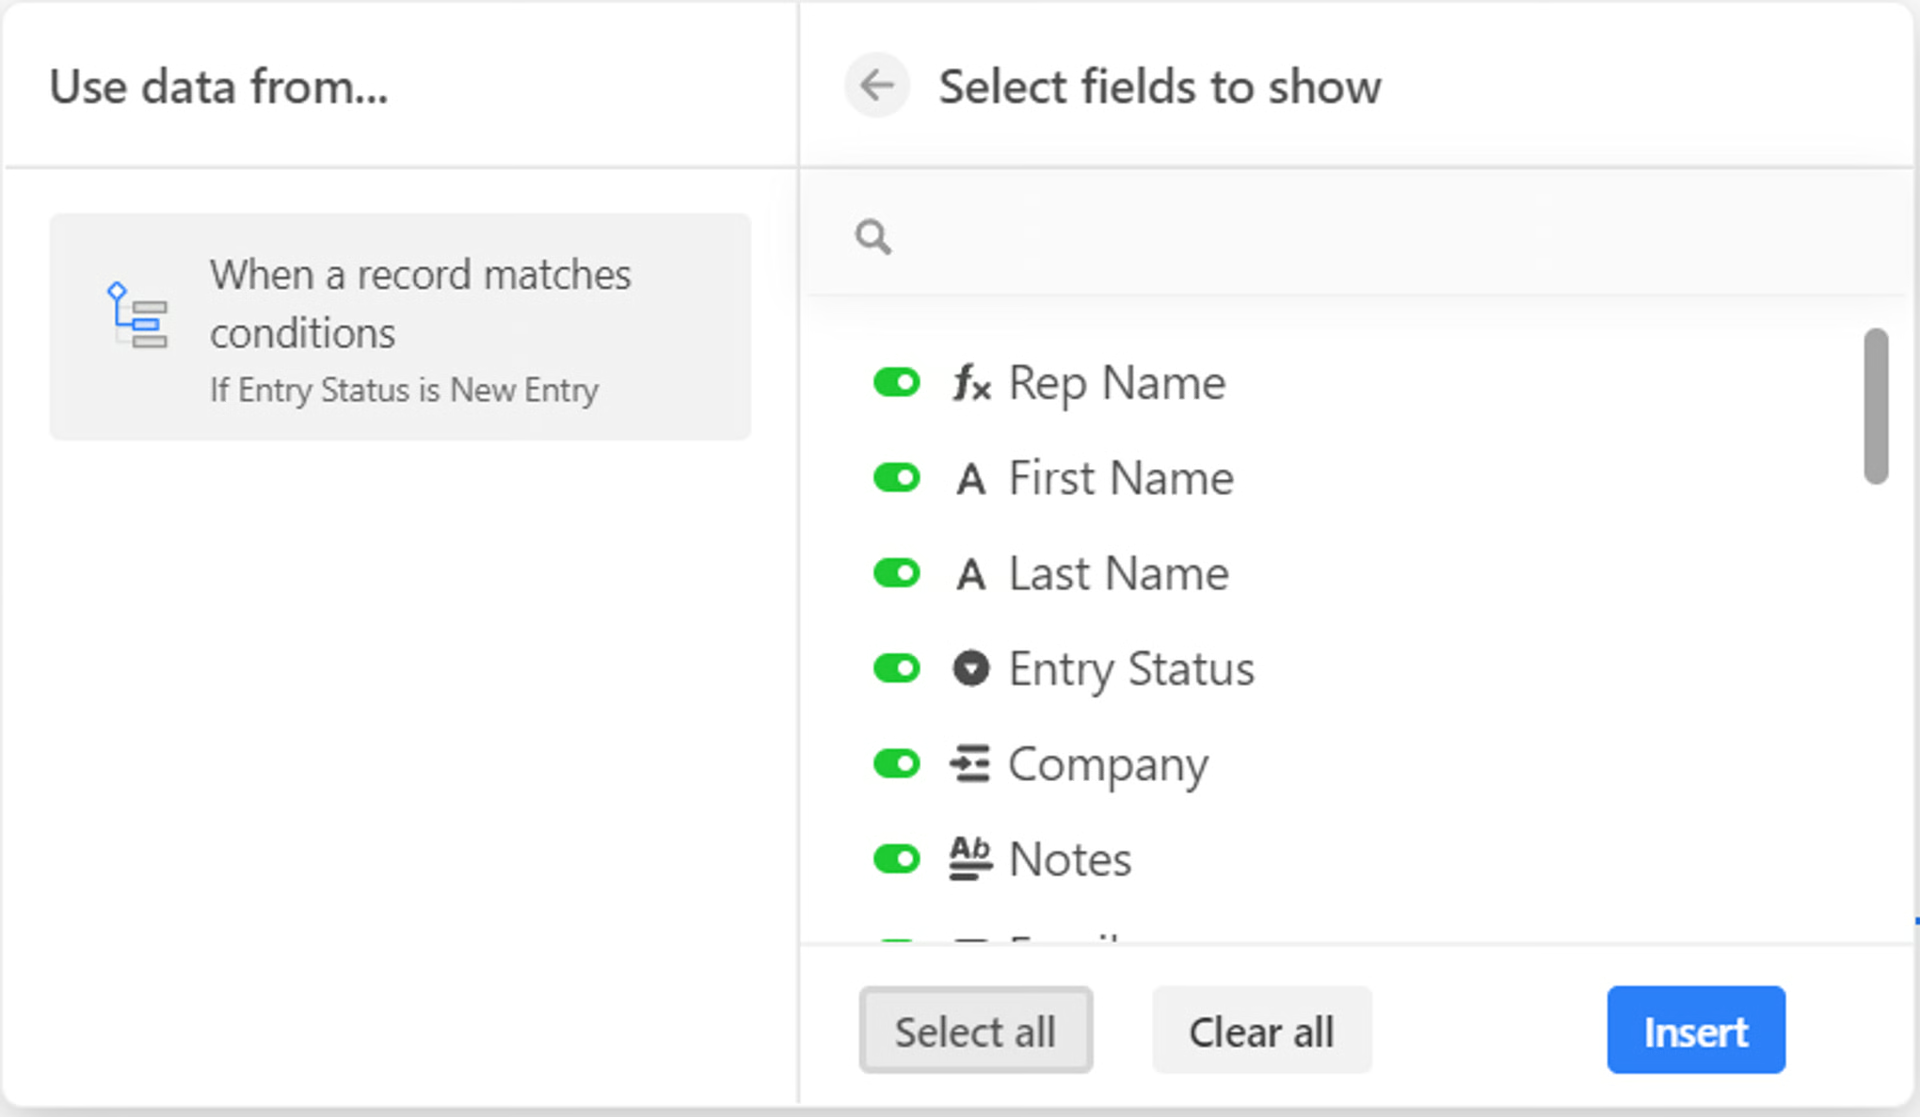
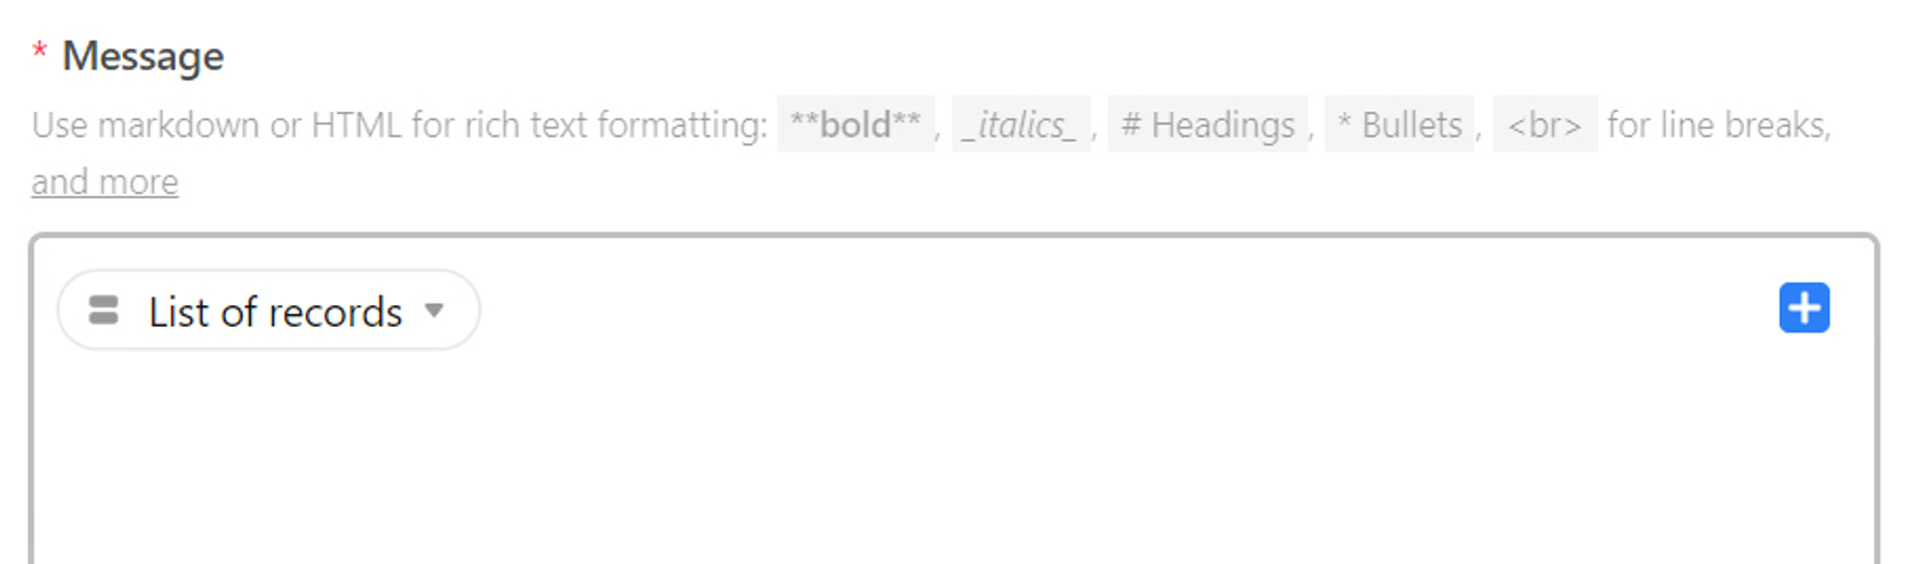
- In the Message portion, you can customize as needed. To add all the data from the form entry, click the + icon and choose List
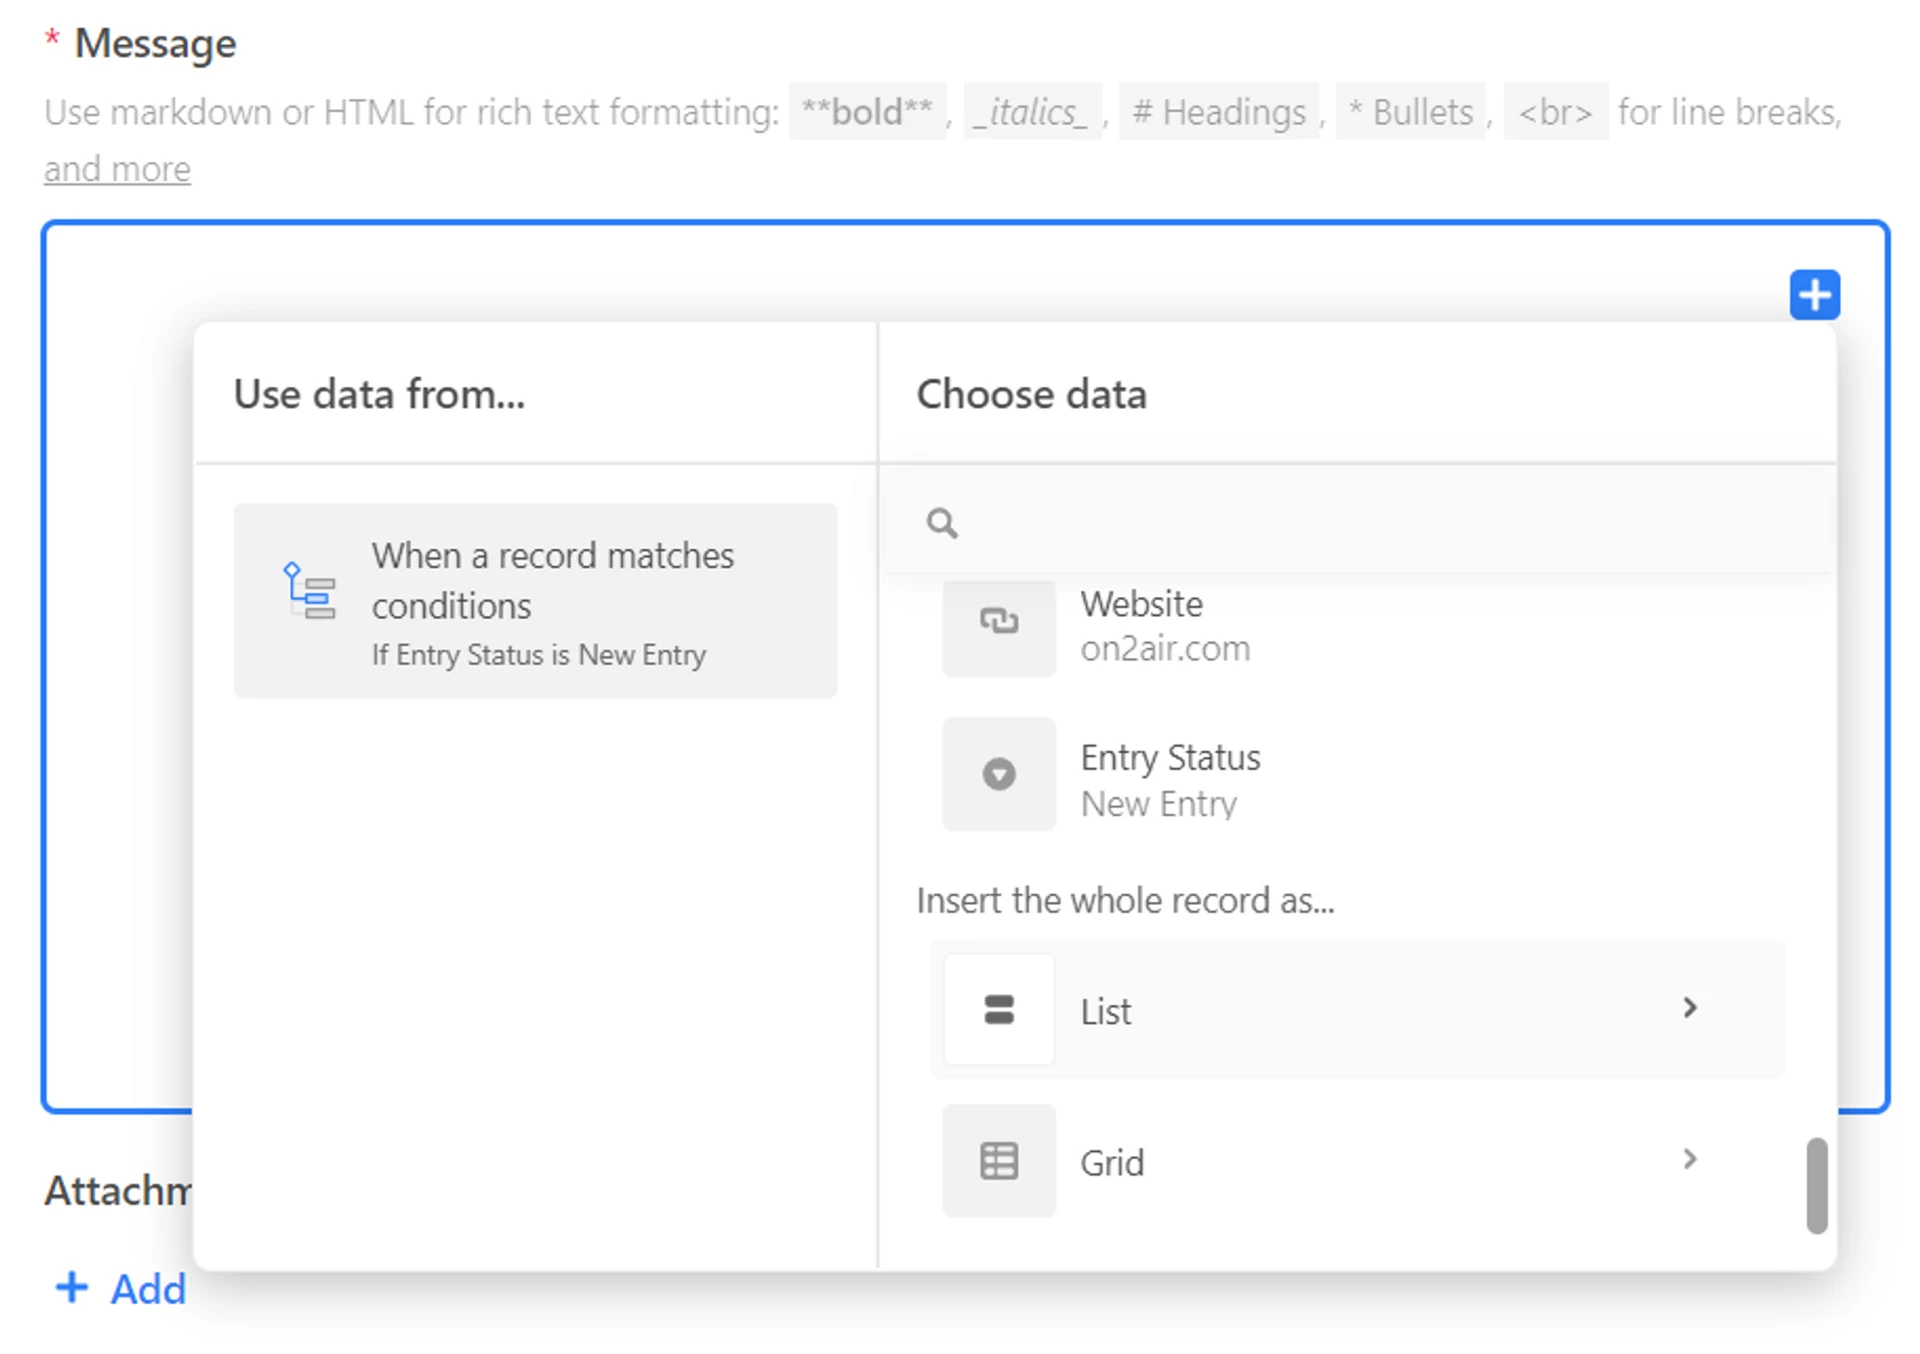
- Choose the form fields you want in the email, then click Insert
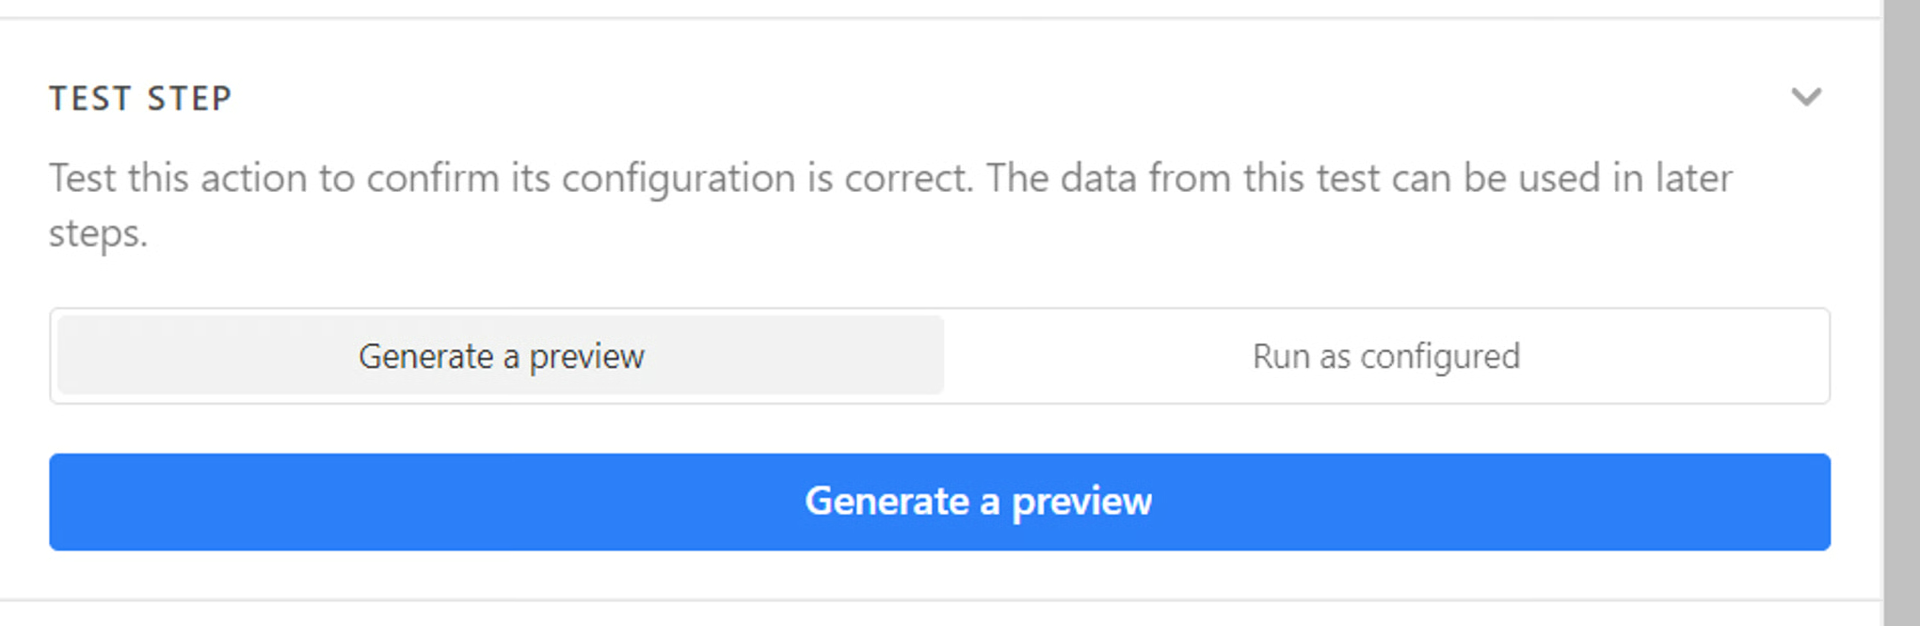
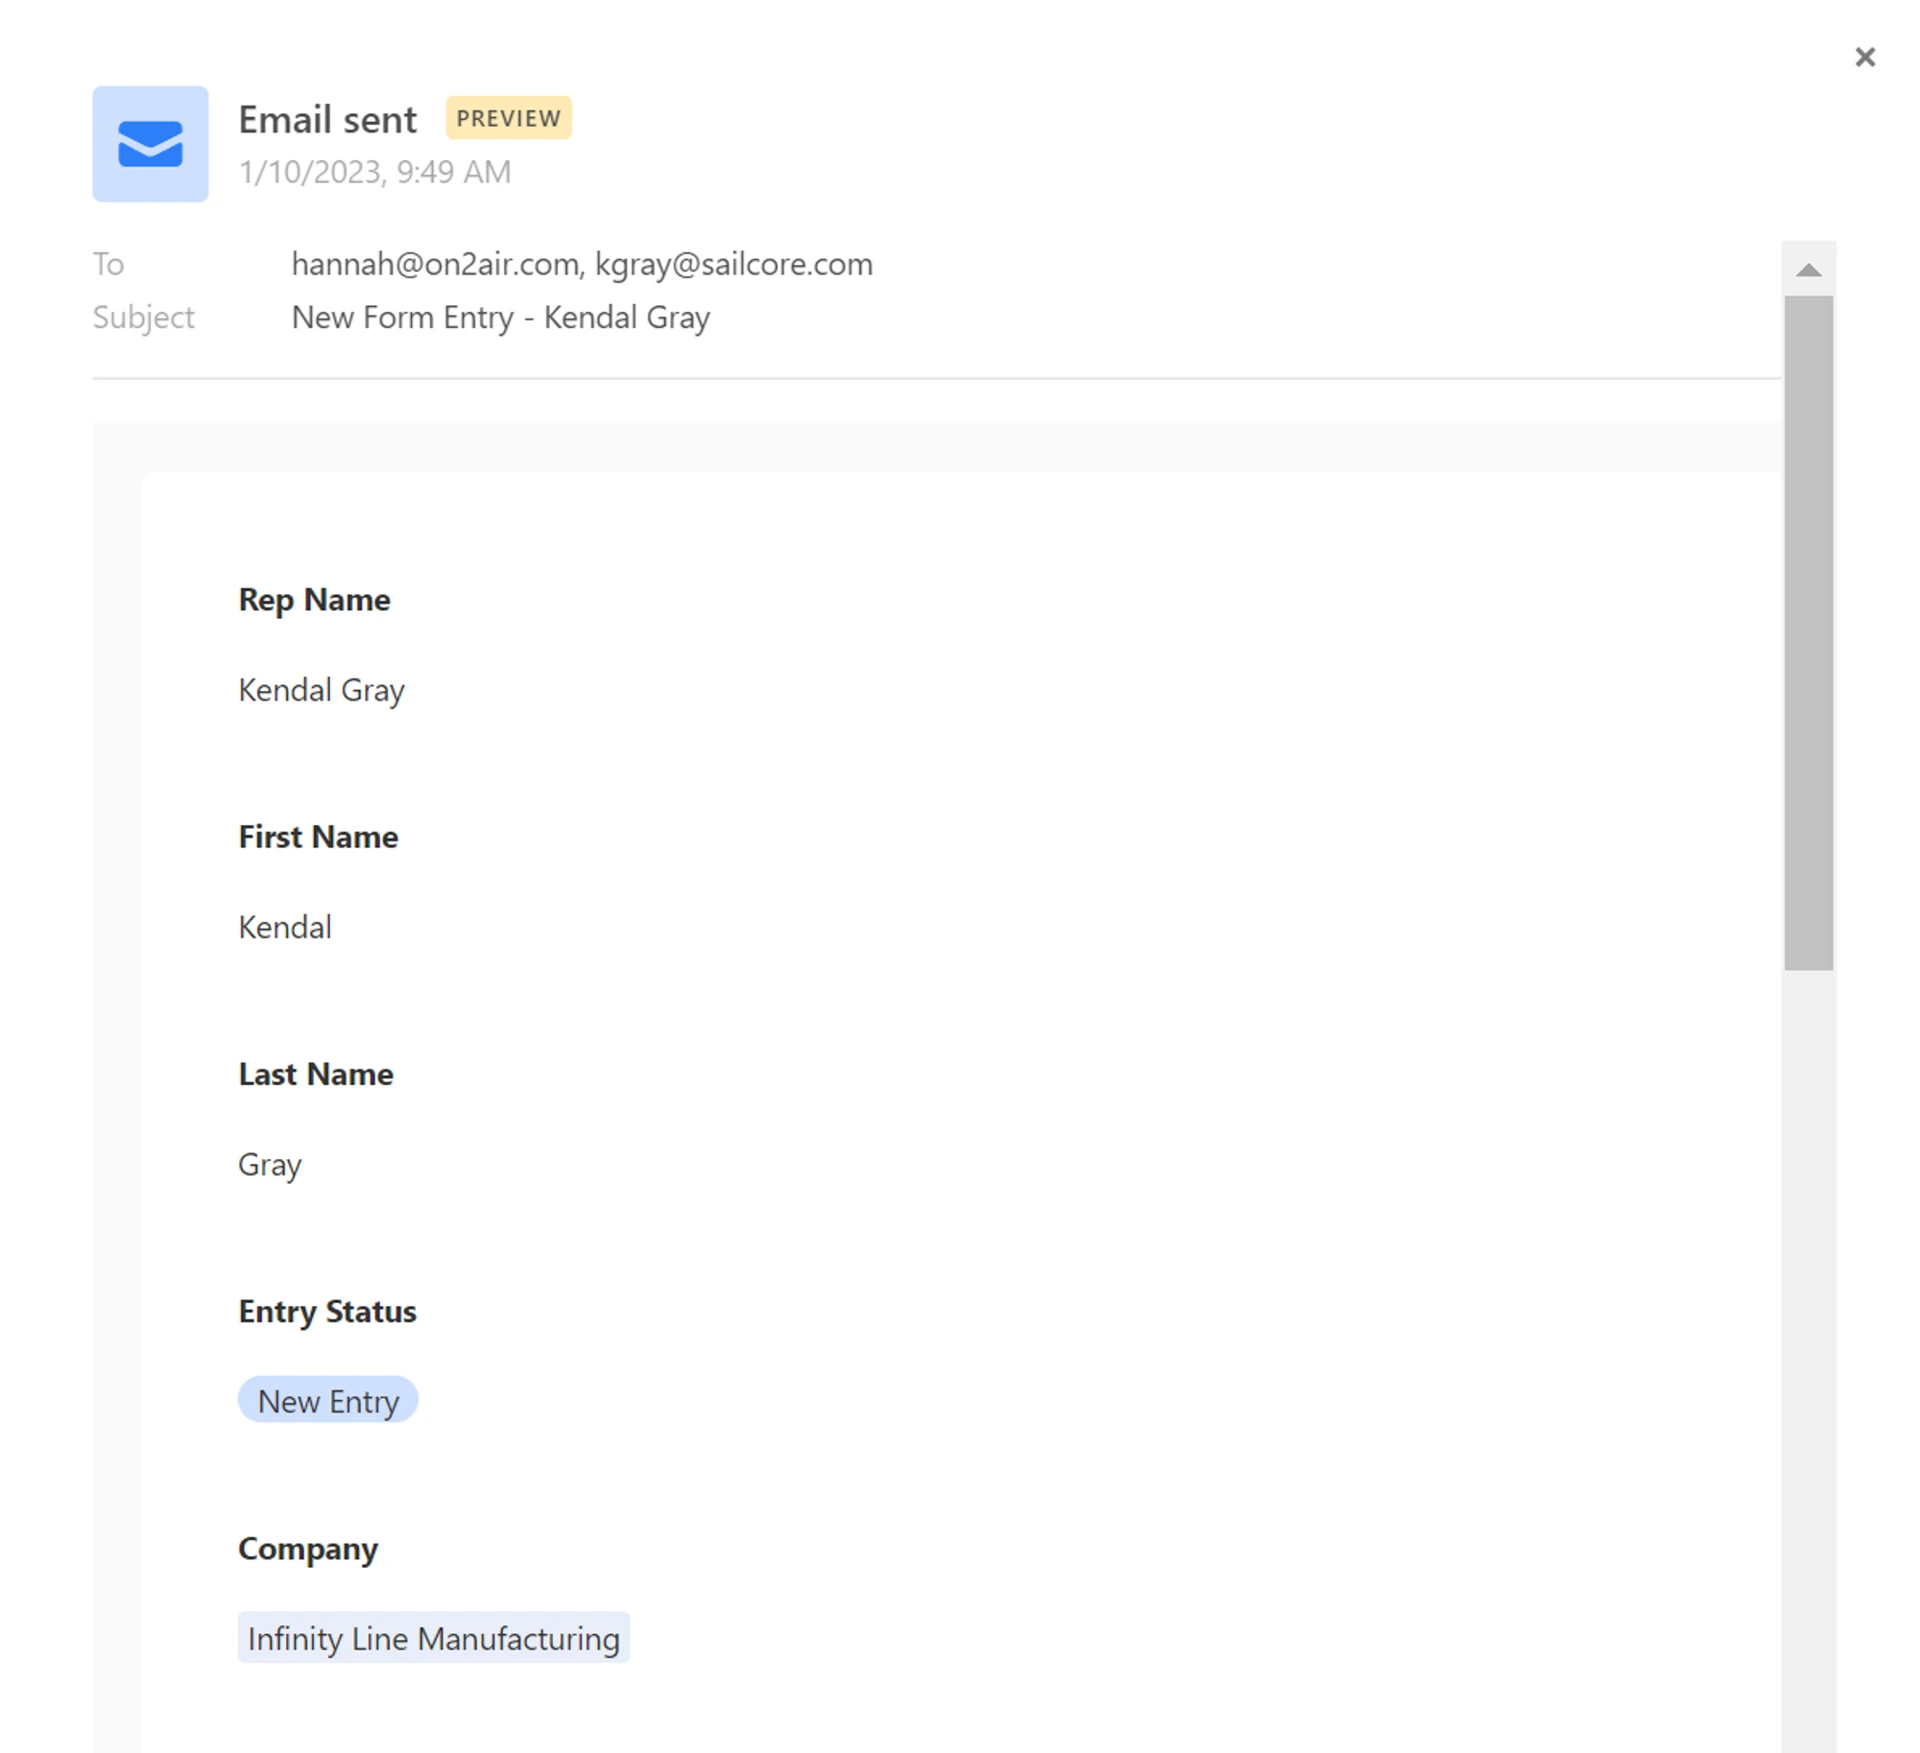
- Click Generate a Preview to see what the Email will look like
Email Preview
- Click Test Automation to ensure everything is correct
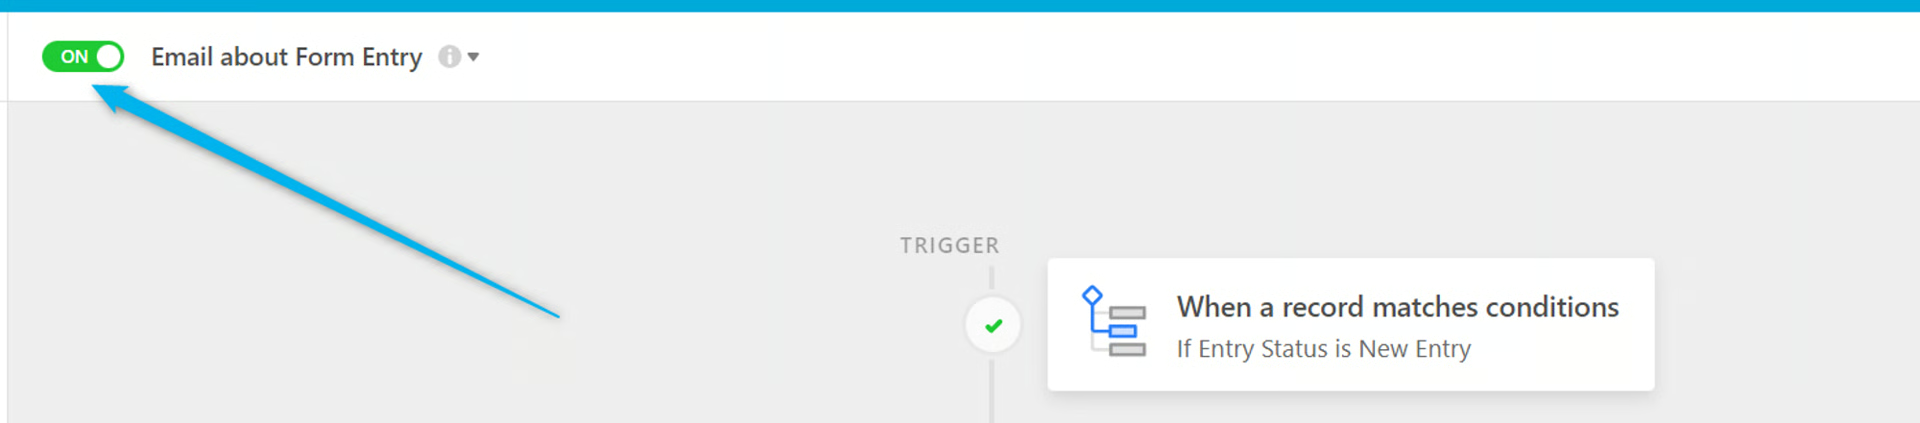
- Enable your Email Automation
For more information on sending email automations, view Airtable documentation
💡
Next:  View Form Submissions