Transfer Airtable API Key to OAuth Authentication in On2Air
 On2Air Backups Help Center >
  Settings
In this tutorial, you’ll learn how to transfer your Airtable API Key connection in On2Air to the OAuth Authentication method now required by Airtable.
In this tutorial
-
Why do I need to transfer from an API Key to OAuth Authentication in On2Air?
-
How to Transfer your Airtable API Key to the OAuth Authentication in On2Air
Why do I need to transfer from an API Key to OAuth Authentication in On2Air?
Section titled “Why do I need to transfer from an API Key to OAuth Authentication in On2Air?”Airtable announced they will disable API Keys that allow you to connect to any third-party service in February 2024 to move to a new OAuth authentication system. They disabled all keys effective February 1, 2024.
OAuth Authentication is a requirement by Airtable for any third-party service, including On2Air, to connect to your Airtable workspace and Airtable bases.
‣
old text
How to Transfer your Airtable API Key to the OAuth Authentication in On2Air
Section titled “How to Transfer your Airtable API Key to the OAuth Authentication in On2Air”-
Log in to your On2Air Account at app.on2air.com
-
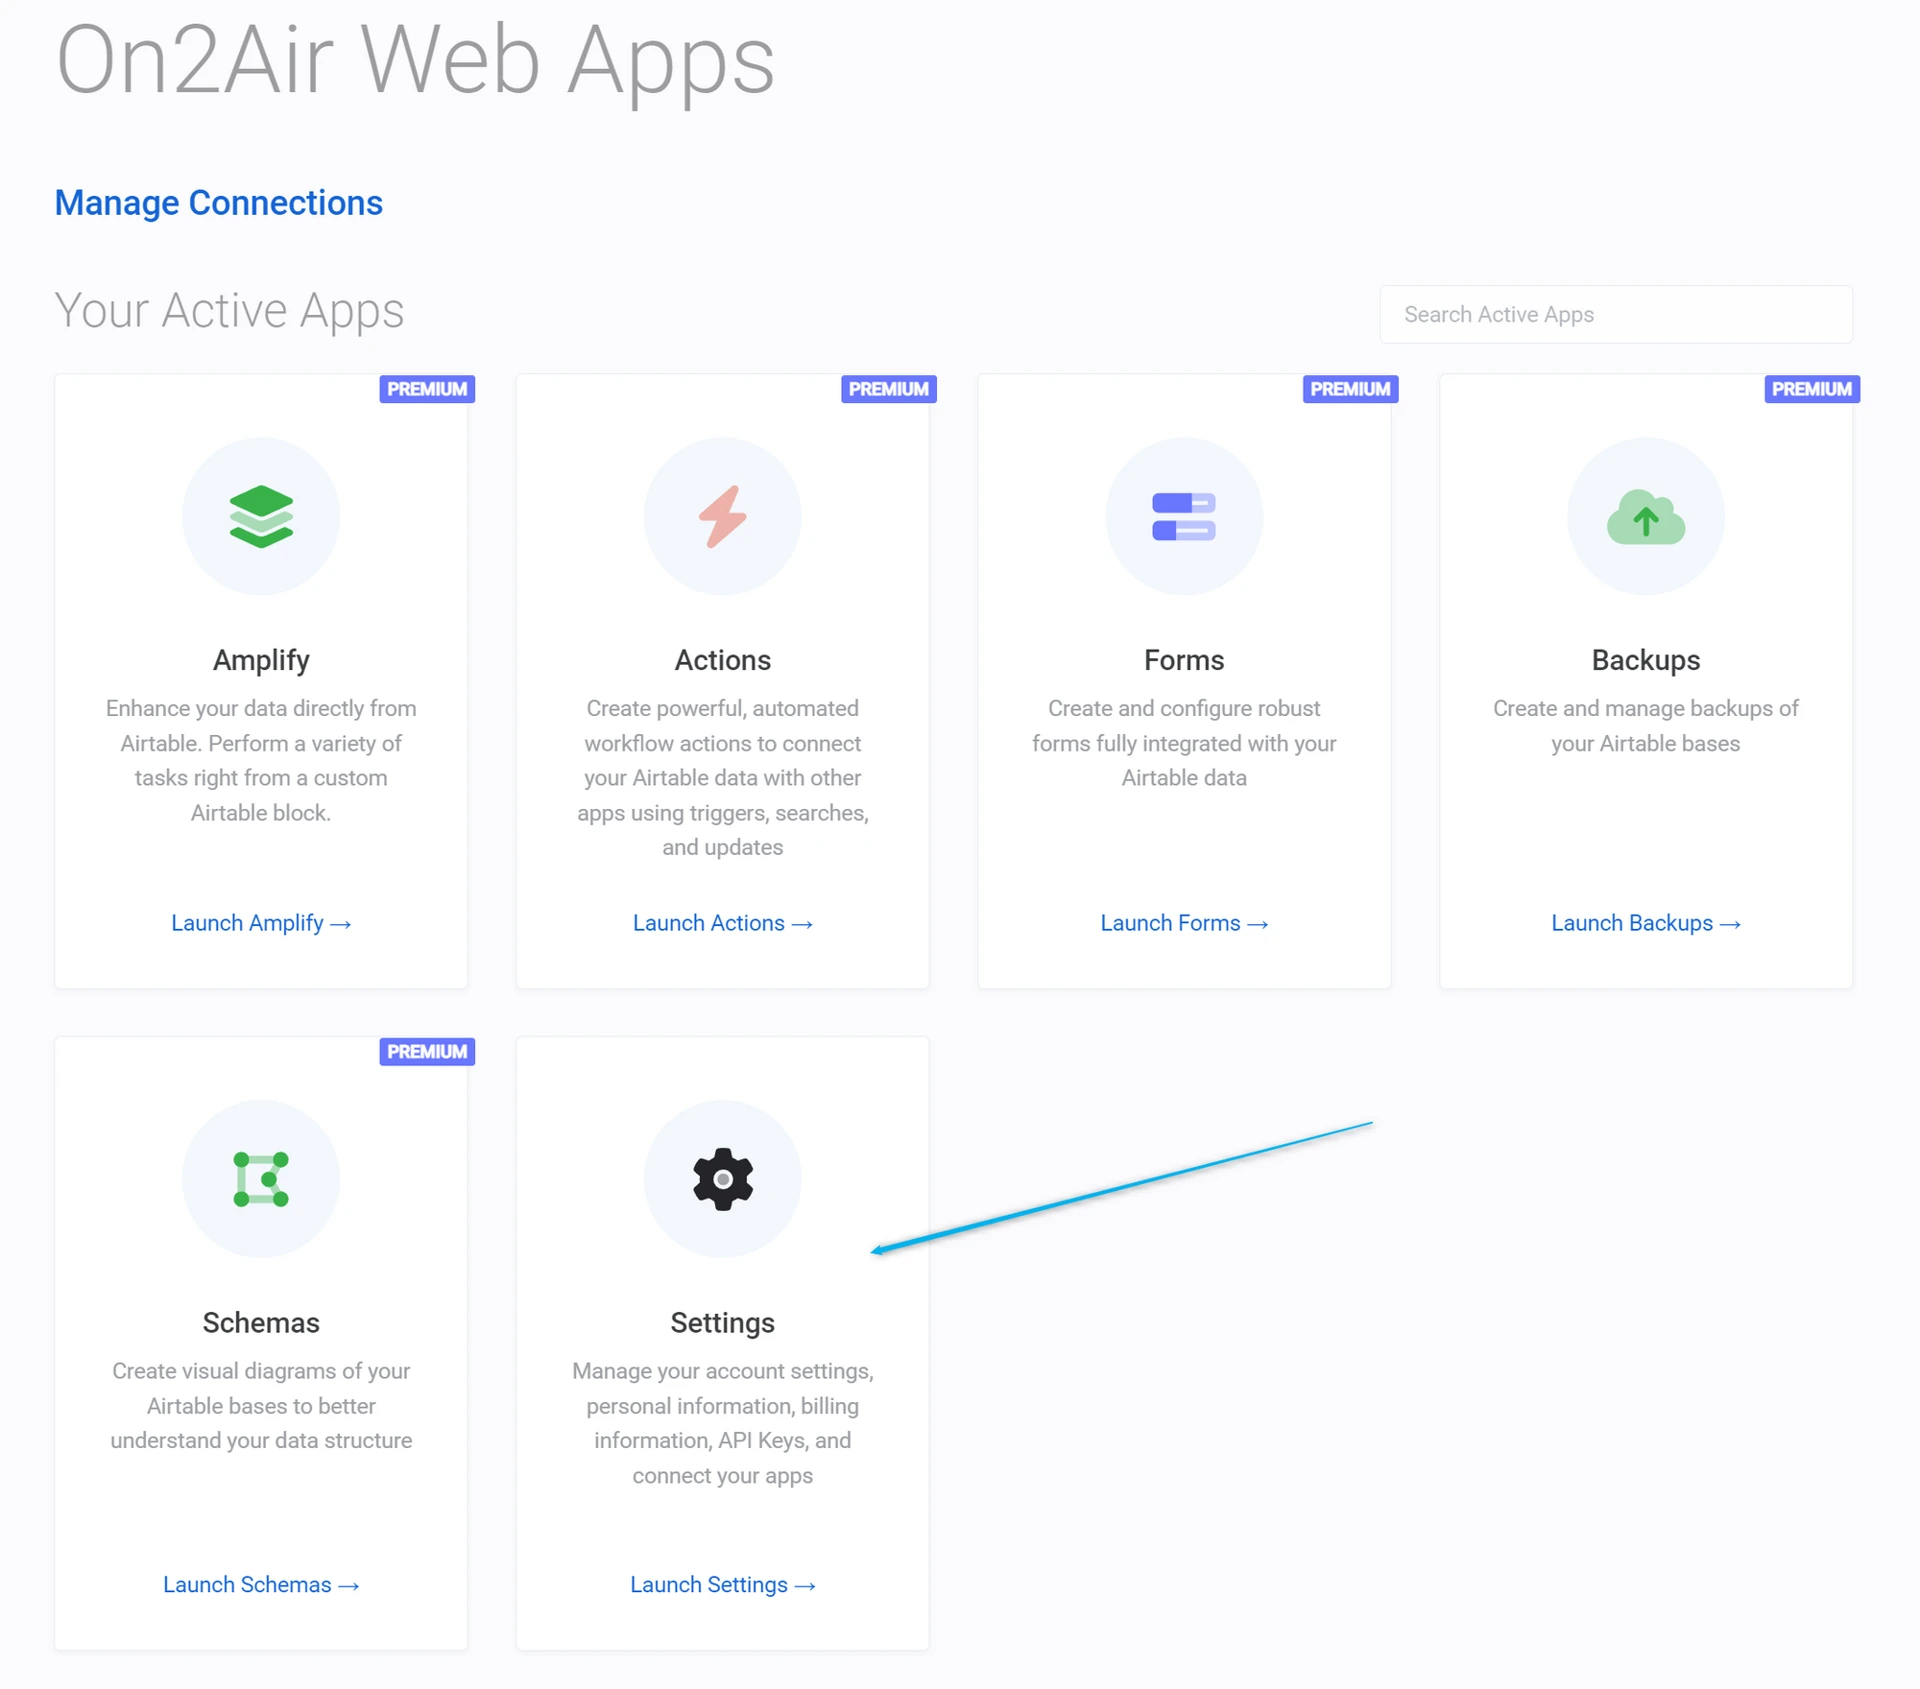
Click the Settings app
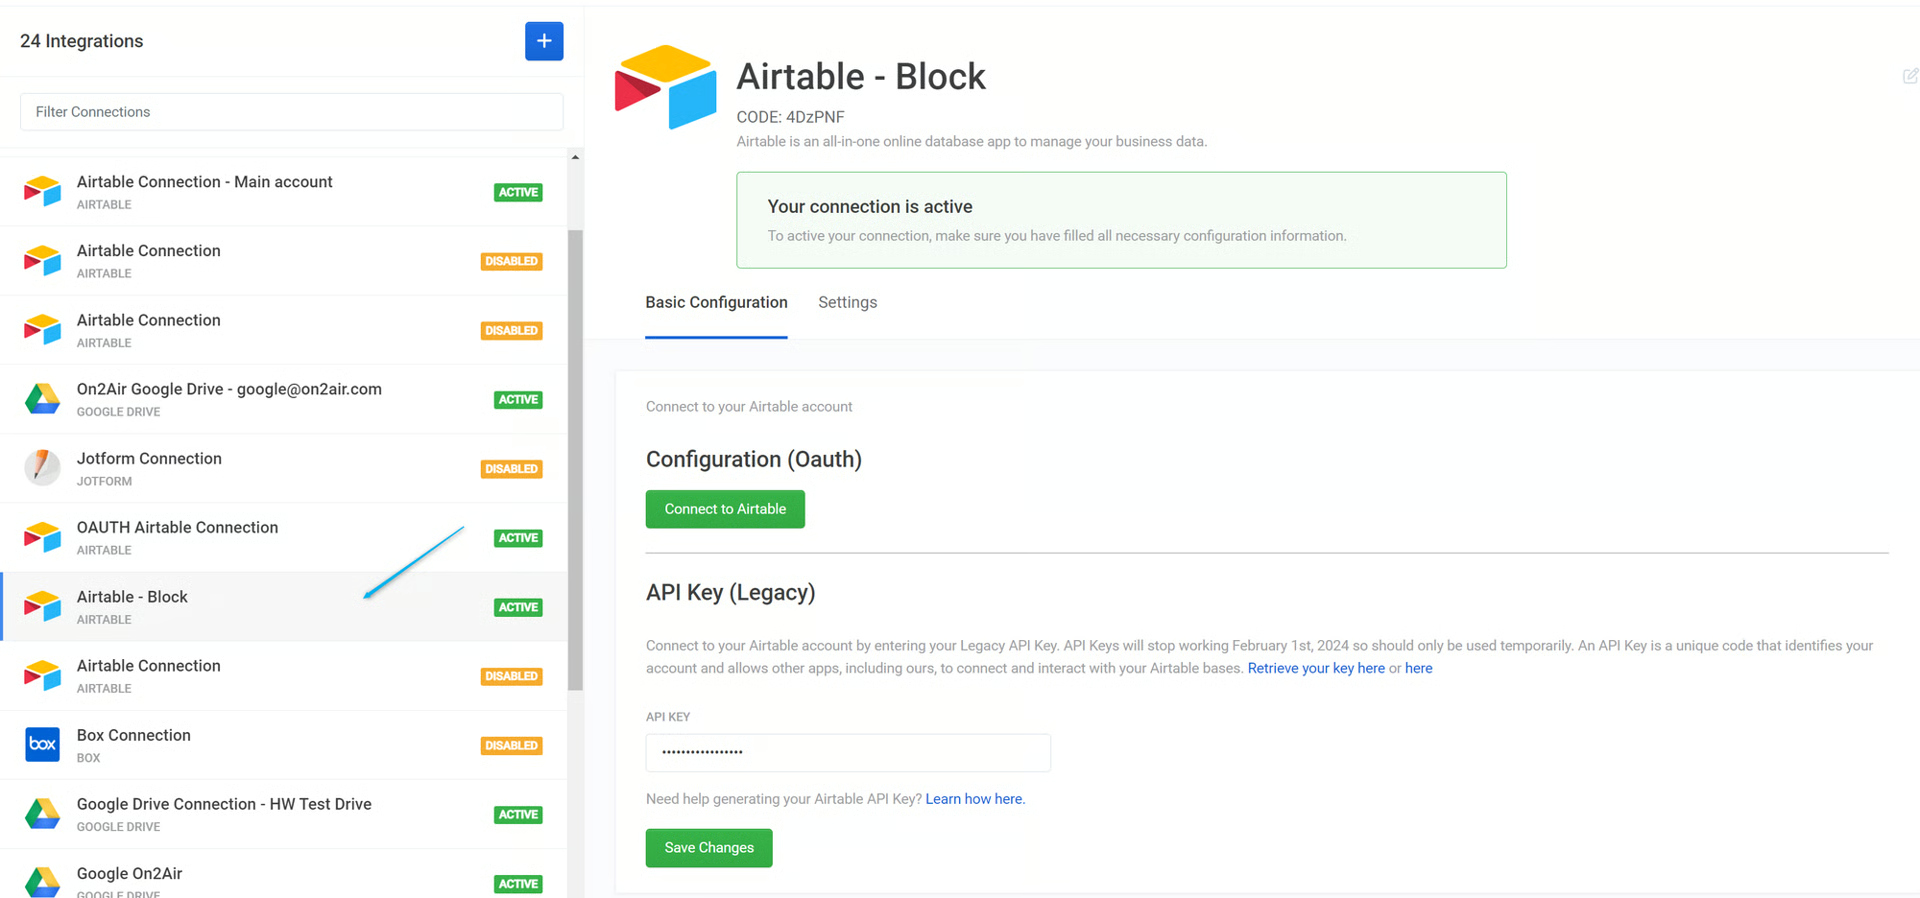
- Choose your Airtable Connection
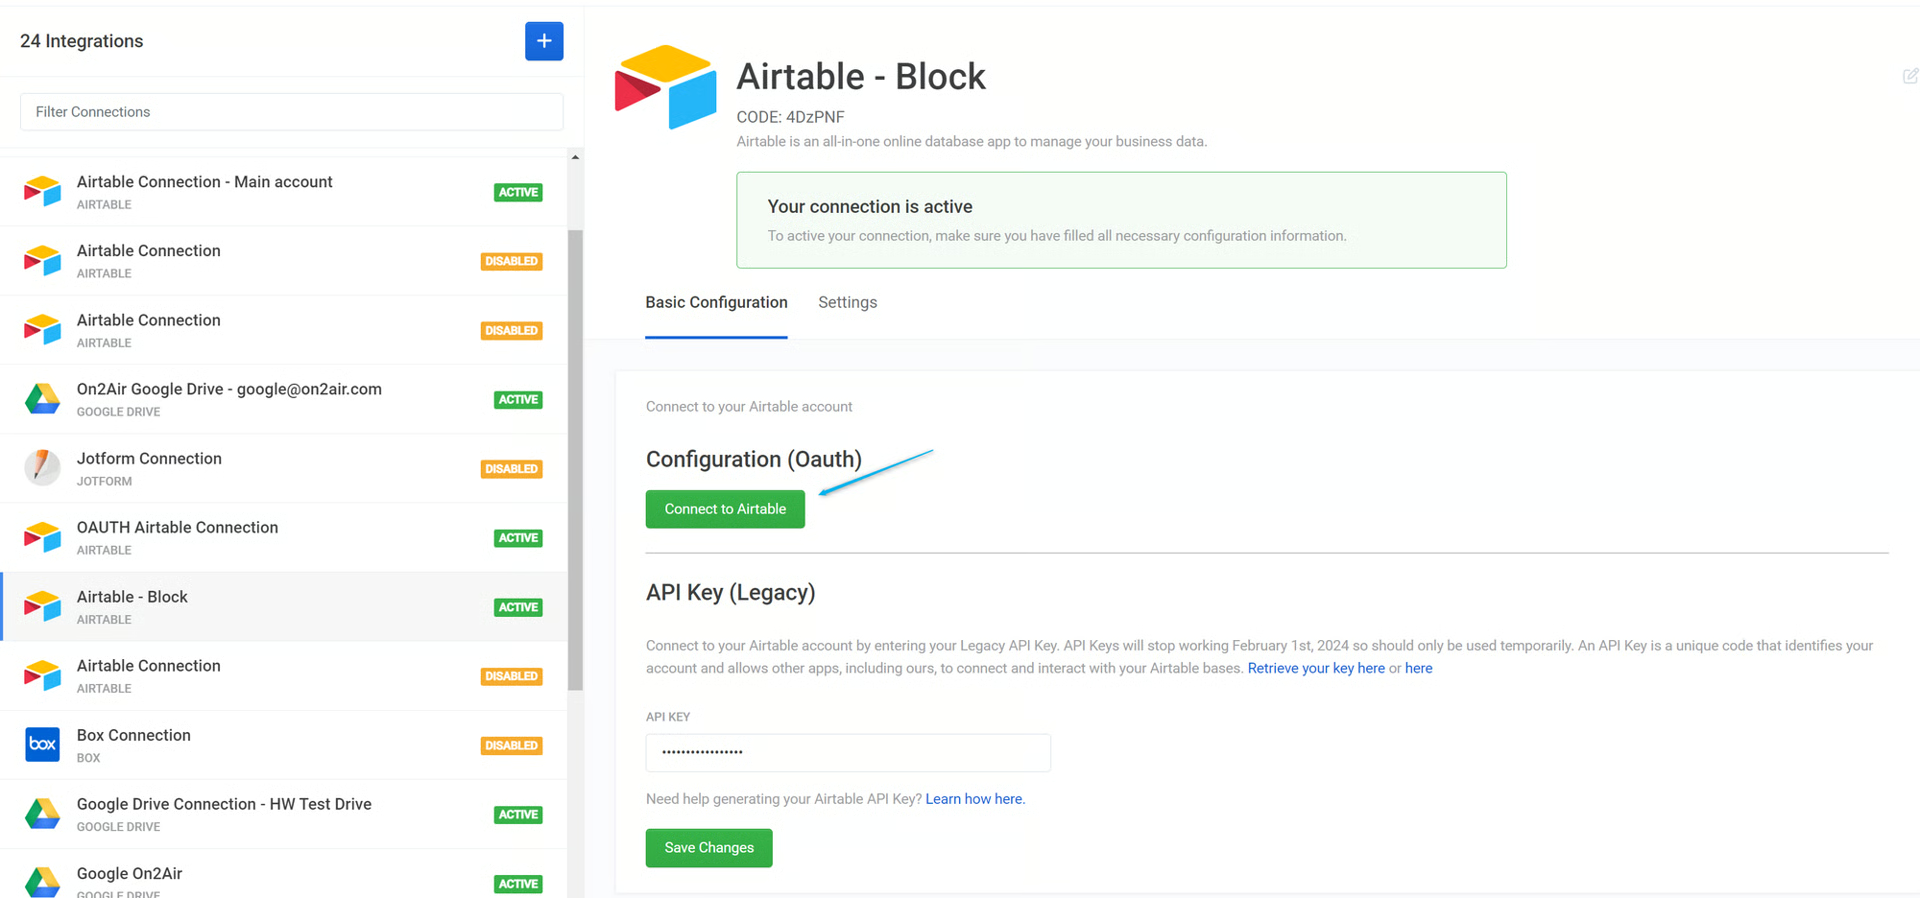
- Under Configuration (Oauth), click Connect to Airtable
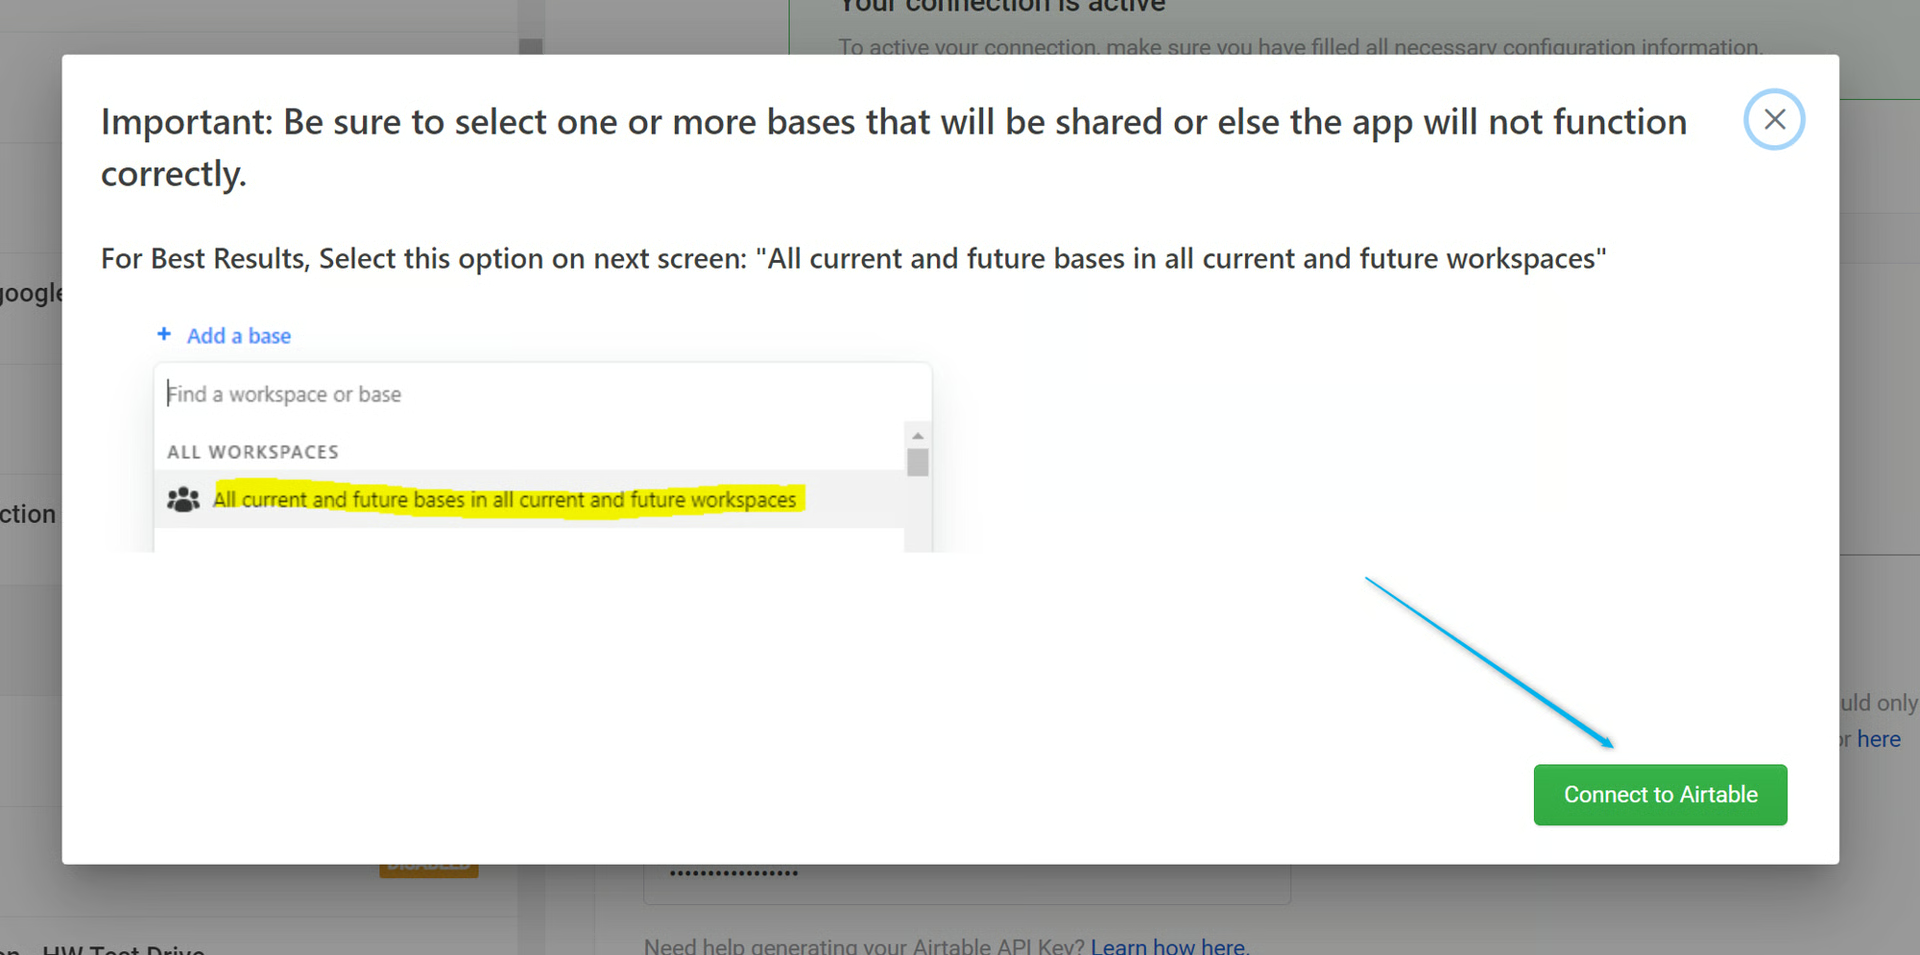
- You’ll see an important message about being sure to choose All current and future bases in all current and future workspaces in the following OAuth settings window.
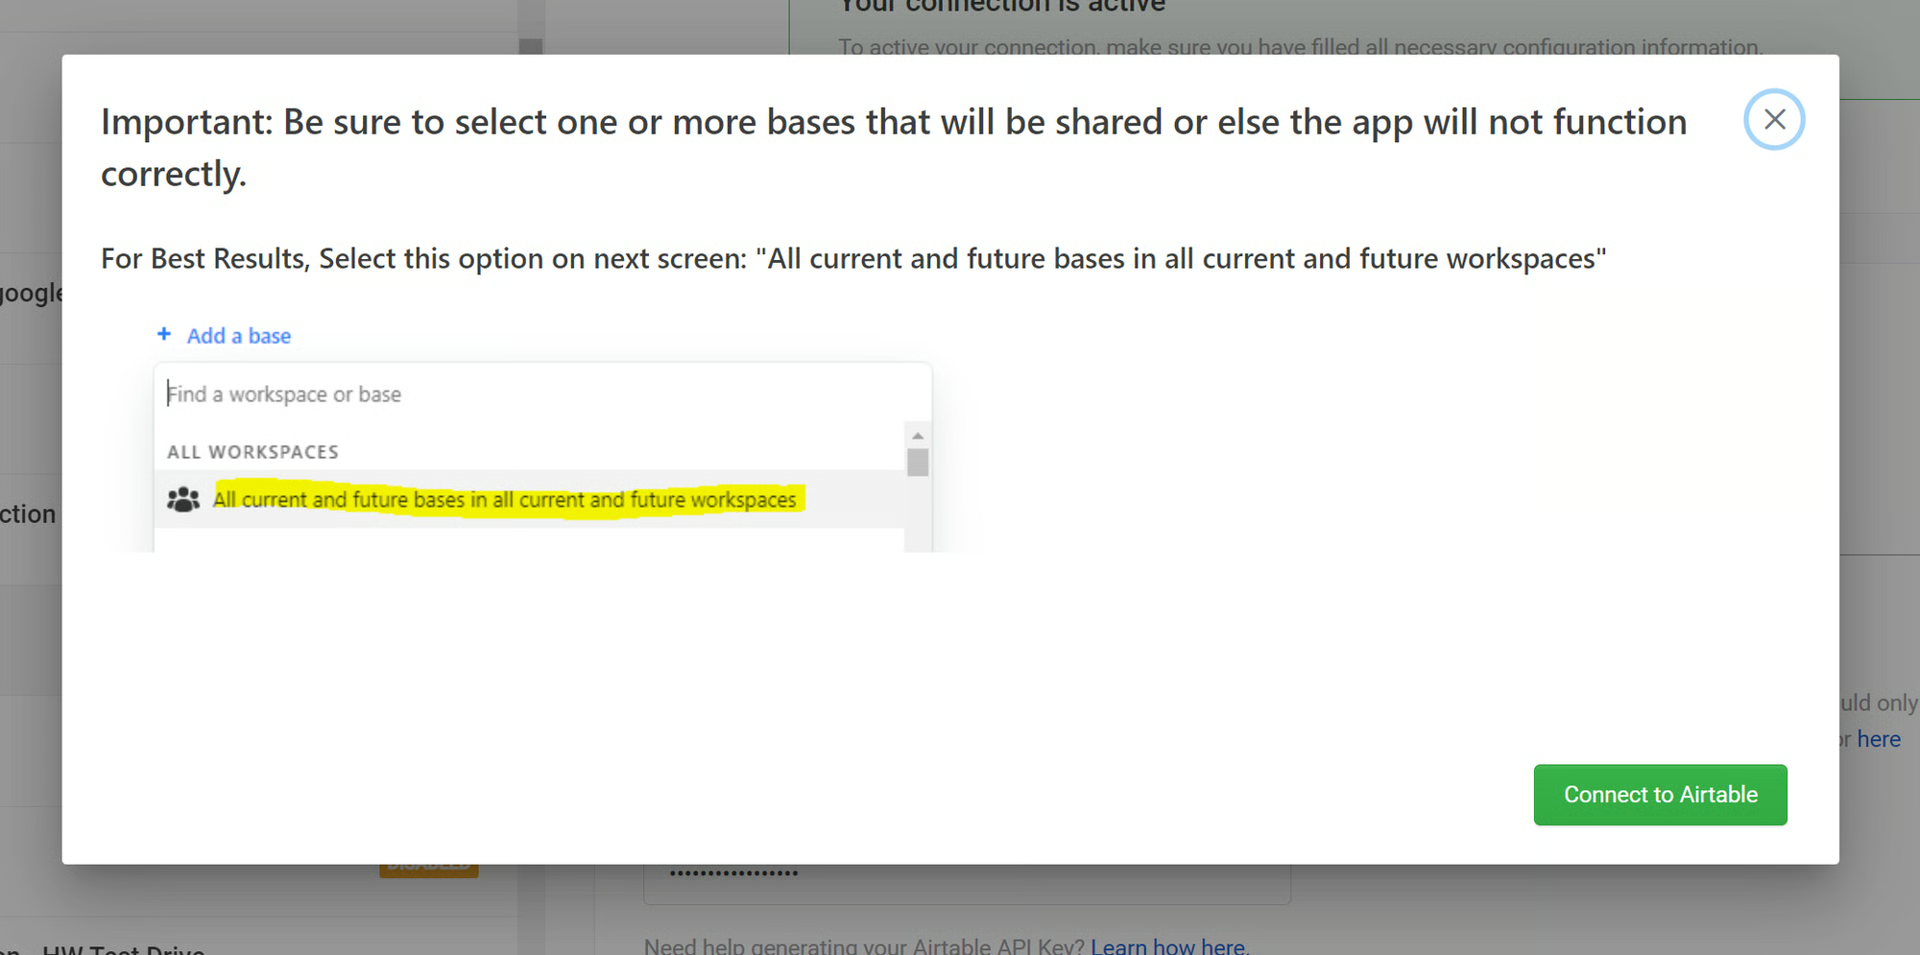
- Click Connect to Airtable
-
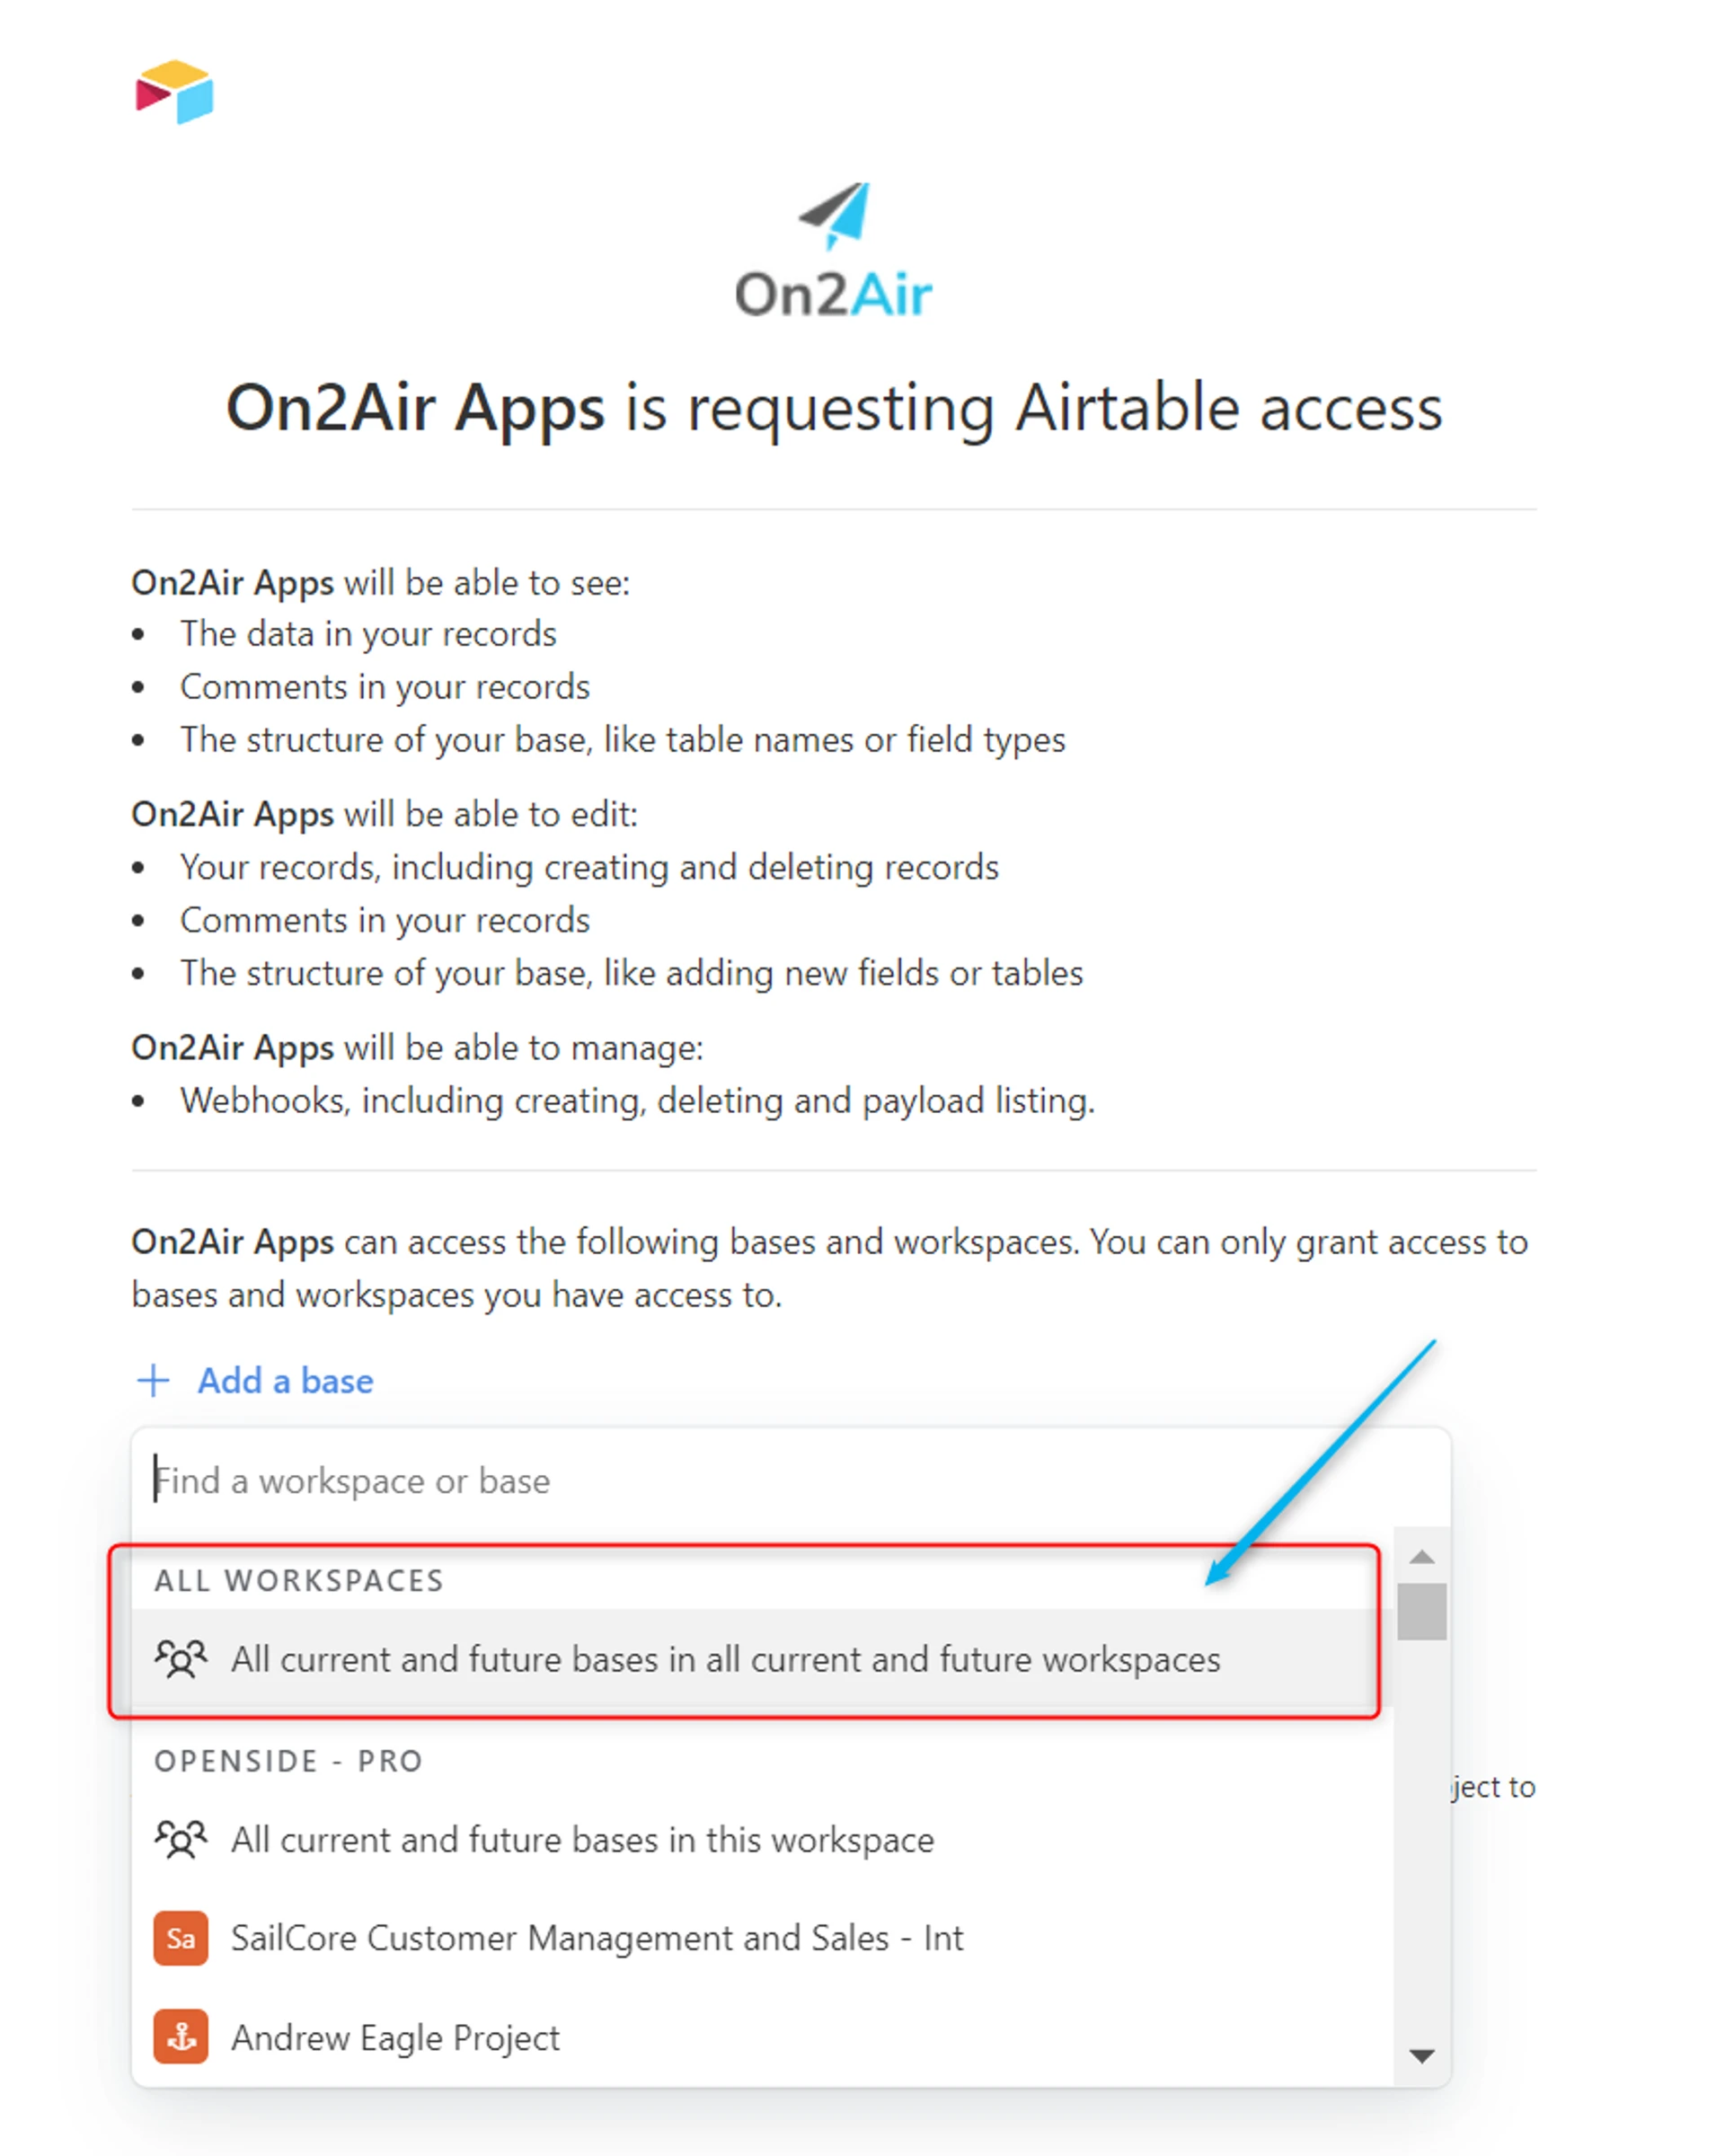
Next, you’ll see a page to authorize On2Air to connect to Airtable
-
IMPORTANT: Click Add a base FIRST

- For best results, choose All current and future bases in all current and future workspaces.
This will allow us to access your Airtable workspace and bases just like we’ve been doing with your API Key connection
-
While you can choose individuals bases, you will need to continually create OAuth connection authentications to On2Air if you ever want to use more than a single workspace, base, or all bases in your Airtable workspace.
-
Click Grant access
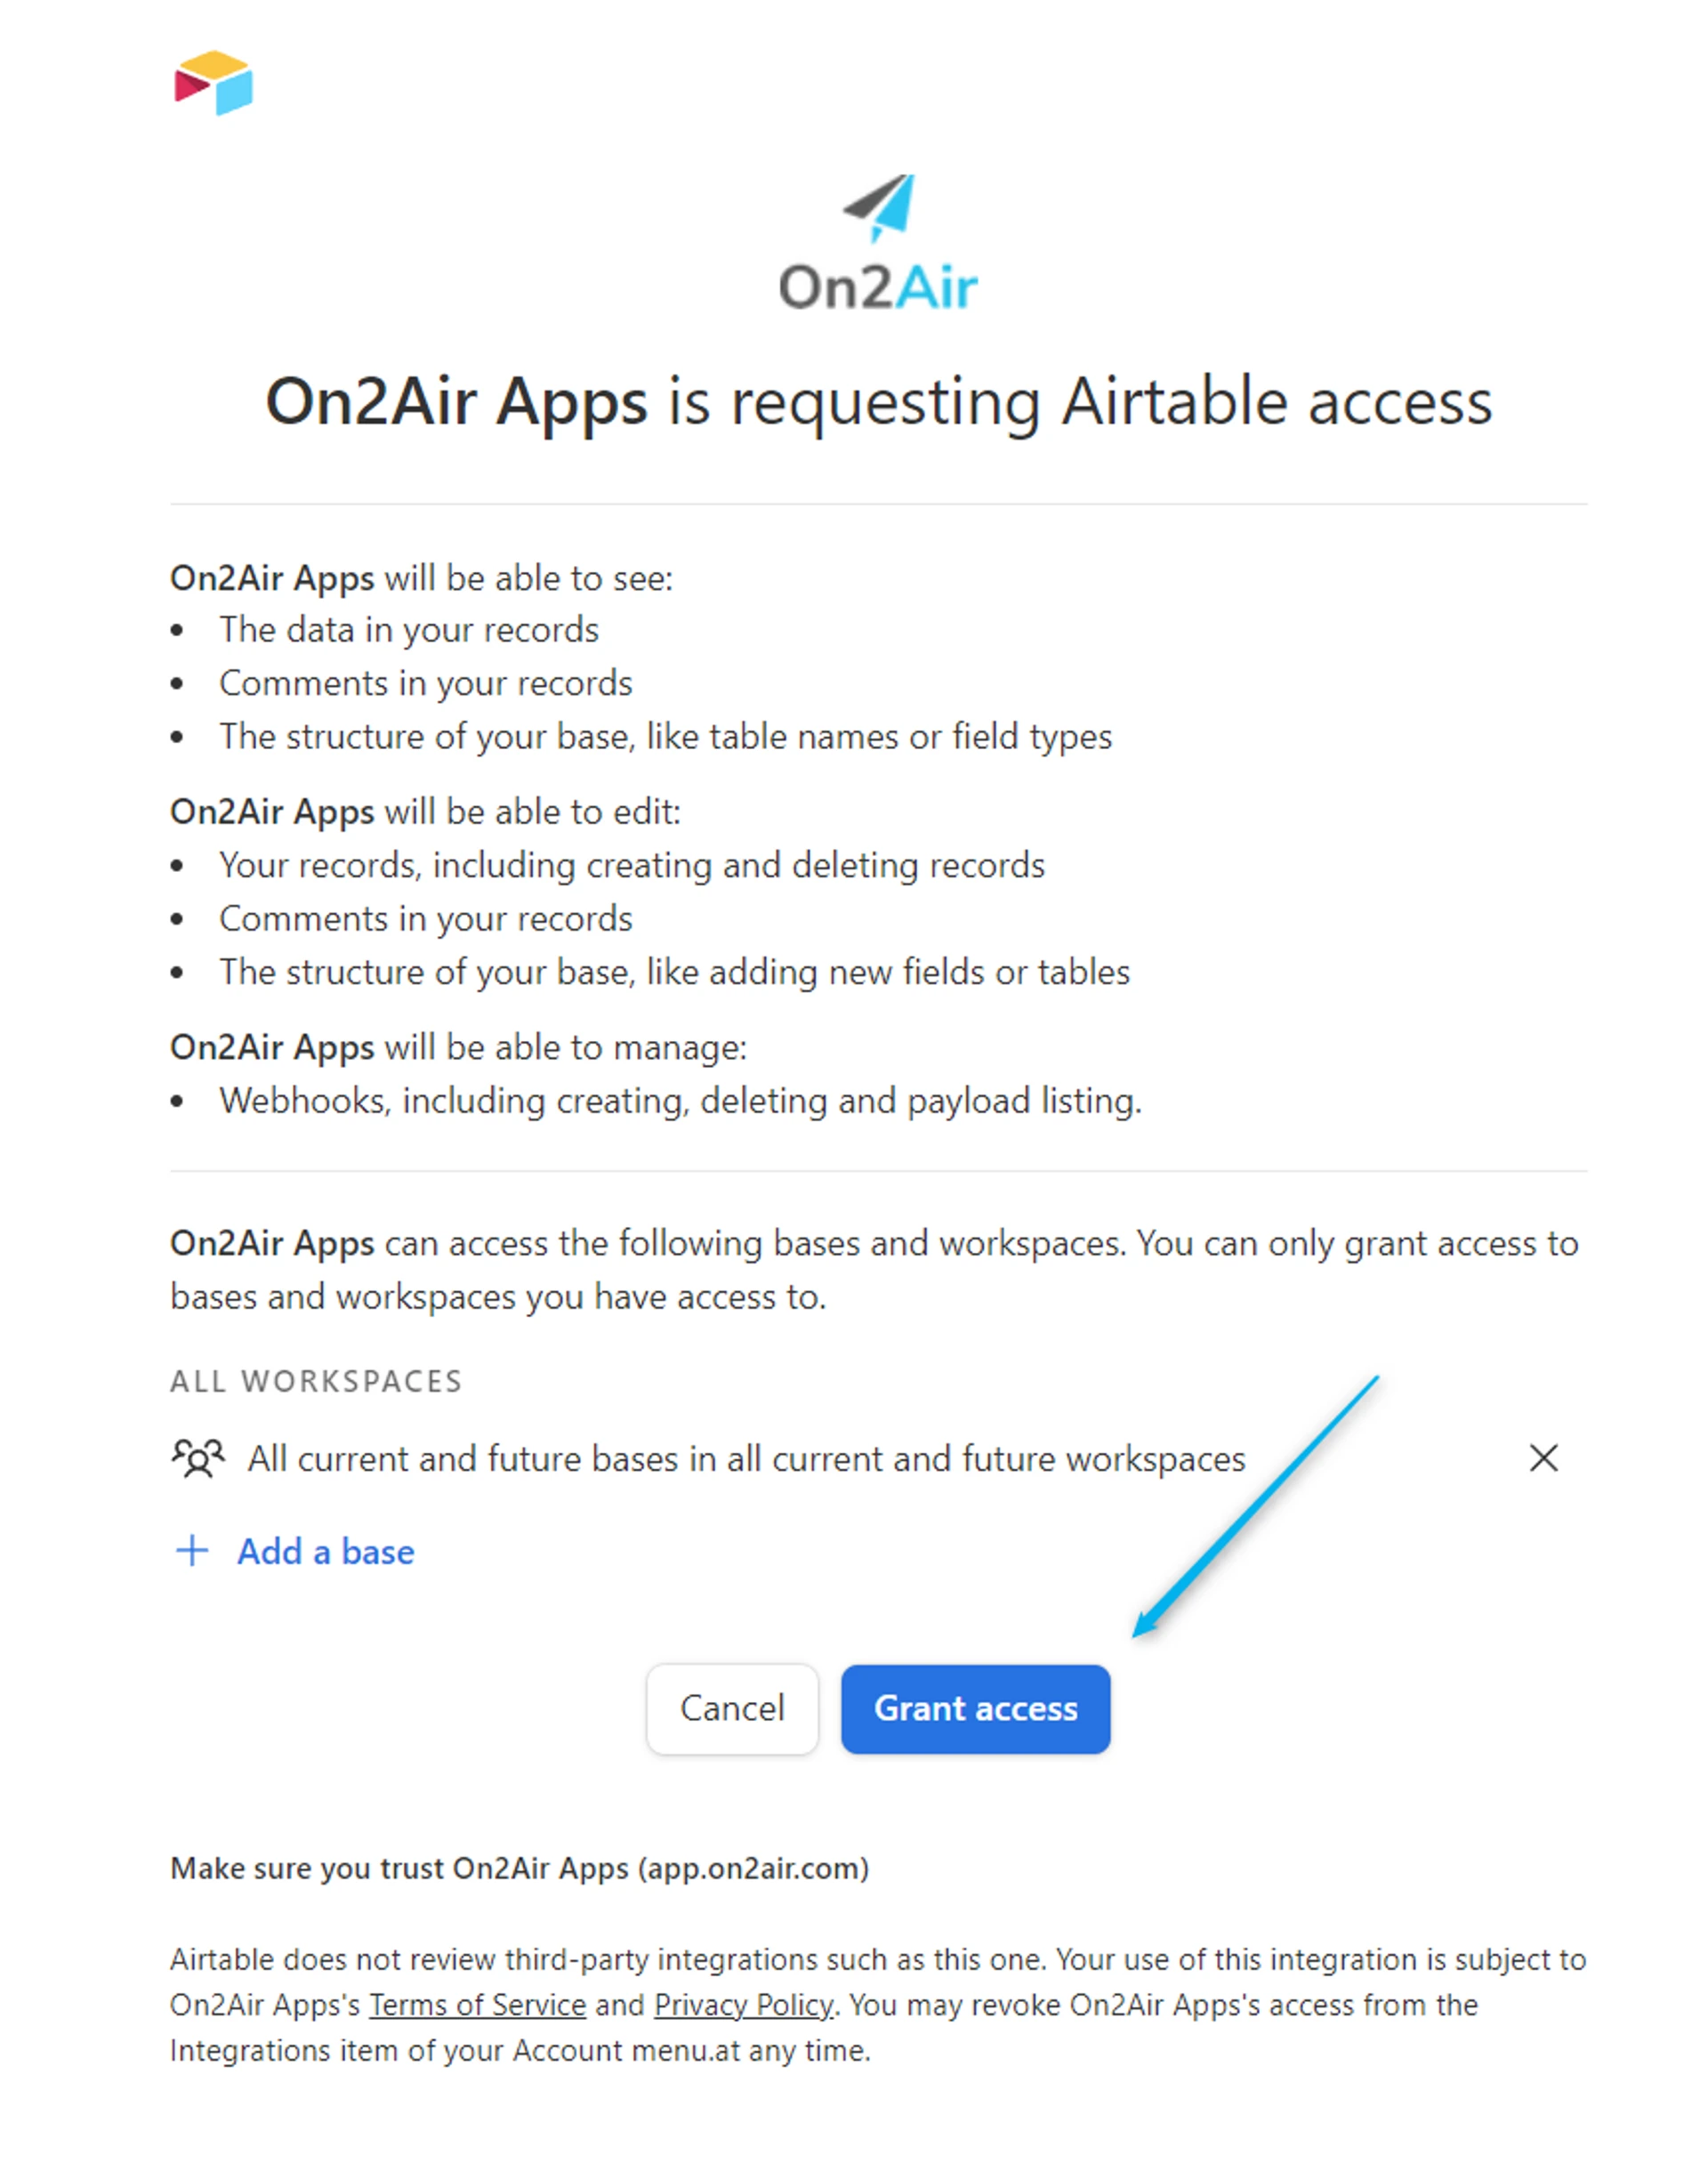
- Your page will reload and display an “Authenticating” message”
-
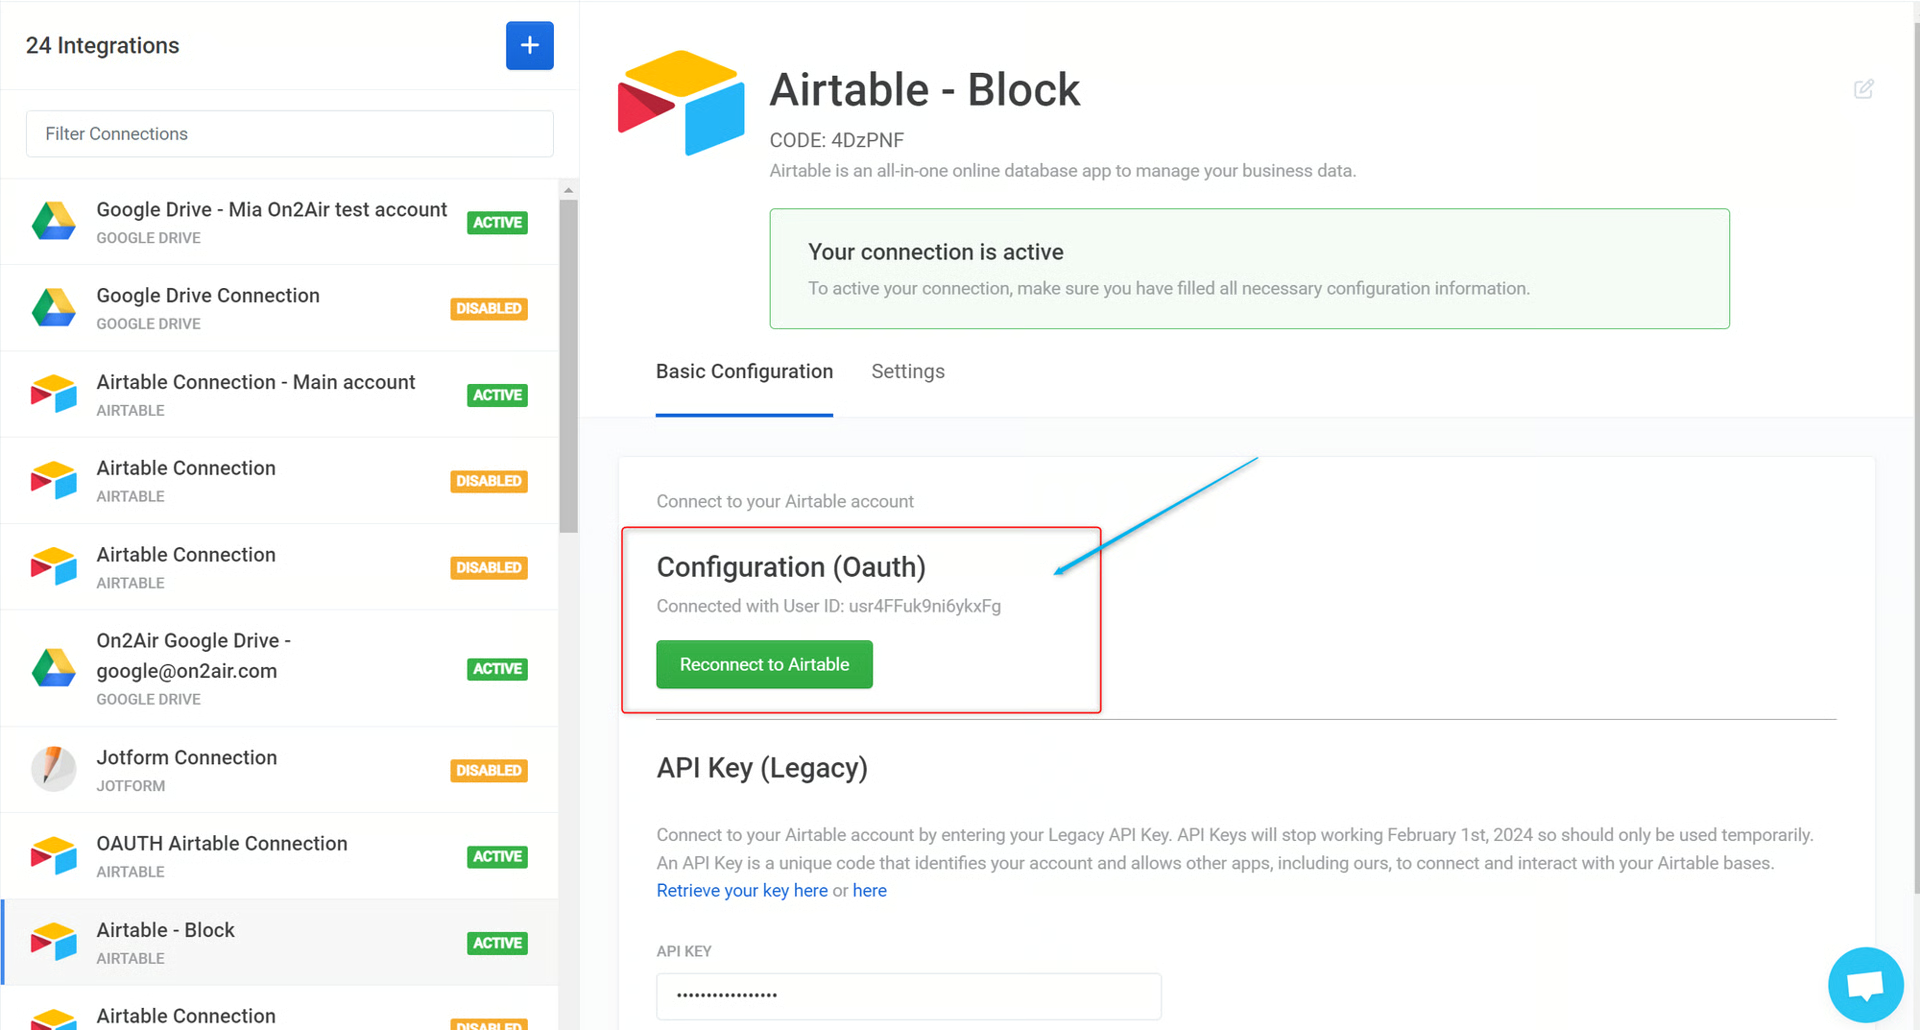
Once the Authentication is complete, you should now see your new OAuth authentication User ID.
-
You’ve now completed the transfer process!