Install Your Function in Your Base
Start using your On2Air Functions in your Airtable base. Install your Function using a variety of options and use the built-in scheduler to determine when your Function runs.
Go to  On2Air Help Center
Install your function using:
Scheduler - Run on a specific schedule Airtable Script - Use in the Scripting App in Airtable Airtable Automation - Use in Automations in Airtable Zapier - Use in Zapier Node.js - Use in your program or application
-
Installing
-
Scheduler
-
Scheduler Setup
-
Enable Scheduler
-
Post Function Execution Settings (Advanced)
-
Multi-Function Strategy
-
Post Functions (Optional)
-
Post Webhook Callback (Optional)
-
Callback on Empty
-
Stringify Callback (Advanced)
-
Connect to Zapier
-
Connect to Scripts
-
Add a Button field to use the Script (used with Record IDs)
-
Connect to Airtable Automations
-
Connect using Node.js
Installing
Section titled “Installing”- Before Installing, you must Enable your function
If you haven’t created an API Key to connect On2Air to other apps, create one now
- In the Installation tab, choose your Installation Source
Scheduler - Run on a specific schedule Airtable Script - Use in the Scripting App in Airtable Airtable Automation - Use in Automations in Airtable Zapier - Use in Zapier Node.js - Use in your program or application
- Select the corresponding API Key
Scheduler
Section titled “Scheduler”The Scheduler in Functions allows you to choose how often you want your Function to run. Choose instant updates or specific minutes, hours, days of the week, days of the month, and timezone. With the scheduler, you no longer have to rely on Zapier or other service to process your Function on a pre-set schedule.
Scheduler Setup
Section titled “Scheduler Setup”The scheduler will check Airtable on a configurable schedule to determine if any records match the configured criteria and will only execute when records are found.
This will automatically run in the background with no other setup on your part, making it the easiest way to run your Function. Changes will take effect upon saving the form.
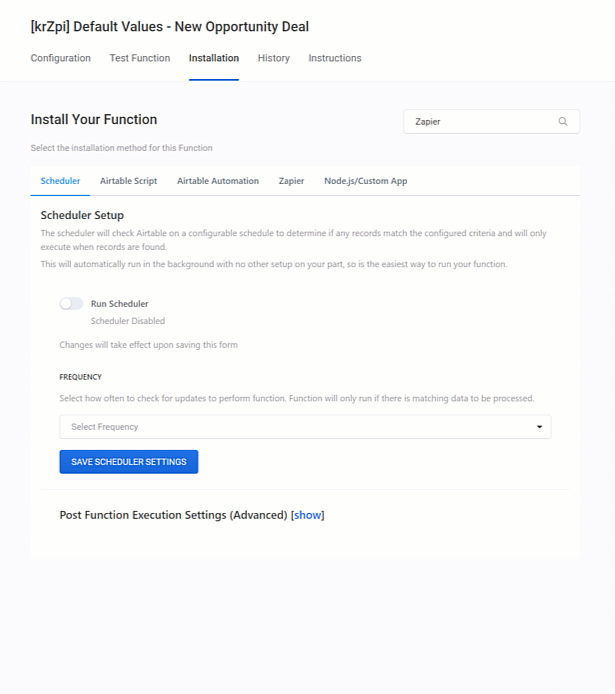
FREQUENCY
Select how often to check for updates to perform function. Function will only run if there is matching data to be processed.
Options:
Instant - Checks for updates every 1 minute
Check every -X- minutes/hours/days/weeks/months - Customize your scheduler to your desired time
- Choose specific minutes, hours, day of the week, day of the month, and timezone.
Configure Custom Cron Setting (Advanced) - Configure using Unix Cron format
View custom cron expression generator - https://crontab.cronhub.io/
Enable Scheduler
Section titled “Enable Scheduler”Click Run Scheduler and Save Scheduler Settings to Enable the Scheduler
Post Function Execution Settings (Advanced)
Section titled “Post Function Execution Settings (Advanced)”Multi-Function Strategy
Section titled “Multi-Function Strategy”Allows you to process multiple Functions. You can process Functions one after the other with or without using records from this Function.
Example: Once a record is processed in this Function and you want to use the updated record in another Function.
Options:
No Record Passing between Functions. Each Function uses its own Trigger - Records will NOT be passed between Functions. Each Function is independent on its own and uses its own Trigger. Trigger Mode of Record ID is not available with this strategy
Send Original Records to All Post Functions - Use this Function’s Trigger and choose multiple Functions to send your original records into Only Functions using the Record ID Trigger Mode are available with this strategy
Chain Outgoing Records from Each Function into Next Function - Connect records from each Function into the next Function Only Functions using the Record ID Trigger Mode are available with this strategy
Post Functions (Optional)
Section titled “Post Functions (Optional)”Select your multiple Functions to be initiated after this Function is completed Choose as many as needed
Post Webhook Callback (Optional)
Section titled “Post Webhook Callback (Optional)”Perform a POST to a Webhook with updated records once Function is completed
Callback on Empty
Section titled “Callback on Empty”Choose whether to callback the webhook every time the Function runs. Not available on Instant Schedules__. If disabled, will only post to callback when records where processed.
Stringify Callback (Advanced)
Section titled “Stringify Callback (Advanced)”Return the callback as a String instead of a JSON object Useful for Scripting in Airtable Automations
Connect to Zapier
Section titled “Connect to Zapier”To connect to Zapier, you have 2 options
- Connect by creating a new Zap
- Connect by choosing a pre-made template
Connect by creating a new Zap
- Choose Zapier as your Installation Source
- Choose your API Key
- Begin the process of creating a new Zap in Zapier
- Choose On2Air as your app in Zapier (if it’s your fist time to use On2Air in Zapier, enter your On2Air API Key)
- Select Perform On2Air: Function as your Event
- Enter the API Key when prompted
- Finish configuring your Zap
- In Set up Trigger, choose Action Functions
- Choose your Function Trigger (this is the Function you just created)
Wait for Results - This allows you to wait for a longer period of time for your records to be pulled from Airtable. Useful for larger amounts of records Default is NO Zapier will wait for 30 seconds If over 100 records, it’s recommended to set this to YES
Callback URL - Used for Delayed Responses to receive function results
Callback on Empty Results - if you want to return blank records - Default is NO
- Click Continue
Next Zapier step
Optional -
Perform A Session Lookup - Used if you want to capture the Session ID where you can then perform a Lookup
Perform On2Air Task - Perform a task associated with an On2Air app (Action or Function)
Connect by choosing a pre-made template
Choose one of the On2Air pre-made templates for Zapier
Connect to On2Air (if first time), using the listed API Key ###########
Connect to Scripts
Section titled “Connect to Scripts”Once you create and test your function, On2Air automatically generates a Script for you to add to the Scripting App in Airtable. The Script contains almost everything you need to use your action immediately.
- Choose Scripts as your Installation Source and select your API Key (A script is automatically generated)
Copy
- Click Copy to Clipboard to copy the script
- Paste the script into the Scripting App in Airtable or into On2Air: Scripts
It will generate an On2Ari: Actions and Functions configuration panel
- Paste the Function ID into the Function Code field -The Function ID is the unique identifier in the title of your Function in On2Air
- In the Callback URL field (if not using a callback URL), add a single space (due to Airtable limitations)
- If you are using a callback URL, enter the URL
- Click Run
- Your Function should now be working!
Depending on your Trigger Mode, you can begin processing your function
Add a Button field to use the Script (used with Record IDs)
Section titled “Add a Button field to use the Script (used with Record IDs)”Button Example:
- Create a Button field
- Choose Run script as the Action
- Choose the Dashboard and the Scripting app where you just added the script
- Then click the button in your record
- You can now click the Button in your record each time instead of having to edit anything in the Scripting app
Optional Settings in Script
func_input[‘callback’] - Set to a webhook URL to receive the response upon completion
func_input[‘wait’] = false;
- Set to true if you need to use the results in your remaining script/automation. Use with Caution as functions may take longer than Airtable’s execution time limits
func_input[‘stringify’] = false;
- Set to true if you need the response to be a JSON string instead of an object; Useful for using with Airtable automations on callback
In the generated script, you will see an output of what the data will look like. There are several areas in the script marked as ‘TODO Item(s)’. You will need to review each TODO, add your logic to the script, add values, or other relevant instructions.
When you update the TODOs, it’s automatically added in the Output to be available for future steps if needed
- Review and complete each TODO Item
//TODO (1/2) configure the inputs for the function // Pass in an array or record ids to be processed
func_input[‘record_ids’] = [record.id]
- Enter your Record IDs. ex: [“rec1”,“rec2”]
This is only used if your function is using Record IDs as the Trigger Mode
Connect to Airtable Automations
Section titled “Connect to Airtable Automations”You can use Functions directly inside of Automations in your base. Using On2Air: Actions in parallel with Automations is essential to perform a variety of functions not available within Airtable.
- Choose Automation as the Installation Source and then choose your API Key A script is automatically generated
Optional settings:
Include Function Definition (Default) - This includes the global function to call any On2Air Function. Its only needed once per code block so if calling multiple functions in same block, can disable after the first.
Using Data from Input Configuration (Default) - If using configuration data to set your values. Disable to set your data within the code
- Click Copy to Clipboard to copy the script
- Open your base in Airtable (the one configured in your Function) and open the Automations tab
- Create a Trigger in Airtable Automations
- In our example, we are using At scheduled time > At regular intervals > Every 15 minutes
- Next, add an Action (Airtable version)
- Click Run script*Run script **is only available in the Airtable Pro plan
- Paste the code into the text editor
- Next, click Add input variables
- For the name, type code
- For the Value, input the Function ID The Function ID is the unique identifier in the title of your function
If your Trigger Mode is RECORD IDs, you’ll need to add an input variable of record_ids and then the record IDs as the values.
- Click Test
If you want to see the results of what was processed, change func_input[‘wait’] = false; to func_input[‘wait’] = true;
Optional Settings in Script
//TODO (1/2) configure the inputs for the function // Pass in an array or record ids to be processed
func_input[‘record_ids’] = [record.id]
- Enter your Record IDs. ex: [“rec1”,“rec2”]
This is only used if your Trigger Mode is using Record IDs
func_input[‘callback’] = config.callback ? config.callback.trim() : "";
- Set to a webhook URL to receive the response upon completion
func_input[‘wait’] = false;
- Set to true if you need to use the results in your remaining script/automation. Use with Caution as functions may take longer than Airtable’s execution time limits
func_input[‘stringify’] = false;
- Set to true if you need the response to be a JSON string instead of an object; Useful for using with Airtable automations on callback
In the generated script, you will see an output of what the data will look like. There are several areas in the script marked as ‘TODO Item(s)’. You will need to review each TODO, add your logic to the script, add values, or other relevant instructions.
When you update the TODOs, it’s automatically added in the Output to be available for future steps if needed
- Review and complete each TODO Item
//TODO (2/2) utilize the records as needed.
Connect using Node.js
Section titled “Connect using Node.js”You can use Actions in your program or application
- In Installation Source, select Node.js
Select your API Key
Click Copy to Clipboard
- Paste into your program
Optional Settings in Node.js
Include Function Definition - If enabled, this includes the global function to call any On2Air Function. Its only needed once per code block so if calling multiple functions in same block, can disable after the first. _
Go to On2Air Help Center