How to Create and Use Layouts for Block Views
 On2Air Help Center >
  On2Air Amplify - On2Air Amplify has been shutdown
🔴 On2Air Amplify has been shutdown to focus on our On2Air Backups Airtable app. Learn more about automated Airtable backups - on2air.com
Layouts contain your Block Views for editing and viewing your Airtable records.
In this article
-
Create a New Layout
-
Rearrange Block Views
-
Navigate the Layout Menu
-
Manage Layouts
-
Layout Info
-
Permissions
-
Switch Layouts
-
Duplicate Layouts
-
Global Settings
-
User Settings
-
App Settings
-
Filtered Records
-
Global Config
-
About
-
Get Support and View Documentation
Create a New Layout
Section titled “Create a New Layout”To create a new layout:
- Click the menu next to the Layout name
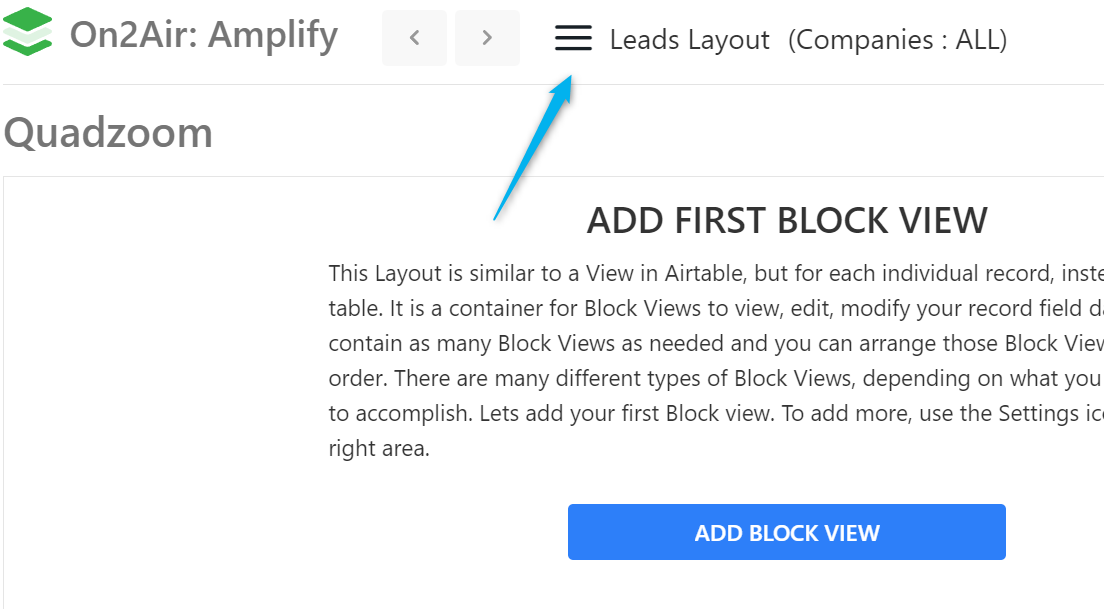
- Click Switch Layout
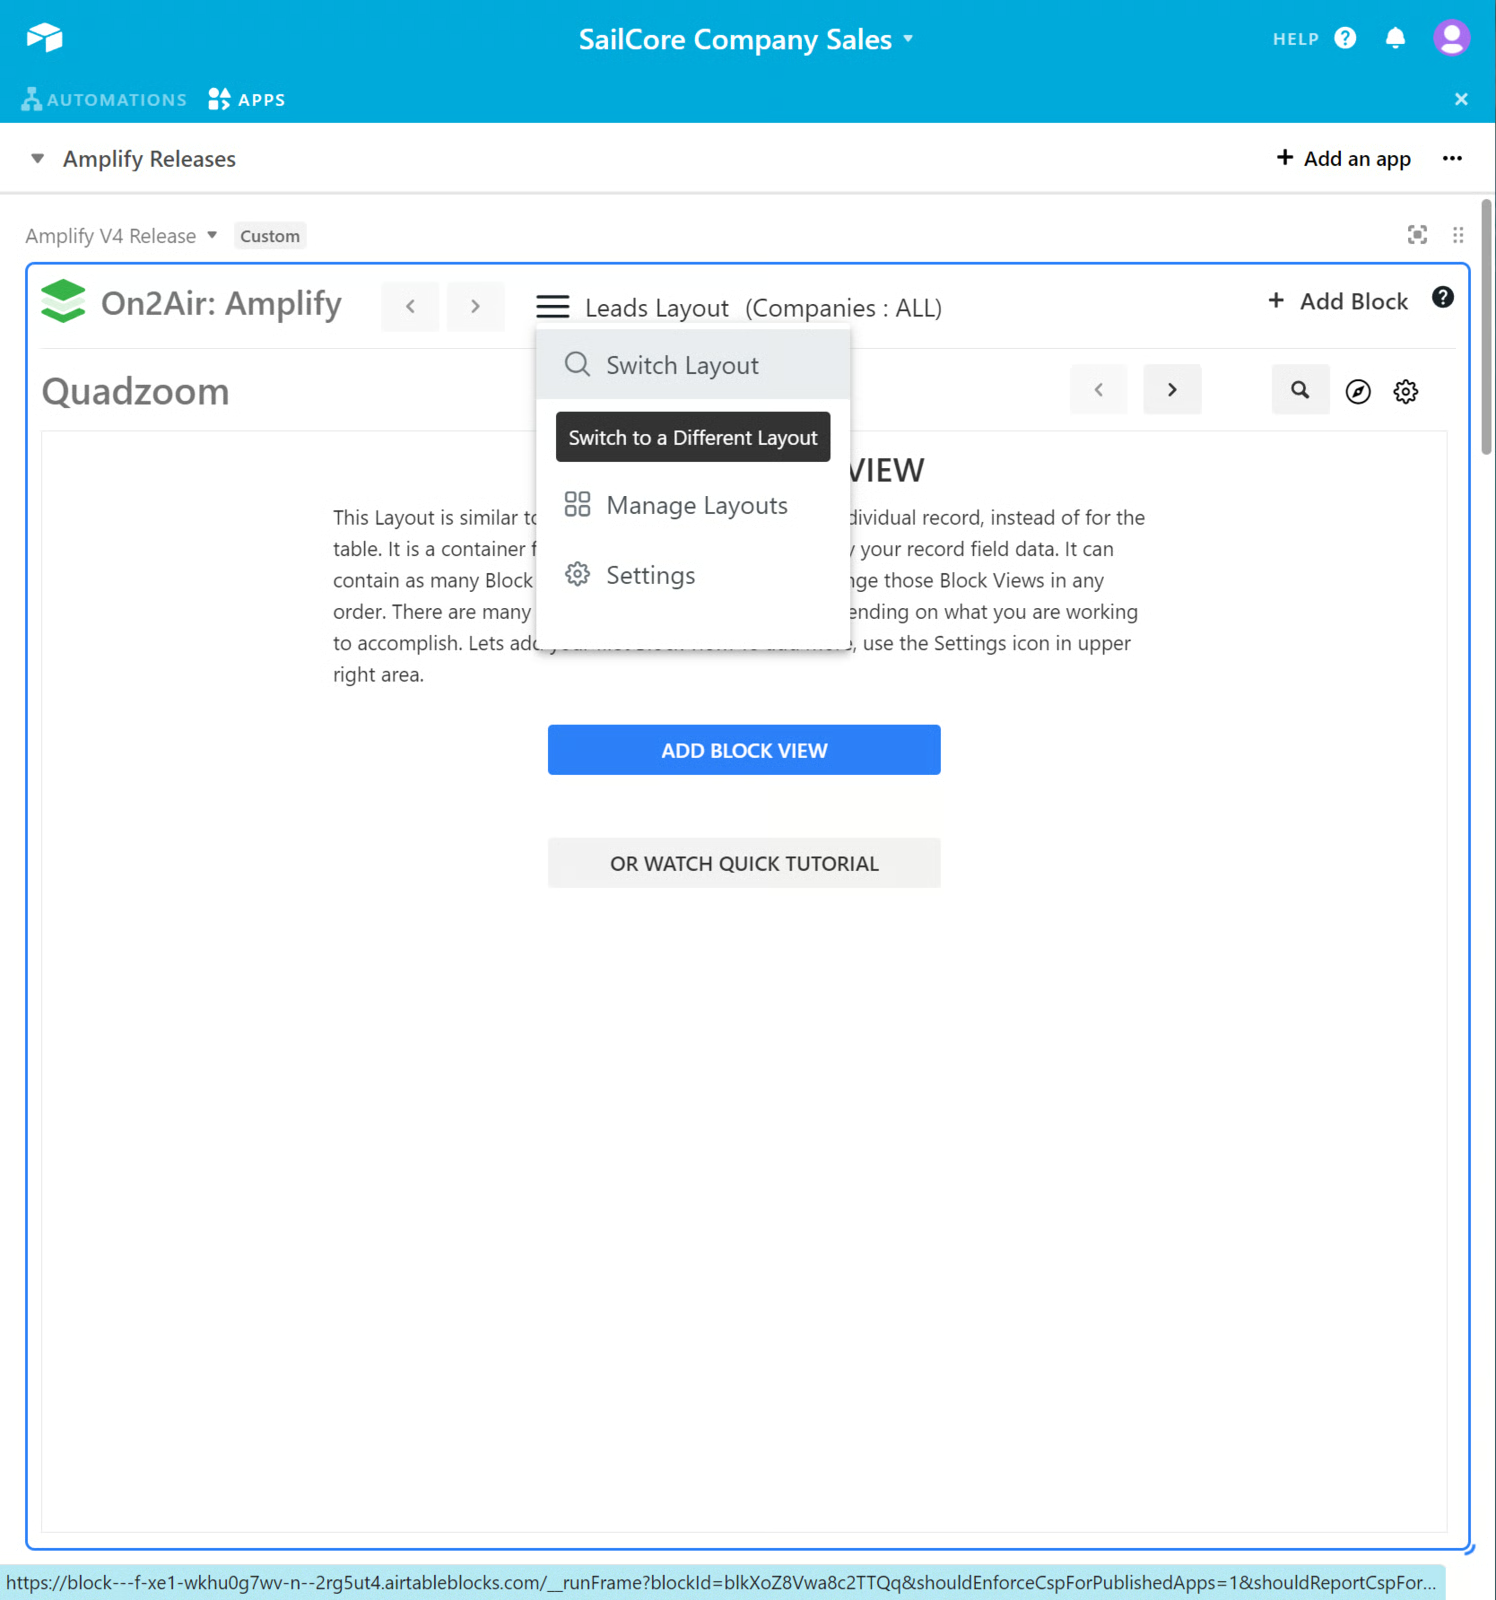
- Select New Layout

- Choose the Tier - Records or Table
- Choose the Table you want to use
- Input a name for your layout, then click Create
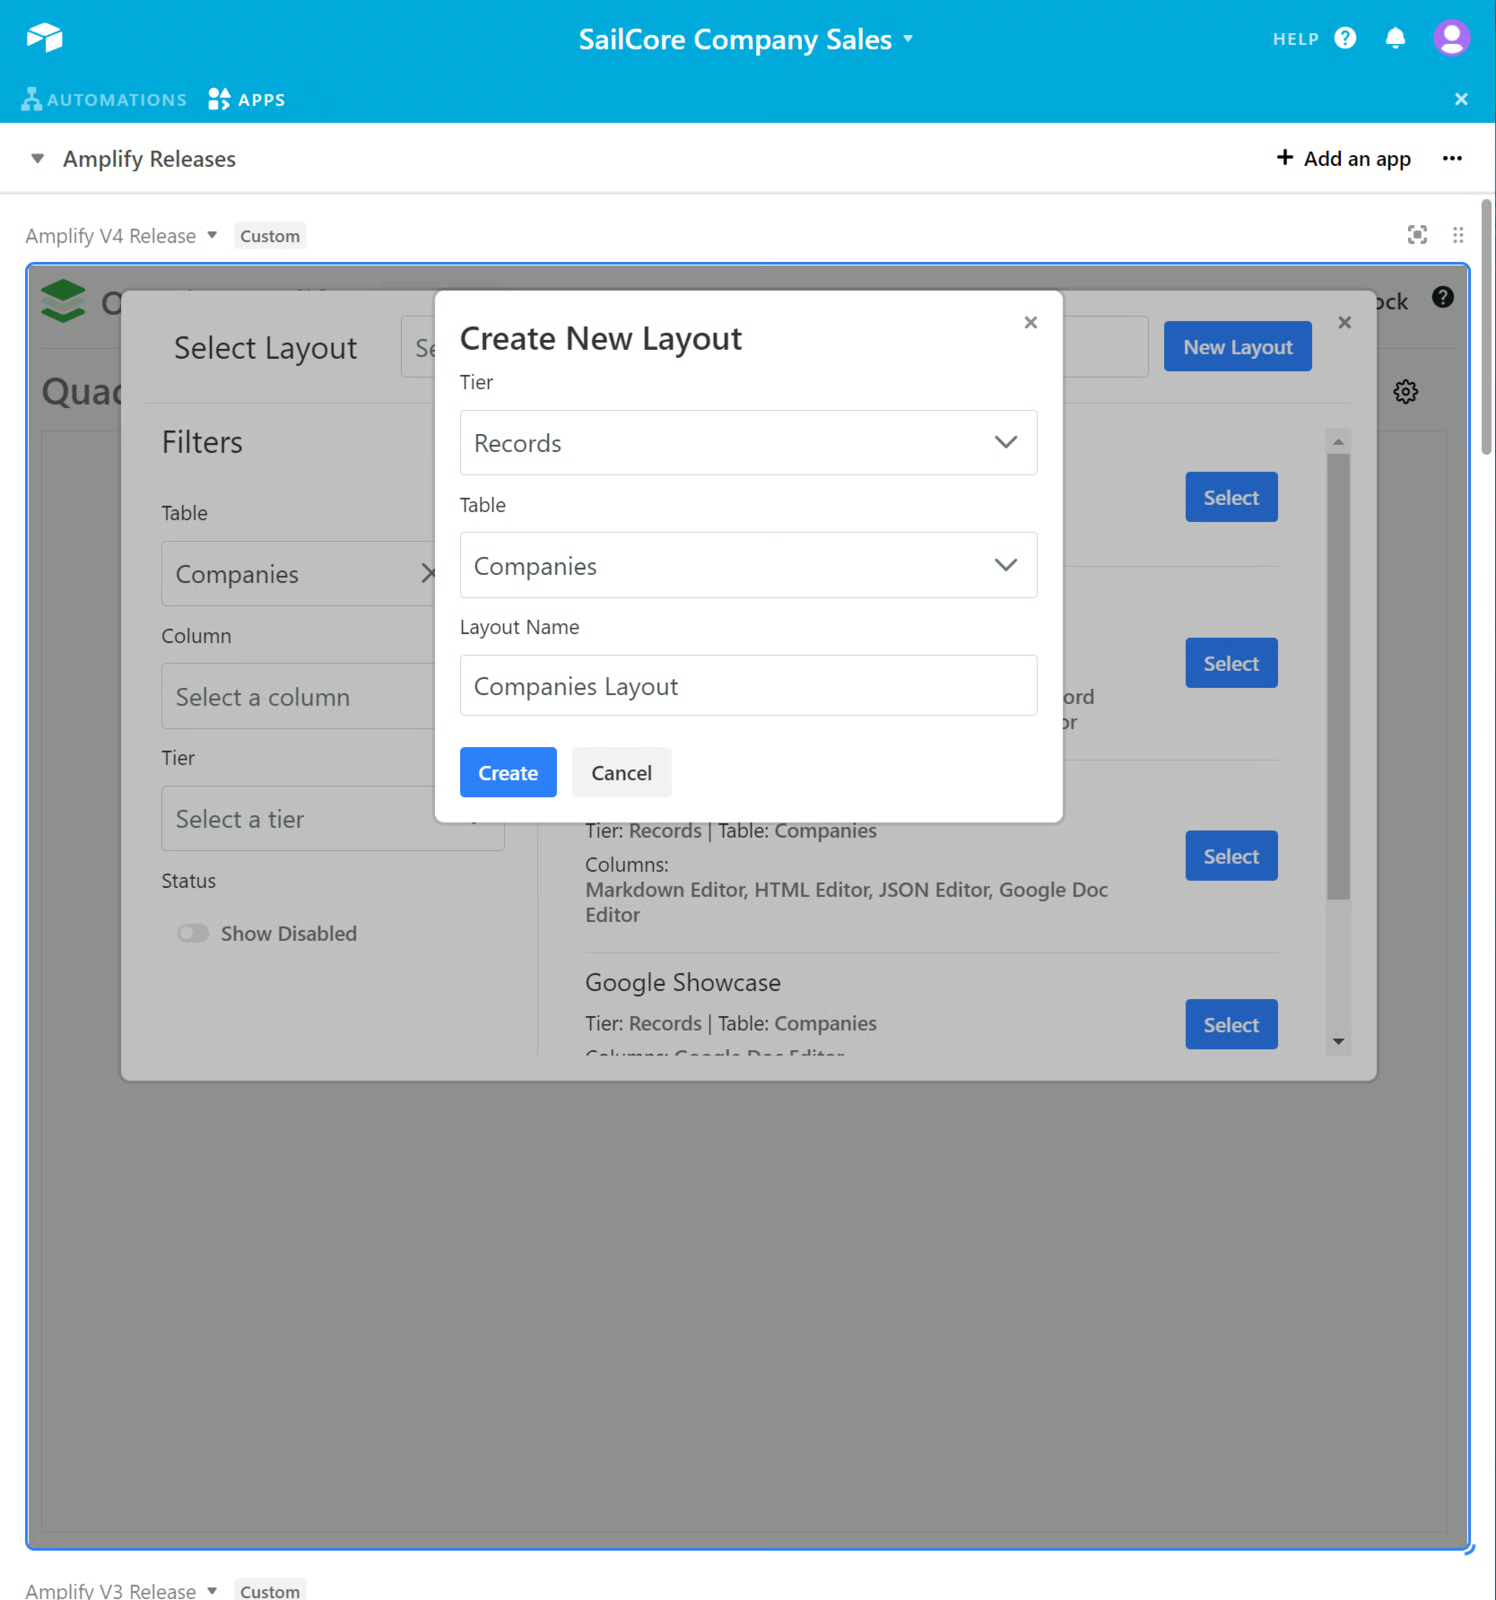
- You can now add Block Views!
| LINK to ADD Block VIEWS
You can also add new layouts from the Manage Layouts menu
Create New Layouts in Manage Layouts view
- To create a new layout inside the Manage Layouts screen
- Click New Layout
- Choose the corresponding Table
- Type your Layout Name
- Click Create
Rearrange Block Views
Section titled “Rearrange Block Views”You can rearrange and resize your block views in various ways.
- Grab the top bar of any block view and move it to where you need
- To resize, grab the side of any block view and drag to the size you need
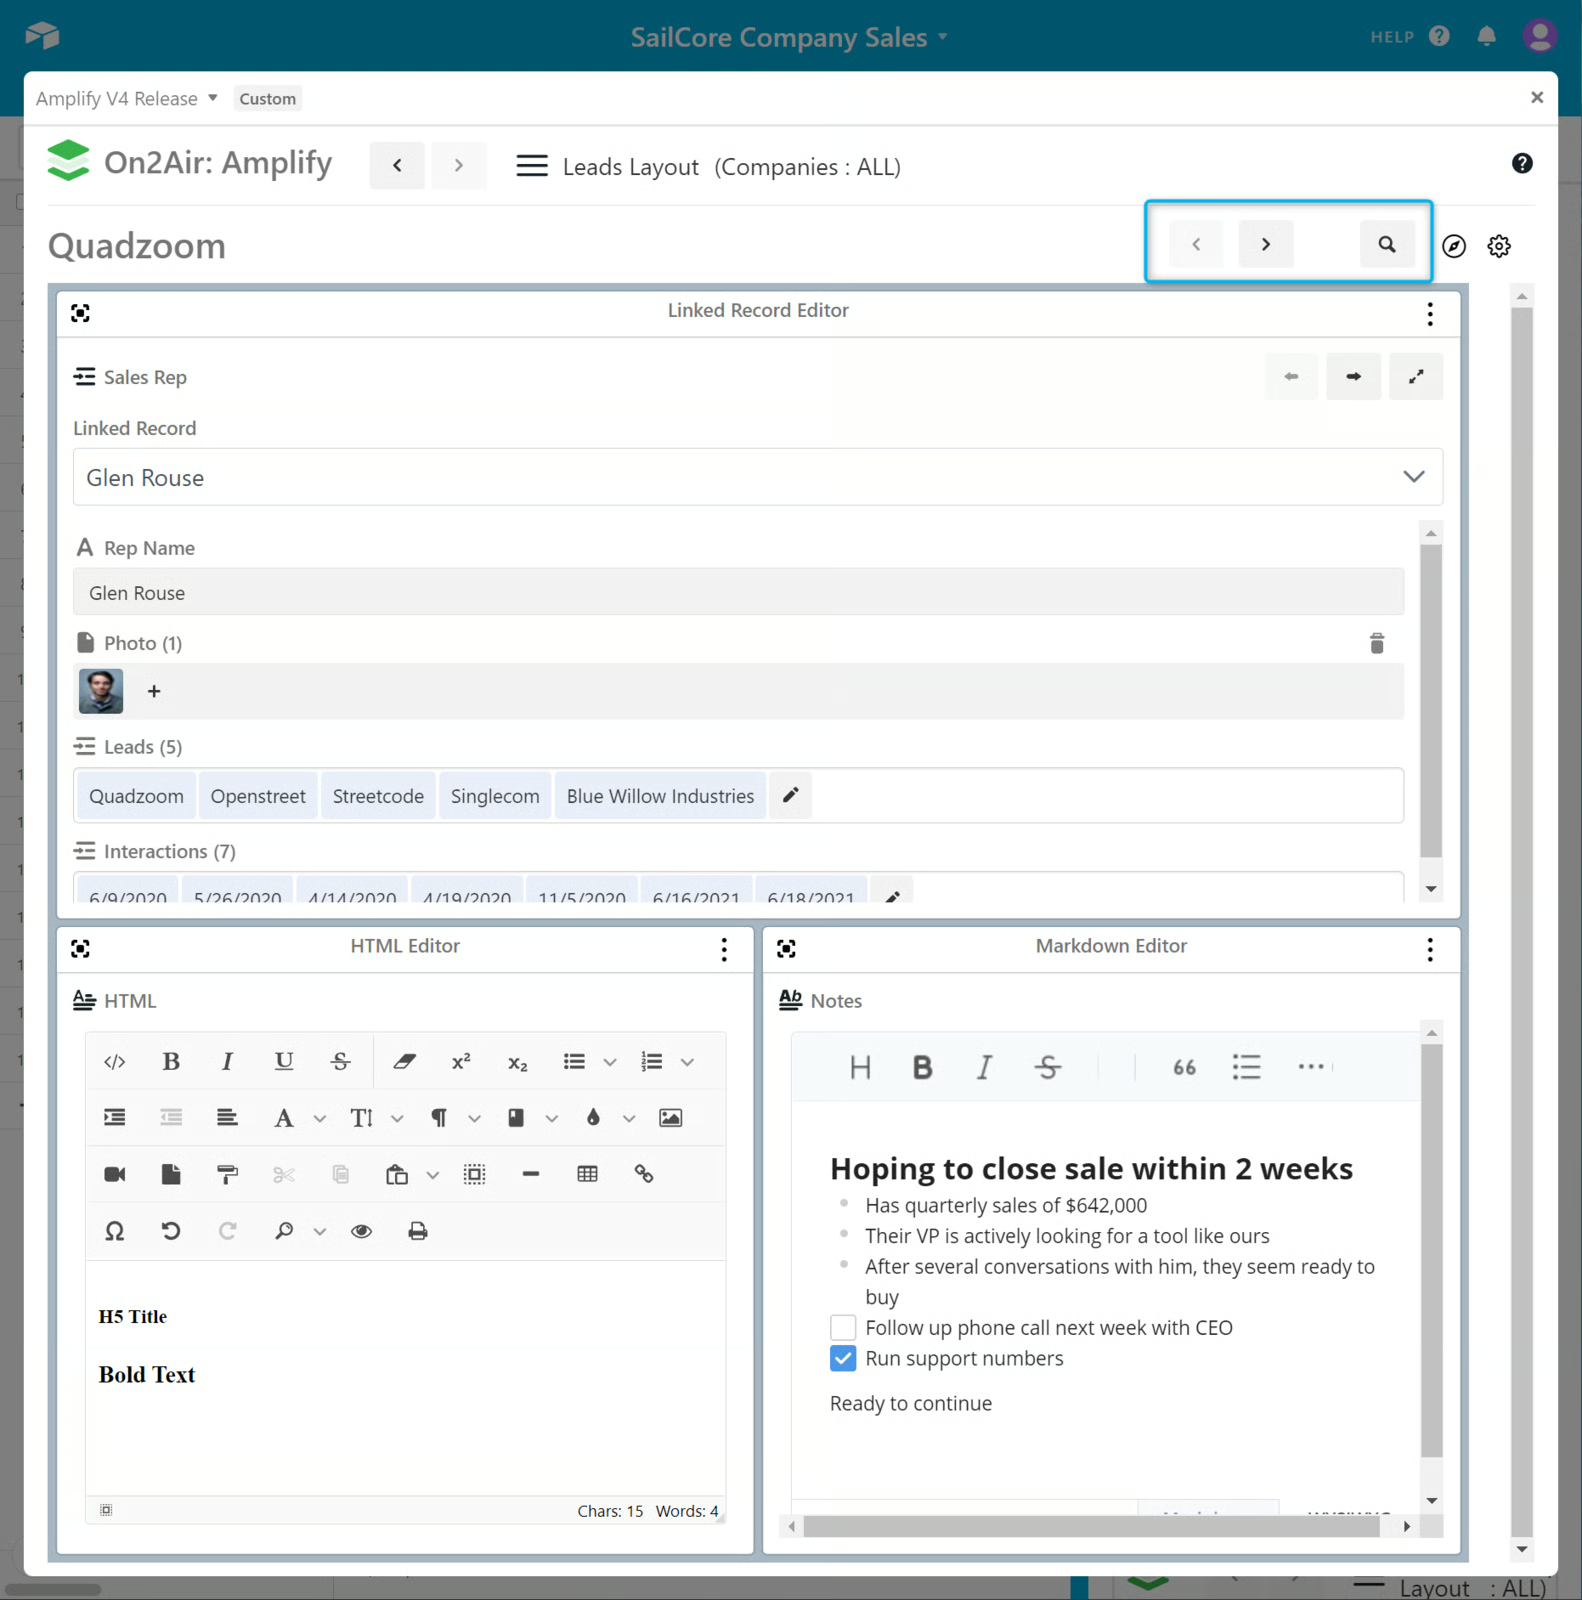
Navigate the Layout Menu
Section titled “Navigate the Layout Menu”The menus above the Block Views allows you to create, edit, expand, browse, switch, clone, delete, and navigate through records. you can also manage layouts and add new Block Views.
You can browse through each record using the arrows. You can also Search records. Learn more about the powerful Search options.
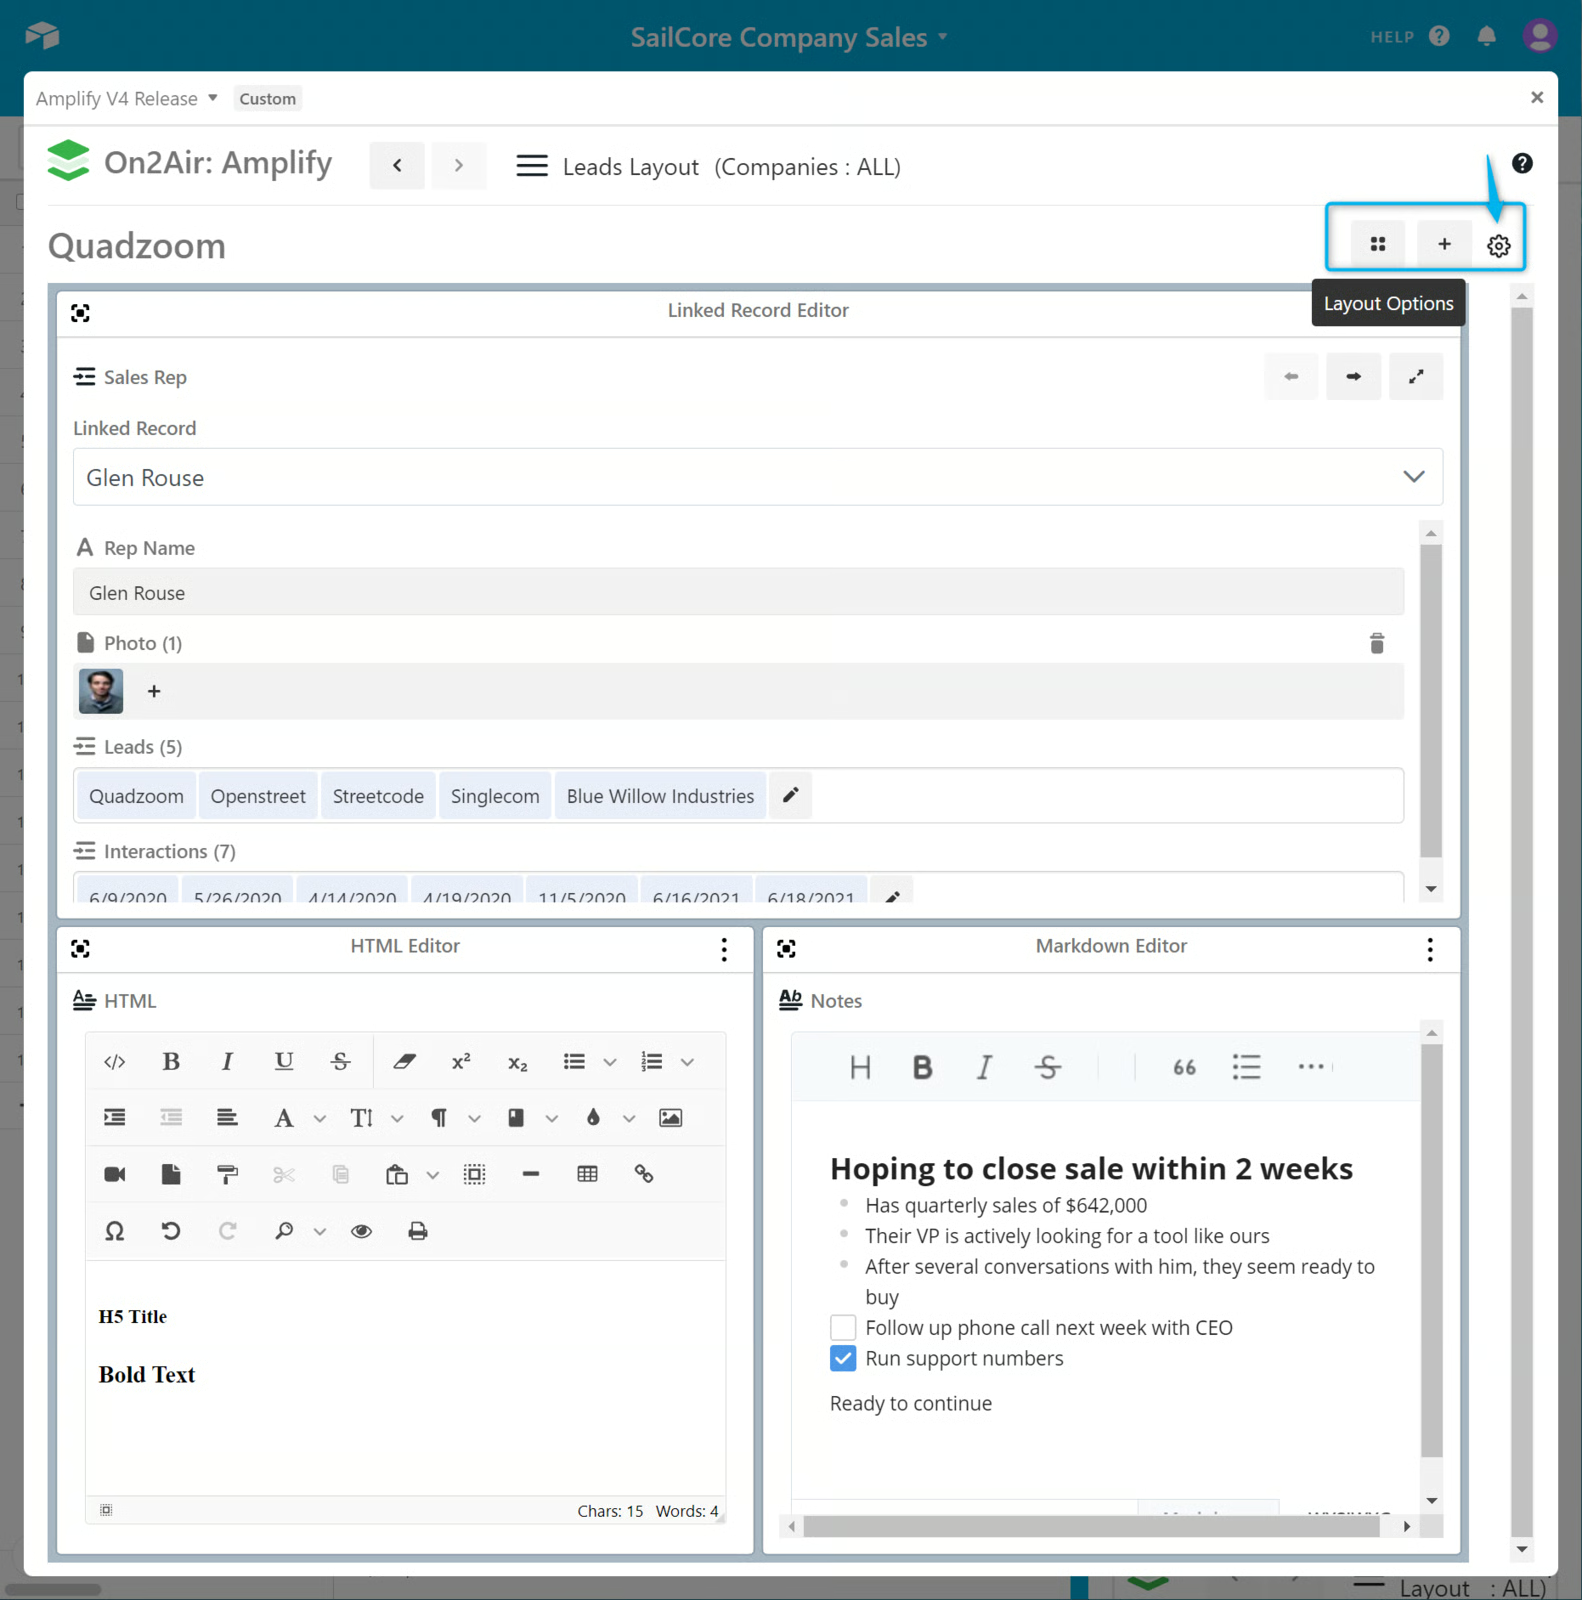
In the Layout Options menu, you can:
Manage Layout - Manage layouts and permissions Add a new block view - Add a new Block View to your layout
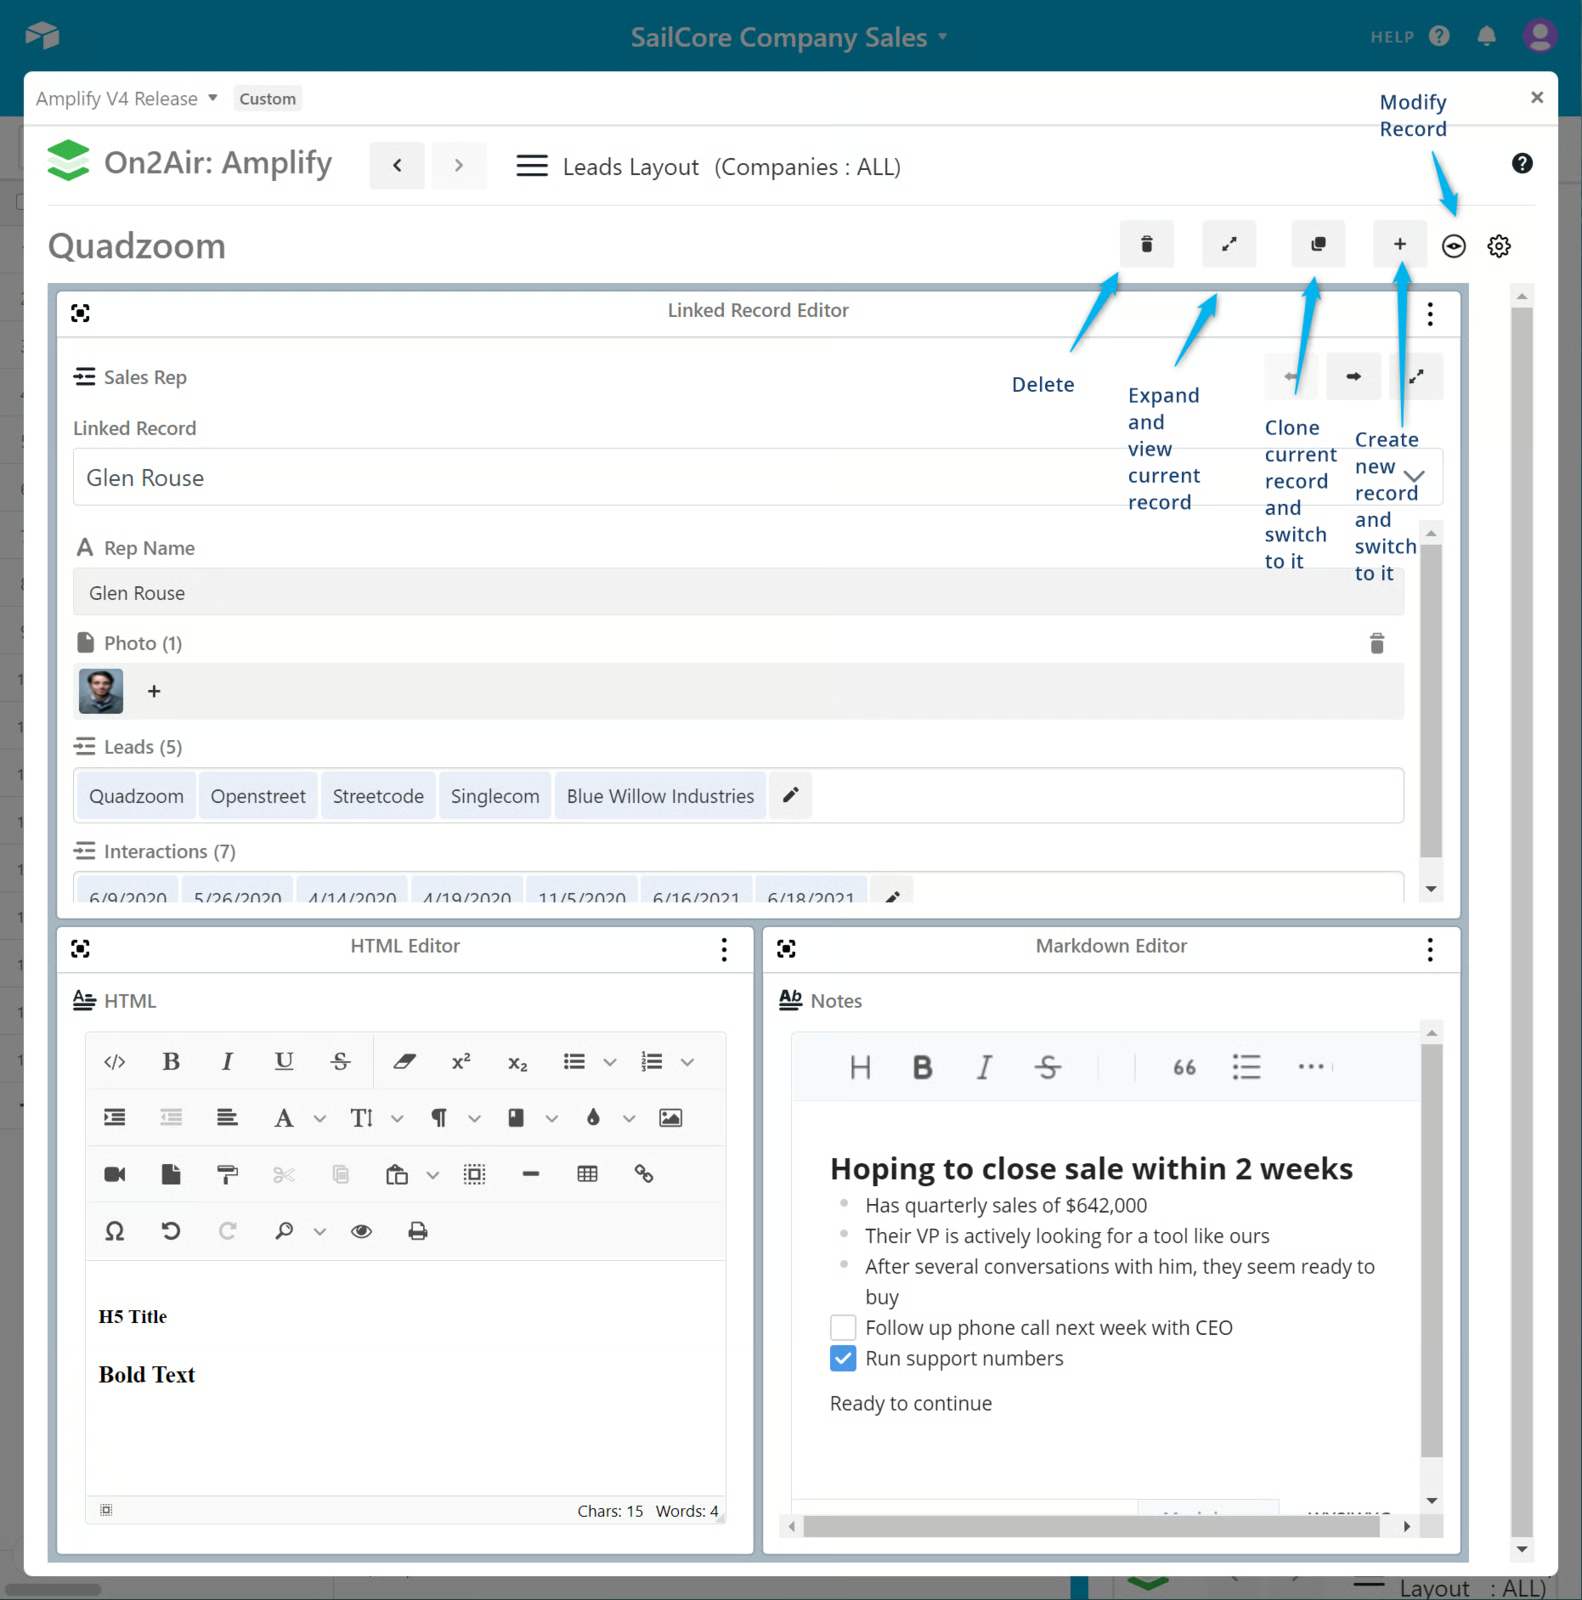
In the Modify Record menu, you can:
Delete Current Record - Delete the record you’re viewing Expand and View Current Record - Expand the record and view it inside the default Airtable record view Clone Current Record and Switch to It - Clone the record you’re viewing and switch to it Create a New Record and Switch to It - Create a new empty record and switch to it
Manage Layouts
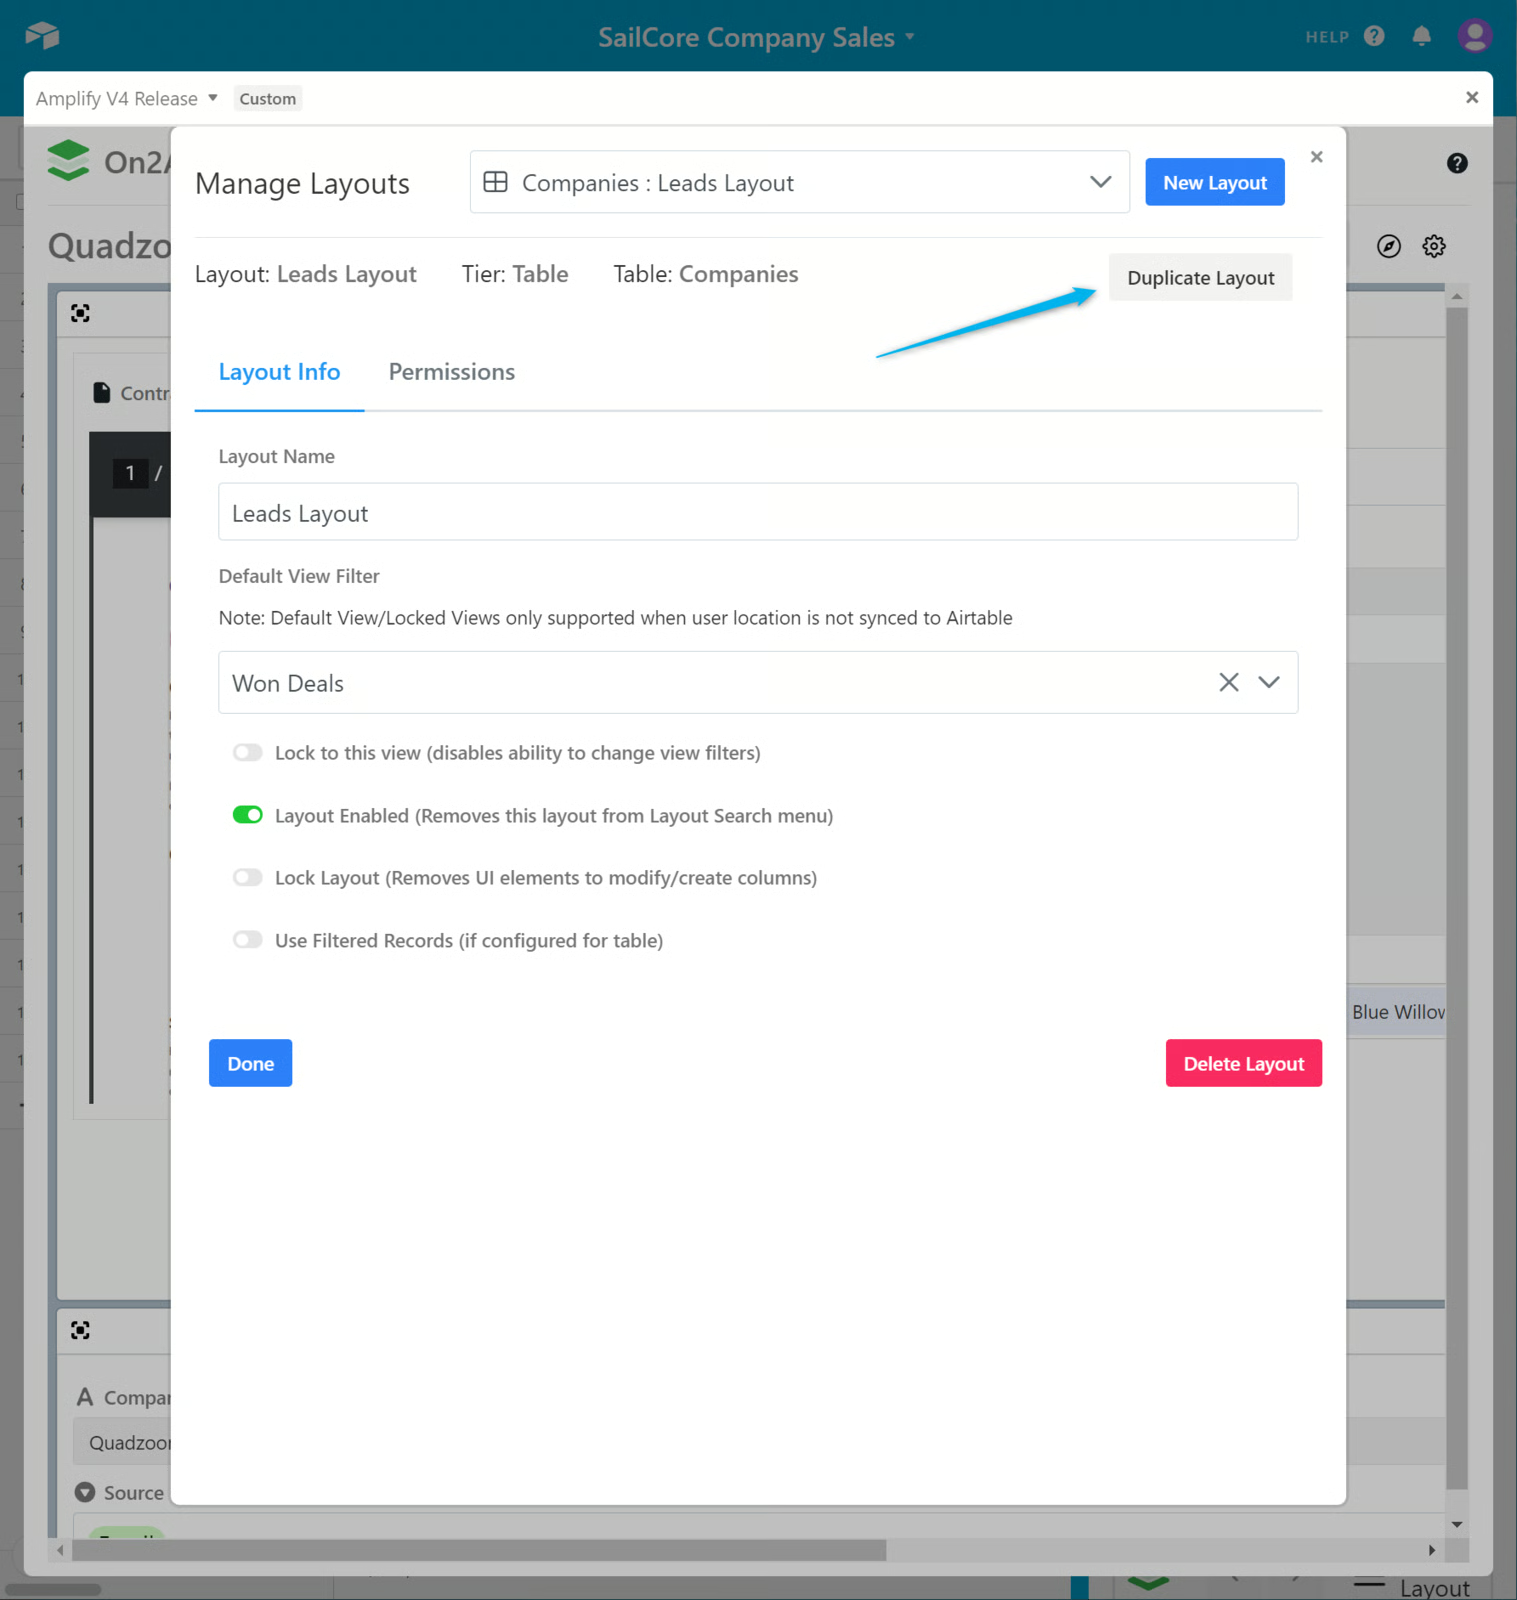
Section titled “Manage Layouts”In Manage Layout, you can manage any Amplify layout. You can rename your layout, duplicate it, specify a view, lock to a view, and set permissions.
By default, the layout you’re currently in will be displayed. You can switch between layouts to edit the Layout Info and change Permissions.

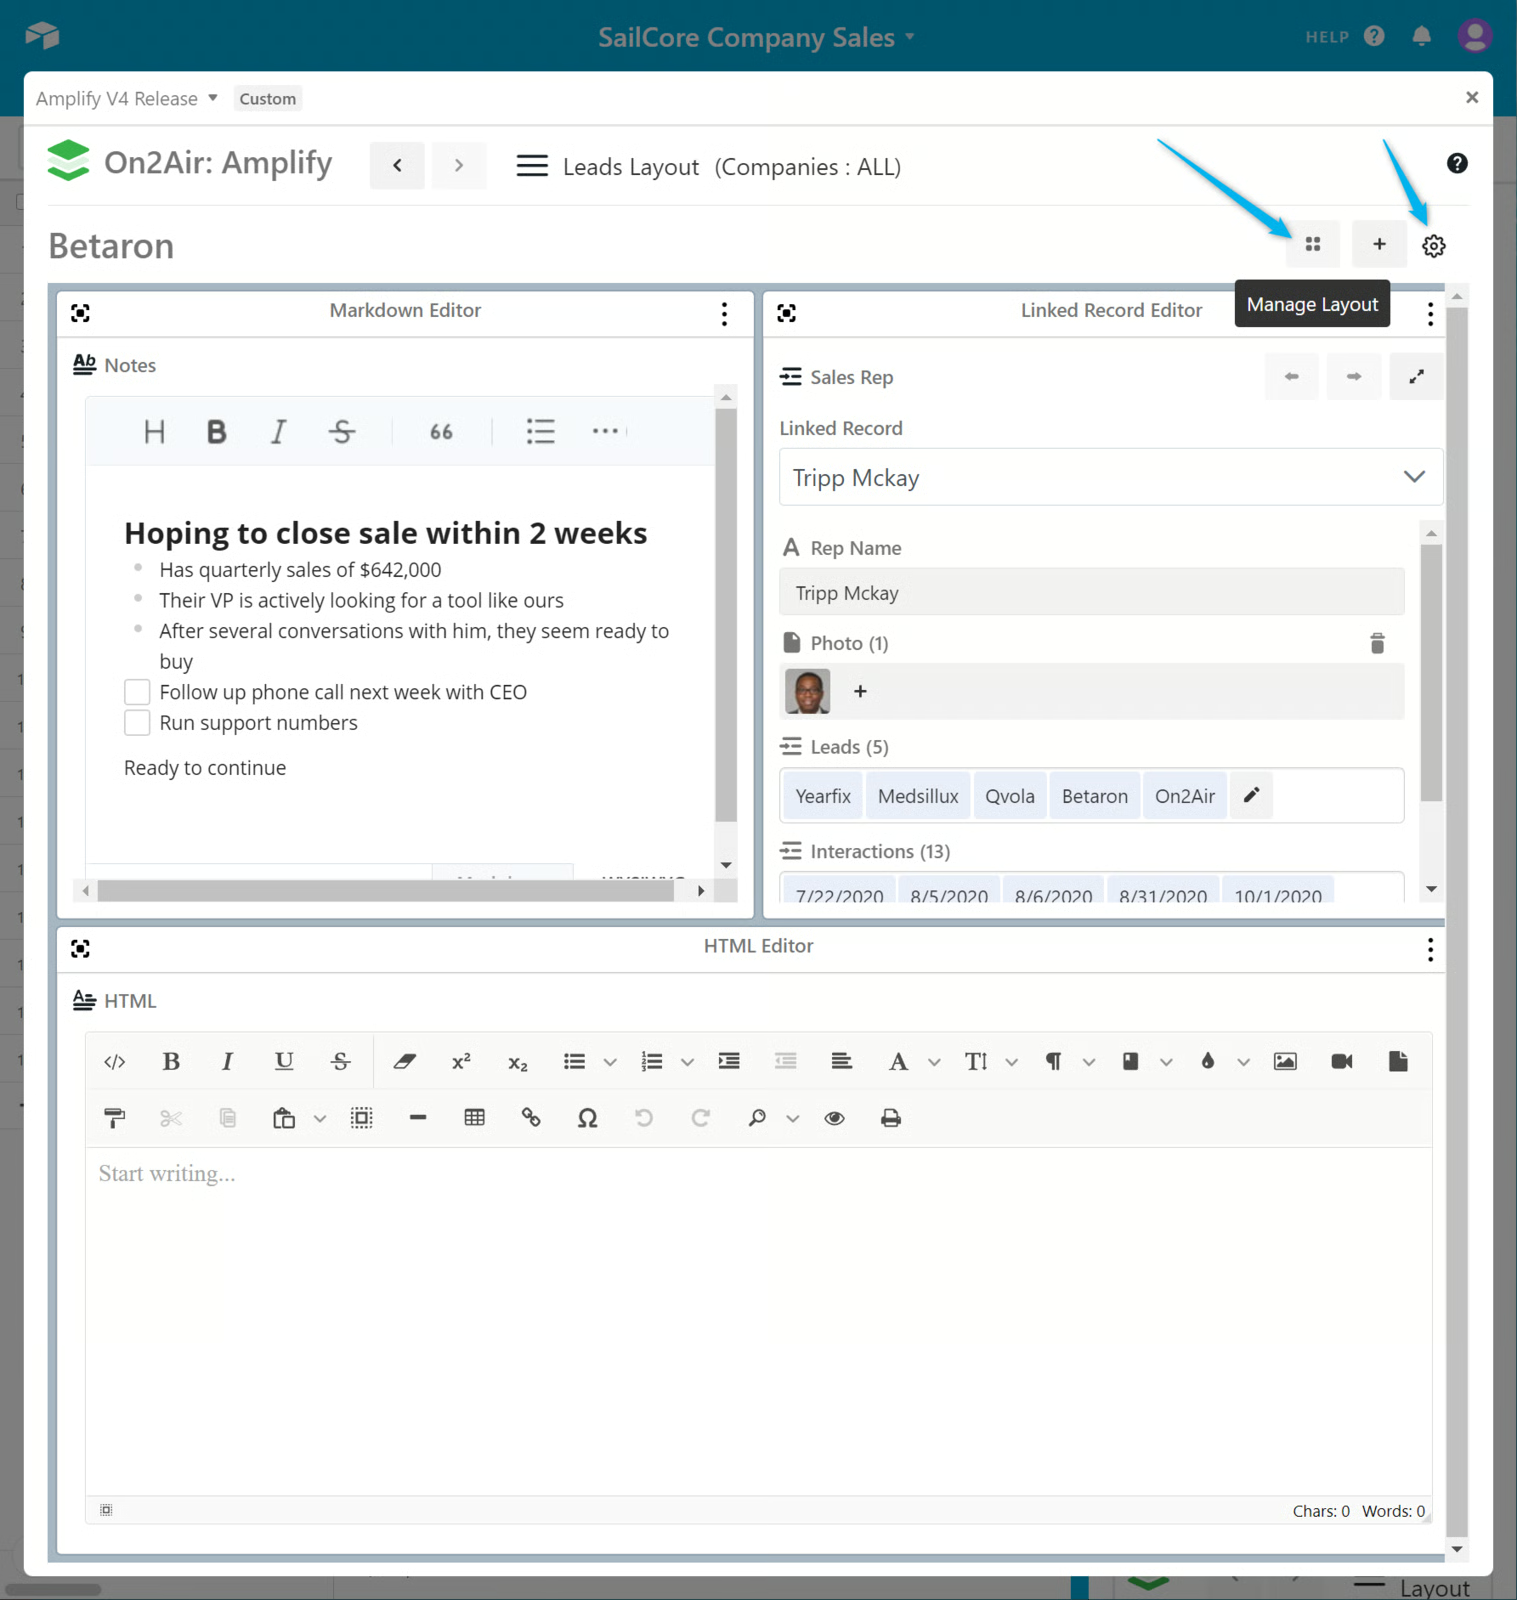
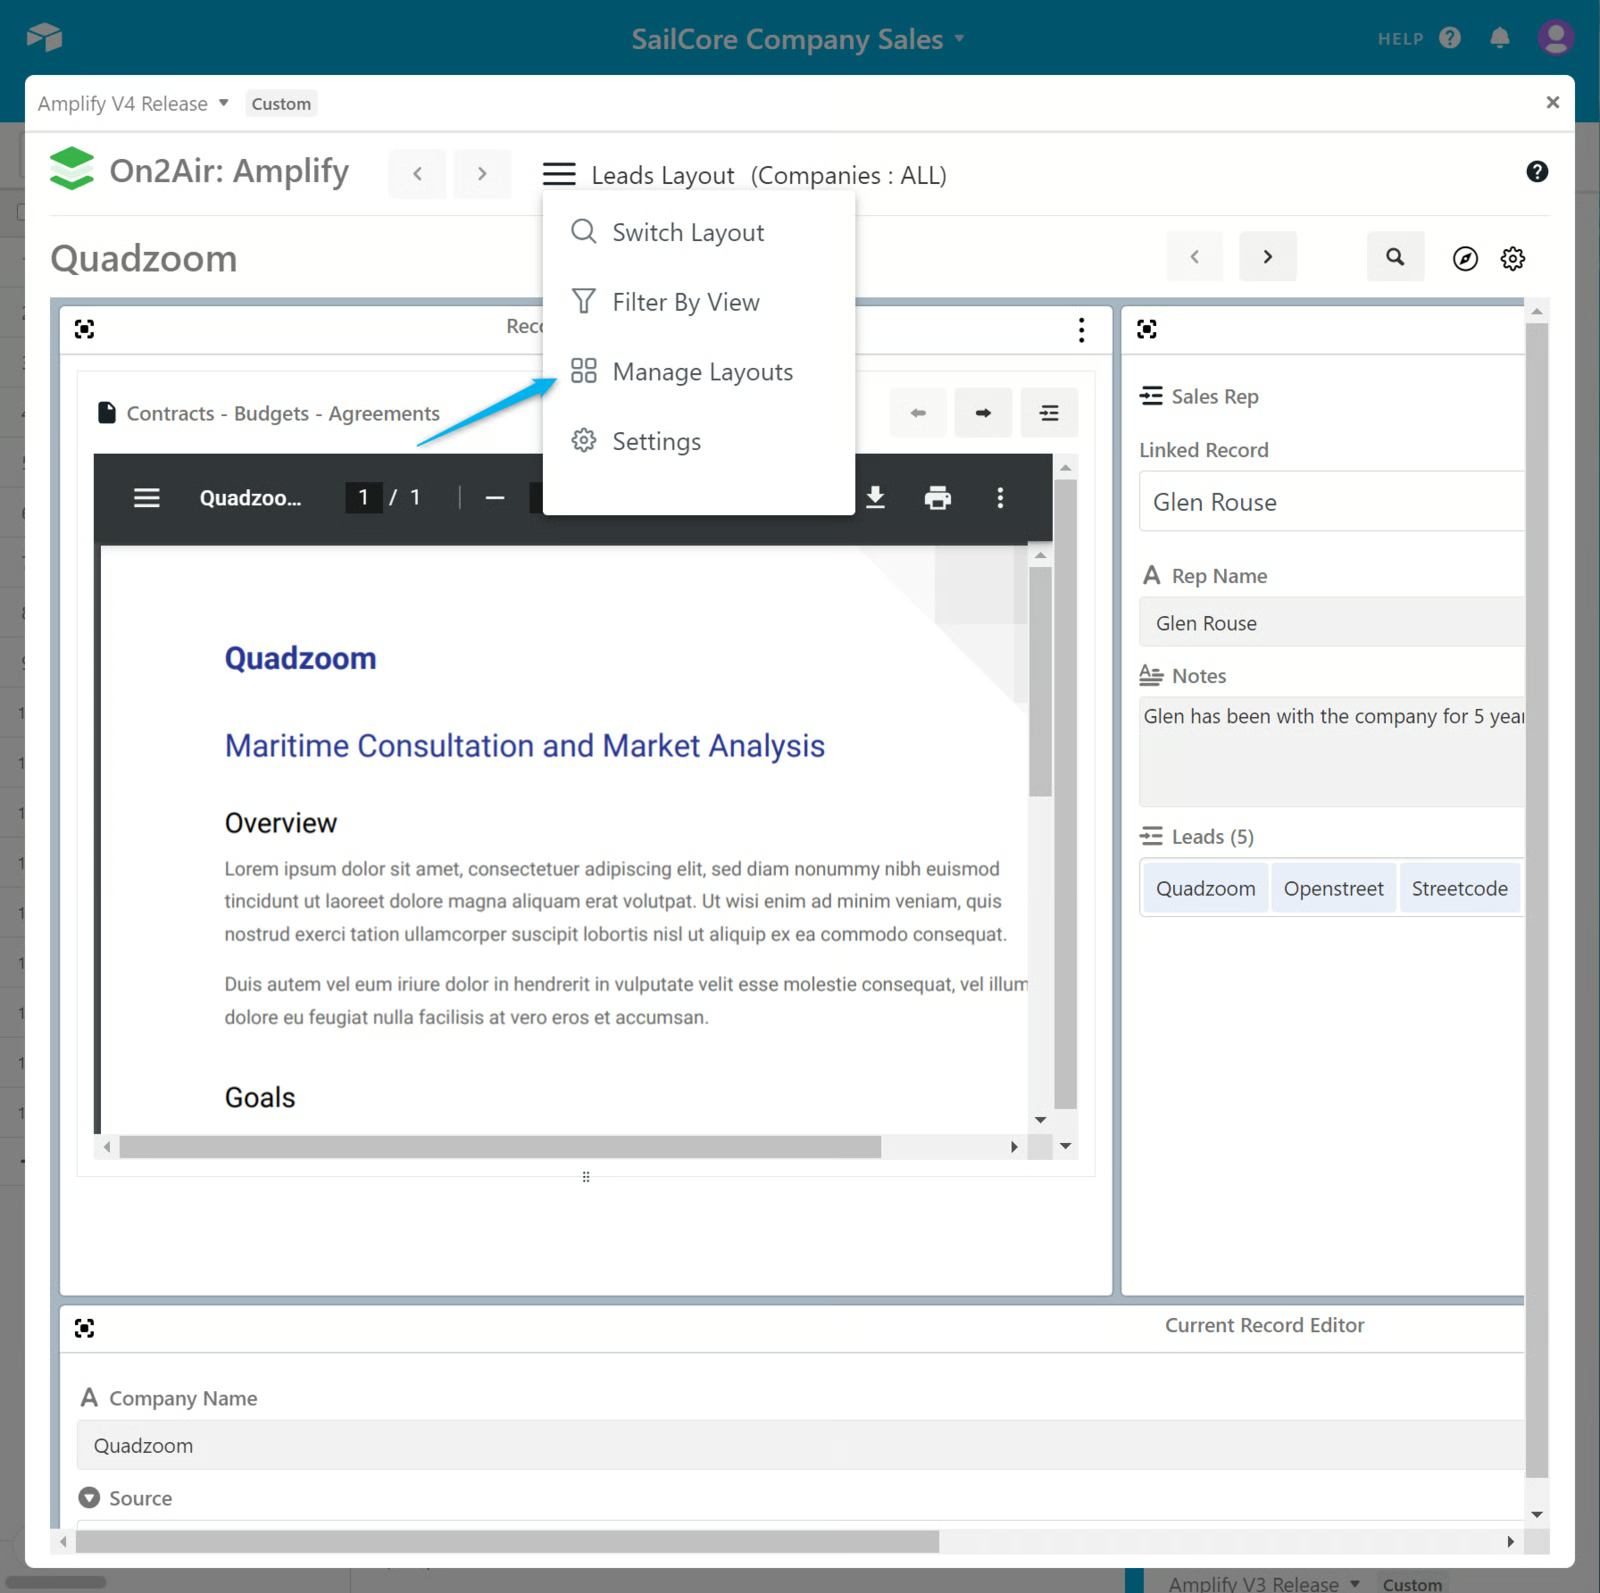
To open the Manage Layout screen
- Click the Gear icon above the Block Views
- Click the Manage Layouts icon
OR
- Click the menu button next to your Layout name
- Choose Manage Layouts
- Edit your options
Layout Info
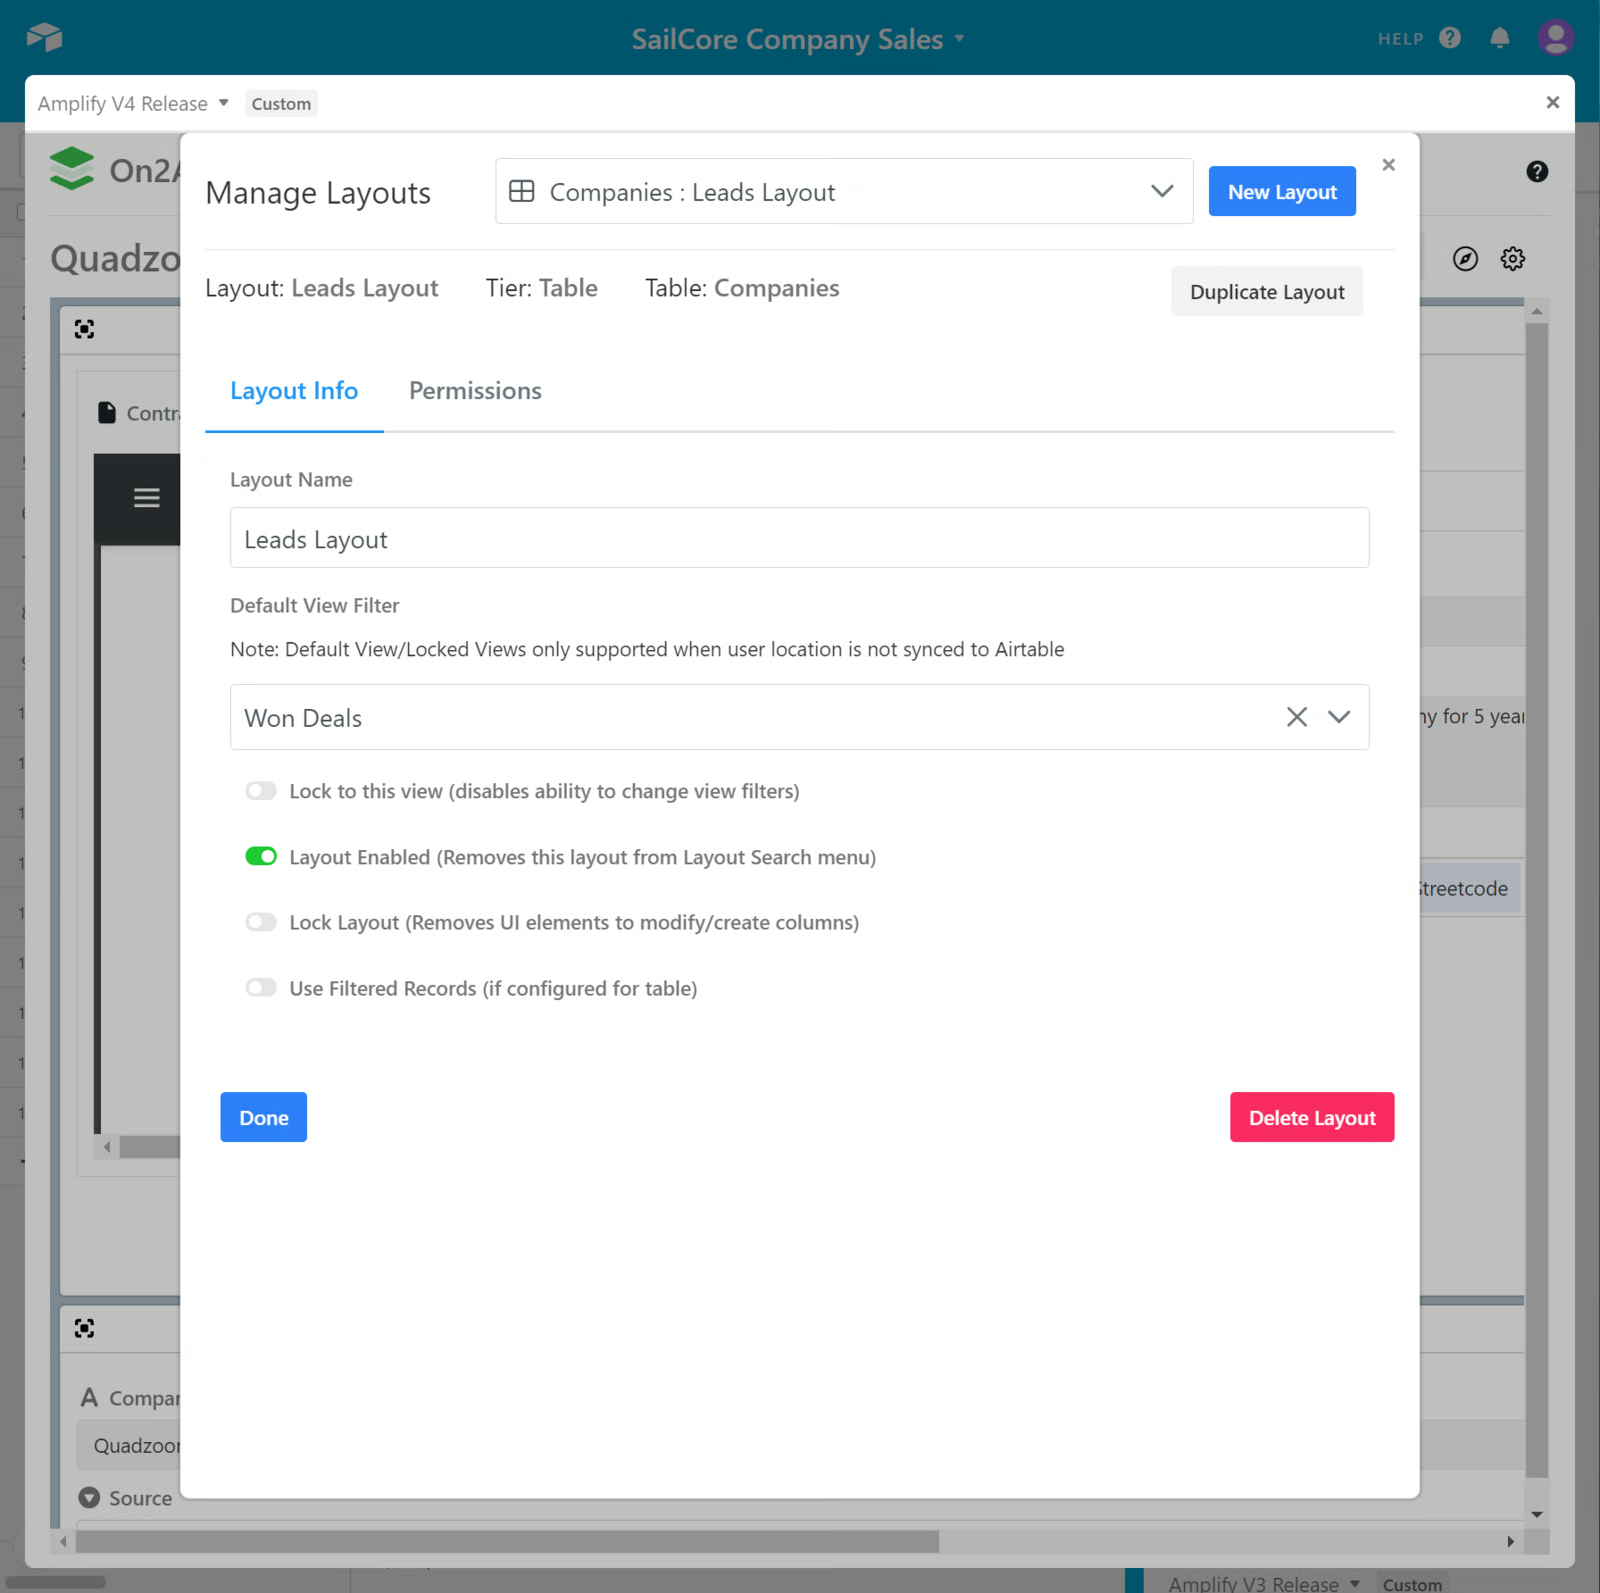
Section titled “Layout Info”By default, Manage Layout will display your current layout.
If you want to manage a different layout, search and/or choose another layout in the search box.
Layout Name - Rename your current layout
Default View Filter (Optional) - Choose a specific view as a Default for this Layout Note: Default View/Locked Views only supported when user location is not synced to Airtable
Lock to this view (Optional when a Default View is chosen) - Lock this Layout to the view chosen. It will disable the ability to change view filters)
Layout Enabled (Default ON) - If this layout is ON, you will always see this layout in the Layout Search menu. If you disable this layout, it will not appear in the Layout Search menu unless View Disabled is chosen in the Layouts Search menu.
Lock Layout (Default OFF) - If the Layout is not locked, you can modify or create Block Views. If the layout is Locked, all elements to modify, rearrange, or create Block Views are removed.
Use Filtered Records (if configured for the table) - use the records that are filtered in the table or view
Permissions
Section titled “Permissions”You can set permissions to choose who can create, edit, or view layouts in Amplify.
These permissions only affect creating, editing, and viewing from the Amplify app, not in Airtable views. Read Only and Comment Role Users will not be add/edit/delete regardless of setting here.
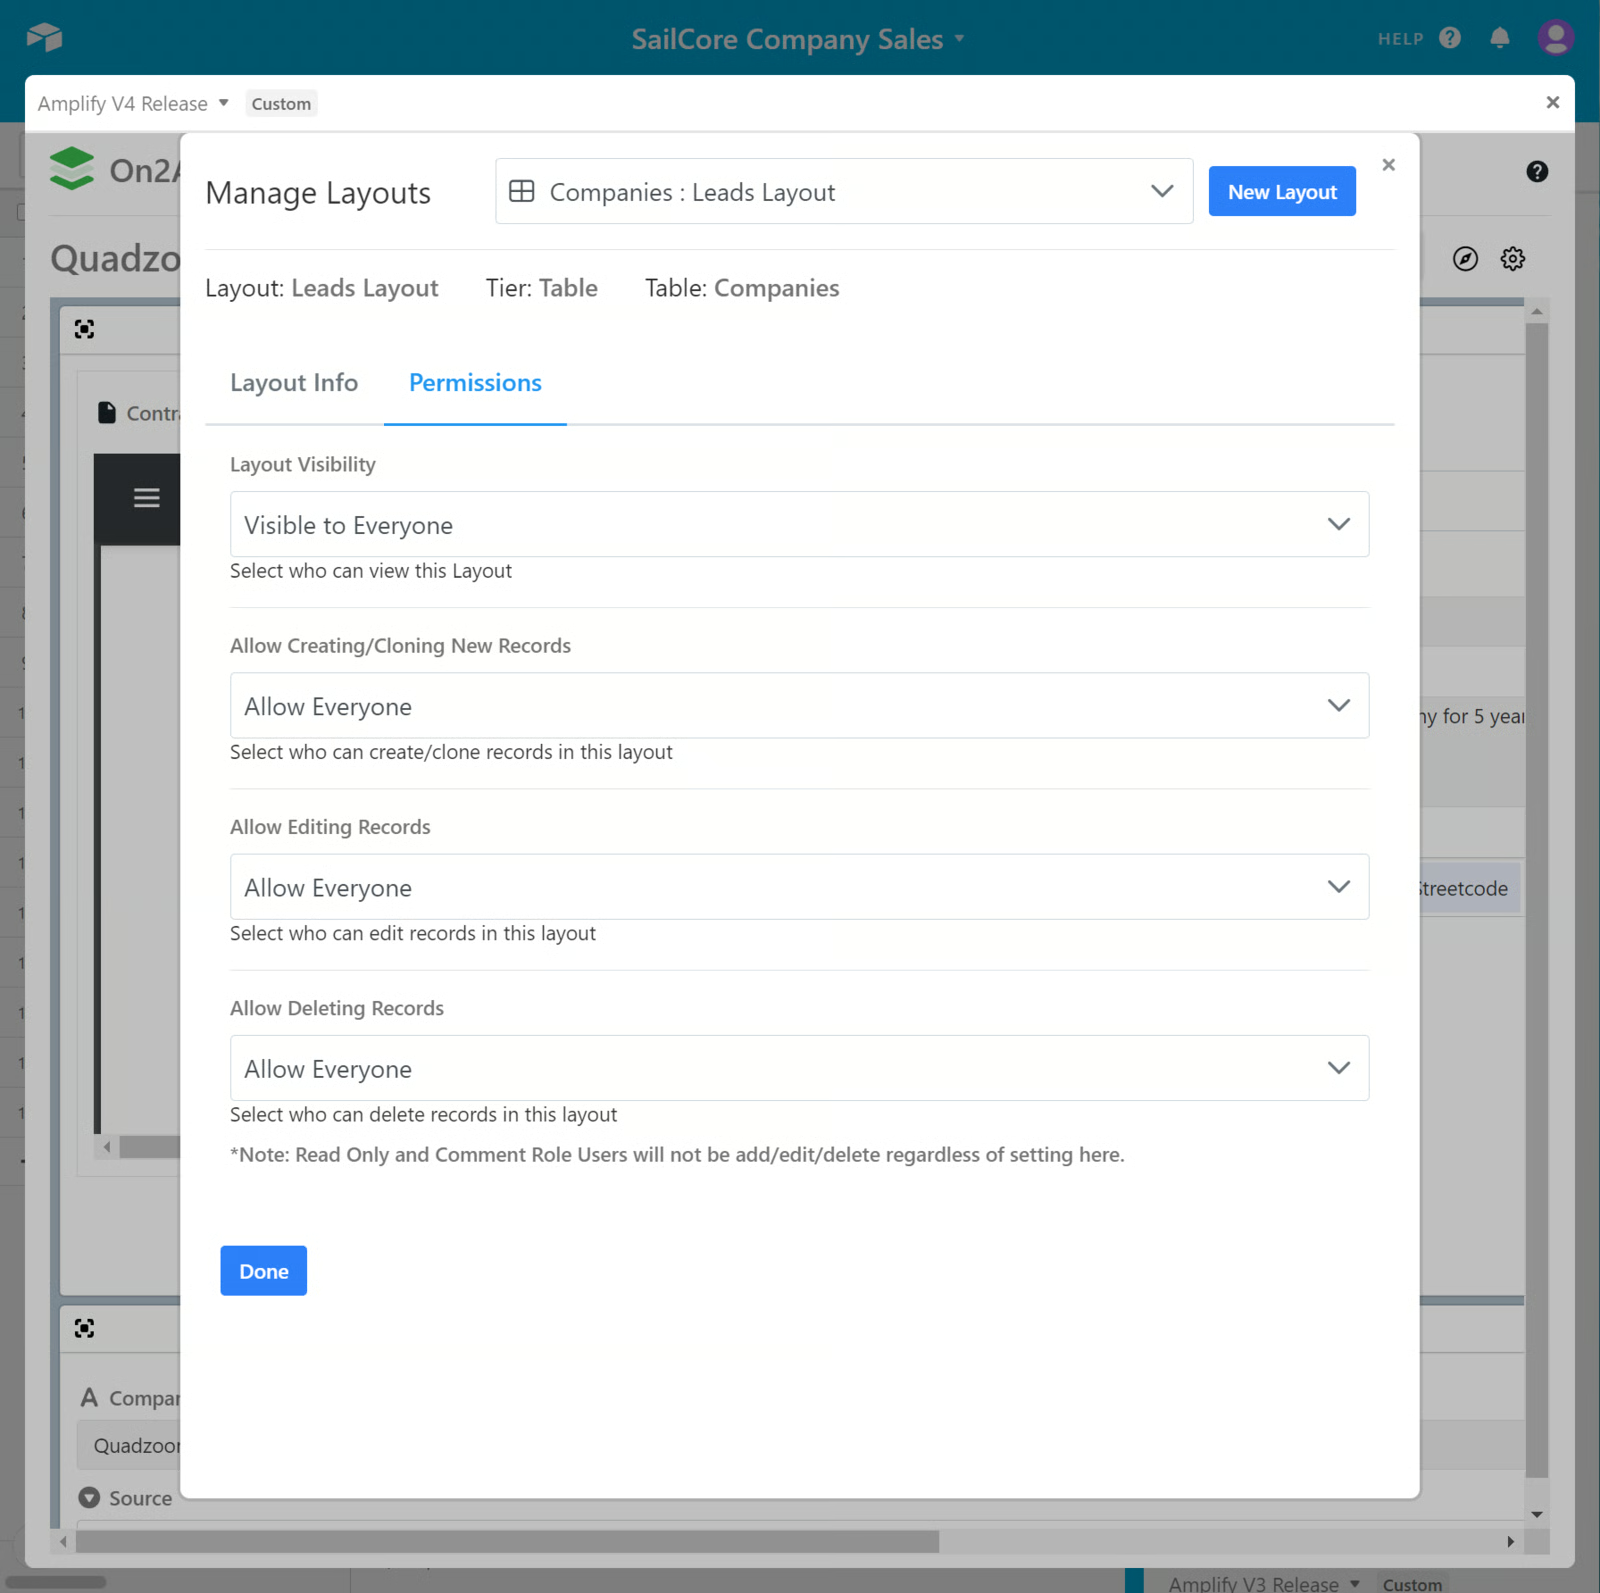
Permissions Available
Layout Visibility - Select who can view this Layout Allow Creating/Cloning New Records - Select who can create/clone records in this layout Allow Editing Records - Select who can edit records in this layout- choose by user or role Allow Deleting Records - Select who can delete records in this layout - choose by user or role
See each option below
Layout Visibility Options
Visible to Everyone - Allow all users in the base to view the layout Visible to Specific Roles - Choose to give access to the Creator, Editor, or Read-Only role types Visible to Specific Users (include) - Choose to give access to specific users in your base Not Visible to Specific Users (exclude) - Choose to exclude access to specific users in your base
Allow Creating/Cloning New Records Options
Allow Everyone - Allow all users in the base to create or clone records Allow Specific Roles - Choose to allow creating and cloning records for the Creator or Editor role types Allow Specific Users (include) - Choose to allow specific users to create or clone records Disallow Specific Users (exclude) - Choose to exclude specific users from creating or cloning records
Allow Editing Records Options
Allow Everyone - Allow all users in the base to edit records Allow Specific Roles - Choose to allow editing records for the Creator or Editor role types Allow Specific Users (include) - Choose to allow specific users to edit records Disallow Specific Users (exclude) - Choose to exclude specific users from editing records
Allow Deleting Records Options
Allow Everyone - Allow all users in the base to delete records Allow Specific Roles - Choose to allow deleting records for the Creator or Editor role types Allow Specific Users (include) - Choose to allow specific users to delete records Disallow Specific Users (exclude) - Choose to exclude specific users from deleting records
- Once your permissions are set, click Done
Create New Layouts in Manage Layouts view
- To create a new layout inside the Manage Layouts screen
- Click New Layout
- Choose the corresponding Table
- Type your Layout Name
- Click Create
Switch Layouts
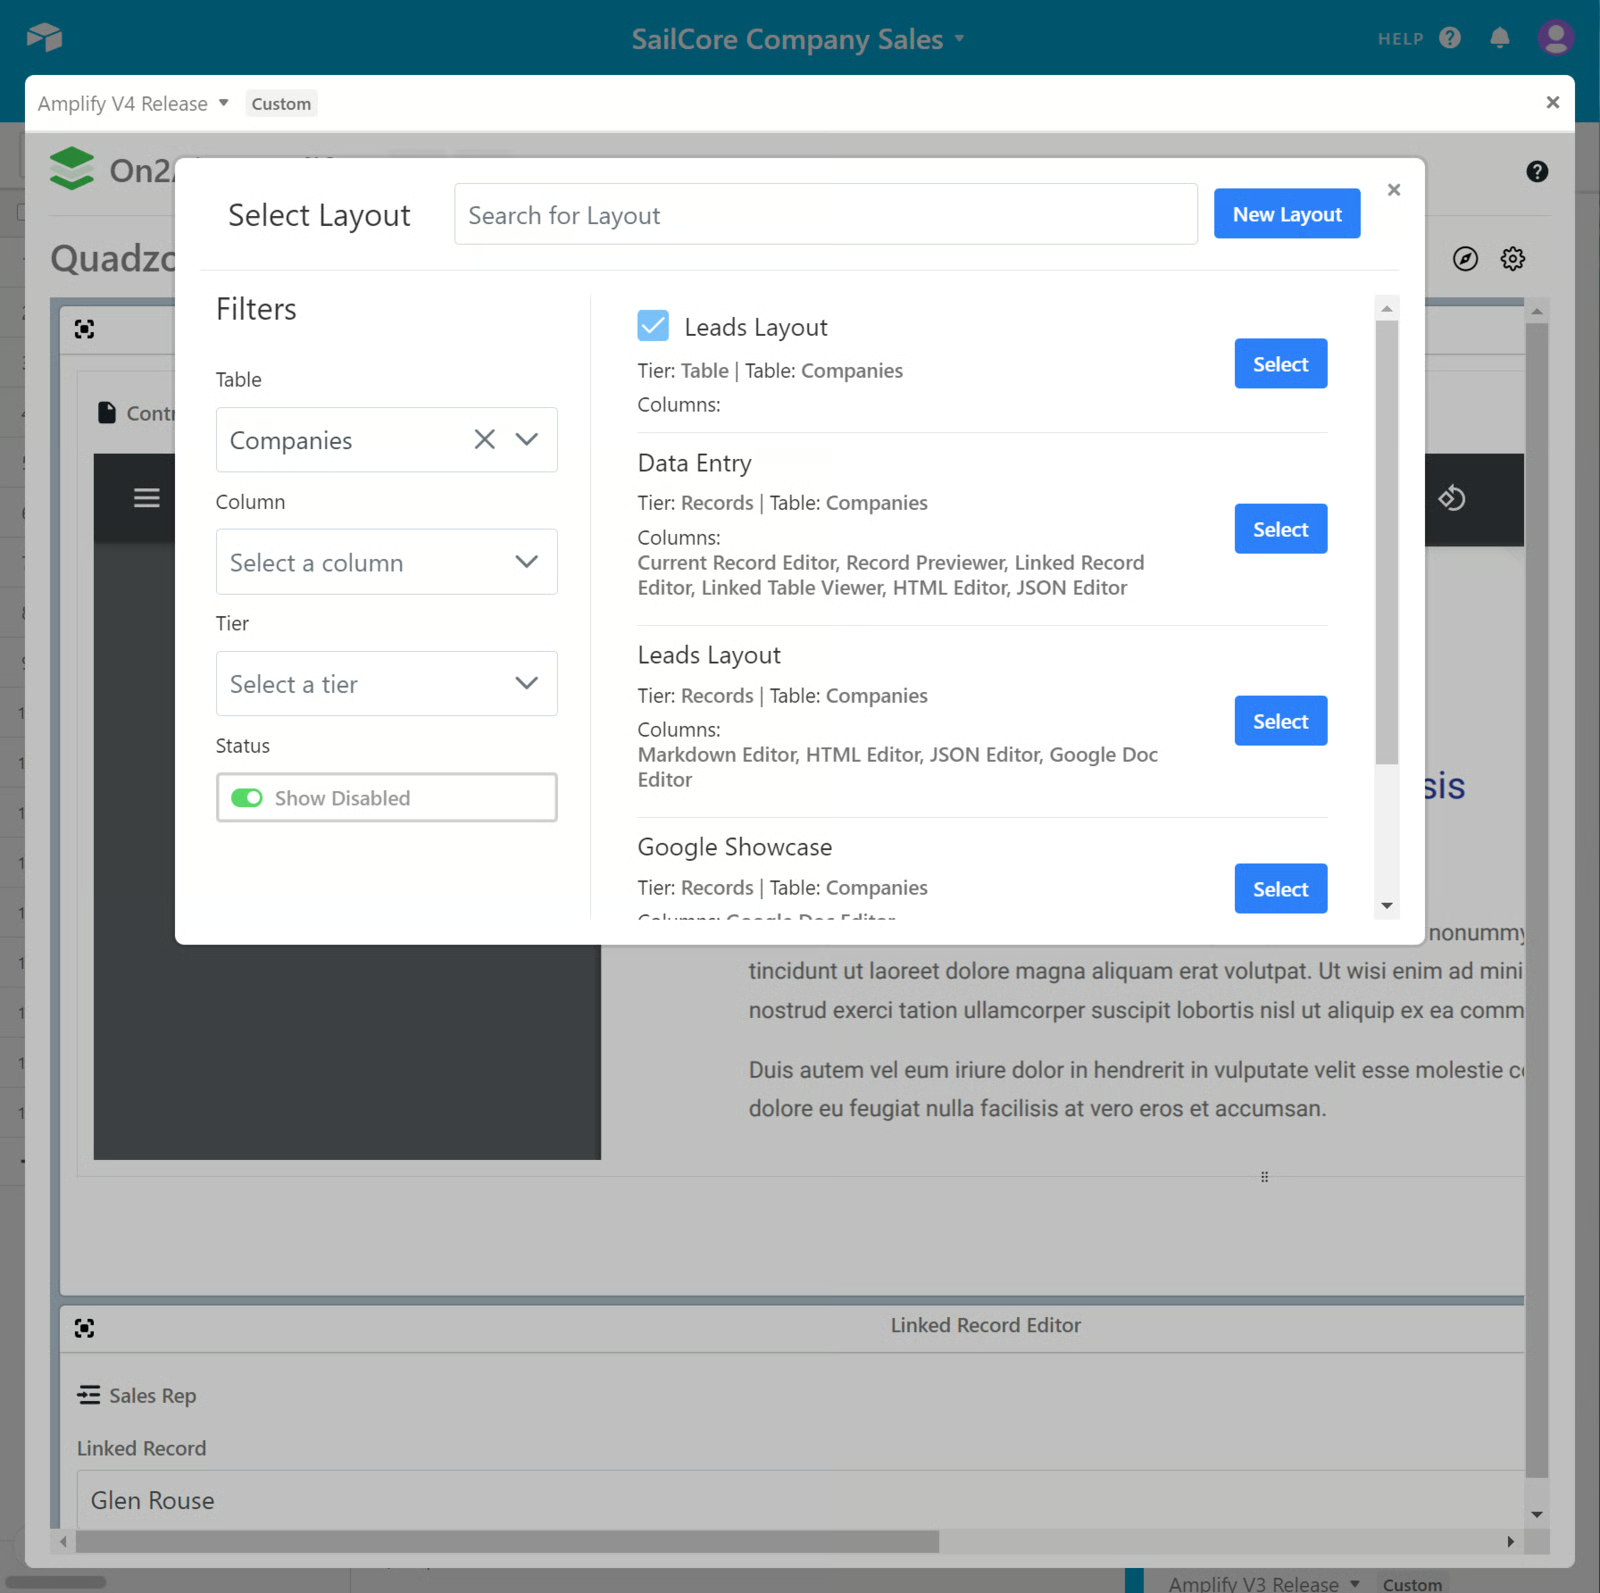
Section titled “Switch Layouts”- Click the menu next to the Layout name
- Click Switch Layout
- You can search and view all your layouts
- Use the filters to filter layouts by Table, Block View Type, or Tier

- Choose another layout
You can also display layouts you have disabled, by clicking Show Disabled
Duplicate Layouts
Section titled “Duplicate Layouts”To duplicate a layout
- Click the menu next to your layout name
- Choose Manage Layouts
- Click Duplicate Layout
Global Settings
Section titled “Global Settings”In global settings, you can set the font size, sync the app with current table, create filtered records per user, and edit full app permissions
User Settings
Section titled “User Settings”Sync with Airtable Location - user-specific for single user
Syncing allows you to navigate fully inside Amplify without having to exit and switch to new tables. You can still work in any table with or without this on. It just depends on your personal preference and whether you want to be in the Airtable view of whichever table you’re viewing.
- Select Stay in Sync if you would like to navigate fully in Amplify without switching tables (Amplify stays open in full screen, doesn’t close, or switch to the corresponding table)
If you DO want to switch tables in Airtable each time you change layouts in Amplify, keep this OFF (When you switch tables in Amplify, it will switch to the corresponding table in Airtable and will exit Amplify from full screen)
Label Font Size - Choose the font size of your field labels
Text Font Size - Choose the font size of your data in Airtable (text)
App Settings
Section titled “App Settings”App Label - Rename the Amplify app label
Sync with Airtable Location* - app-specific for all users
Syncing allows you to navigate fully inside Amplify without having to exit and switch to new tables. You can still work in any table with or without this on. It just depends on your personal preference and whether you want to be in the Airtable view of whichever table you’re viewing.
Stay in Sync for Everyone - If ON, all users will keep the app in sync with Airtable. This means every user will be able to navigate fully in Amplify without switching tables (Amplify stays open in full screen, doesn’t close, or switch to the corresponding table)
If you DO want to switch tables in Airtable each time you change layouts in Amplify, keep this OFF (When you switch tables in Amplify, it will switch to the corresponding table in Airtable and will exit Amplify from full screen)
- *Role Permissions **- Who can access the Amplify app by role (Creator or Editor available)
Select Permissions - Depending on the Role permission you have selected, you can enable or disable the Role to be able to
Modify Layouts or Modify Layout Block Views
Filtered Records
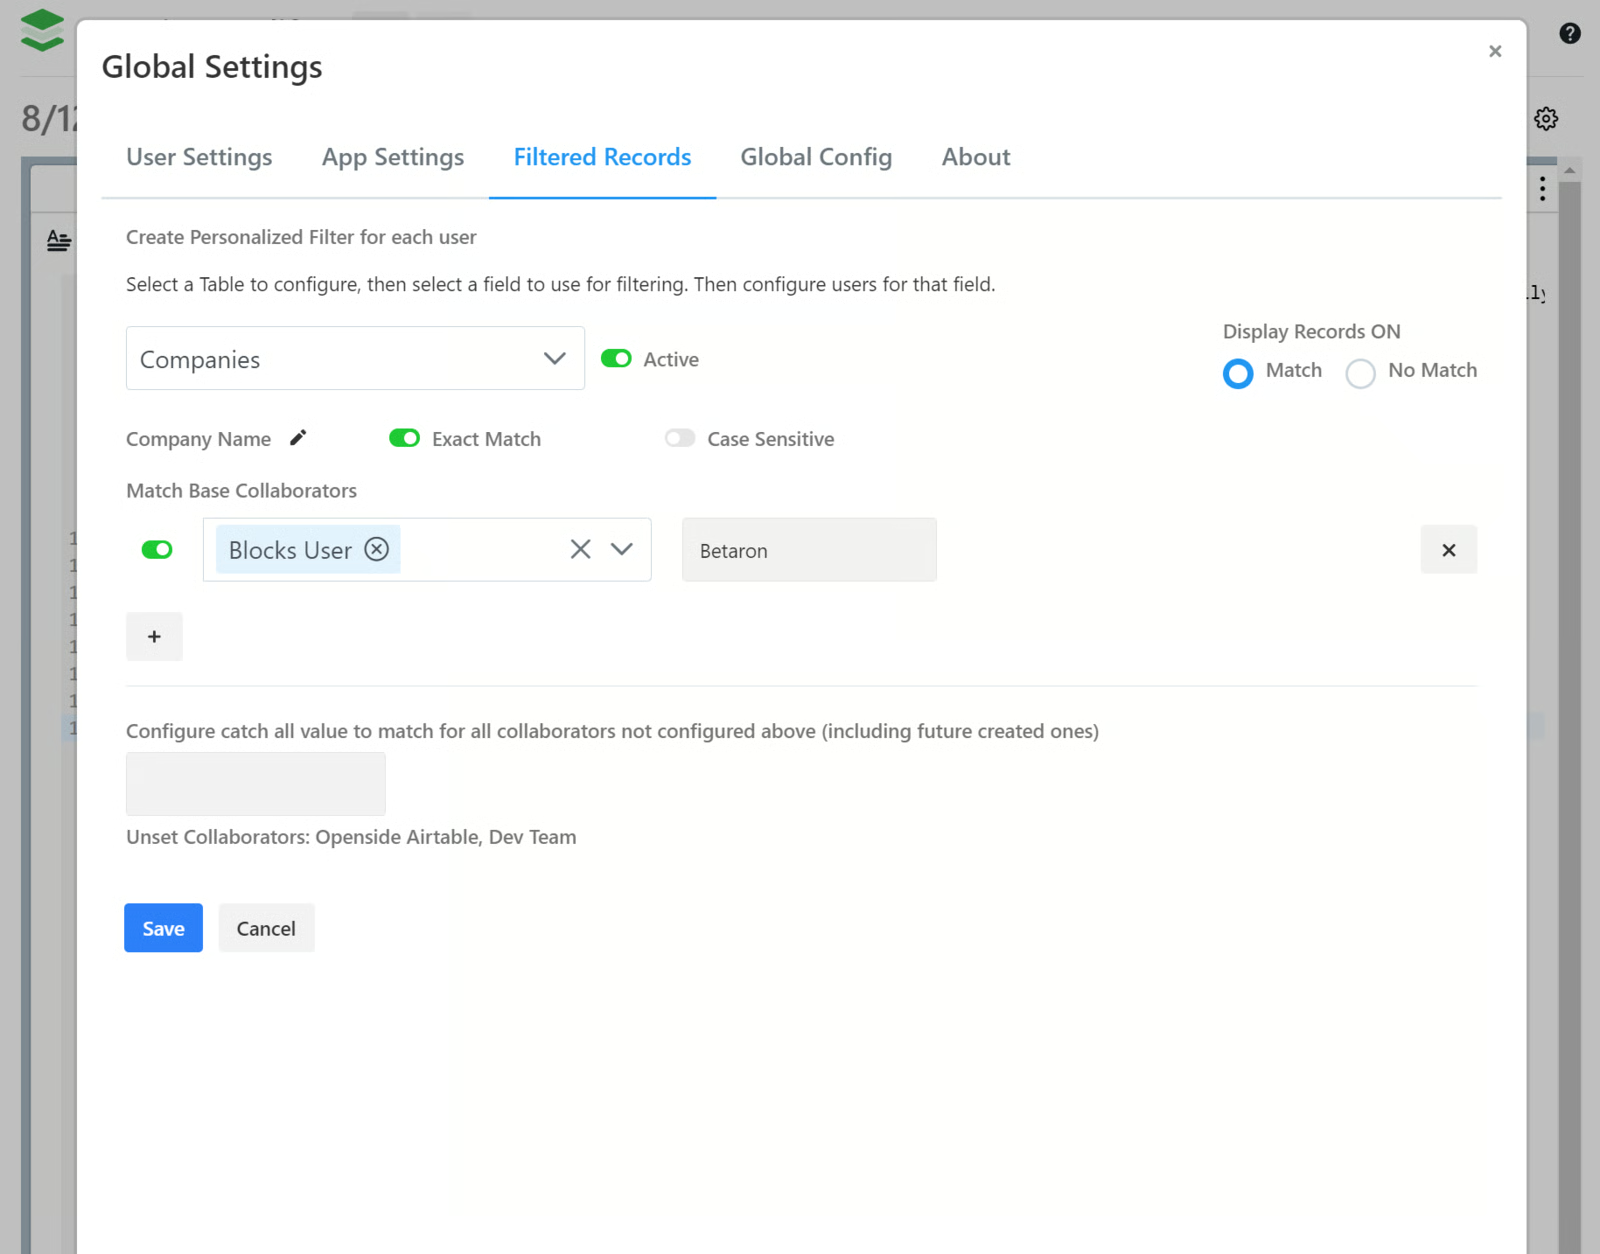
Section titled “Filtered Records”With filtered records, you can choose which users can view and focus on specific records per table or exclude specific users from seeing records. You can create the filter based on a specific field and a field value.
Filtered records is not meant to hide data from a user, but instead to allow someone to focus on only the records that are relevant to their needs.
Create Personalized Filter for each user
Select a Table to configure, then select a field to use for filtering. Then configure users for that field.
Example:
Exclude User - Exclude USER 1 from seeing the record based on the Company Name field that contains the name ‘Betaron’
Include User - Allow USER 2 to view the record based on the Company Name field that contains the name ‘Betaron’
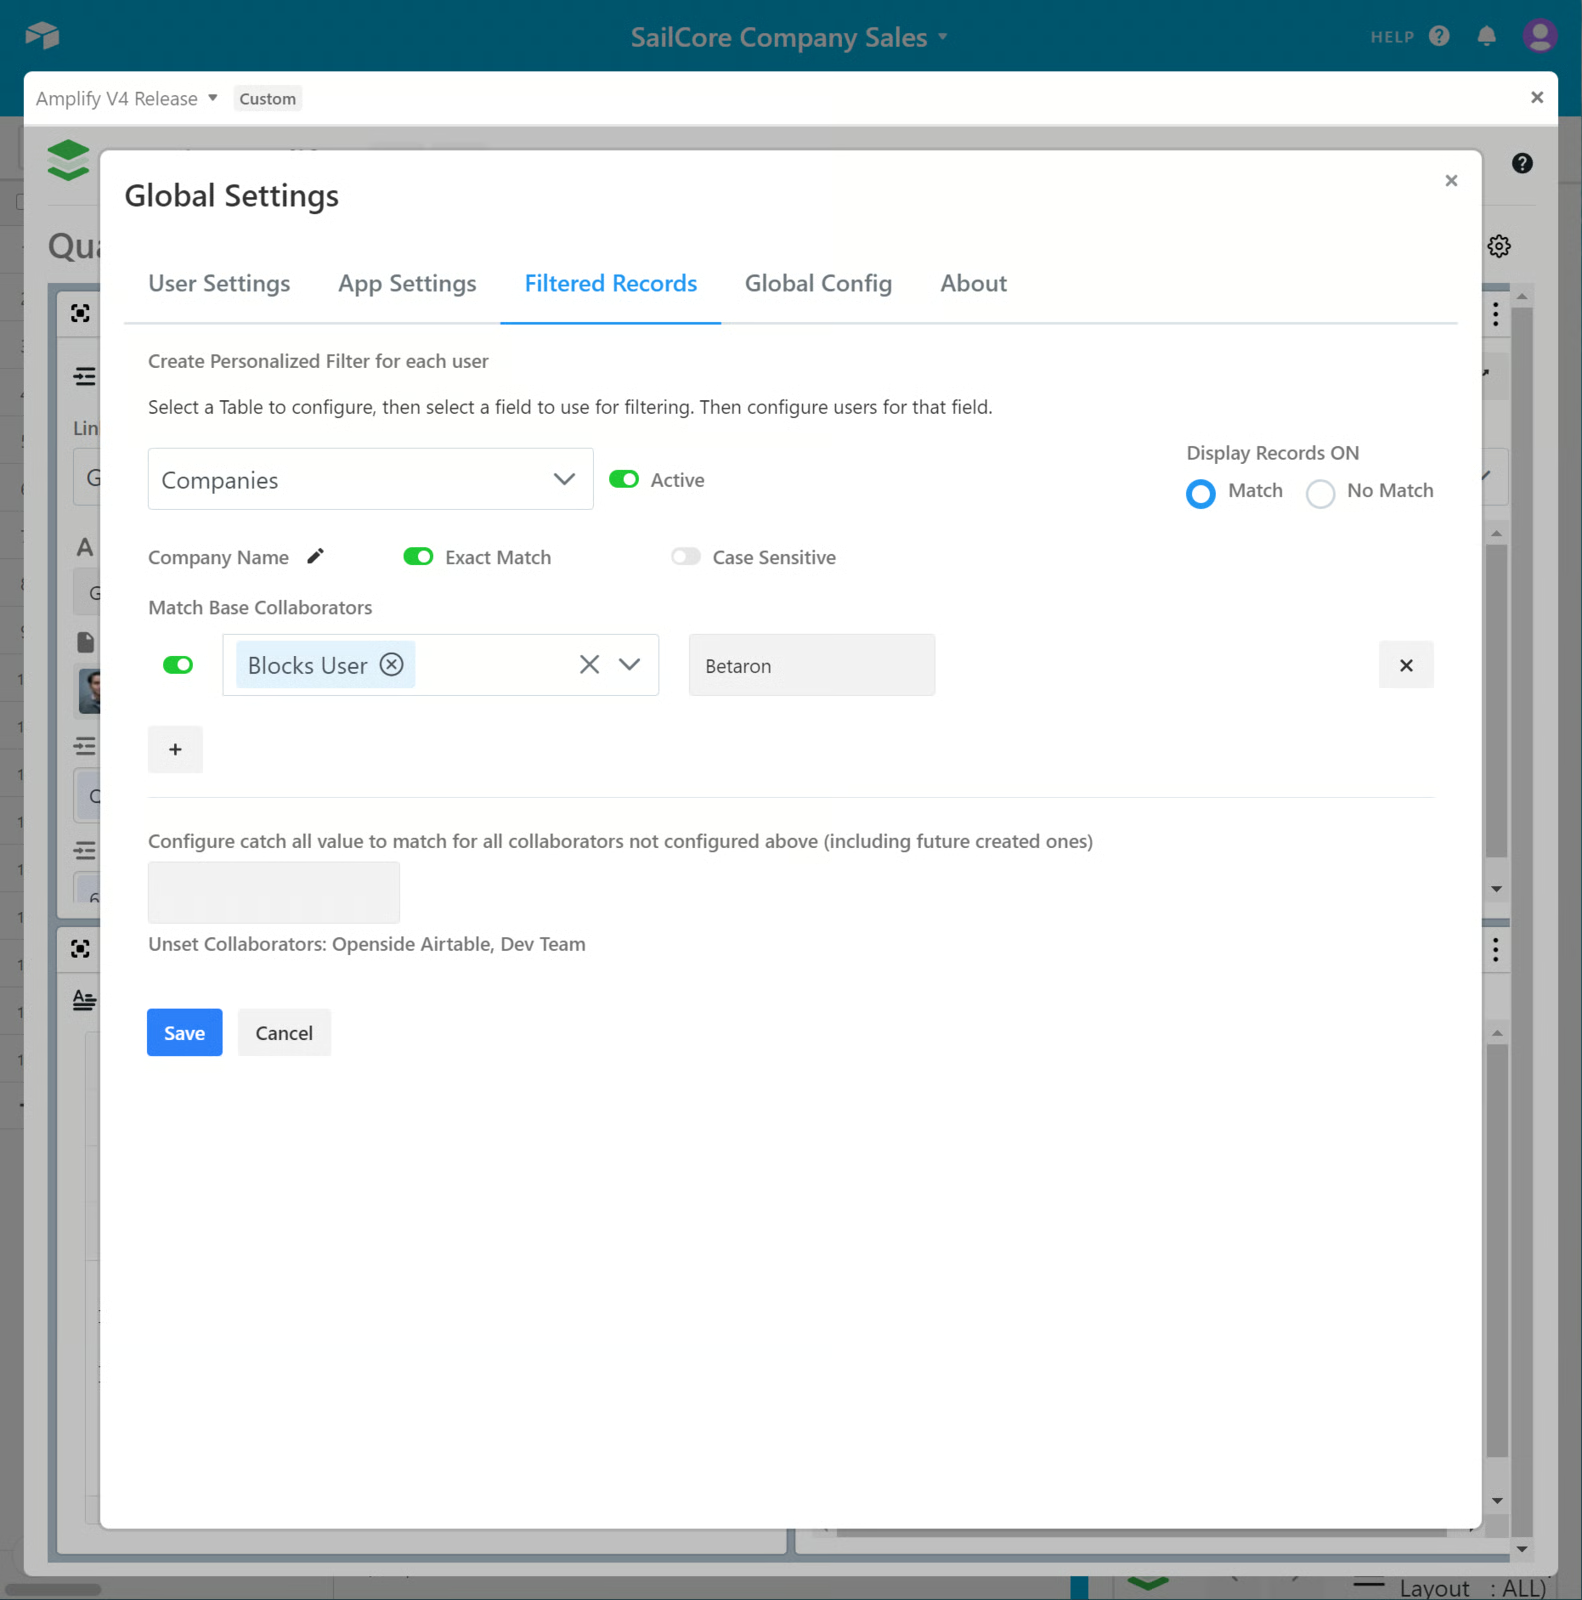
- Choose a Table
- Choose a Field
- optional - Exact Match - match the text exactly to verify a match - Case Sensitive - match the text case exactly to verify a match
- Match Base Collaborators - choose base users
- Choose Display Records ON
Match - Display the record to a user if the field value matches No Match - Hide the record from a user if the field value matches
Unset Collaborators
Configure catch all value to match for all collaborators not configured above (including future created ones)
- Enter a catch-all value for unset collaborators/users
Global Config
Section titled “Global Config”Used for troubleshooting with On2Air
About On2Air : Amplify - Info about the app
Information about your app install -
Base ID Install ID Install Status Your User ID Your On2Air User Role
Support and Documentation - Access Support and Amplify Documentation
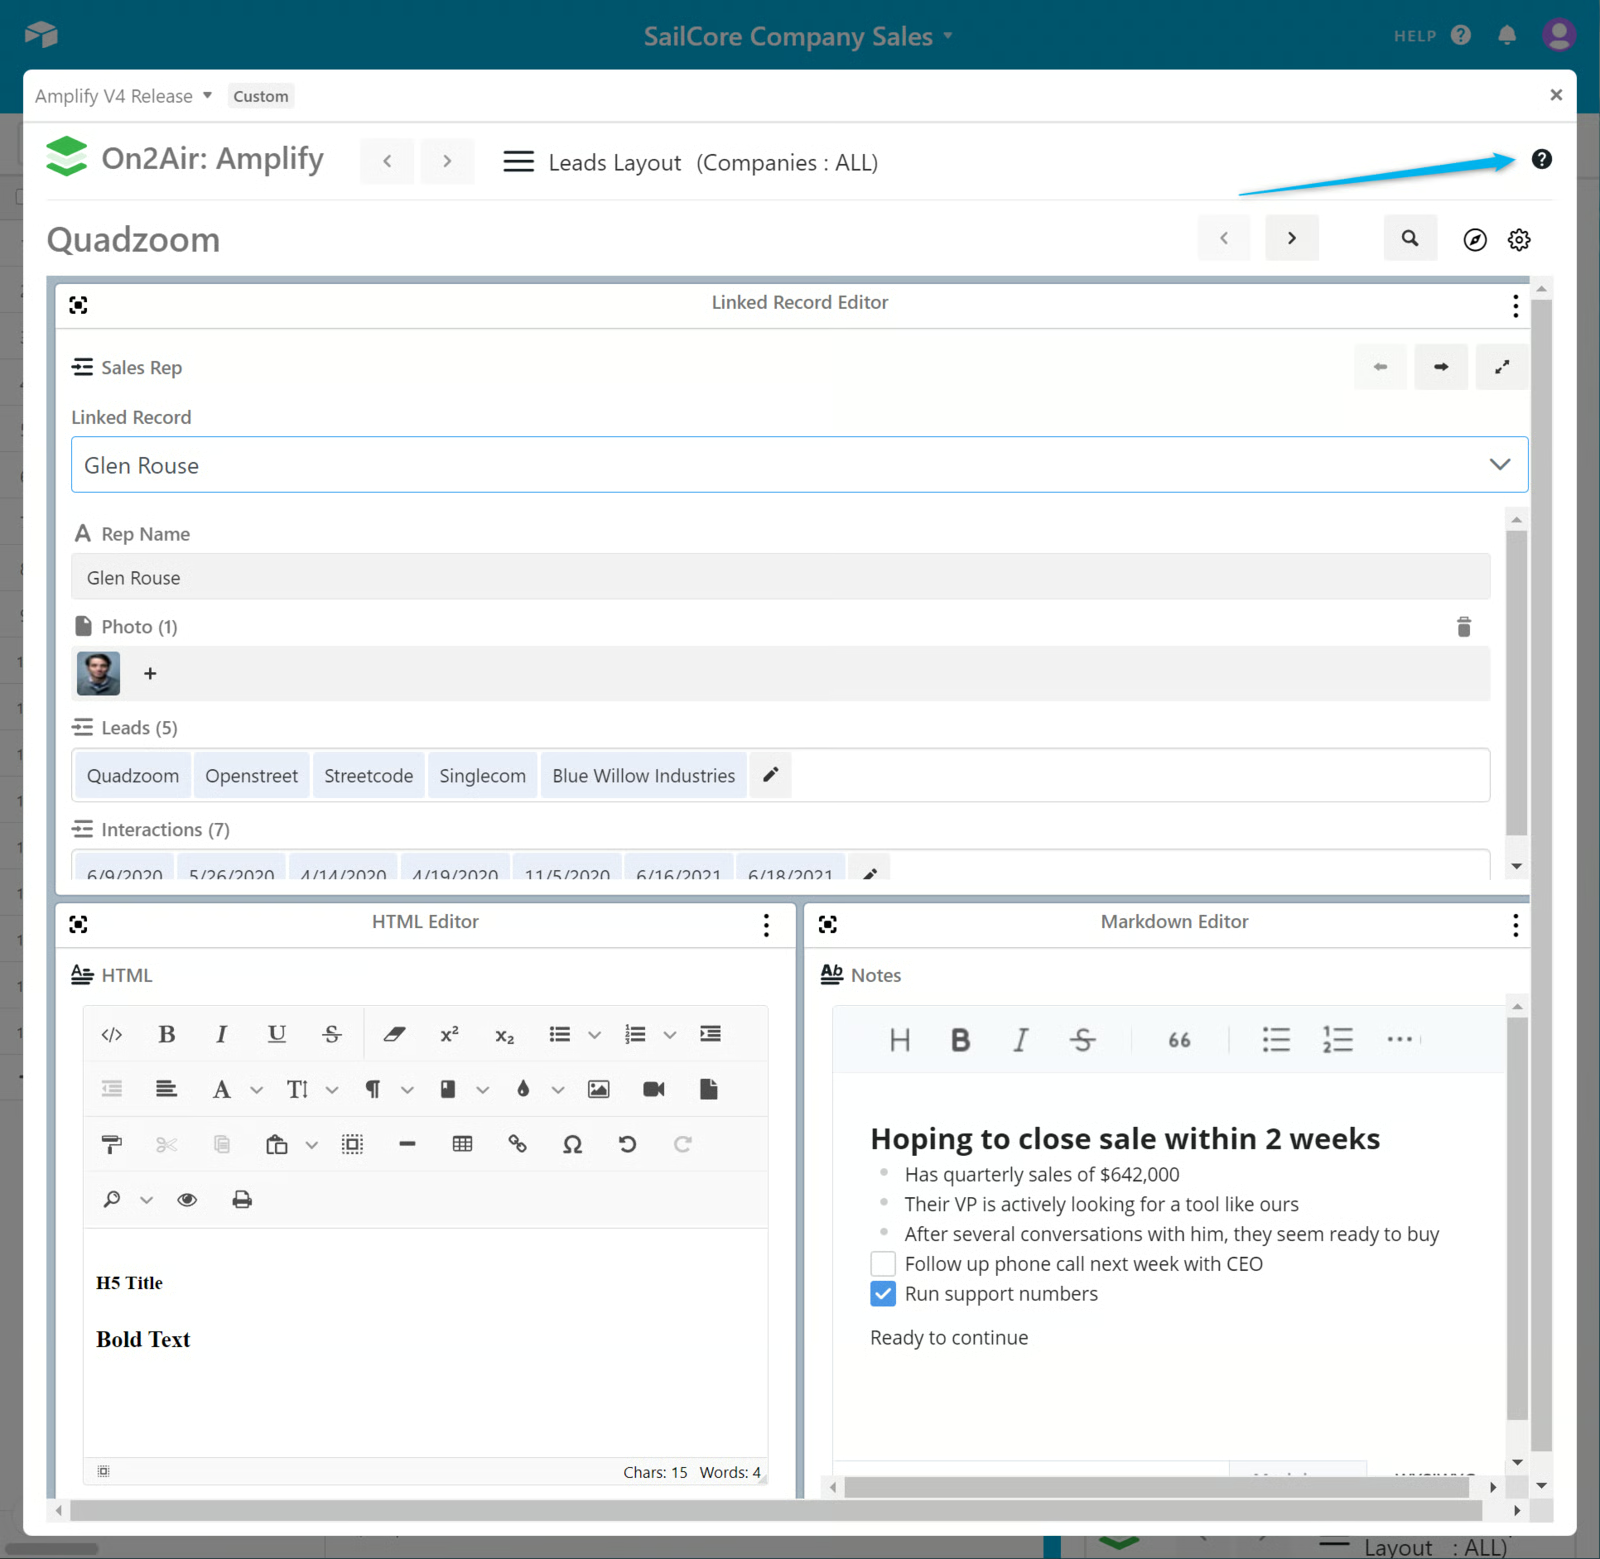
Get Support and View Documentation
Section titled “Get Support and View Documentation”- Click the question mark icon to get support or view the documentation
- ***