Embed
🔴 On2Air Forms has been shutdown to focus on our On2Air Backups Airtable app Learn more about automated Airtable backups - on2air.com
➡️
The Embed field in On2Air Forms allows you to embed any online content or websites on your form from a URL stored in your Airtable base. You can display websites, calendars, videos, and many other types of content on the internet!
See more Fields in the Form Field Reference

In this tutorial
-
How to Add a Field to Your Form
-
Field Configuration
-
Field Labels
-
Field Status - Display Mode
-
Field Defaults
-
URL Prefill Settings
-
URL Prefill Key
-
Disable Prefills for Field
-
Embed Configuration
-
Adding the Airtable Field with the URL or Embed Code
-
Special Options Require Embed
-
Customizing the Embed
-
Extra Options (Advanced)
-
Danger Zone
How to Add a Field to Your Form
Section titled “How to Add a Field to Your Form”Here’s how to add Airtable Fields or On2Air Custom Fields to your Form
➡️
 How to Add Airtable Fields and On2Air Custom Fields to Your Form
Field Configuration
Section titled “Field Configuration”Field Labels
Section titled “Field Labels”Example:
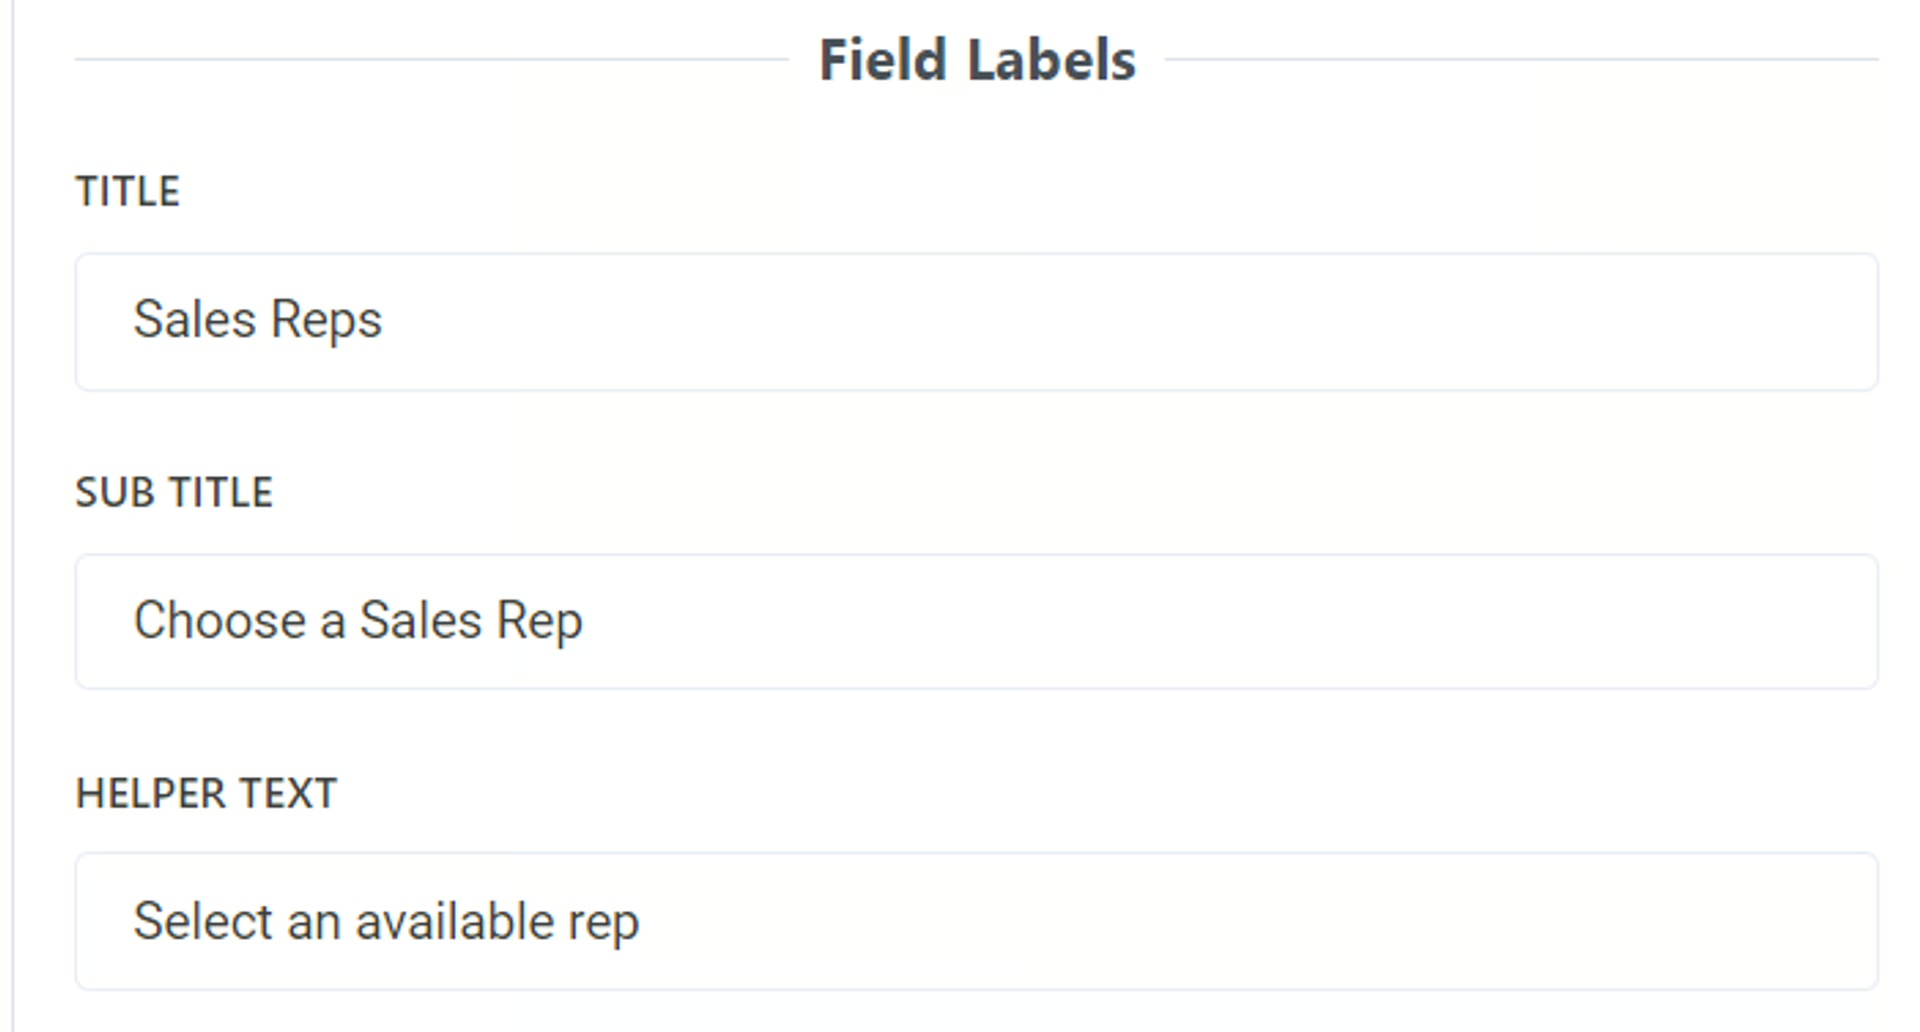
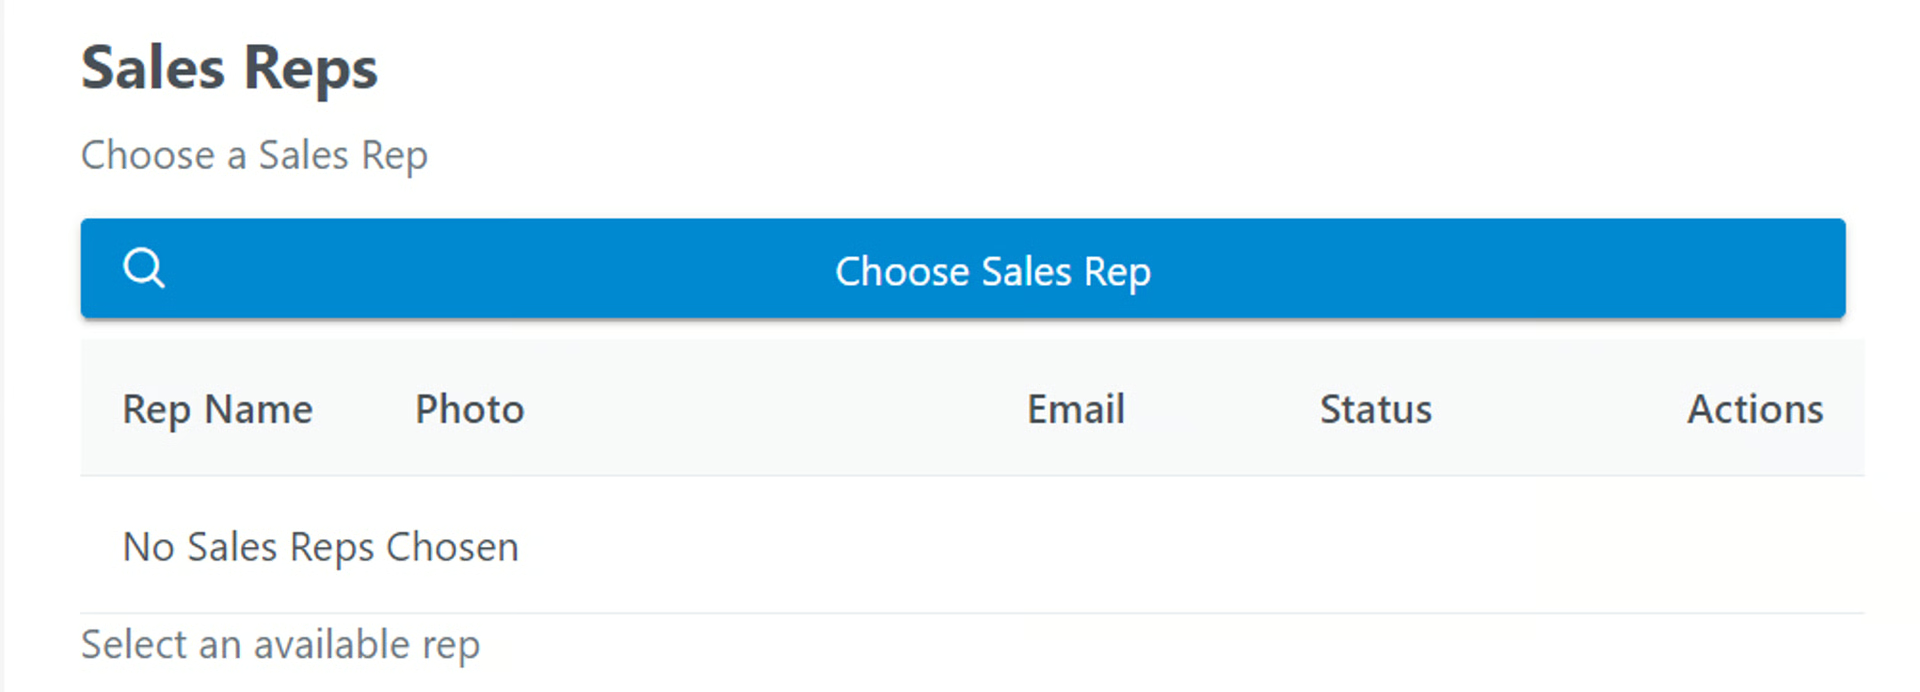
Title
- Add a title to be displayed above the field as the main name. To leave blank, add a single space
By default, this is the name of your field in Airtable. You can use a different field name than your base and it will not affect the field name in your base.
Sub Title
- Add a subtitle to be displayed above the field. To leave blank, add a single space
You can use text in this field and you can use Markdown to increase text size, bold, or italics
Related:  Use Markdown with On2Air Forms
Helper Text
- Add helper text to be displayed below the field. To leave blank, add a single space
You can use text in this field and you can use Markdown to increase text size, bold, or italics
Related: Use Markdown with On2Air Forms
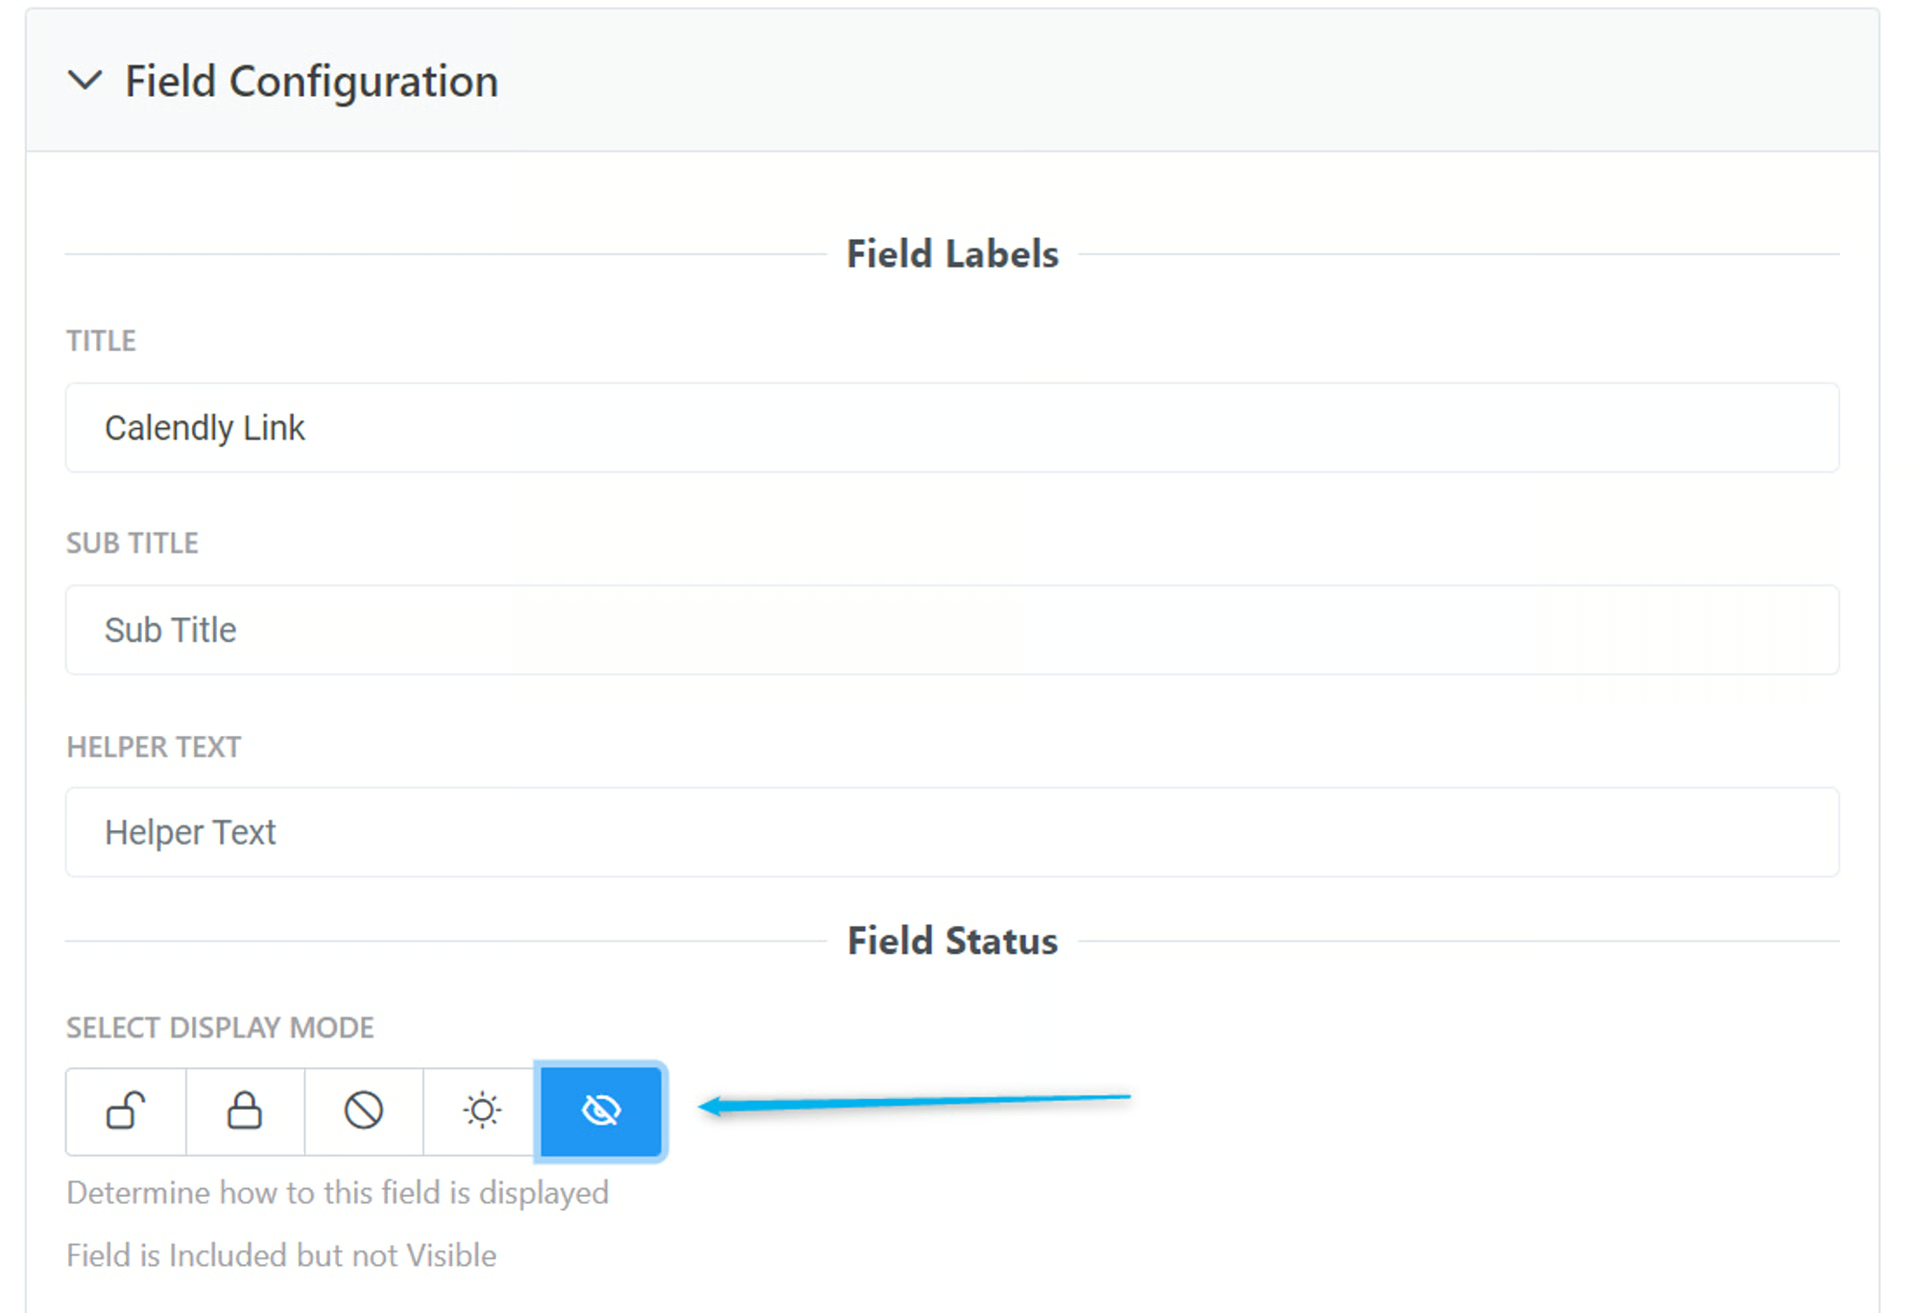
Field Status - Display Mode
Section titled “Field Status - Display Mode”Select Display Mode
- Choose how you want this field displayed on the form
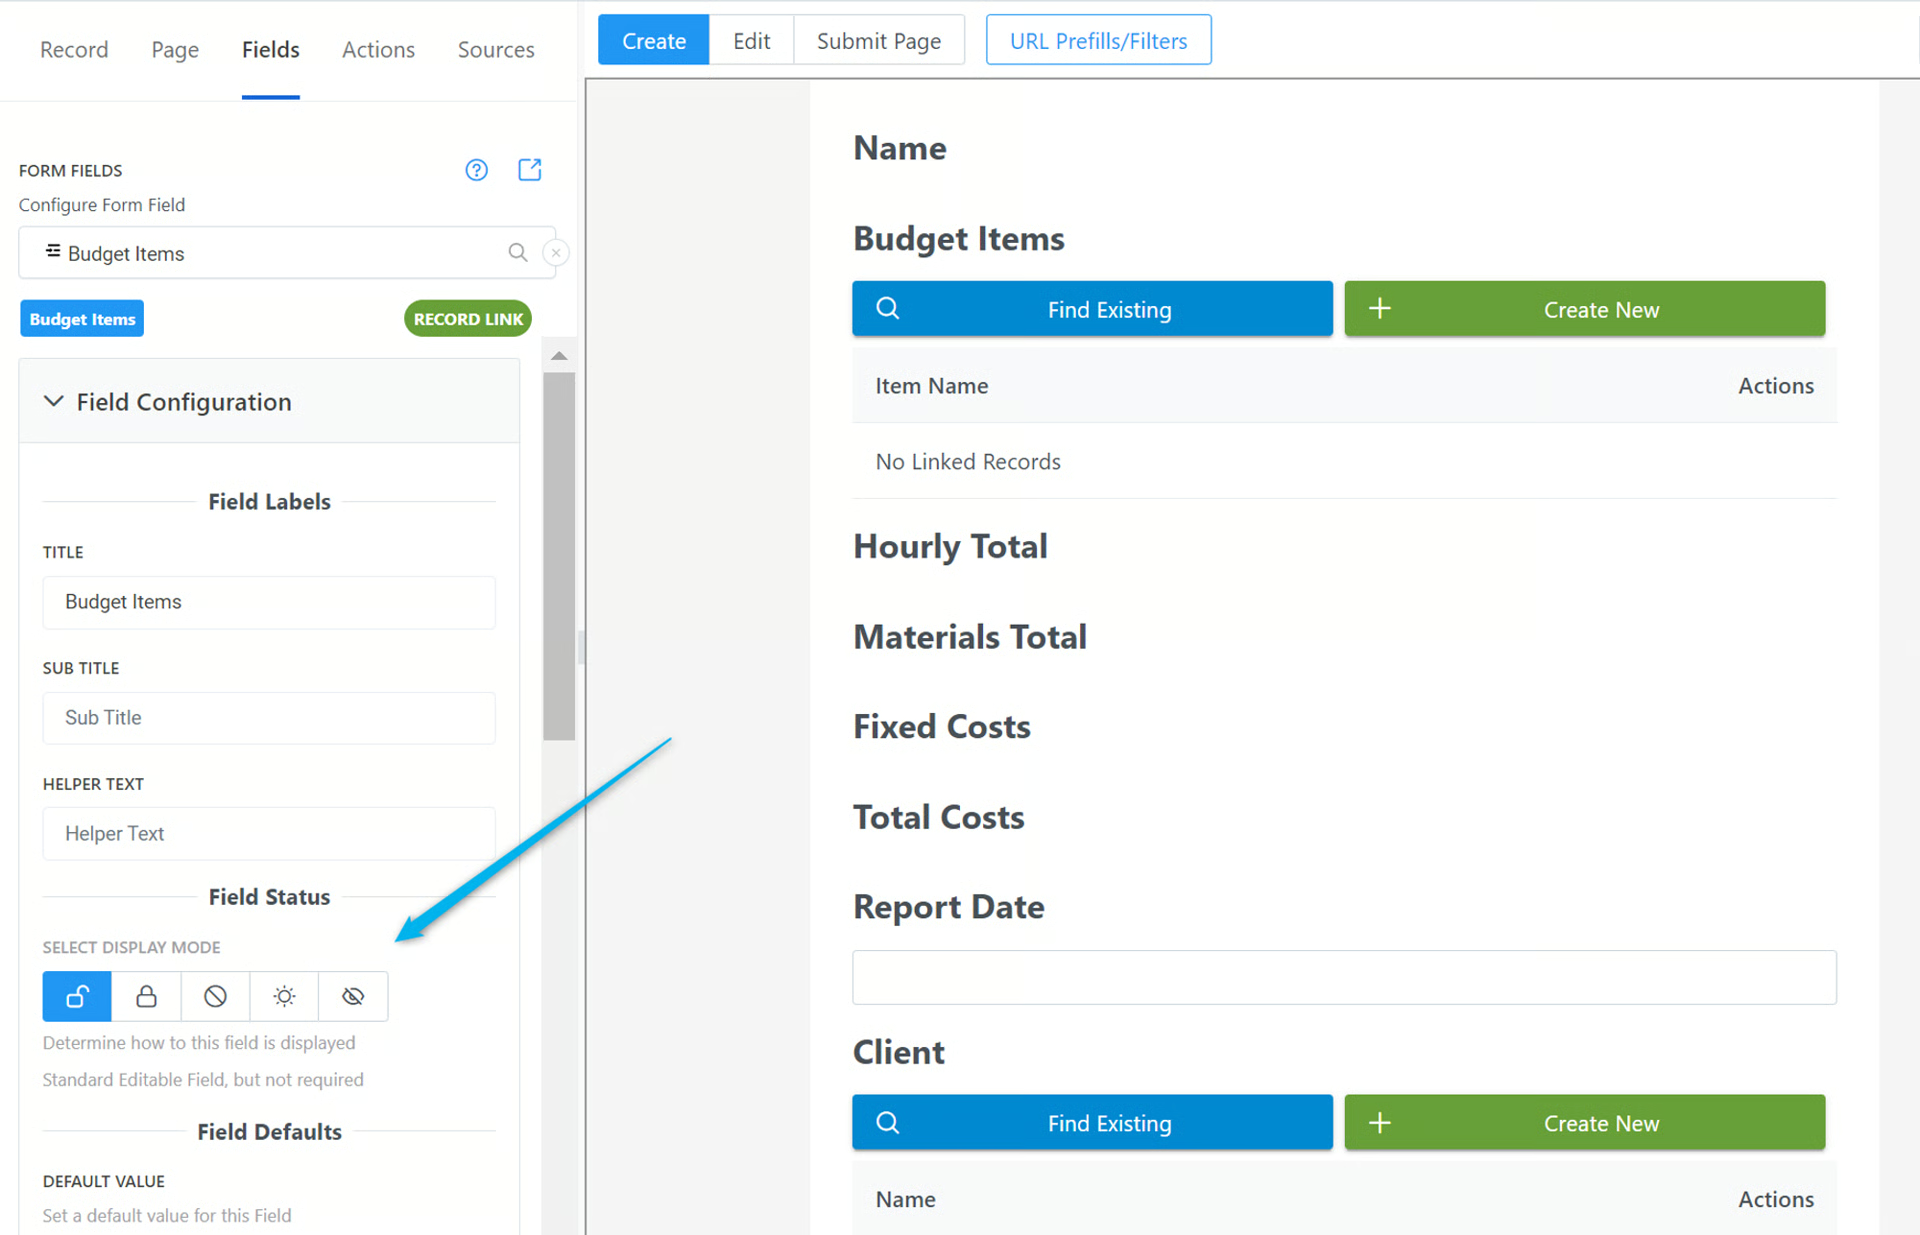
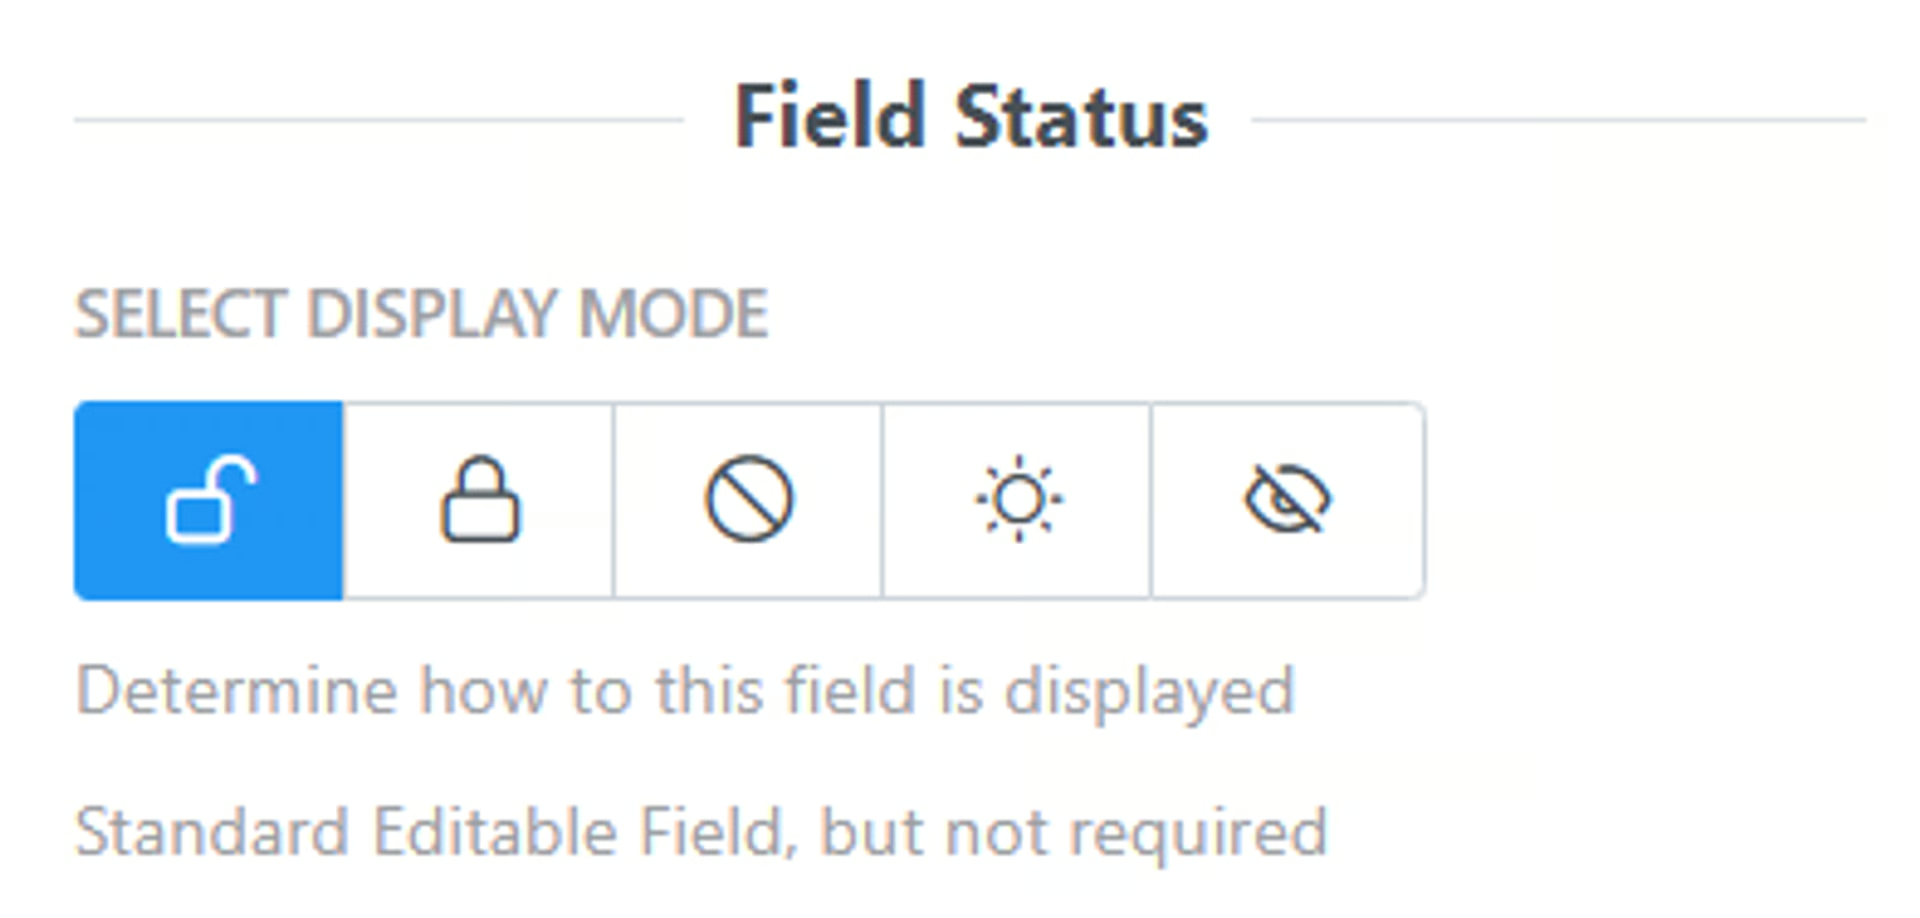
Options:
- Optional Field - Standard, editable field - Form user can complete this field, but it is not required
- Required Field - Standard, editable field - Form user is required to complete this field
- Disabled Field - Standard, non-editable field - Form user can view, but not edit
- Display Field - Display the field as Text or other format
- Hidden Field - This field will not be displayed for the form user, only internally
Field Defaults
Section titled “Field Defaults”Default Value - Add a default value to this field that will be added to every form submission
Use Default on Edit if Empty - Enable if you want to use the default value on Record Edits if the field has no value when the form is submitted
➡️
Related:  How to Add Default Values to Your Form
URL Prefill Settings
Section titled “URL Prefill Settings”URL Prefill Key
Section titled “URL Prefill Key”The Key used to set this field value from the URL (i.e. ?key=value). (i.e. www.yoururl.com?key=value)
Example: Your URL is www.yoururl.com?shoes=red
- The Key is shoes and the value is red. When your form user uses this URL, the shoes field will automatically be entered as red without the user having to enter it in.
➡️
Related:  What is a URL Prefill (Pre-Populated Fields) and How to Use Them in On2Air Forms
Disable Prefills for Field
Section titled “Disable Prefills for Field”- To completely disable URL Prefills from this field, delete the key
Embed Configuration
Section titled “Embed Configuration”Adding the Airtable Field with the URL or Embed Code
Section titled “Adding the Airtable Field with the URL or Embed Code”To use the Embed field, you will need to have a URL or Embed Code already stored in your Airtable base. You can use the following field types:
- URL Field
- Lookup Field to a URL
- Text Field
- Attachment Field - Images and PDFs
- Linked Record field on your form with one of the other field types available

💡
IMPORTANT: Once you have a field in your base with the URL, add the actual field to your On2Air Form
-
The field has to be on the form to be used in the Embed. We’ll show you how to hide it in the next step.
-
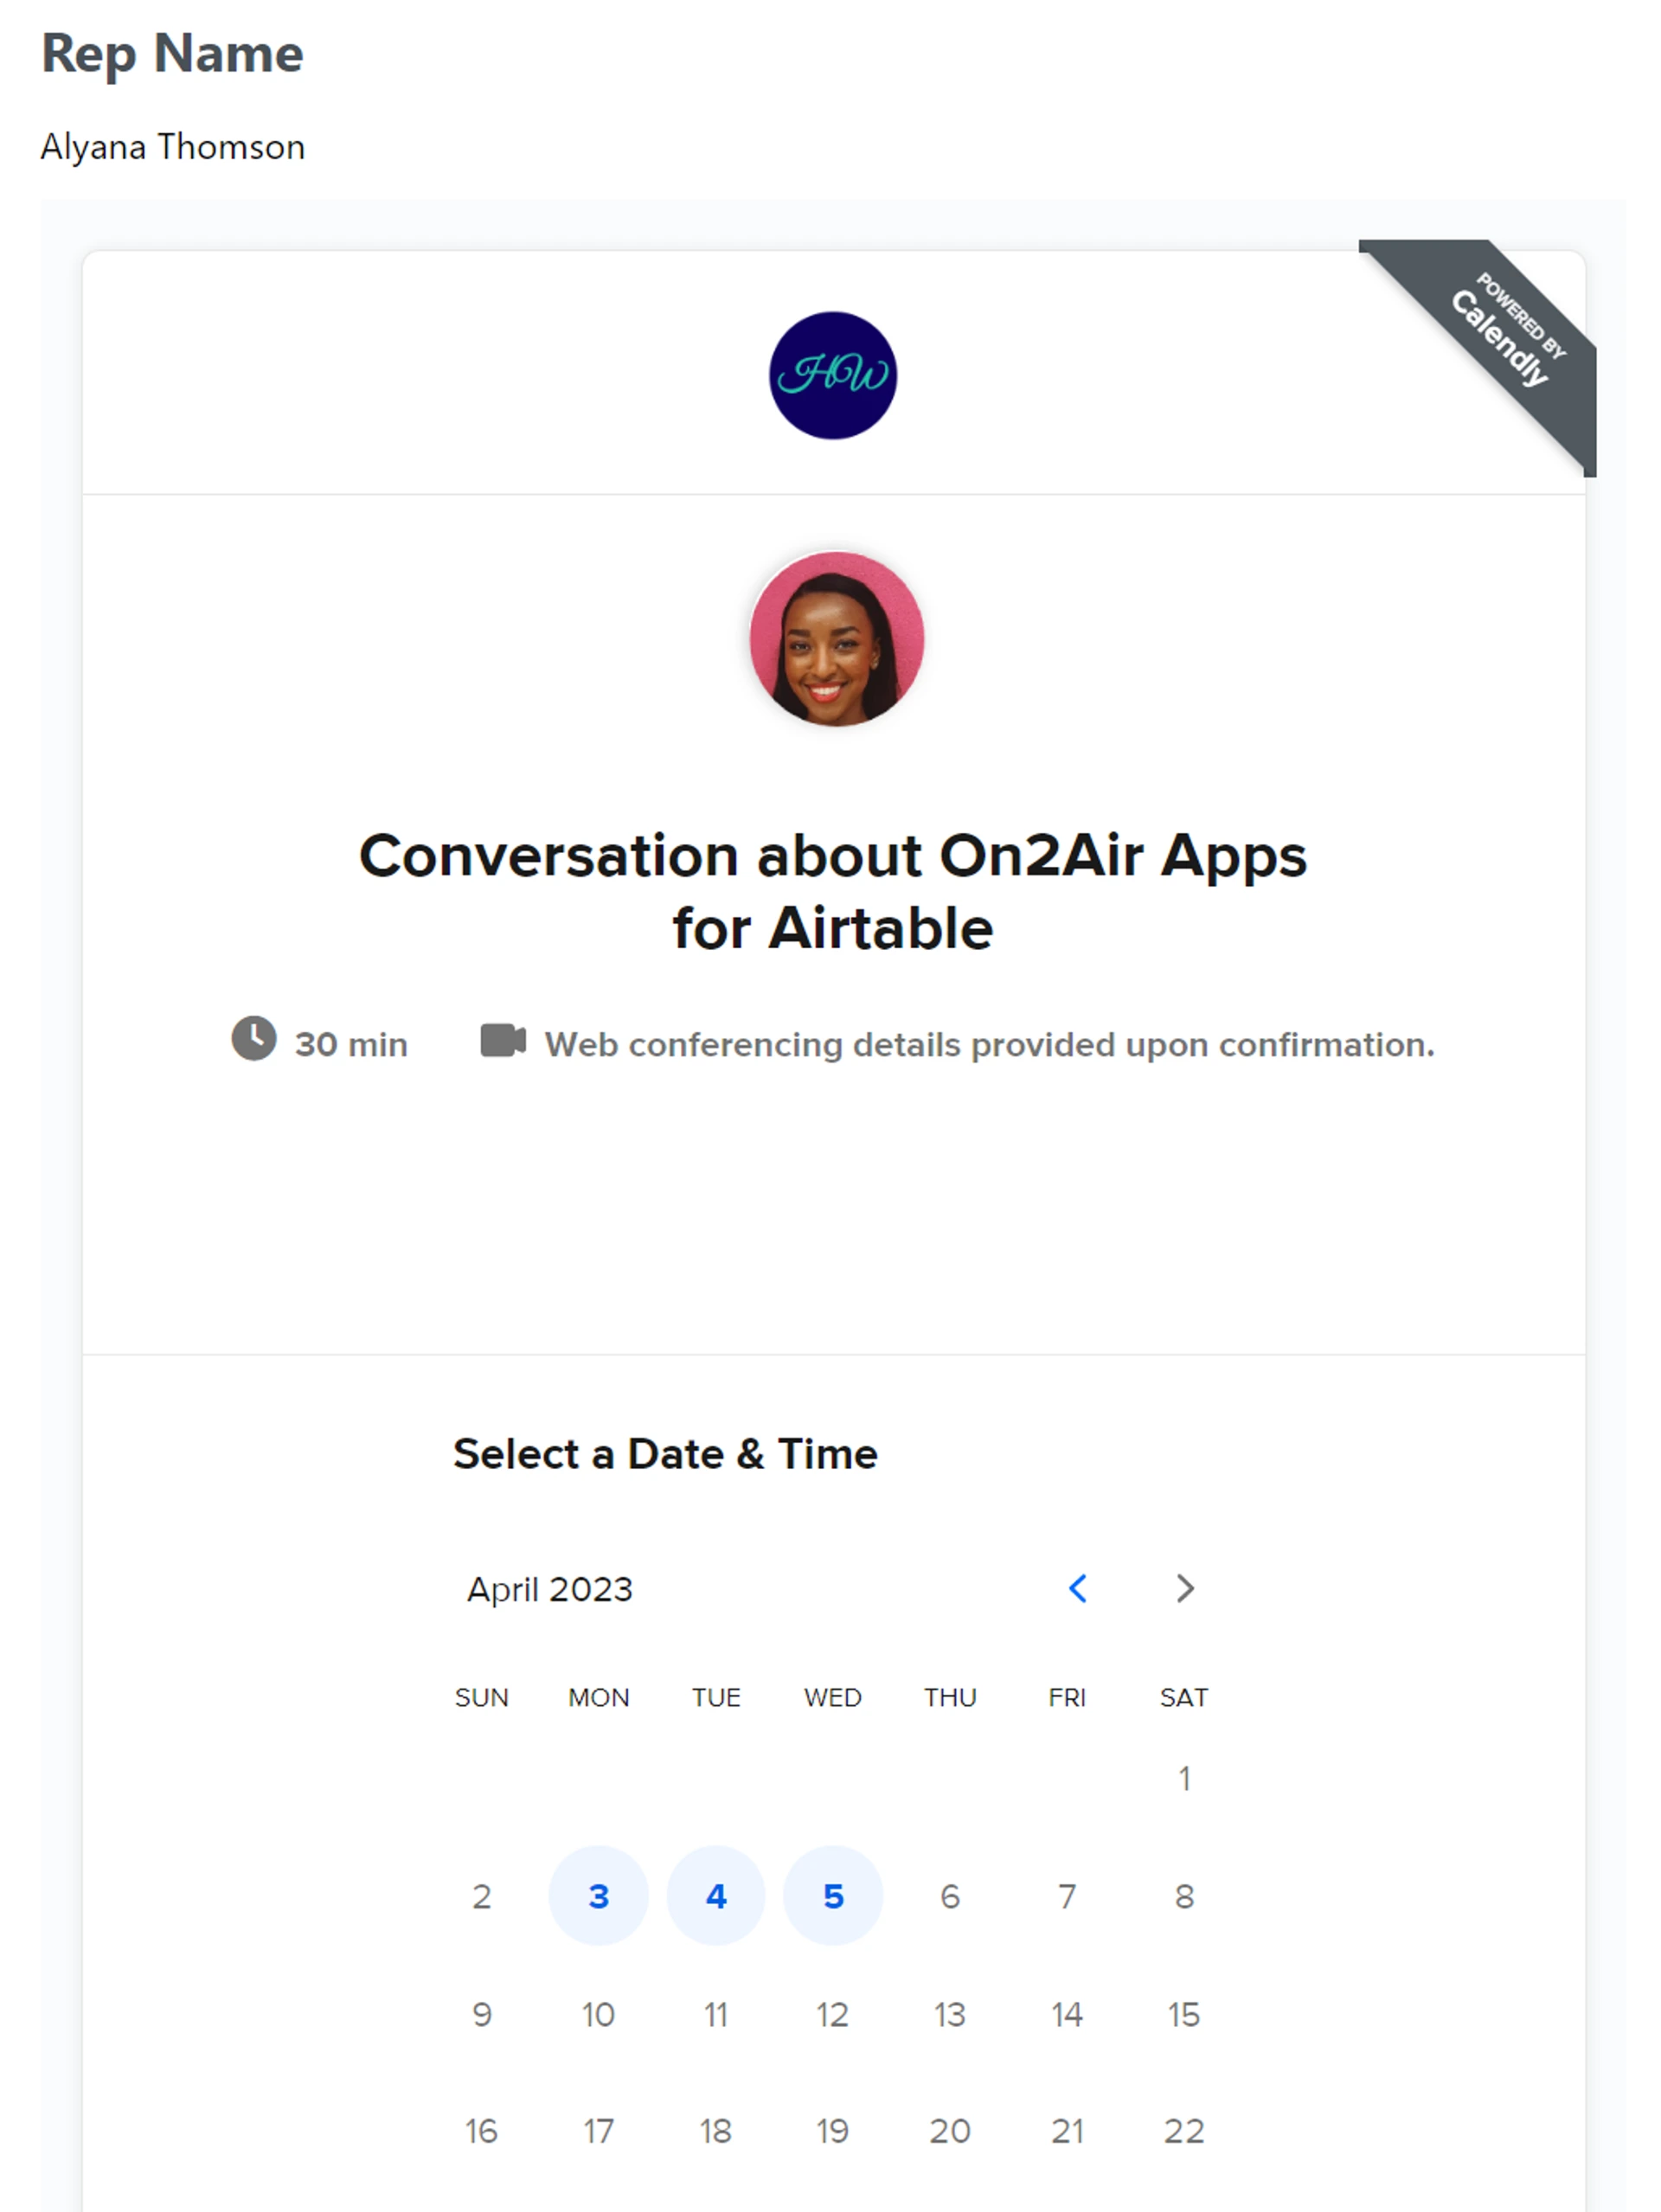
In this example, we’re going to use a Calendly calendar link that many people use for booking meetings and appointments

- You can then hide it on your form so the user doesn’t see the field by changing the Field Display Mode to Hidden
-
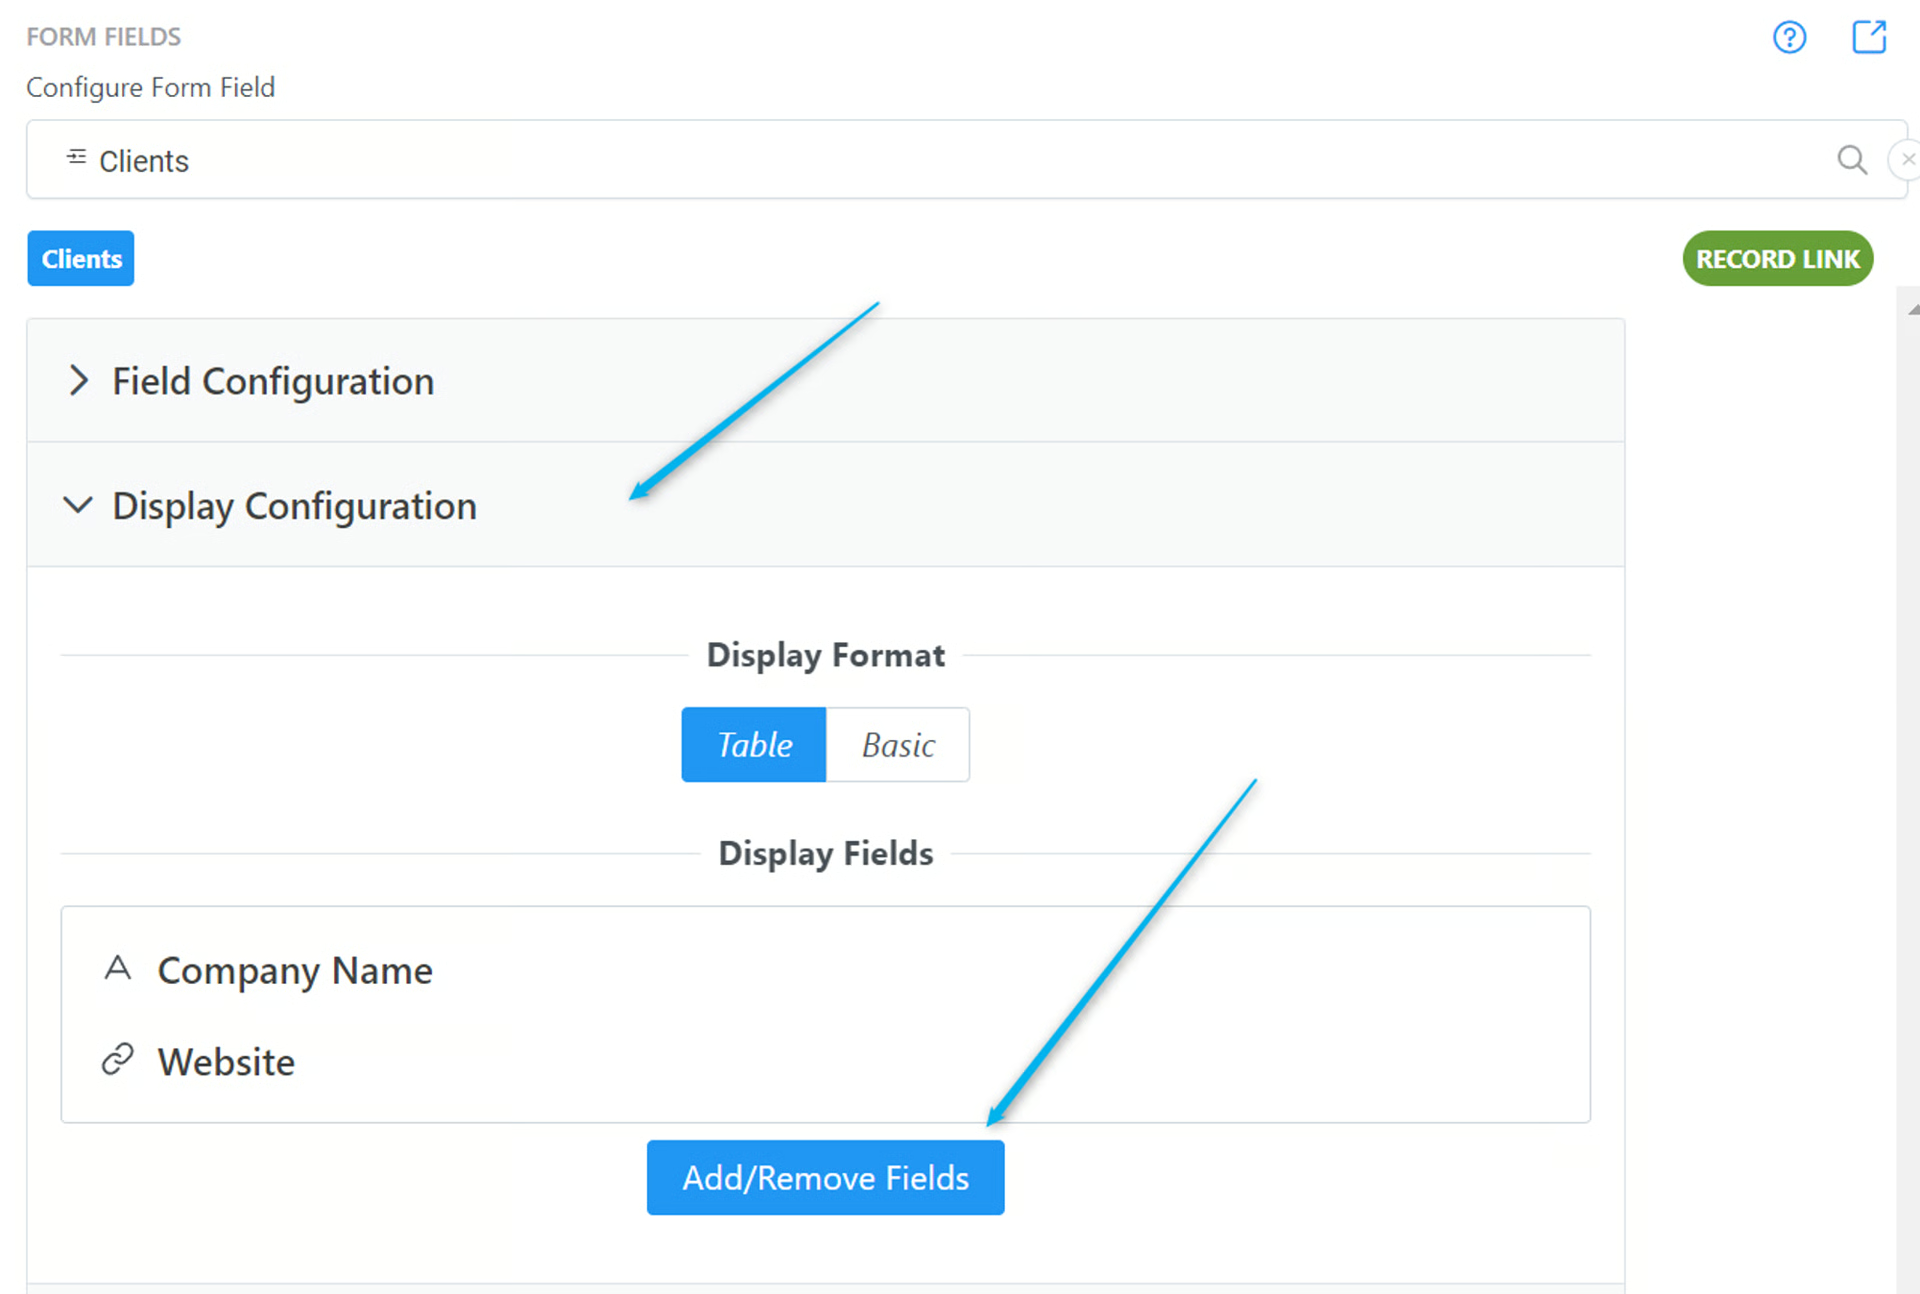
If you’re using a Linked Record field as your Embed source, you need to first ensure the field from your Linked Record table is enabled in the Linked Record Display Configuration
-
You can do this by clicking your Linked Record field, opening the Display Configuration, then click Add or Remove Fields to choose the URL or other field you need
- Next, add the Embed Custom Field to your form. You can find it in the Custom Fields section where you add fields.

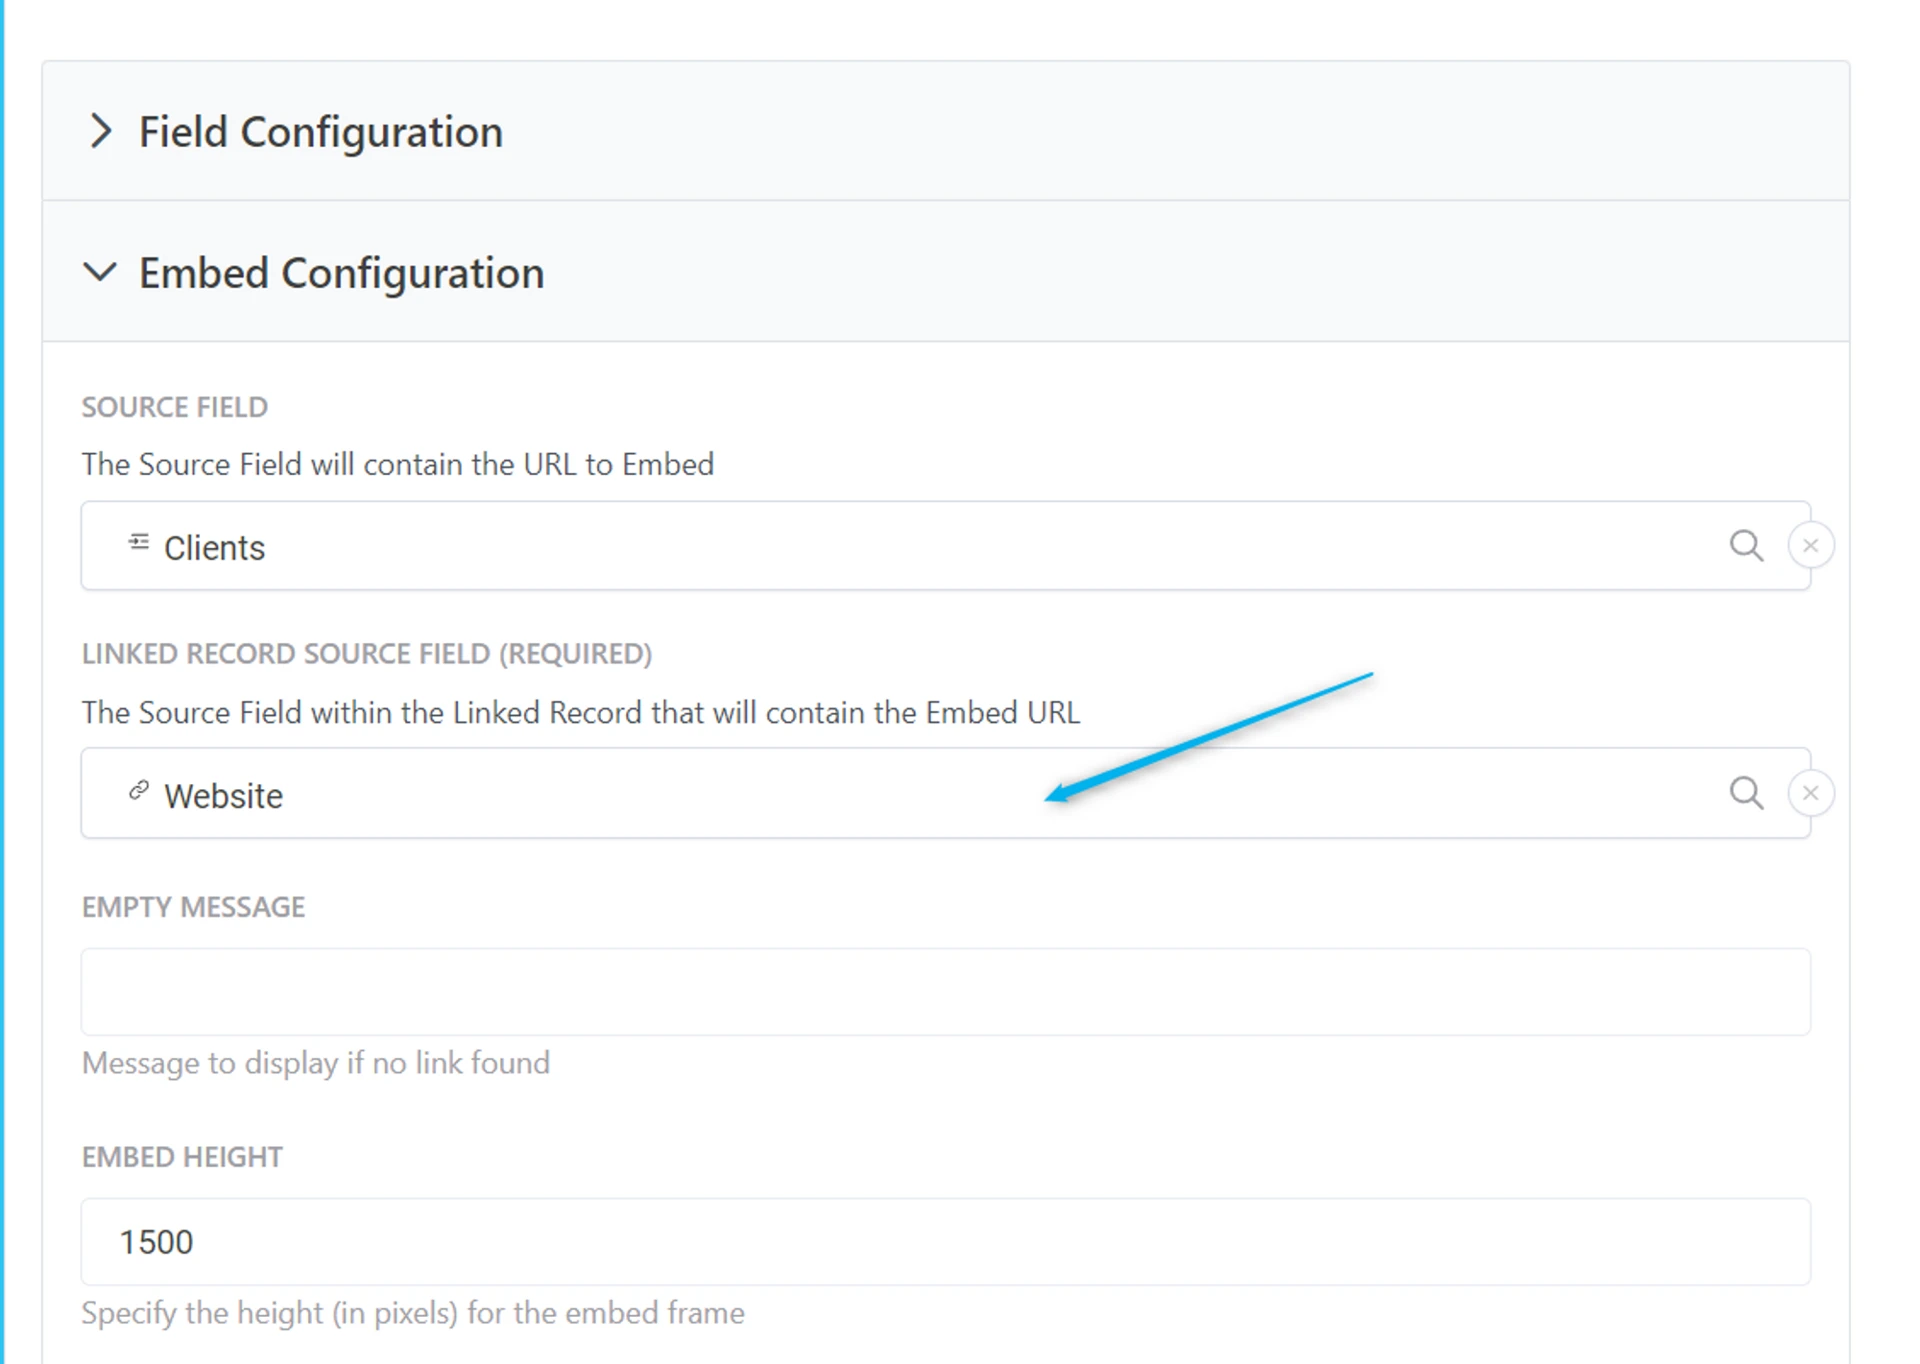
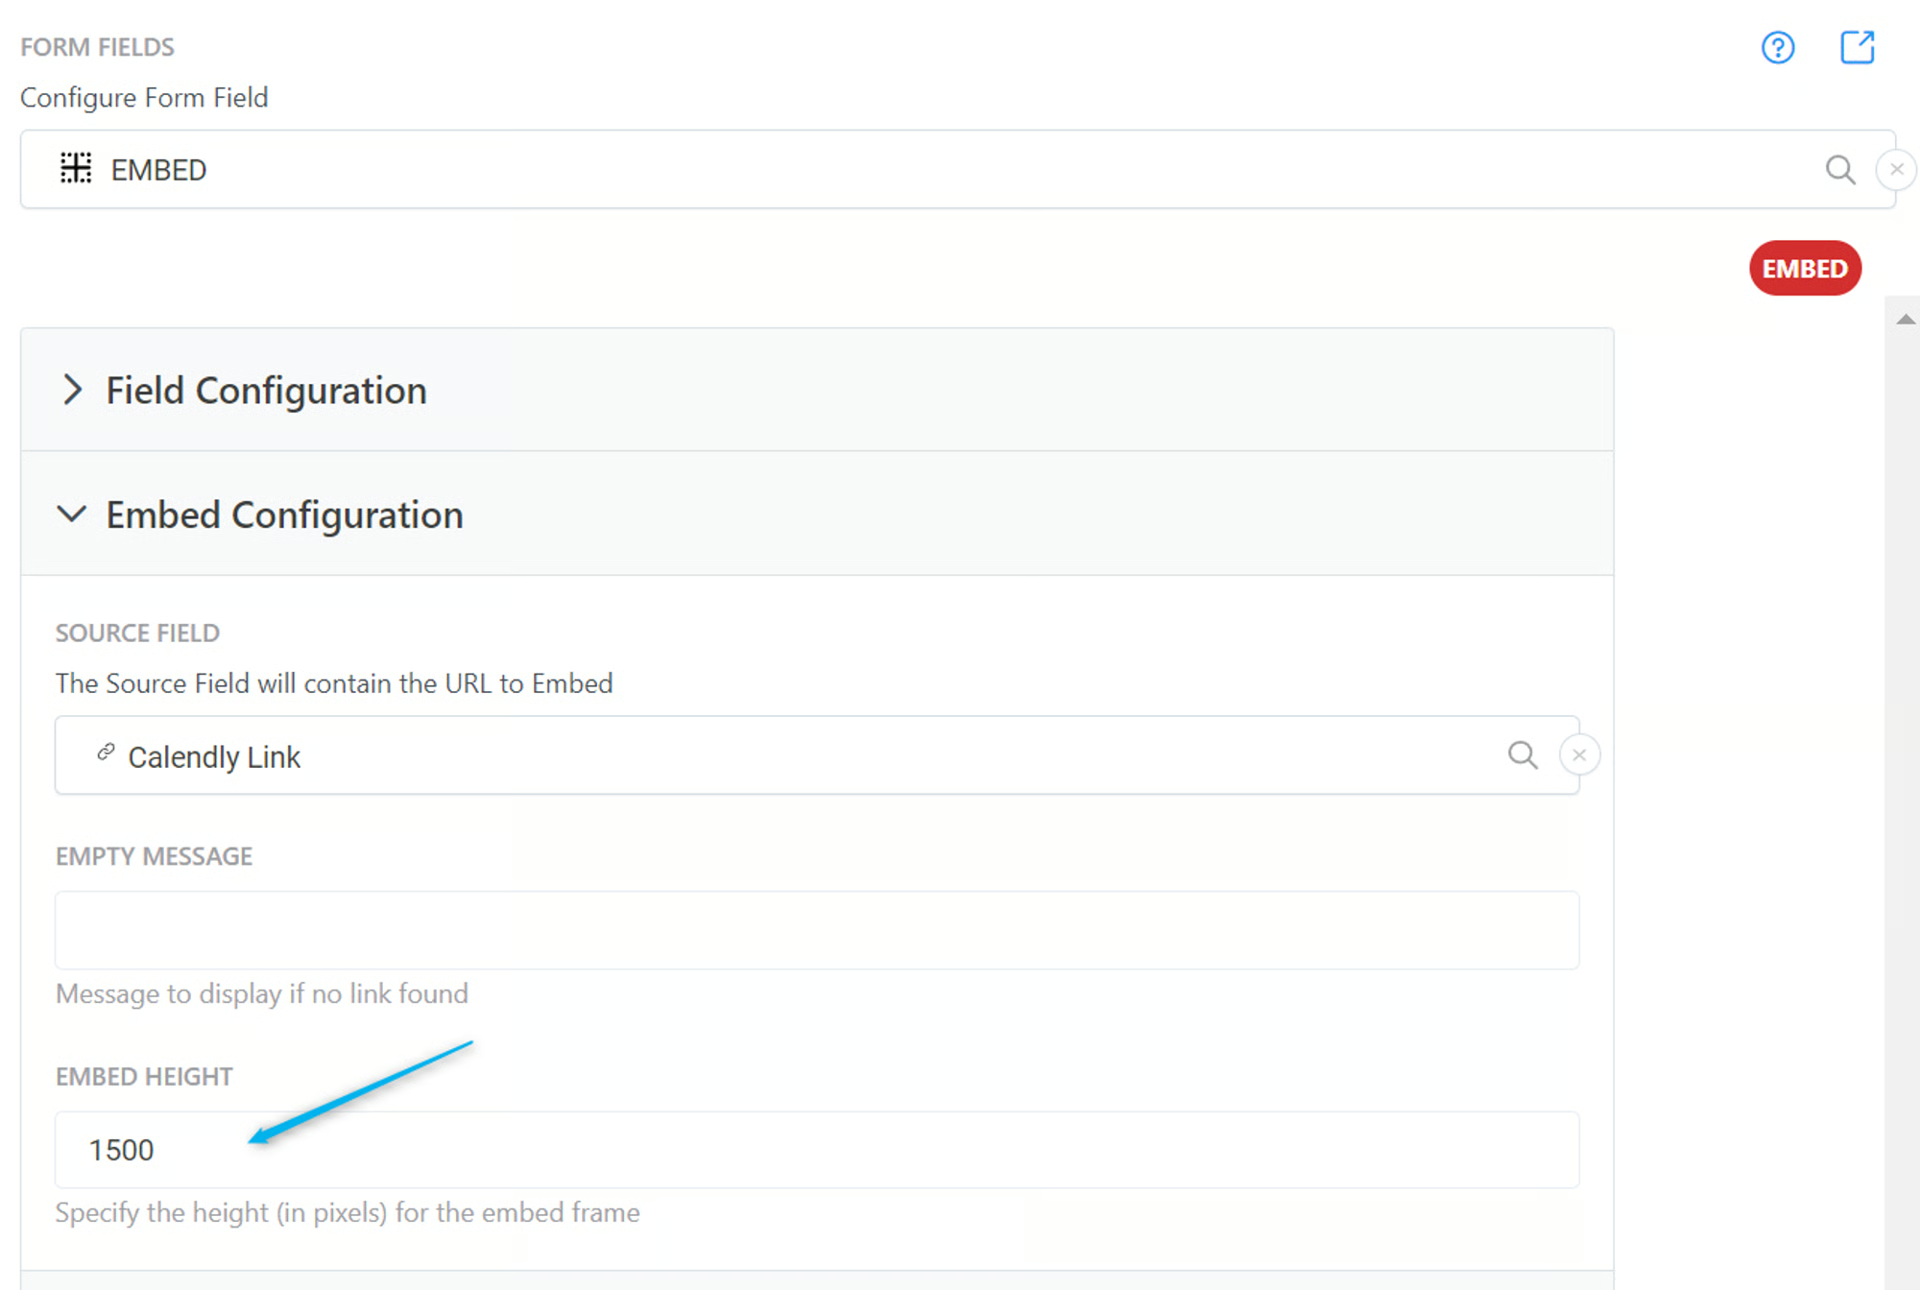
- In the Embed Configuration menu of the field, choose your Source field which is the URL field or other field type you added to the form
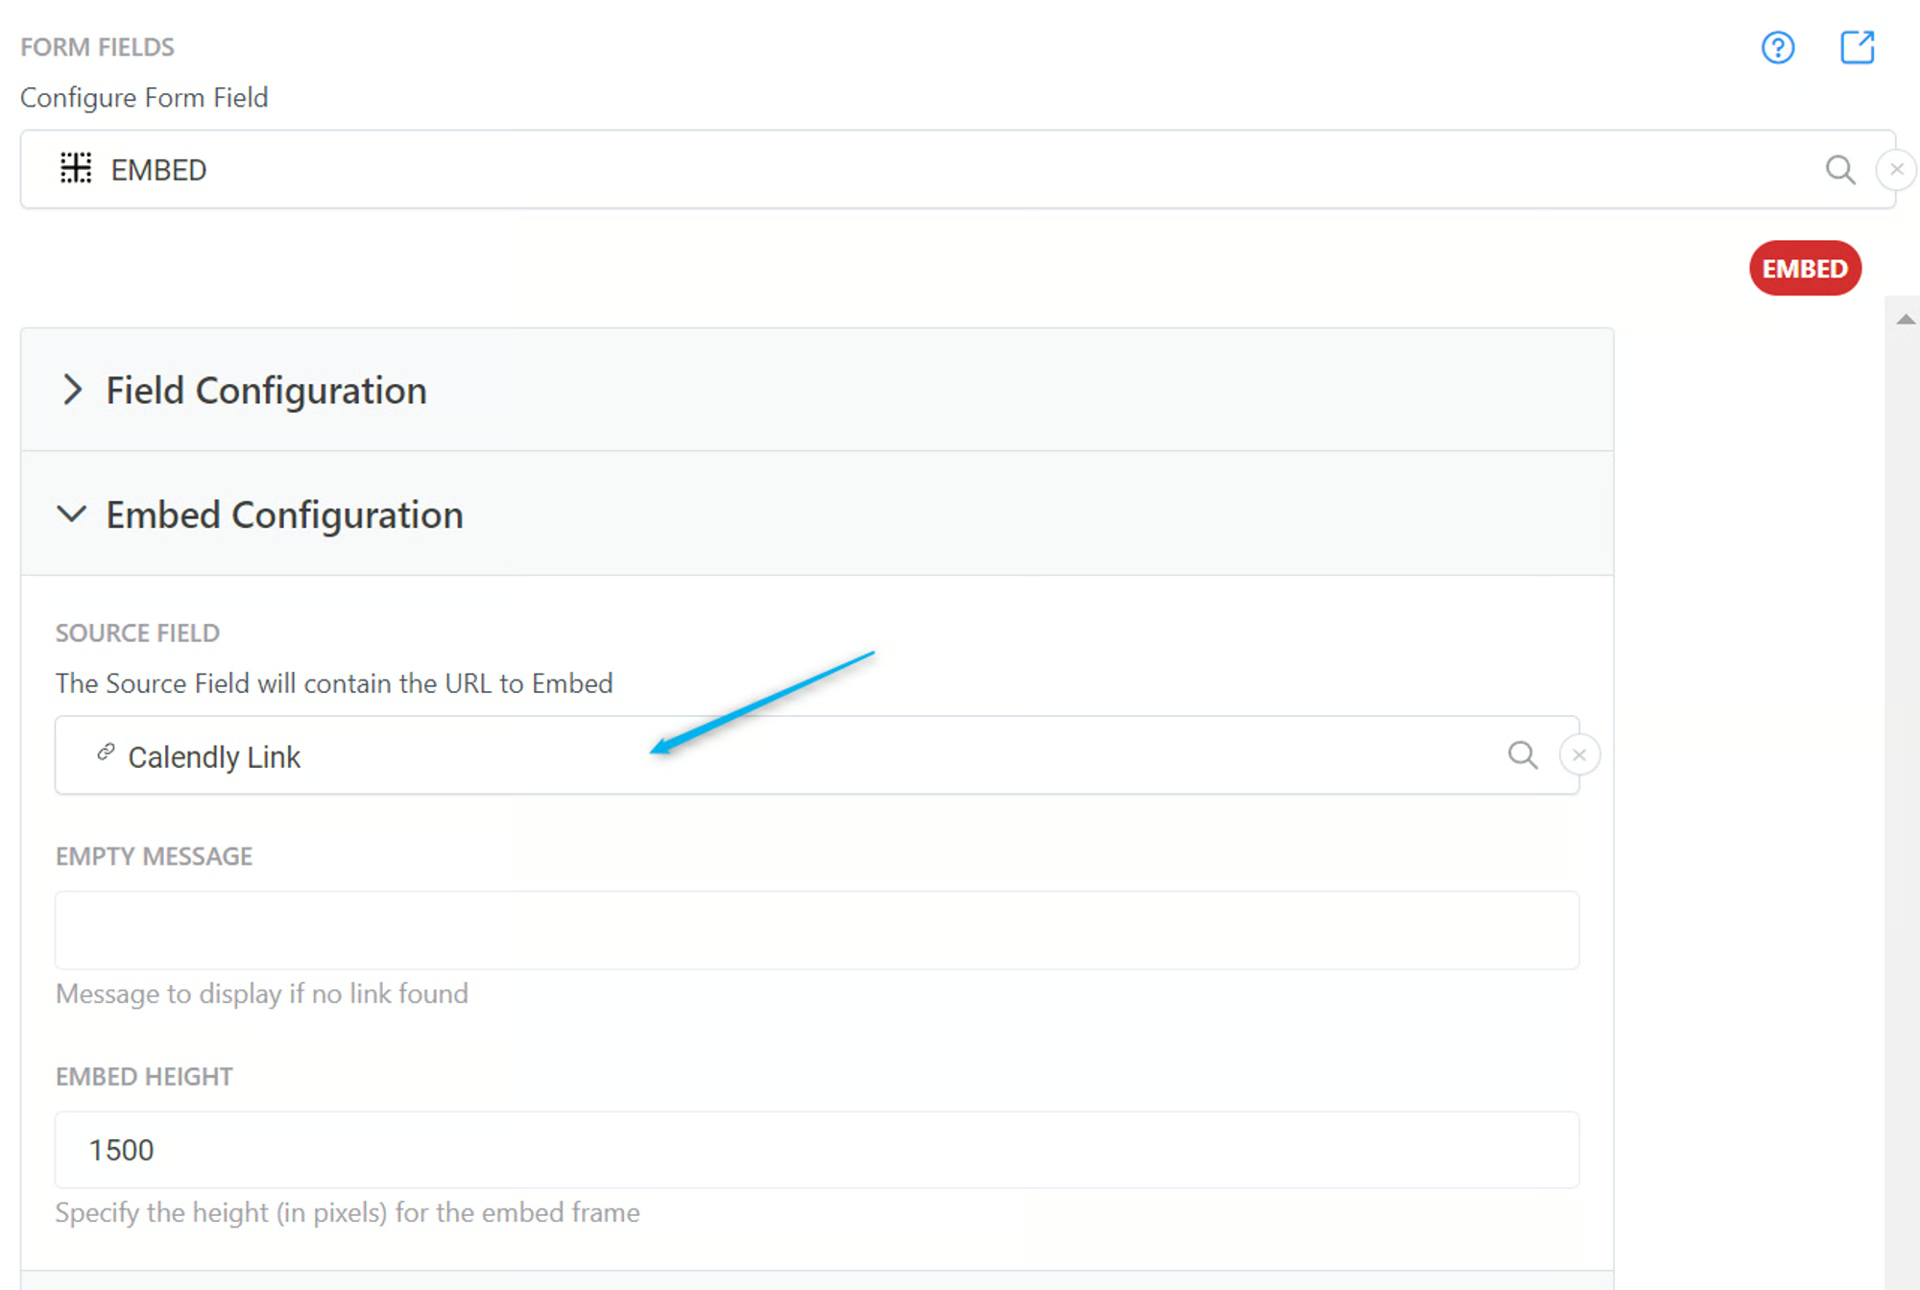
- If using a Linked Record as your Source, you’ll see a secondary Linked Record Source Field.
- Choose the field containing your URL
Special Options Require Embed
Section titled “Special Options Require Embed”At this time, some services will require that you use the Embed code or iFrame rather than a URL. We are working to enable more platforms that only require the URL.
Example: YouTube
With YouTube, you’ll need to use the actual Embed code of the video
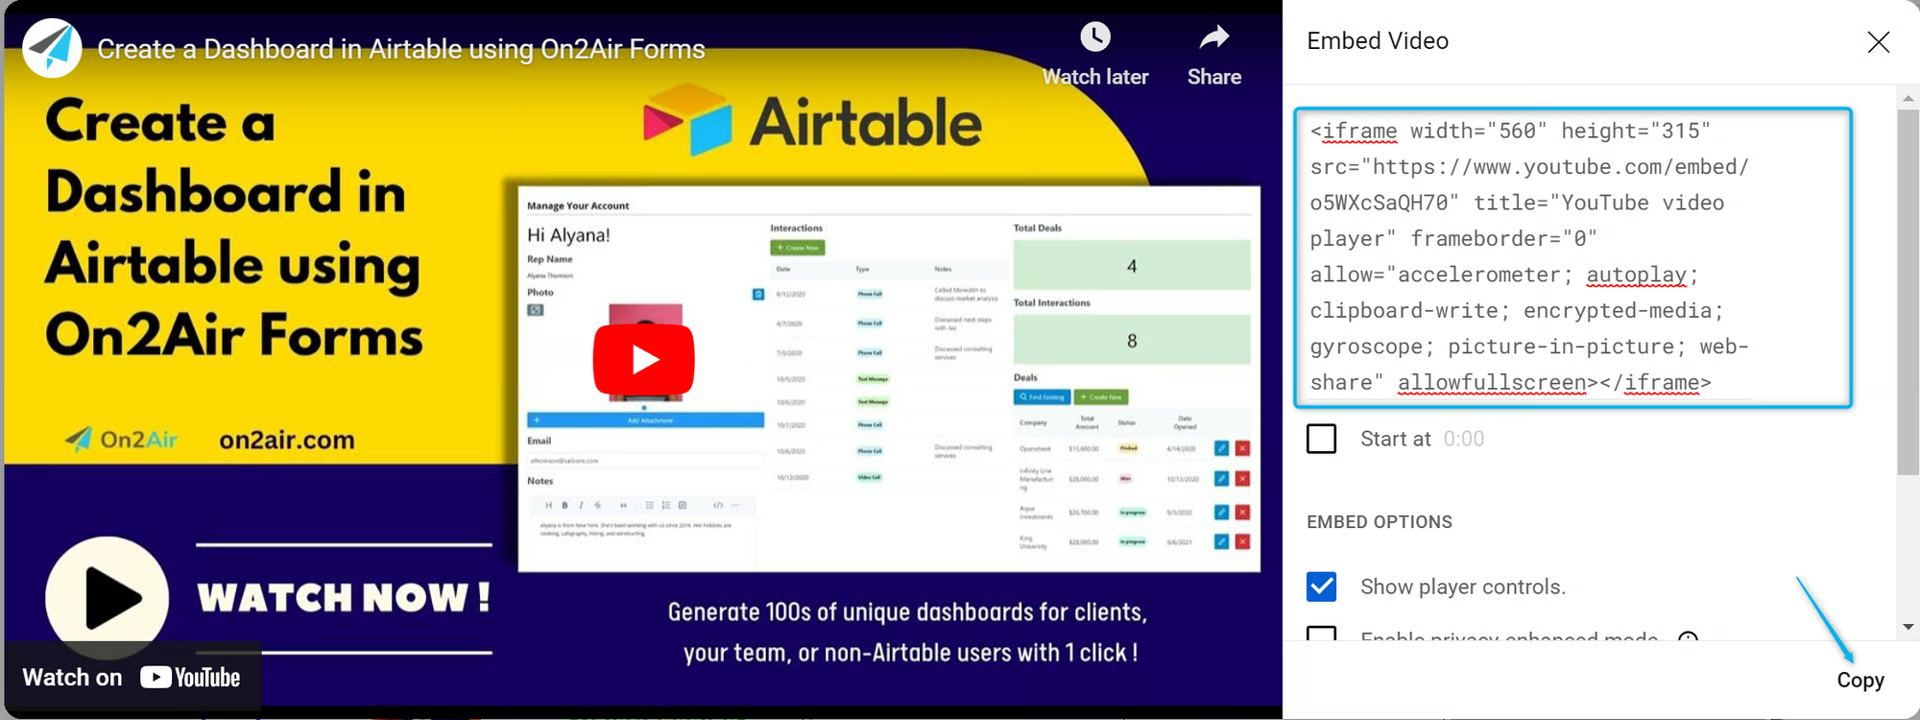
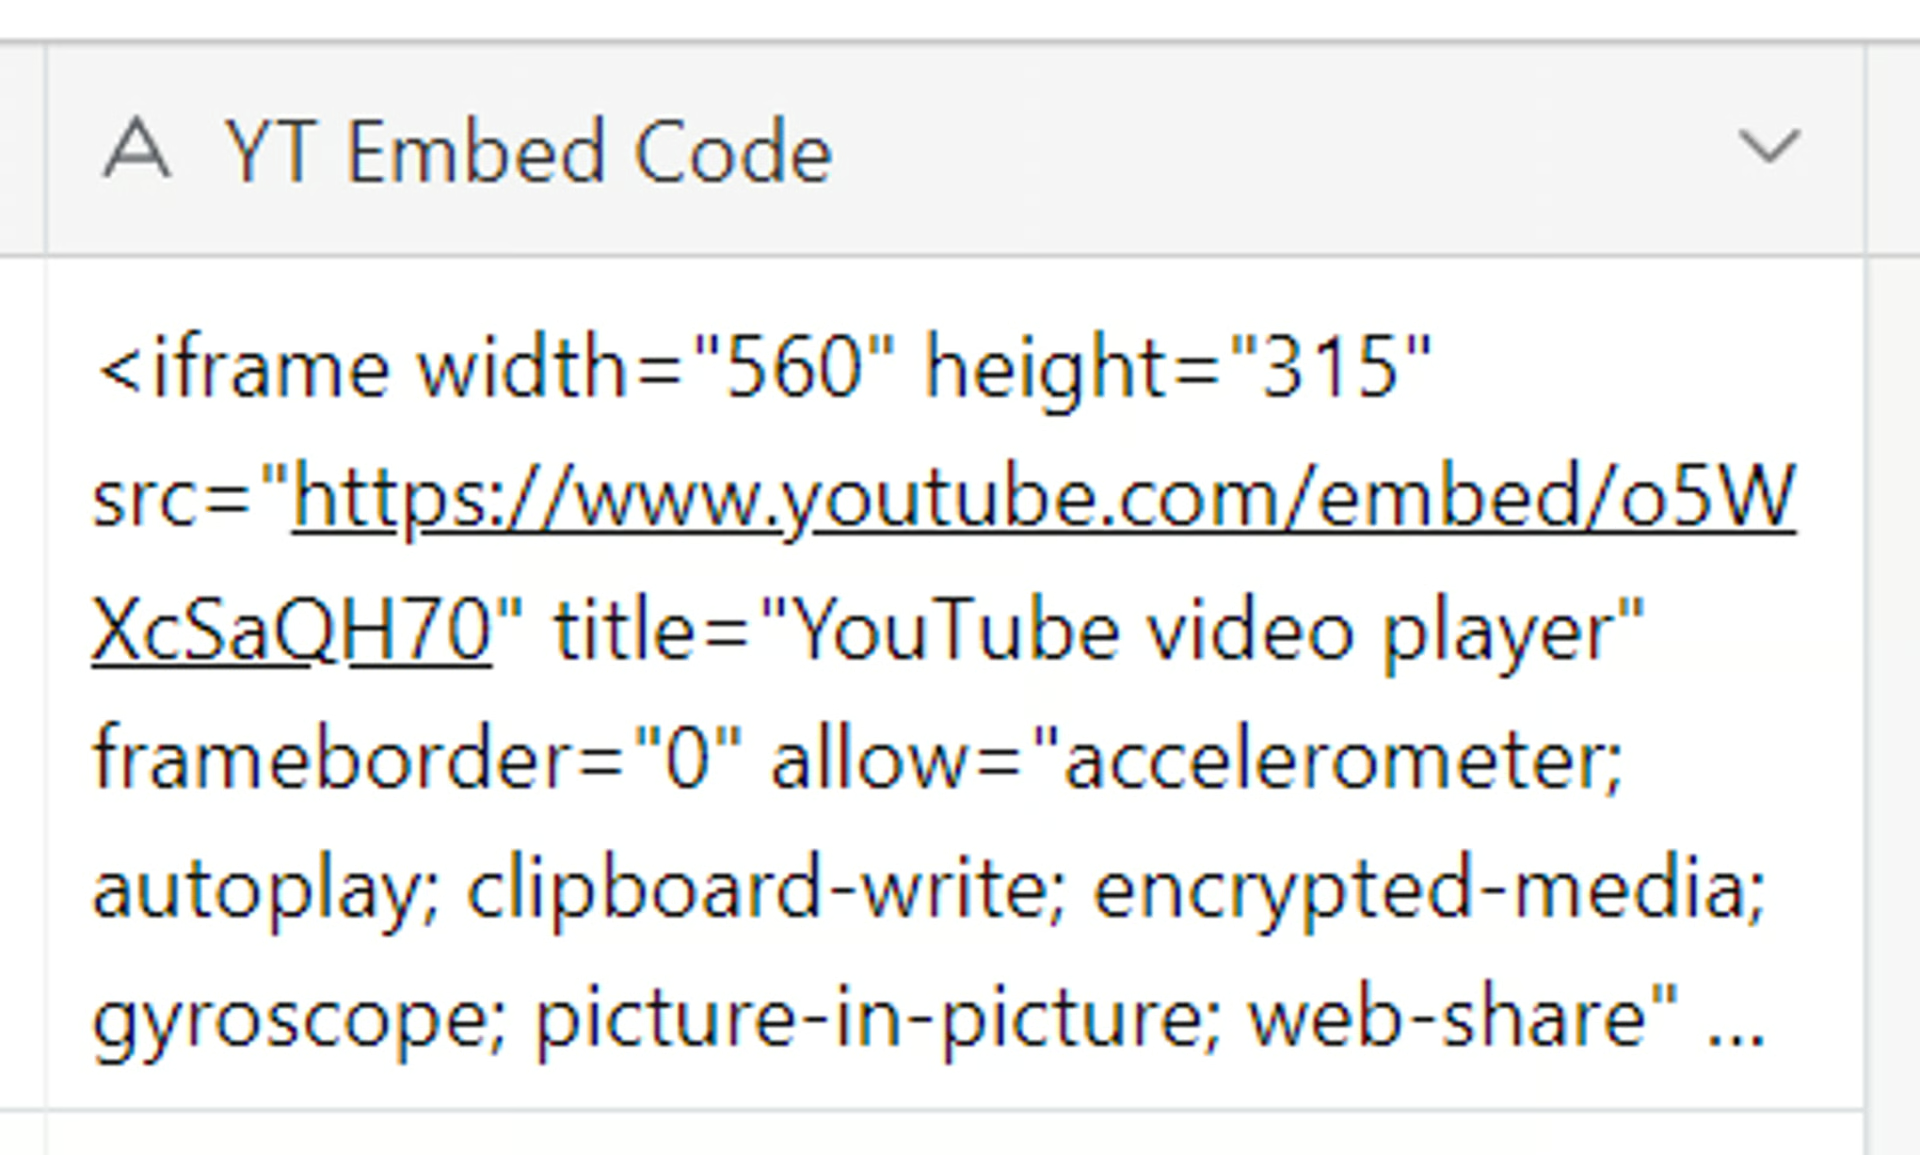
- Paste the Embed code into a Text field in your Airtable table
47d3a1bed3bb4e8283bb14747ff4f6fd
-
Add the Airtable field onto your form and hide the field
-
Add the Embed field to your form and choose the Airtable field containing your embed code
Customizing the Embed
Section titled “Customizing the Embed”-
Add a message in the Empty Message field to display if there is no URL used for the Embed
-
To leave it blank, use your spacebar to add multiple spaces to the Empty Message field
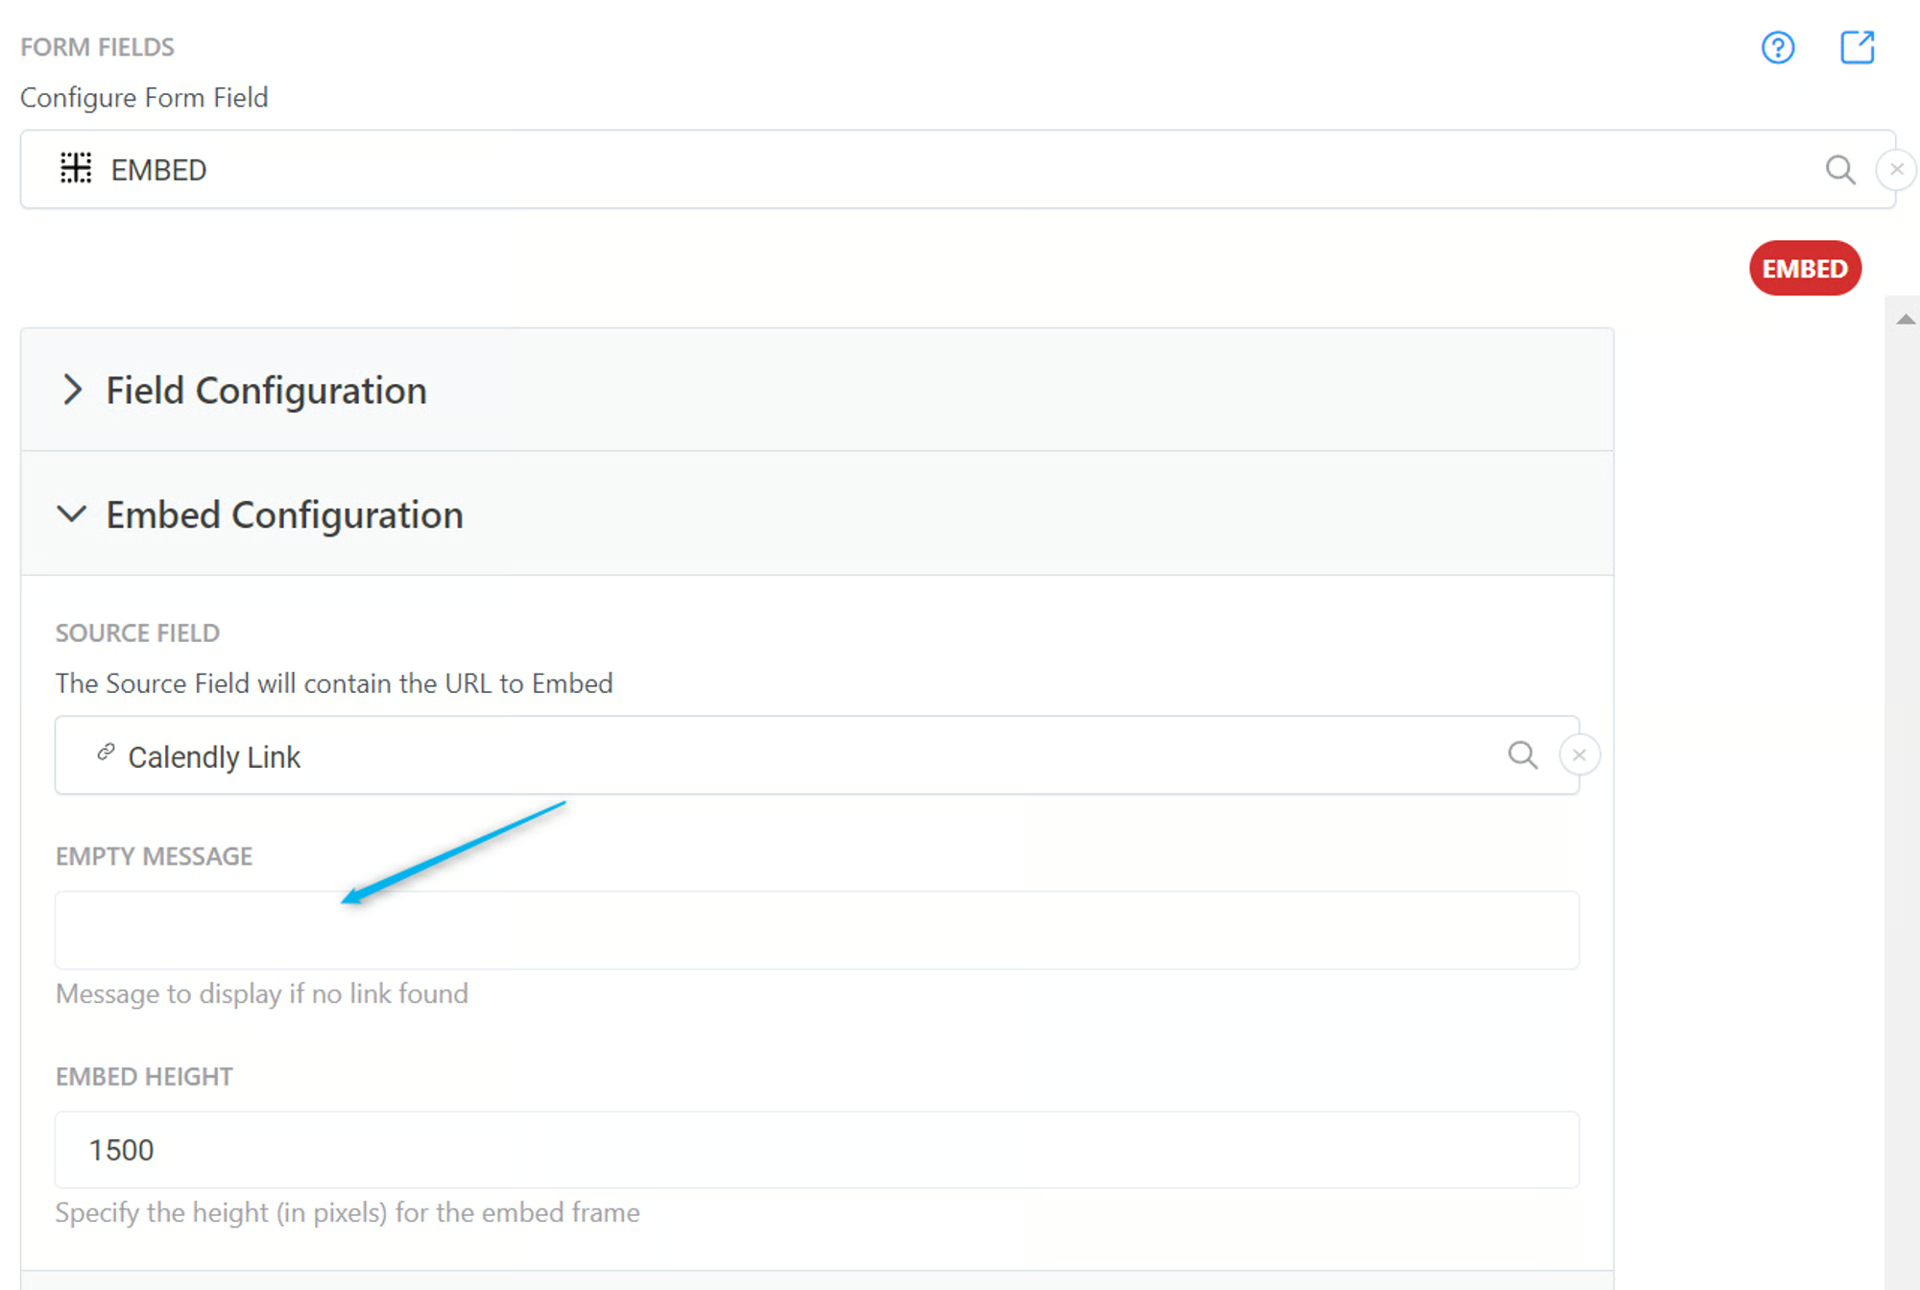
- To change the height of the Embed container frame, add the Embed Height in pixels
- Now when you view an Airtable record that has a URL in your URL field, you can see the embedded content on the form
Extra Options (Advanced)
Section titled “Extra Options (Advanced)”None available
Danger Zone
Section titled “Danger Zone”- Delete your field from the form
- Click Remove
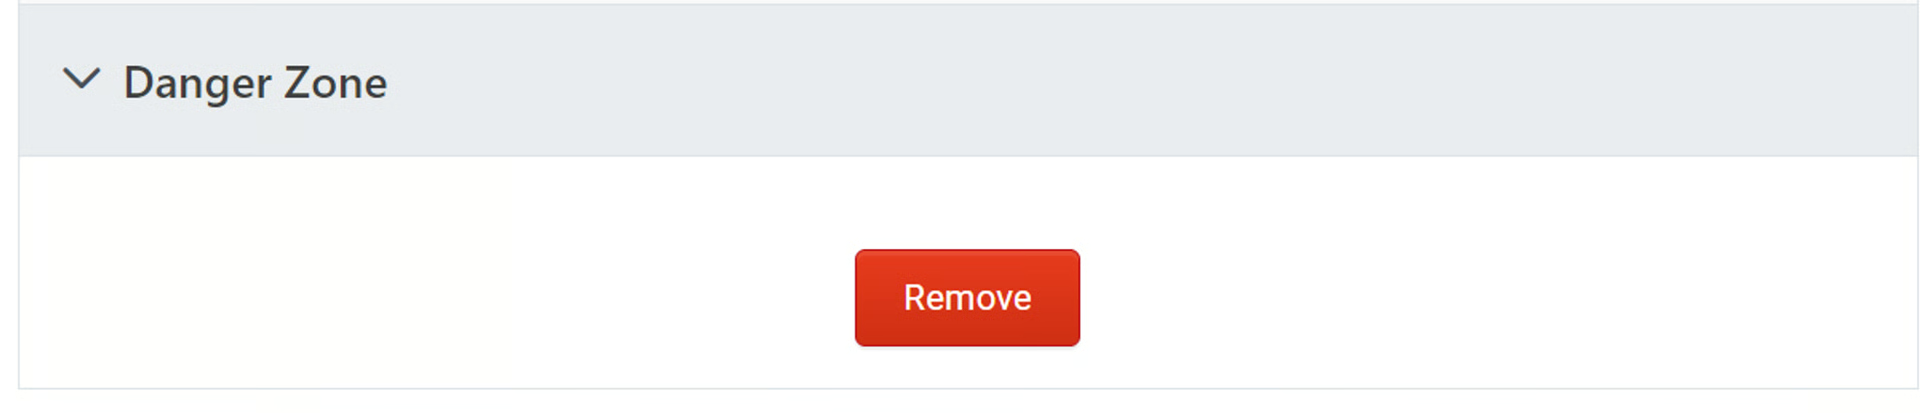
- Click Yes, I want to delete this field from the form