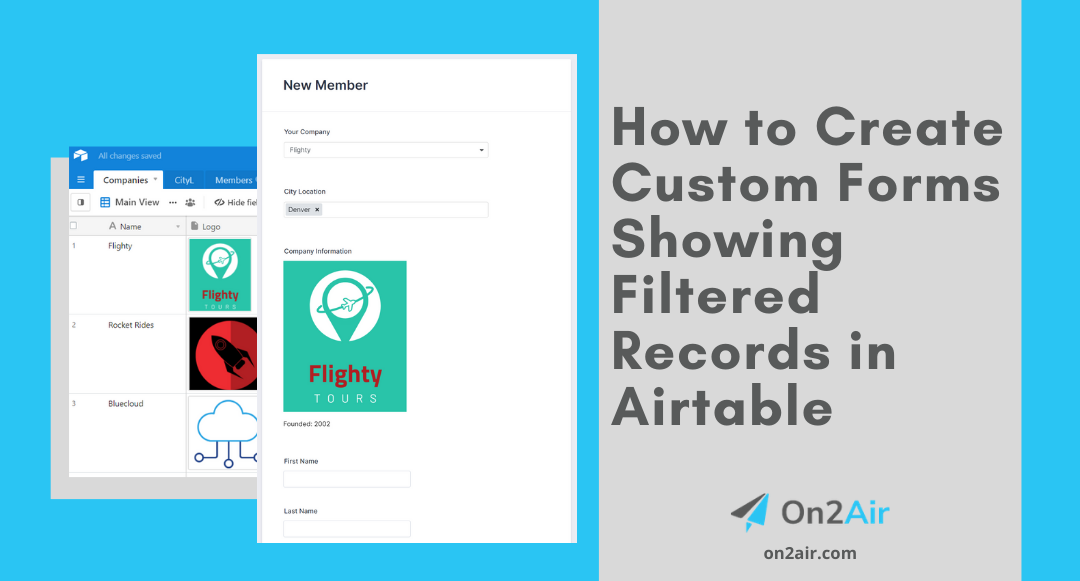
How to Display Data From Your Airtable Records on Your Forms
If you’re using forms in Airtable, there are many times you probably want to filter the records shown in your form fields and also display images or other data. In this post, we’ll cover how you can filter your forms to show users specific info and then display data from your Airtable base.
Have you ever wanted to display information stored inside your Airtable records on an Airtable form?
You can with the On2Air Forms app!
If you’re using forms in Airtable, there are many times you probably want to display record data from your base. Then, you want to show only a specific and filtered sub-set of records.
For example:
- You have a table called Companies with 150 companies. You only want to display the 70 “Active” companies as a dropdown field on your form.
- Now, the person completing the form can choose from the list of 70 Companies.
- Once the user chooses a Company, it then displays a list of Locations that are specific to that Company.
- You then to display the Company Logo and the year the Company was founded on the form – and you have it all stored in your Airtable record.

For example, your user chooses from a list of companies, then once they choose a company, the next field shows only the cities where the company has locations.
Instead of showing every single city in your Airtable base, you can filter it to show only certain cities.
Using forms connected with your Airtable bases is a simple way to capture information for all kinds of purposes, such as your sales process or project management. Even better are forms you can customize and filter to display data from your base and show only what you need the form user to see.
In this post, we’ll cover how you can display data from your Airtable base and use custom filters to display specific data in your forms using On2Air: Forms.
Table of Contents
Creating a customized form connected to Airtable
Send the form information back to Airtable
Extra features you can add to your form
Creating a customized form connected to Airtable
In On2Air: Forms, you can create filters for your form fields to display only what’s important to you and for your user.
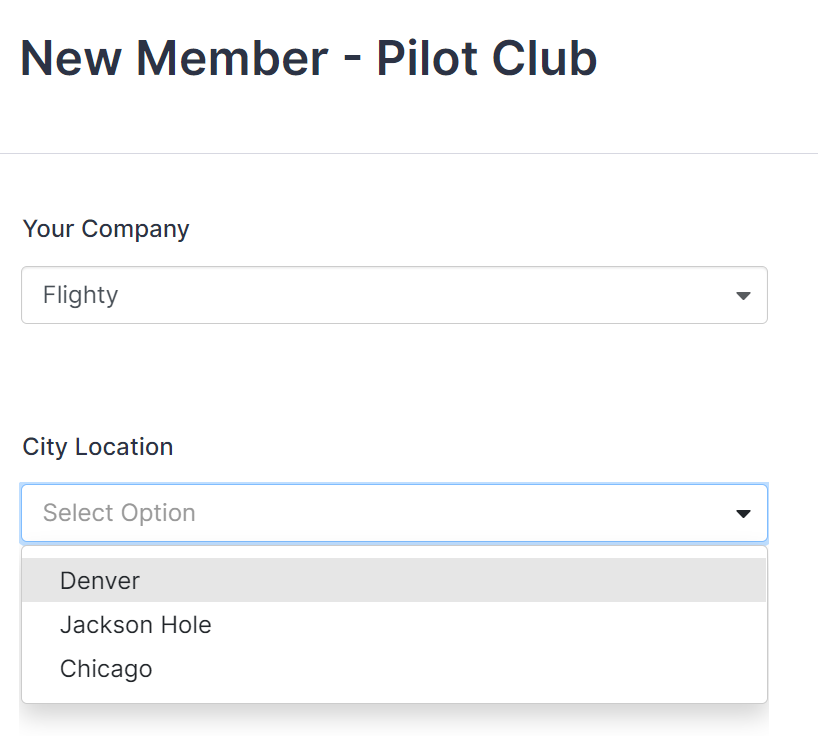
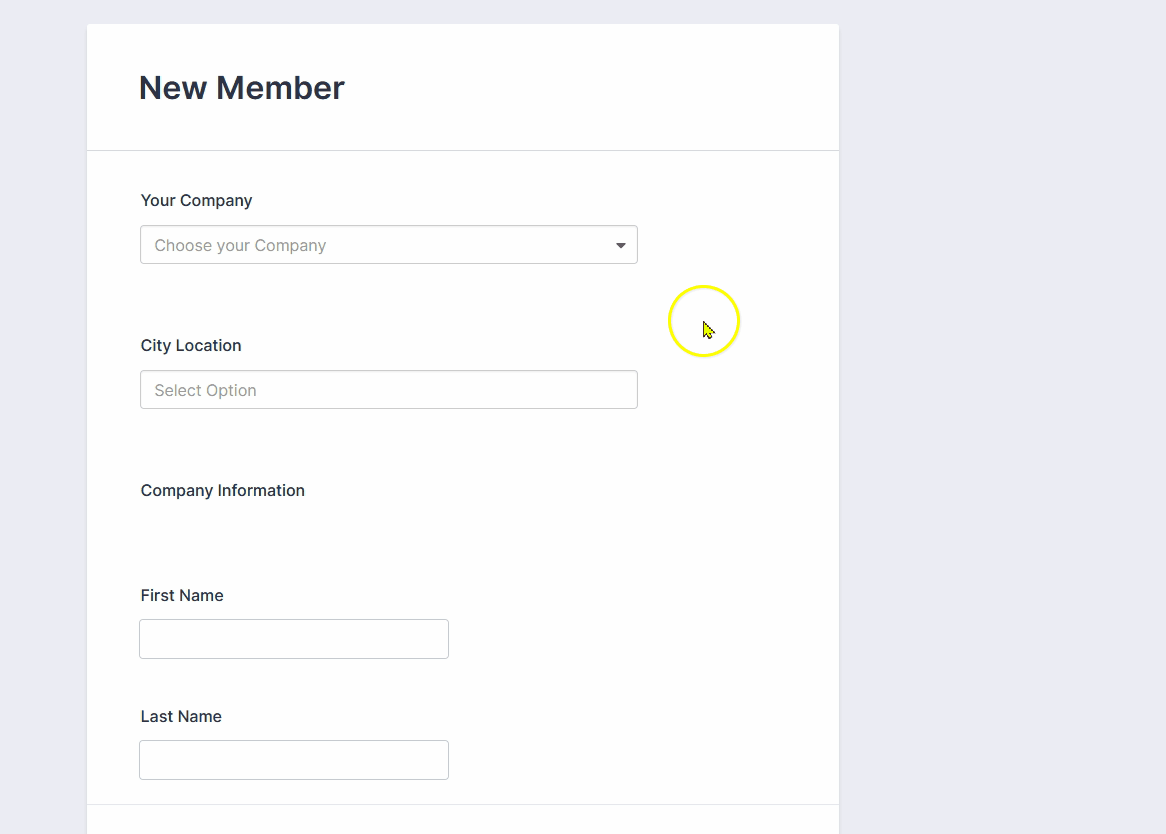
We’re going to use a Pilot Club Members Airtable base to sign up new members to the club.
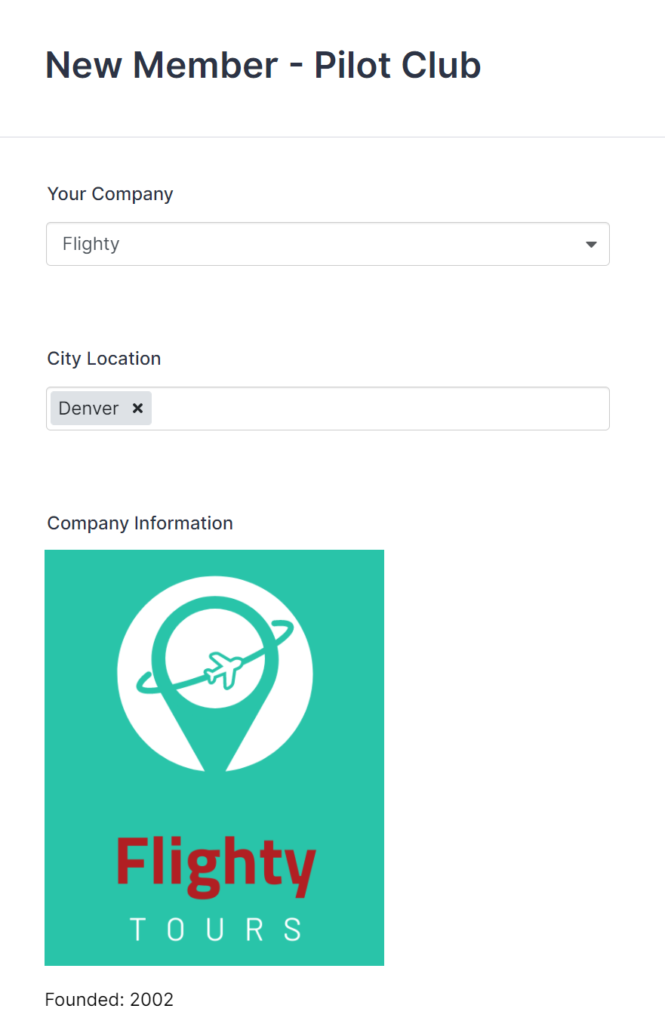
When a new club member signs up, they can select their employer from the list of companies. Once they choose a company, the city form field will display only the cities related to that company.
Additionally, when the Company is chosen, the Company logo and year founded will be displayed on the form. The logo and year are stored in the Company Airtable record.
Before creating the form
1. First, connect your Airtable account to On2Air and your JotForm account to On2Air.
2. Then, copy this base to use as your template.
If you want to create your own base using the information in the toggle below.
Creating the form
Create a Form in JotForm
Add the Company field
- In JotForm, create a new form
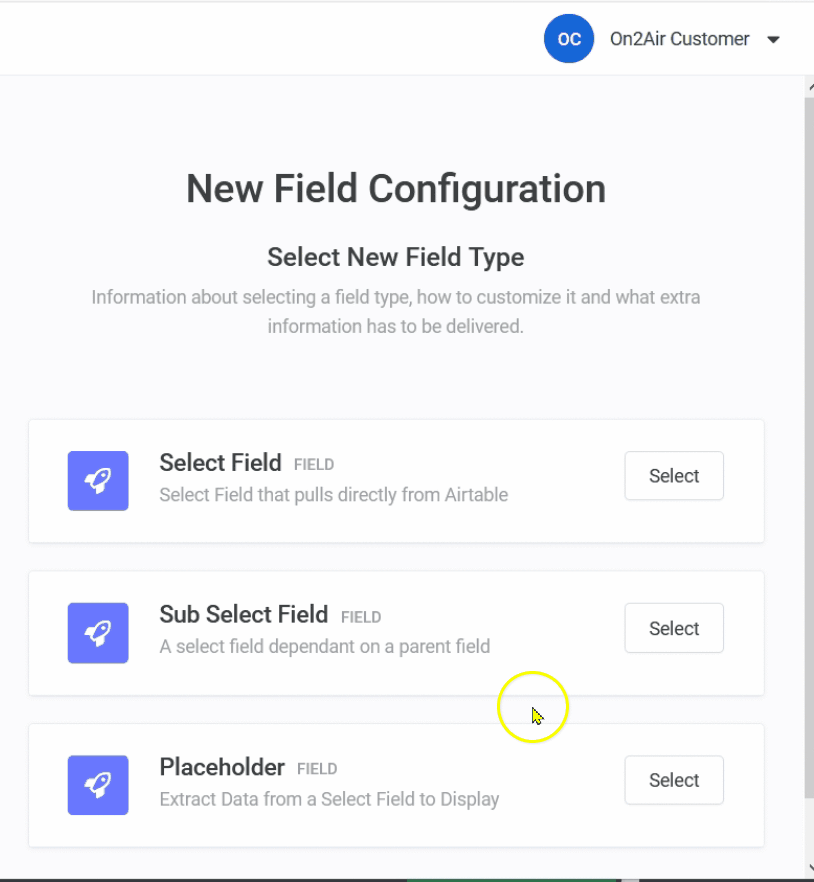
- Add the On2Air Widget
- In the first widget, choose the Select Field
- Choose your Member Airtable base, the Company table, and the Company Name field
- In Display Configuration, choose the Company Name field
- In the Value fields, choose Company Name, City, and Logo/Founded HTML
- Click Update Field Details
Add the City field
- For the next field, add another On2Air Widget
- Choose the Sub-Select Field
- Choose your Member Airtable base and the City table
- In Search Configuration, choose Search Fields and City Name as the Search Field
- Choose Exact Match as the Matching Style
- In Display Configuration, choose the City Name as the Display Field
- In the Value fields, choose the Companies Record Link, City, First Name, Last Name, and Email
- In Parent Configuration –
- Choose Select Field as the Parent Source
- Choose the Company Select Field you just created as the Parent Source
- Choose Company Name as the Parent Source Field
- In Parent Link Mode
-
-
- Choose Field Match as the link mode
- Choose CompanyRollup as the Child Search Field
- Choose Contains as the Parent Matching Style
-
- Click Update Field Details
-
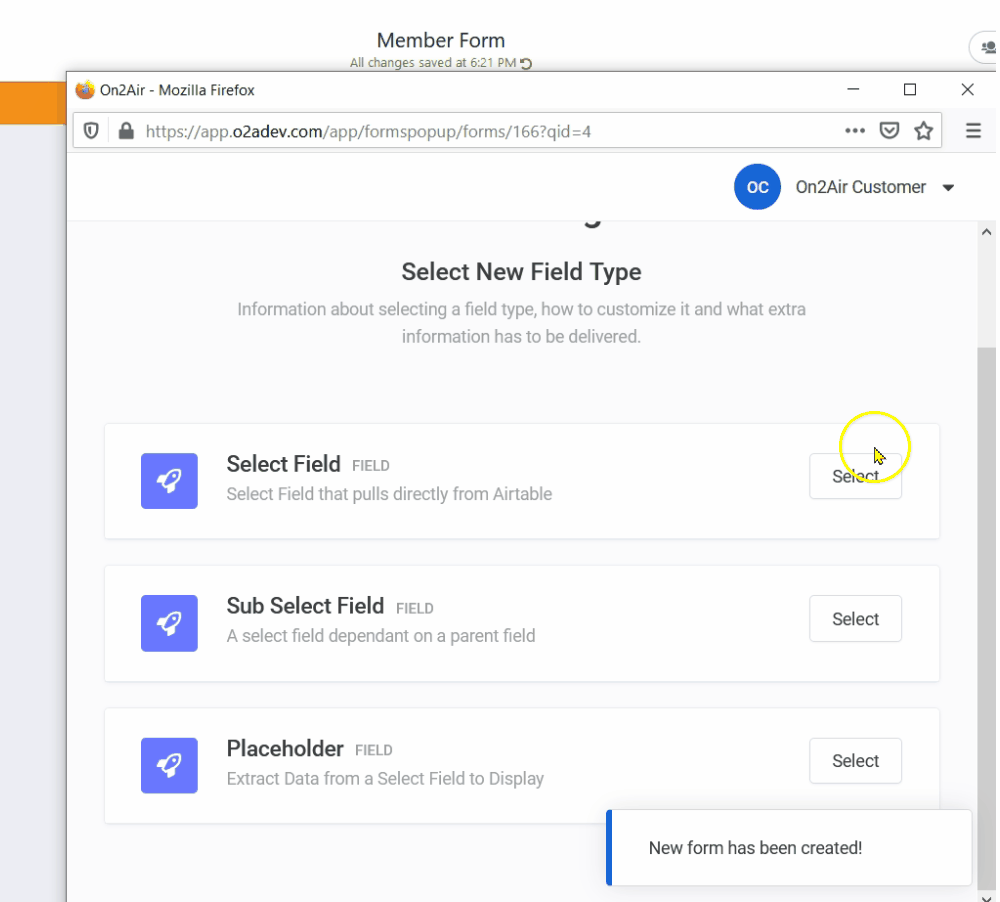
Add the Logo field
- For the next field, add another On2Air Widget
- Choose the Placeholder Field
- In the Input Field, choose the Company Select Field
- Choose Logo HTML as the Field Name
- Click Update Field Details
![]()
Send the form information back to Airtable
- Create 2 Short Text fields in JotForm – 1 for First Name and 1 for Last Name
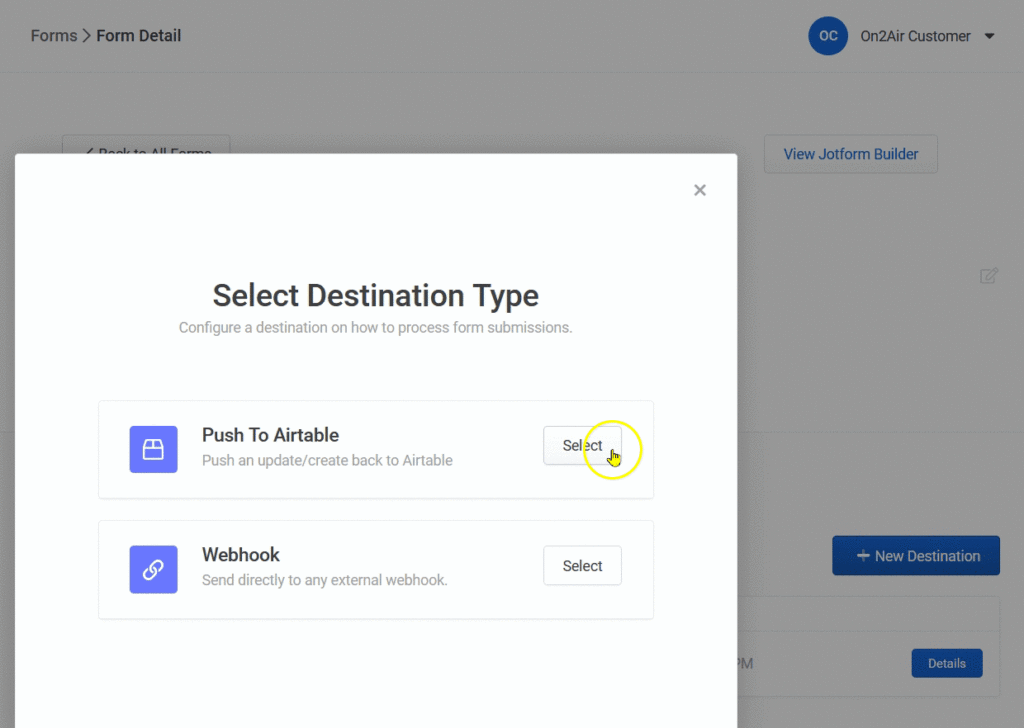
- In On2Air in your new form, click New Destination
- Select Push to Airtable
- Click Update Details
- Click New in the Destination field
- Choose the Member base and Member table
- Select Create as the Destination Mode and click Done
- Next, click Sync in Field Links and all your JotForm fields will be displayed
- In Field Links, match each field to the corresponding field in Airtable
- To match the Company Name – Select Field correctly, add a Field Key with the name of the Company name field from the Companies table – “Company Name” – it must match the name of the field exactly
- Enable your Destination and your Form
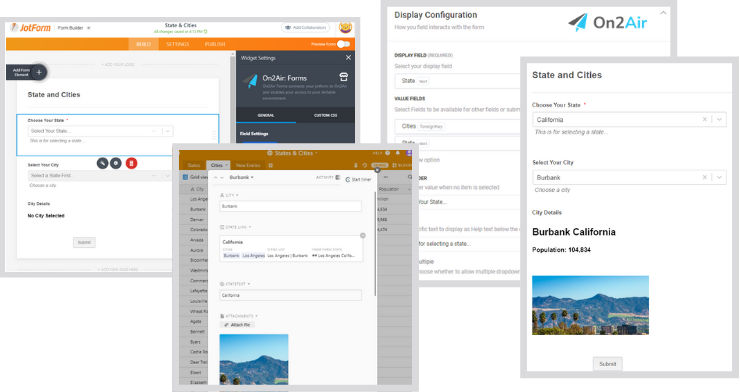
Final result
Let’s check out the final result.
When you view the form, the Company is displayed as a dropdown option. When the Company is chosen, the Logo and Year Founded is displayed.
At the same time, when the Company is chosen, the Cities related to the Company are populated in the Cities field.
When the First Name and Last Name are entered, the entire form information is sent back into the Airtable base.
Extra features you can add to your form
Now that you’ve created the form to display the company cities and the logo, you can customize it even further.
- Create and send URL links to specific users or individuals at specific companies with their information prefilled
- Send the form information to Zapier to use with any of your other apps
- Create a webhook to send the data to any other service
- Update existing records in your base
- Filter a select view of companies to be displayed in the dropdown
- Add hidden fields to capture data needed internally and send it back to your base
Better forms in Airtable
That’s it!
Your forms can be customized to fit any need. Whether you need to prefill data in your form, update records in your base, show only a specific set of records, display custom images, or output your own custom HTML and markdown, On2Air: Forms can help you with the most advanced forms.
You can even combine them with specific automations.
As you’re using Airtable in your business, start a trial with On2Air, our suite of apps for Airtable, to make it even better. On2Air allows you to create advanced forms, automatically backup your bases, and connect your bases to other bases or any other software.
Even More Dynamic and Advanced Forms with On2Air: Forms
Forms in Airtable make it easy to capture information directly into your base. However, the forms in Airtable have multiple limitations.
On2Air: Forms allows you to create advanced forms. With On2Air: Forms for Airtable, you can prefill form data, add conditional logic and conditional lookups, and much more. Create dynamic, customized forms to fit your specific business needs.
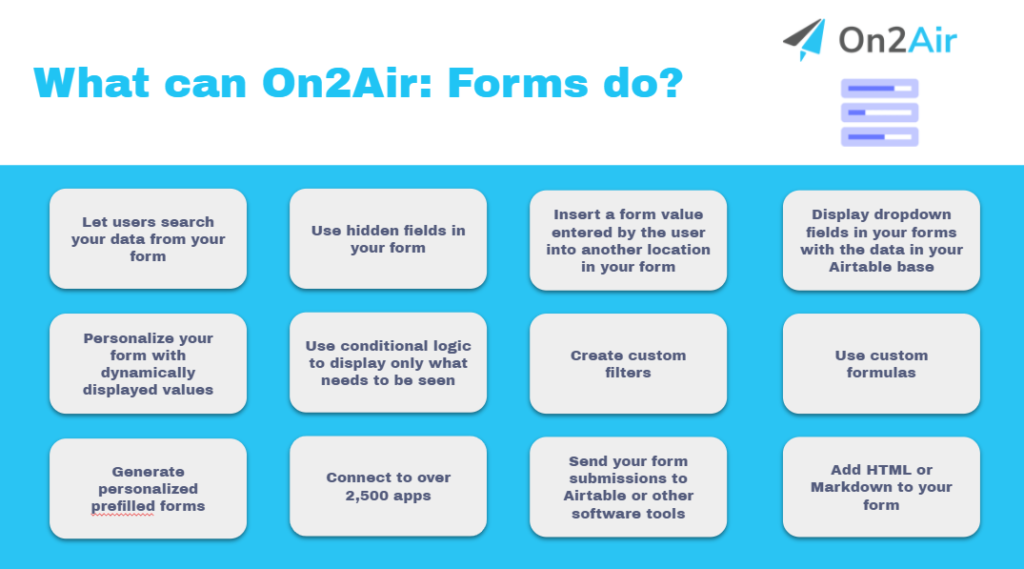
What can On2Air: Forms do?
- Let users search your data from your form
- Use hidden fields in your form
- Personalize your form with dynamically displayed values
- Generate personalized prefilled forms
- Use conditional logic to display only what needs to be seen
- Connect to over 2,500 apps
- Insert a form value entered by the user into another location in your form
- Create custom filters
- Send your form submissions to Airtable and other software tools
Current Limitations in Airtable Forms
- Conditional logic is very limited
✅ On2Air: Forms is able to incorporate a variety of conditional logic options
- Can’t use custom Formulas
✅ On2Air: Forms allows you to customize your form even further with custom formulas
- No app integrations with other apps you use
✅ On2Air: Forms has integrations with Airtable, Zapier, JotForm, and any other service using a webhook
- Can’t use information added by the user into other areas of the form
✅ On2Air: Forms can take user information added into a field and use it in another location on the form
- Limited customization options for the look and style of your form
✅ On2Air: Forms allows you to use HTML and Markdown. You can also use a variety of options available in JotForm.
- Unable to personalize forms to display only what is needed per user or a specific set of users
✅ On2Air: Forms allows you to create specific URLs (URL parameters) for any audience
- Unable to display fields in multiple ways
✅ On2Air: Forms allows you to display your forms as dropdowns or lists with checkboxes, both visually appealing on desktop and mobile
- Lacks multiple advanced integrations
✅ On2Air is a suite of multiple apps to make your business information in Airtable even better
On2Air: Forms allows you to create and configure dynamic forms using your Airtable data. Enhance your Airtable forms with more options, such as prefilled data, custom search, placeholders, hidden fields, read-only fields, display order sorting, default values, and much more.
On2Air: Forms Is Part of the On2Air App Toolkit
You not only get the advanced features of On2Air: Forms, you get an additional 6 apps in the On2Air toolkit to use with your Airtable bases!