How to Automatically Add a Set of Tasks to Each New Project Using Airtable Automations
With Airtable Automations, you can create an automation to add a checklist set of tasks every time you create a new project. This automation will save you time and monotonous manual data entry.
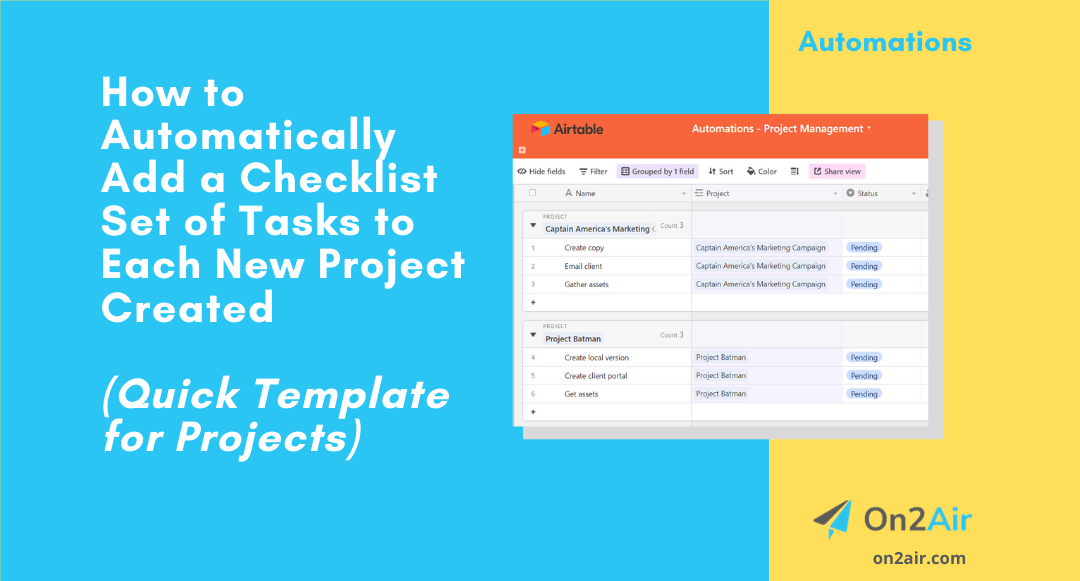
Many times, when starting projects, they require the same set of tasks to kick off the project. This can be for websites, development, digital marketing, or any type of services consulting and implementation.
With Airtable Automations, you can create an automation to add a set of tasks every time you create a new project. This automation will save you time and monotonous manual data entry.
__________________________________________________________________
You can now do this tutorial with Airtable Record Templates instead! Learn more about how to use Record Templates.
Want to protect and backup your Airtable data automatically?
Check out On2Air Backups, automated backups of Airtable to Google Drive, Dropbox, or Box.
__________________________________________________________________
What is an automation in Airtable?
An automation is a series of actions that happen automatically when certain criteria are met. This can be anything from creating new records, updating fields, and emailing someone, to sending information to another software app and then bringing the updated information back.
In this article
This article will show you how to set up an automation in Airtable that will add multiple task records to a Tasks table each time you create a new project record in your Projects table.
This Automation includes:
Trigger – When a record enters a view
Action – Create record
Before creating this automation, you need:
-
At least 2 tables in your base – Projects and Tasks
-
A checkbox field in your Project table labeled ‘Add Tasks’
-
A view in Projects called ‘Automated Tasks’ filtered Where ‘Add Tasks’ is checked ✅****– This view will contain the records that will initiate the automation. This will allow us to complete multiple fields in the project before the automation starts
To create your Automation
Set up the Trigger
-
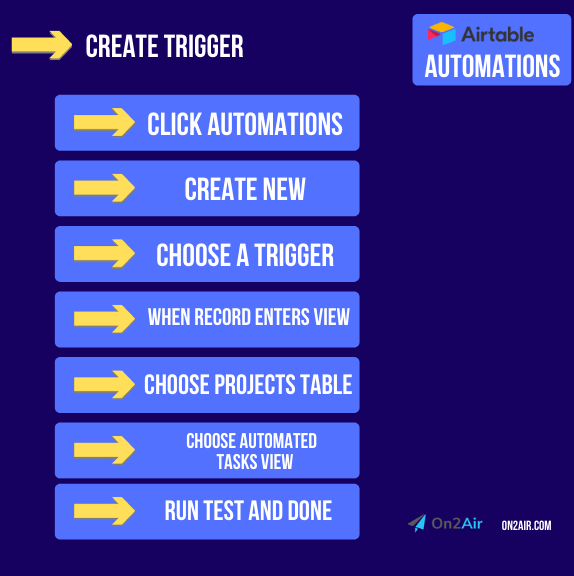
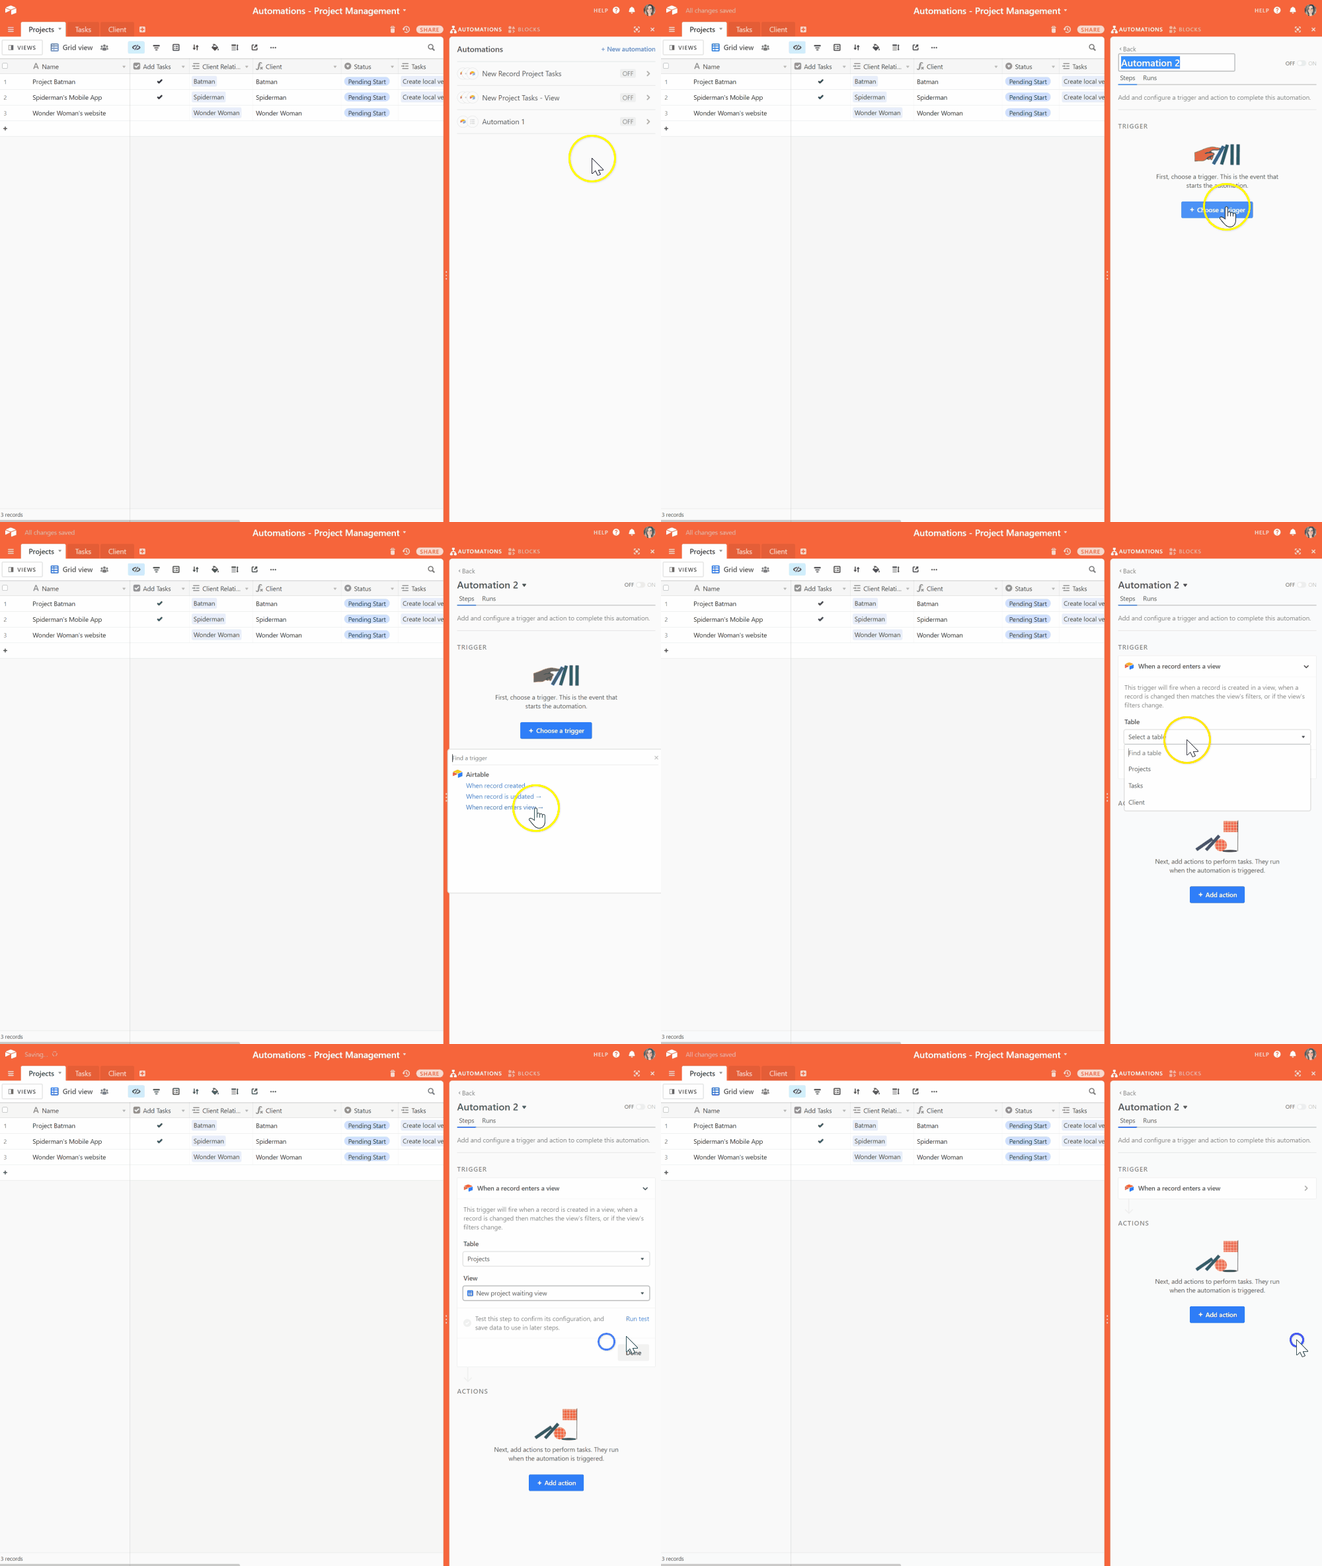
Click Automations
-
Click Create new (or +New automation if you already have existing automations)
-
Click Choose a trigger
-
Click When record enters view
-
Choose your Projects table
-
Choose your ‘Automated Tasks’ view
-
Click Run test and verify test is successful
-
Click Done
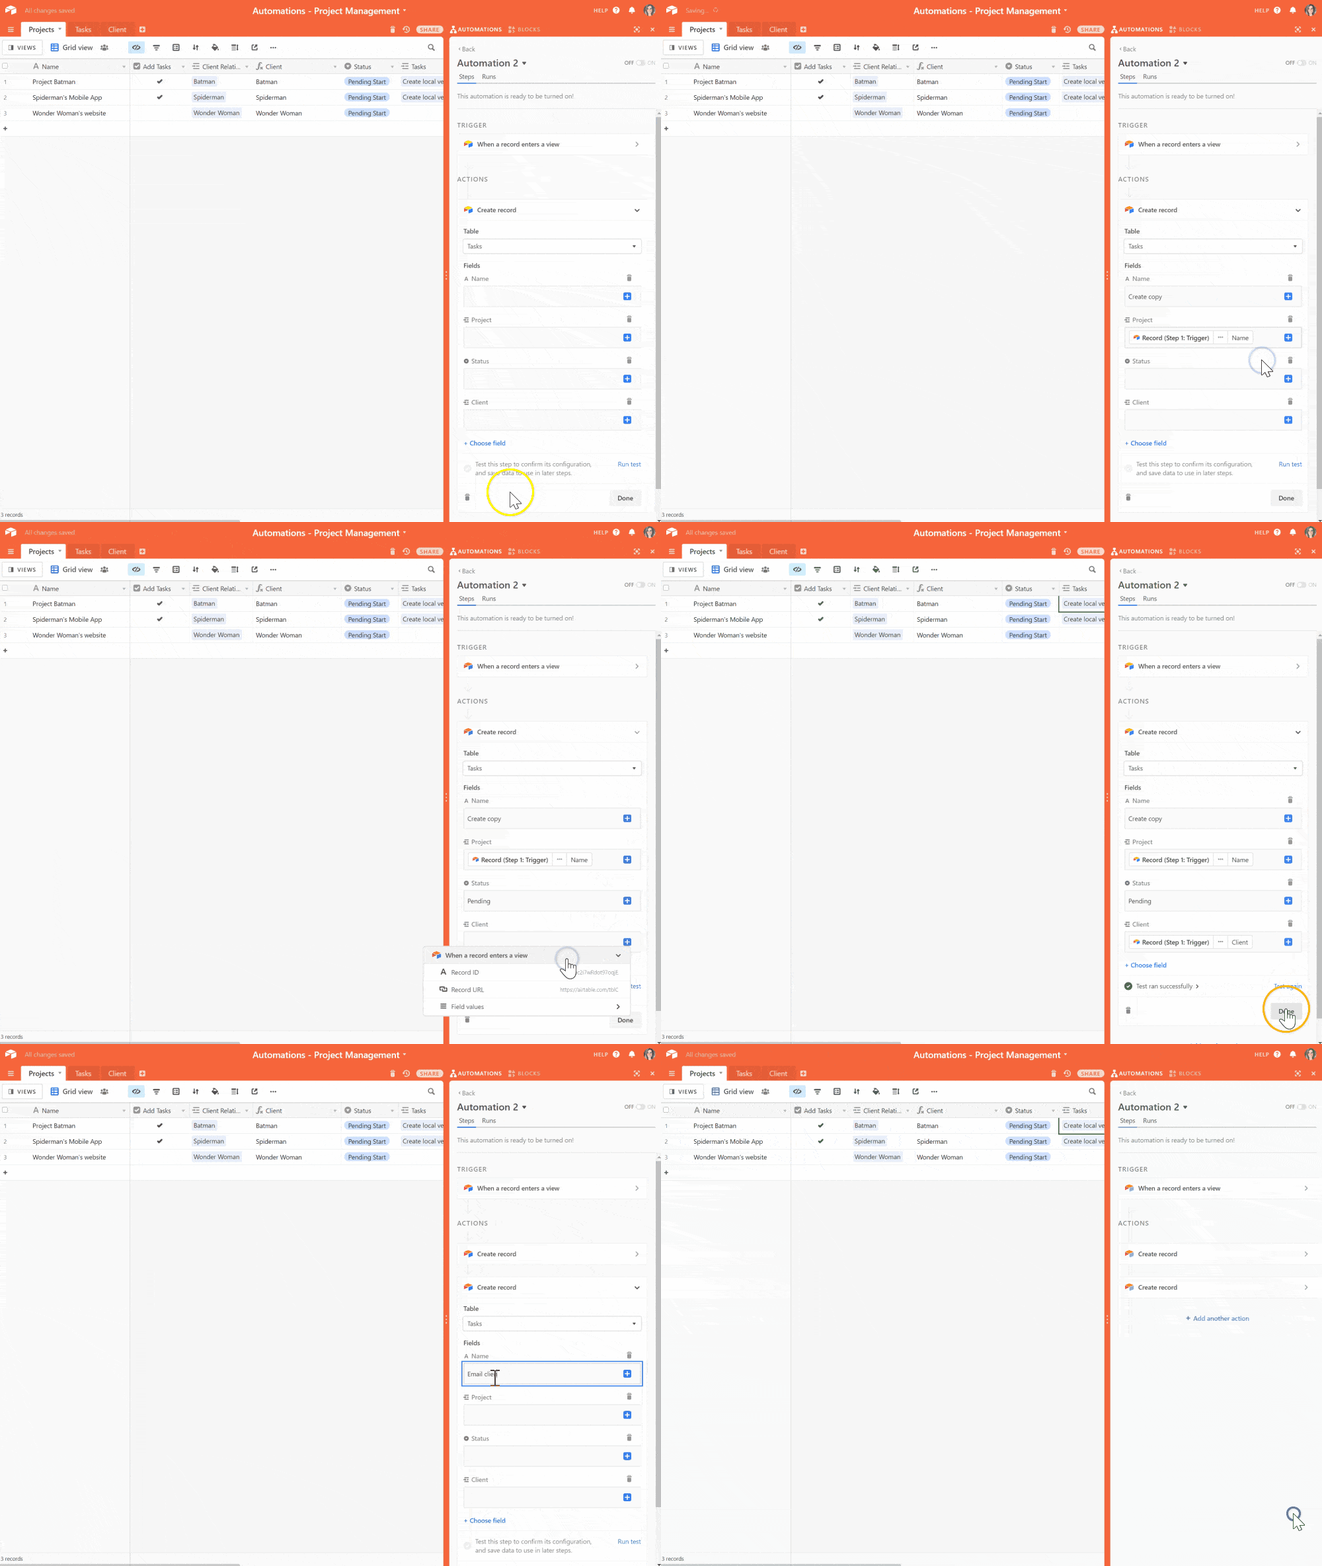
Next, set up the Action
-
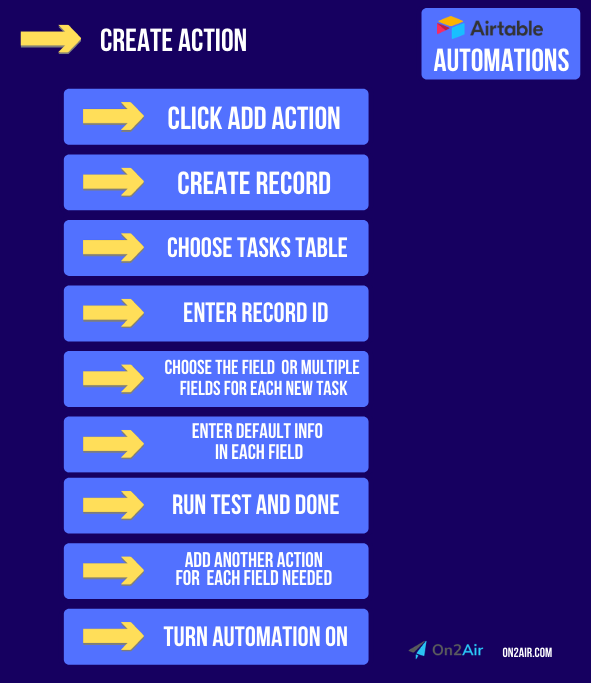
Click Add Action
-
Click Create Record
-
Choose Tasks Table
-
Choose the Field you want to be completed each time a new task record is added
This includes the Task name and could also include the Status, Collaborator, Project name, and Client name
In this example, I added the Client Formula Field and the Project Name Field and pulled the value from the Project view When a record enters a view (see screen capture below) -
Add your default information in the Field
-
Click Run test and verify test is successful
-
Click Done
-
Click Add another action
-
Continue adding each Field you want to be completed each time a new task record is added
This could be the Status, Collaborator, Project name, and Client name -
Add your default information in each Field
-
After each Task is added, click Done
Now, go try out your new automation!
-
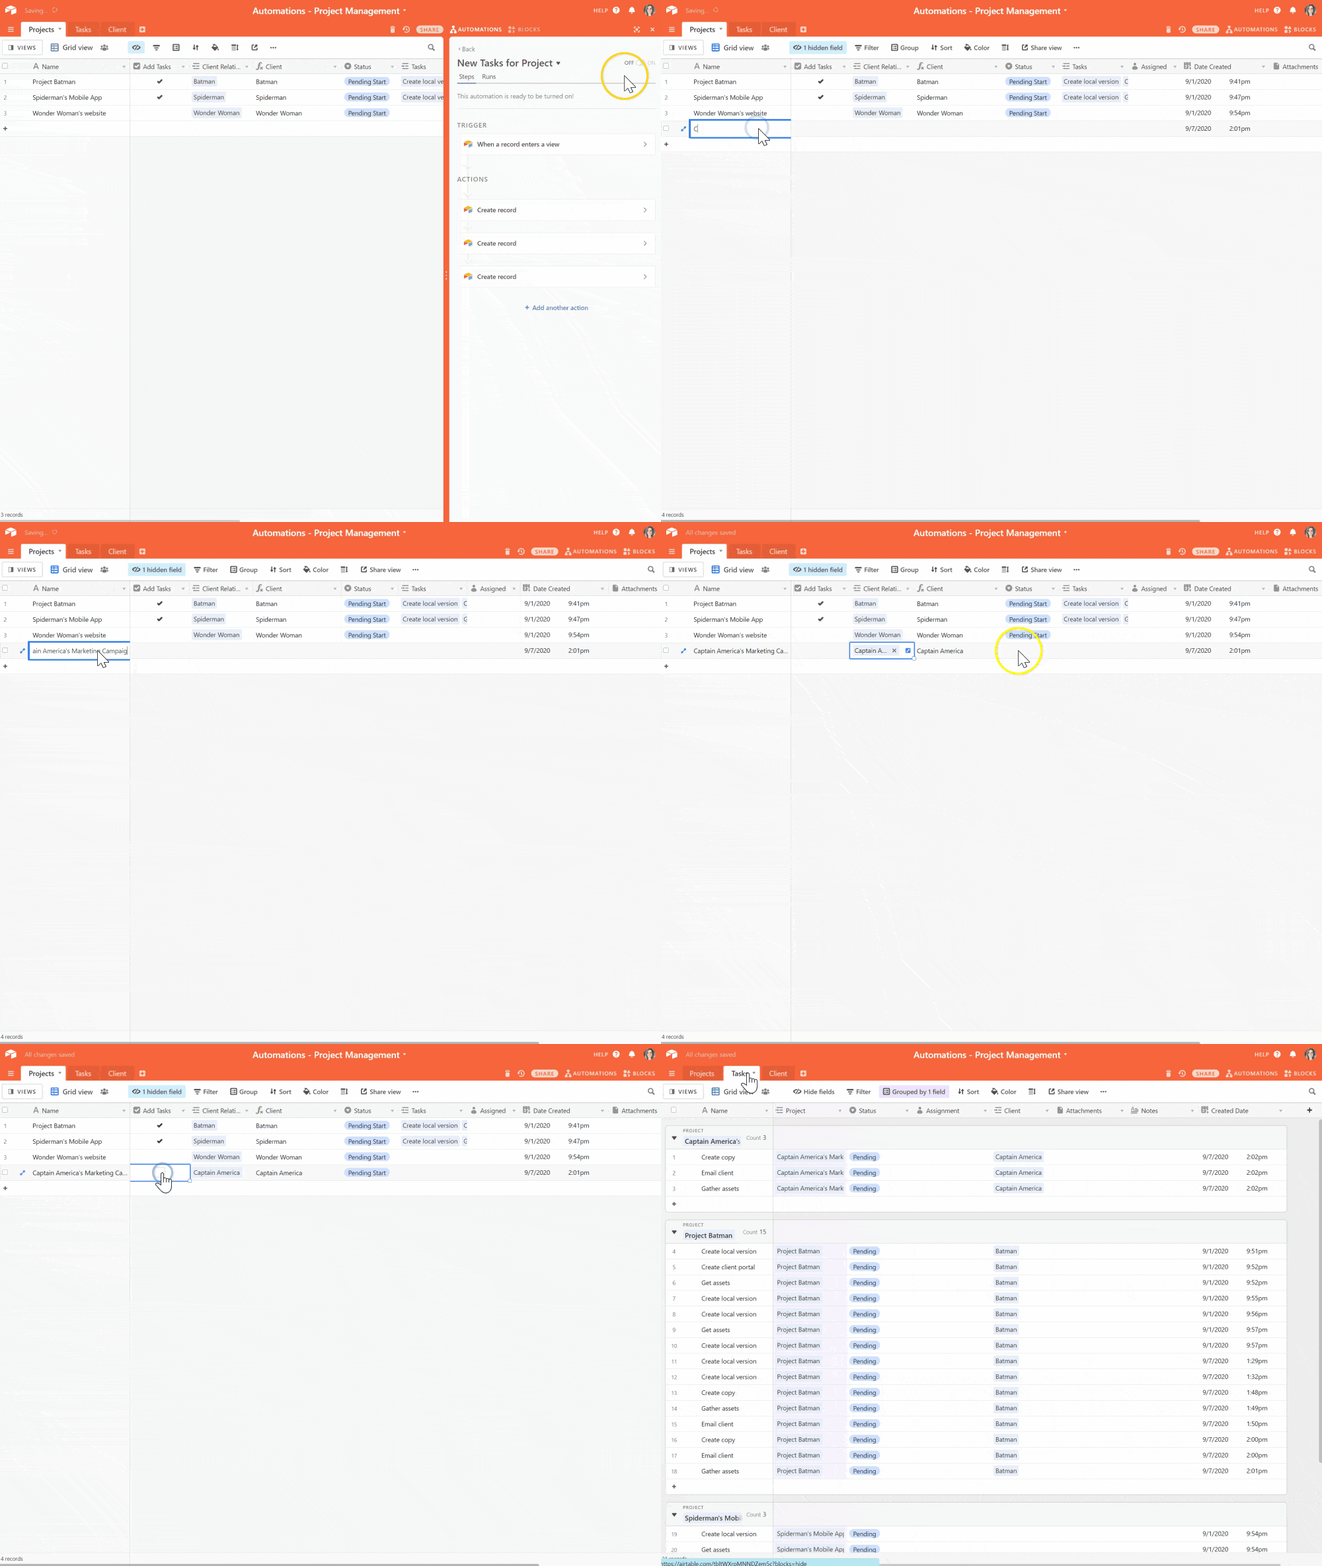
Add a new project in your Projects table and fill in any other relevant fields in your project record
-
Once you’ve completed all your fields, click the checkbox.This will add the Project to your new view and automatically add all the templated tasks into the Tasks table!
More Automation Examples
With Automations, you can make data entry and updates in your Airtable bases seamless.
Check out our list for more Airtable Automation examples.
Other Ways
You can use this Airtable automation to create a task list or a checklist for anything. It can be useful for a weekly or monthly recurring set of tasks.
Automations can be used for any type of business process. Whether it’s finances, client management, marketing, or sales, you can turn many of your typical tasks into automated workflows.
