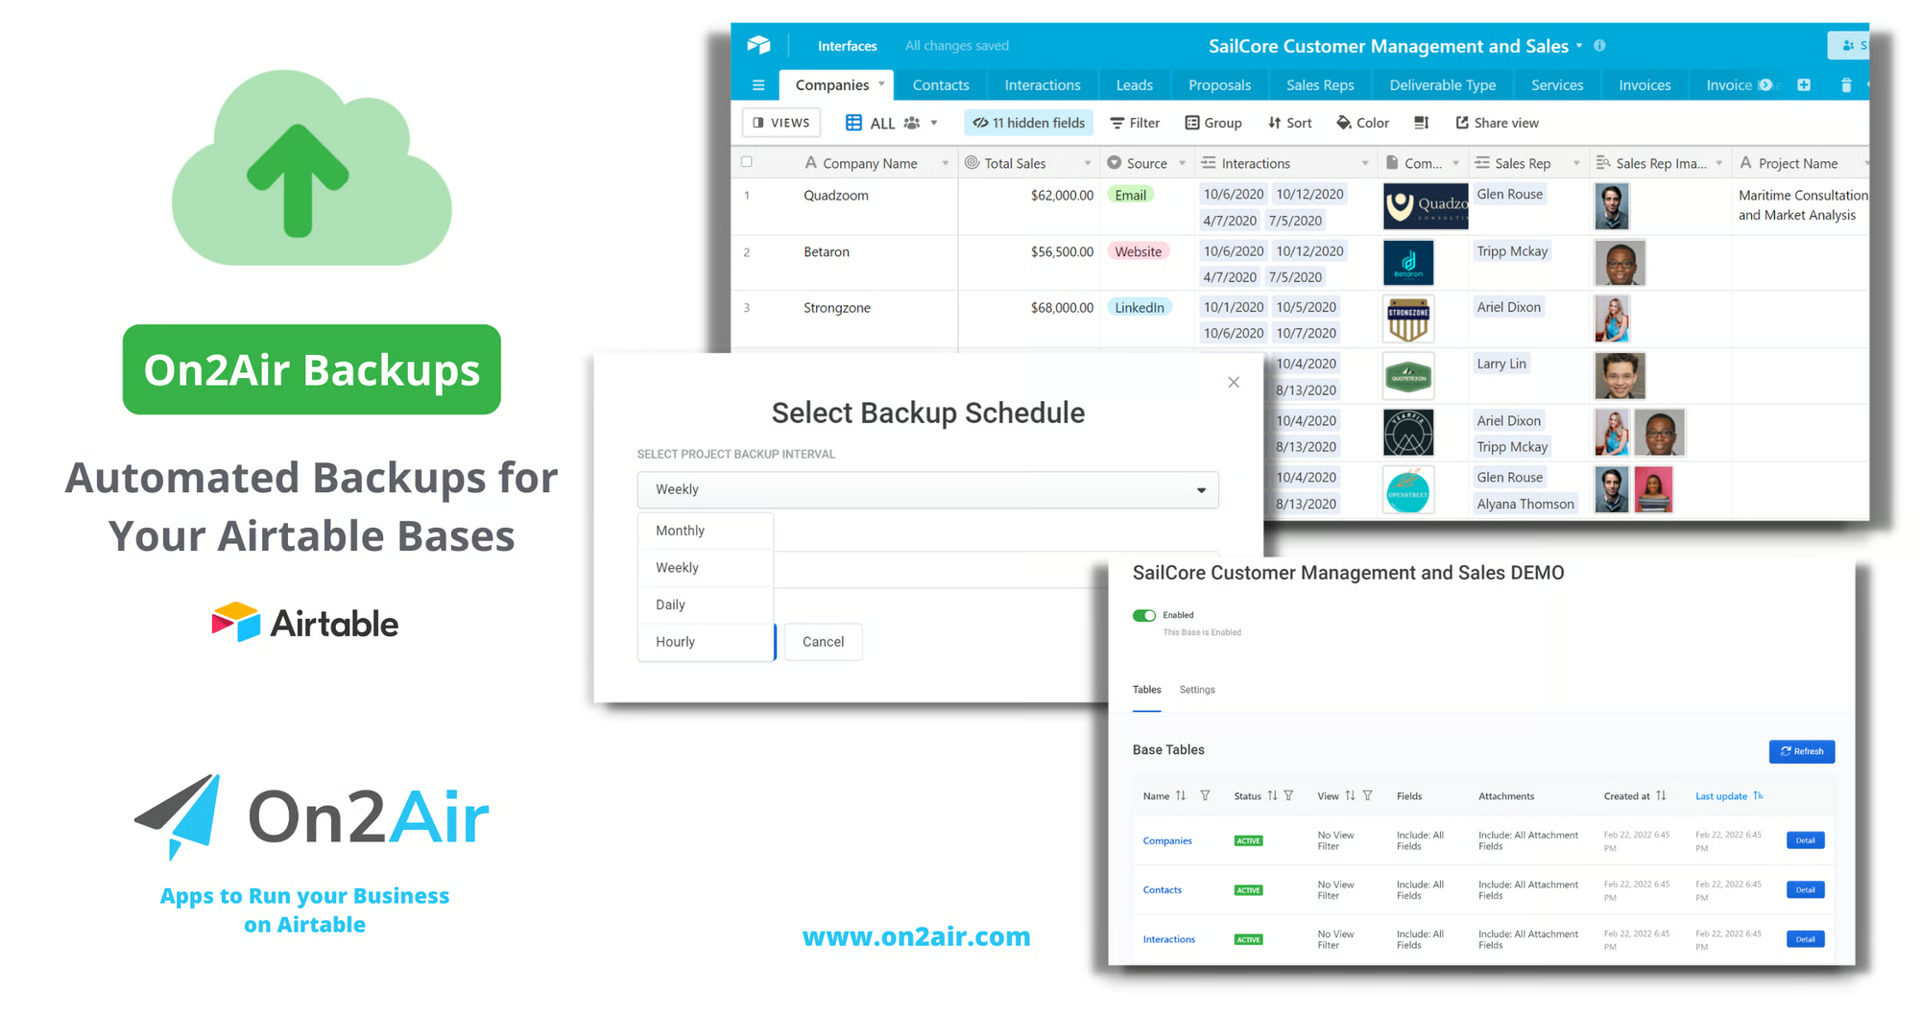
What to Do After You Upgrade (Set a Backup Schedule and Add Airtable Bases)
Once you’ve upgraded On2Air Backups, you need to set your automated schedule and, if available on your plan, add more Airtable bases.
 On2Air Help Center >
  On2Air Backups Start a free trial
In this tutorial
-
Upgrade and Choose Your Backup Schedule
-
Schedule Options
-
How to Set a Backup Schedule
-
Enable Your Backup
-
How to Back Up Multiple Airtable Bases to a Backup Project
Upgrade and Choose Your Backup Schedule
Section titled “Upgrade and Choose Your Backup Schedule”To enable an automated backup schedule and add more Airtable bases, upgrade to a plan****.

Once you’ve upgraded, you’ll need to set the Schedule and Reactivate the backup.
- Upgrade to a Backups Plan
Schedule Options
Section titled “Schedule Options”The schedule option depends on the plan you chose.
Monthly - available on all plans
- Choose a day of the month
Options are: * 1st day of month * Mid month (15th) * Last day of month
Weekly - available on Essentials, Pro, and Premium plans
- Choose any day of the week
Daily - available on Pro and Premium plans
- Choose a time of day
* Choose a specific hour of the day * Toggle Yes to Include Weekends (Optional)
Continuous - available on Premium plans
- This backup schedule runs continually. Each time a backup is completed, another one begins.
* Toggle Yes to Include Weekends (Optional)
How to Set a Backup Schedule
Section titled “How to Set a Backup Schedule”-
Once you’ve upgraded, you need to set your new automated Schedule
-
Upgrade to a Backups Plan
-
In your Backups Project, click Settings, then click Schedule

- Choose your Backup Project Interval and Interval Value
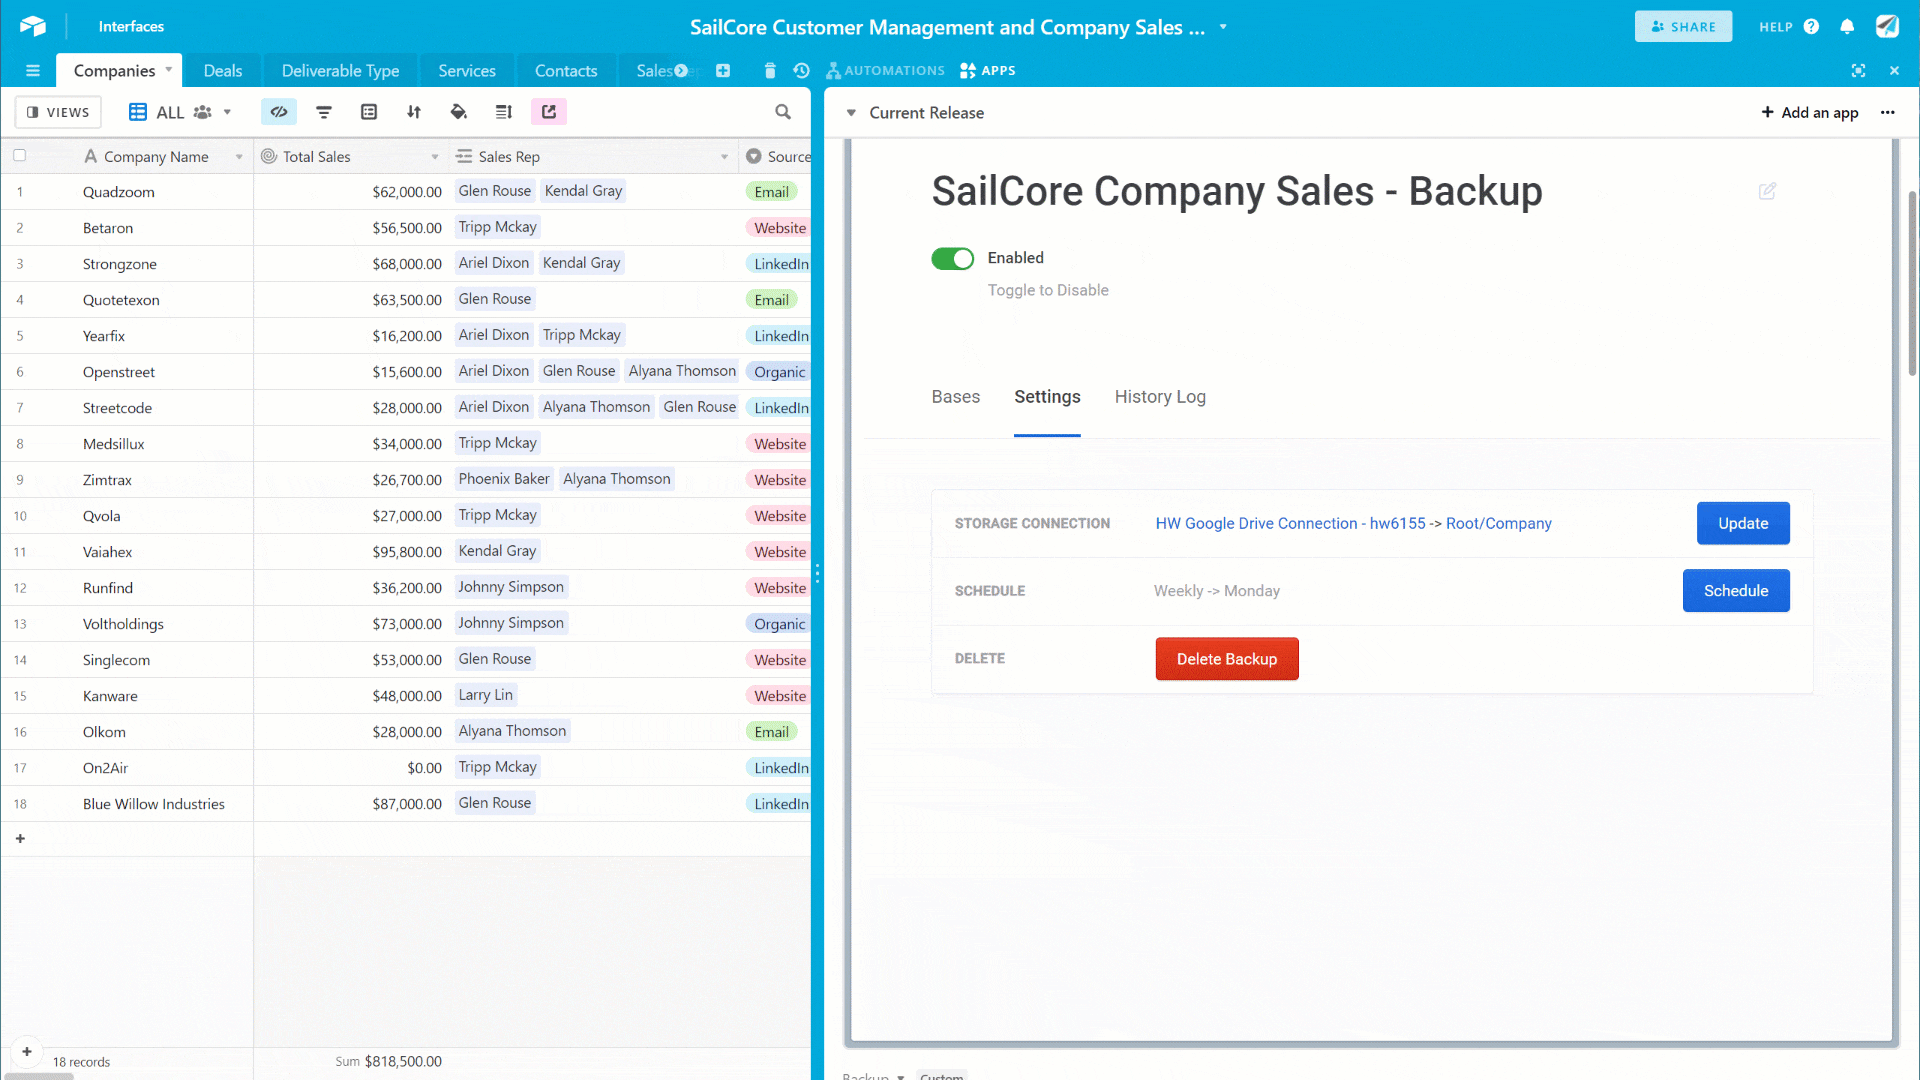
- Click Update Schedule
⚙
You can also Customize Your Base Backup (Include/Exclude Fields, View, and Attachments)
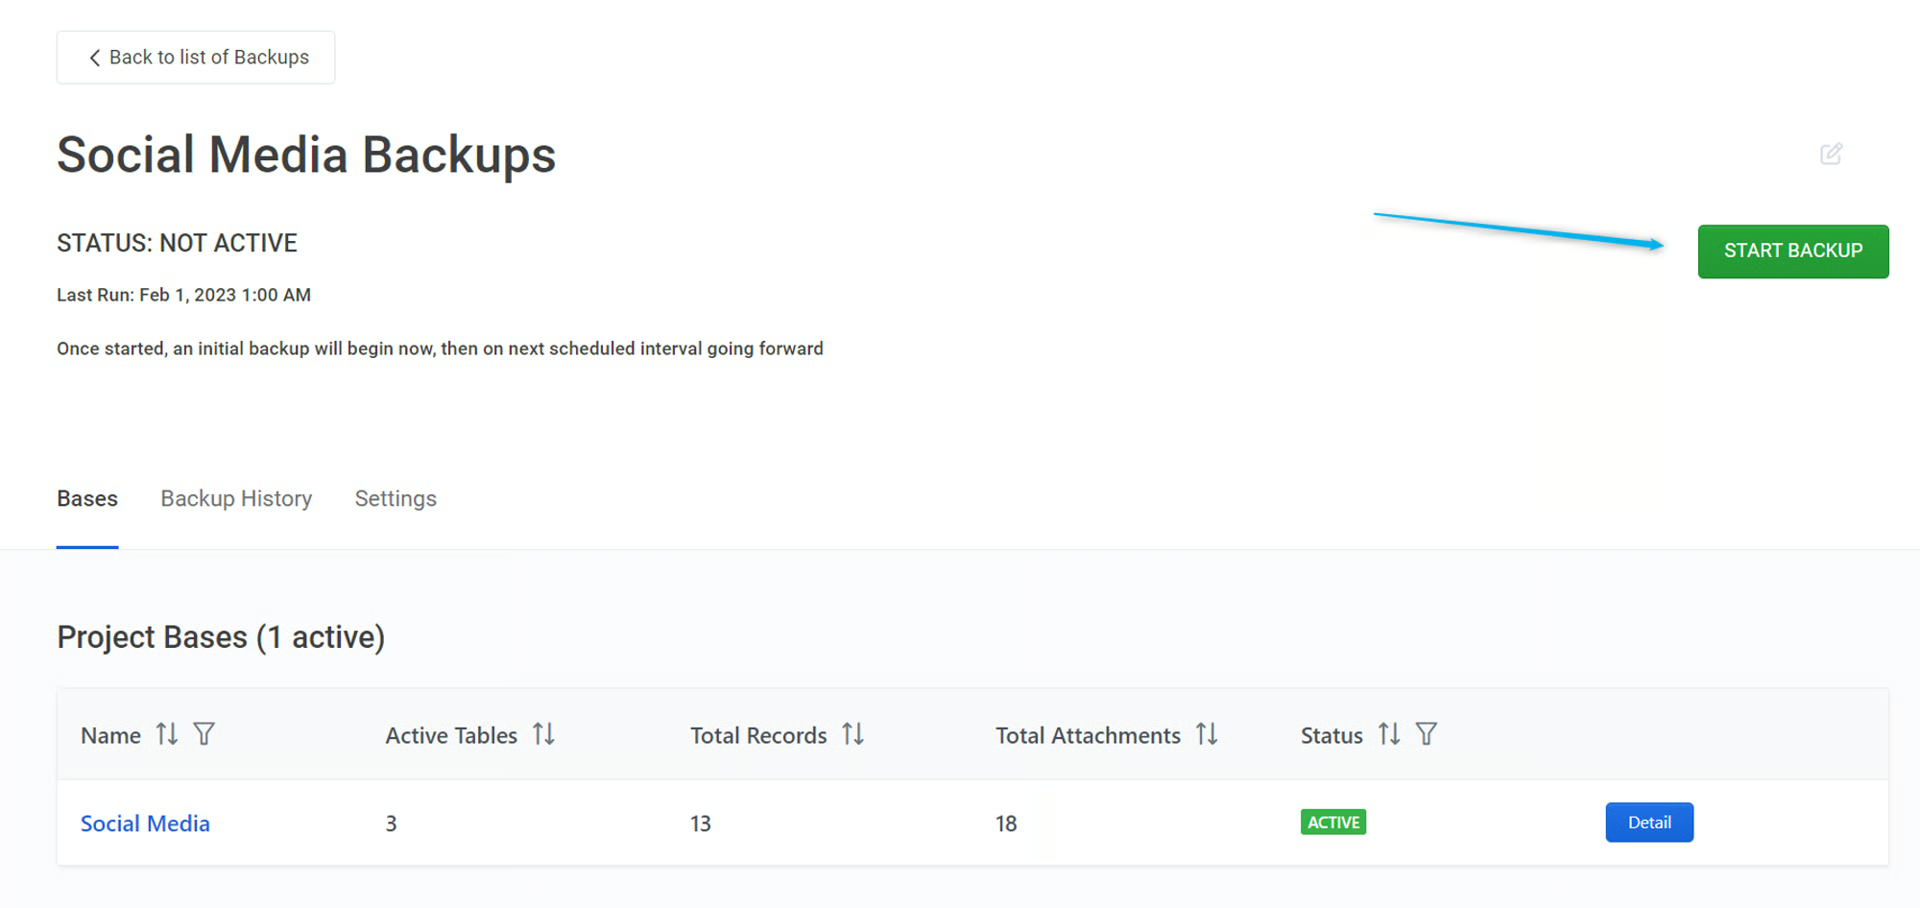
Enable Your Backup
Section titled “Enable Your Backup”Once you’ve set your backup schedule (paid plans), click Start Backup
How to Back Up Multiple Airtable Bases to a Backup Project
Section titled “How to Back Up Multiple Airtable Bases to a Backup Project”- To add more Airtable bases to your Backup Project, click Add Base to Backup
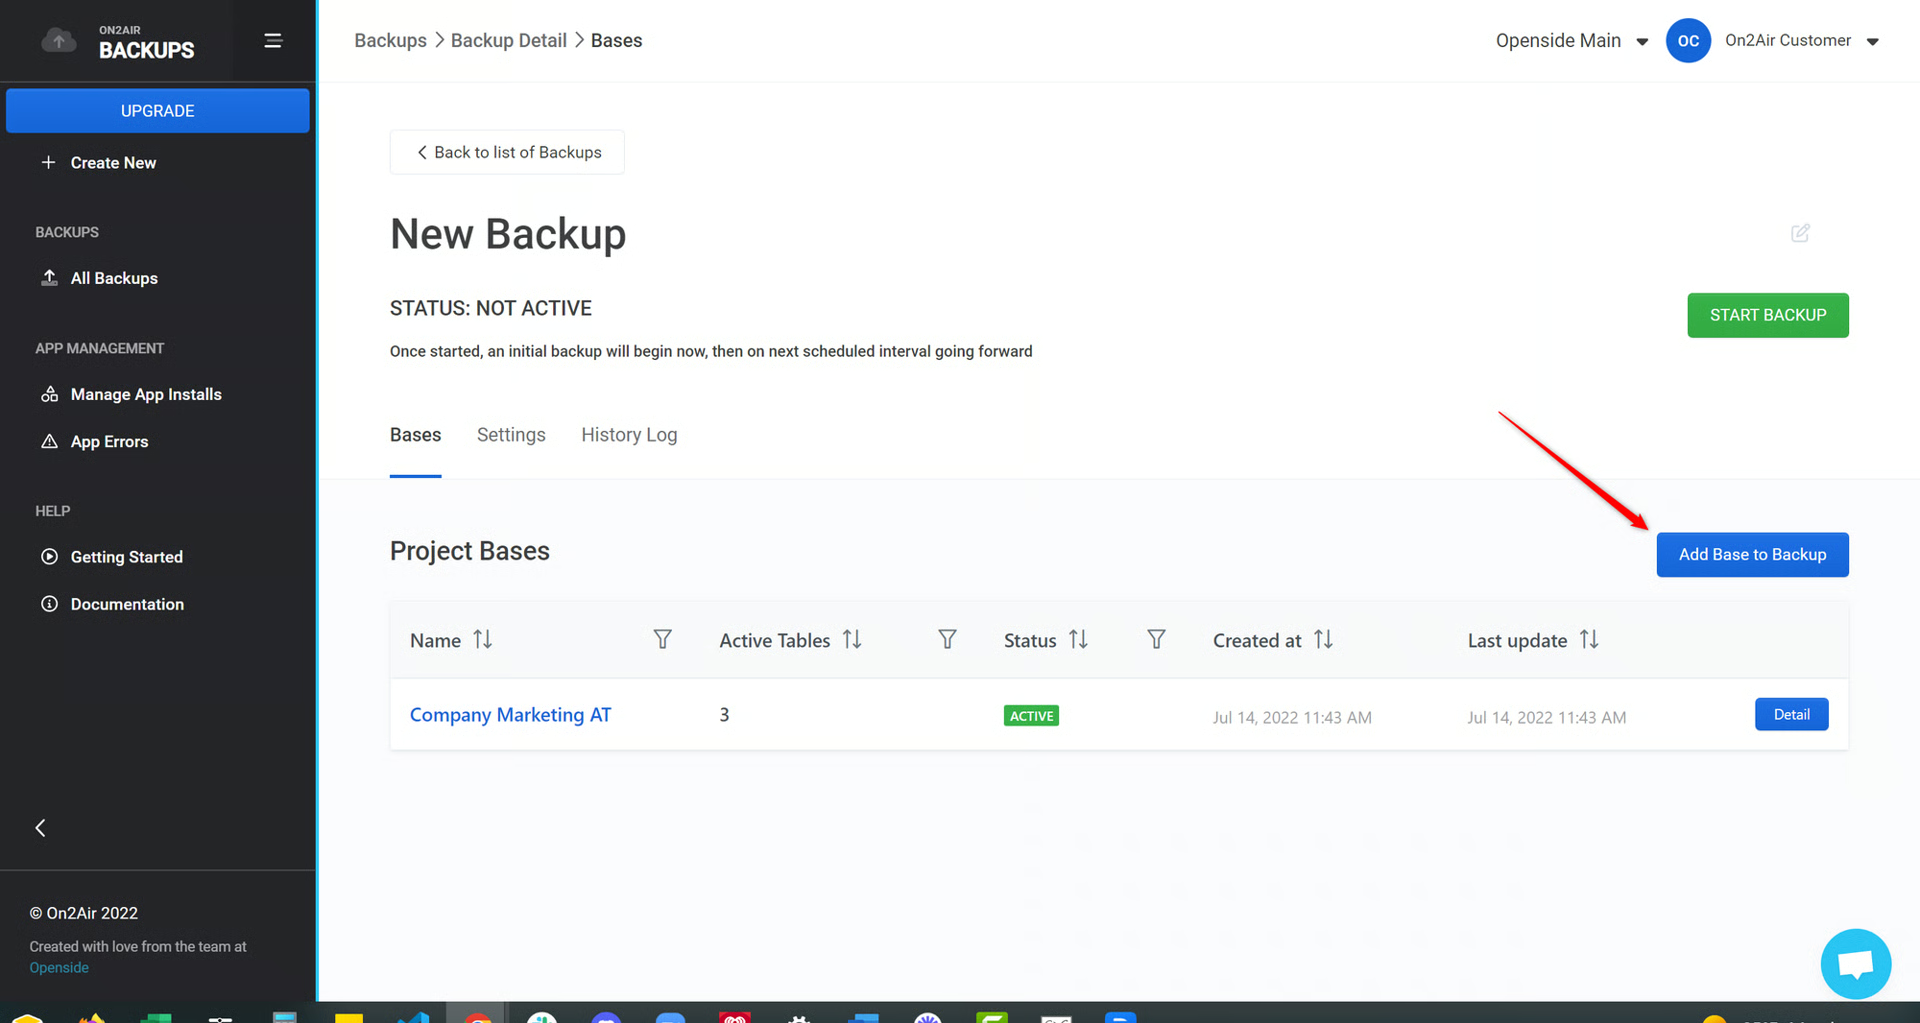
- You’ll choose your Airtable connection and the next Airtable base you want to add to the Project
You can do this as many times as you need depending on your Backups plan

- Click Start Backup to start backing up all the Airtable bases in the Backup Project
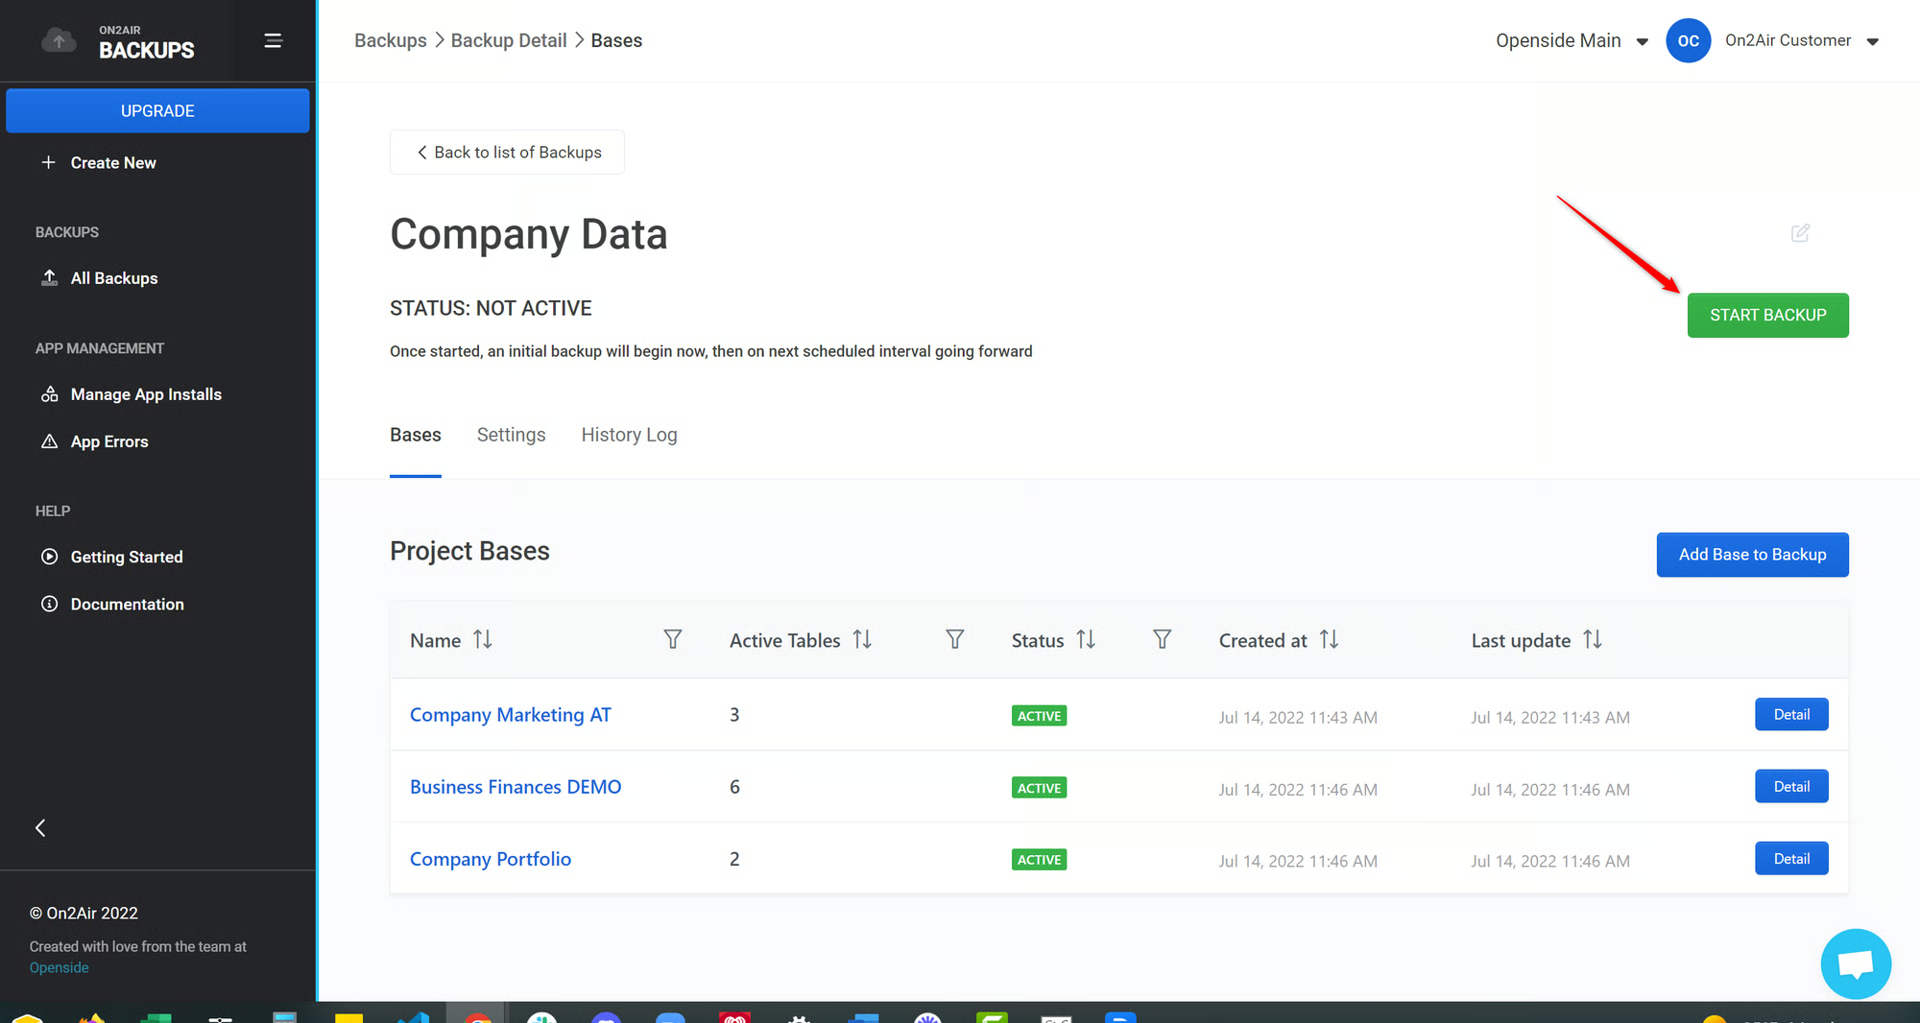
- You can click the History Log tab to see your backup status