JotForm Individual Form
🔴 On2Air Forms - JotForm has been shutdown to focus on our On2Air Backups Airtable app Learn more about automated Airtable backups - on2air.com
⭐
We now have a brand new  On2Air Forms app for Airtable that doesn’t require JotForm! It connects directly to Airtable. You can sign up for free access at On2Air Forms Signup Learn more here - On2Air Forms
The JotForm Dashboard for each of your forms contains a list of all form fields and field types. From the dashboard, you can change field names, delete fields, generate webhooks, and access the form ID.
Learn more about On2Air: Forms
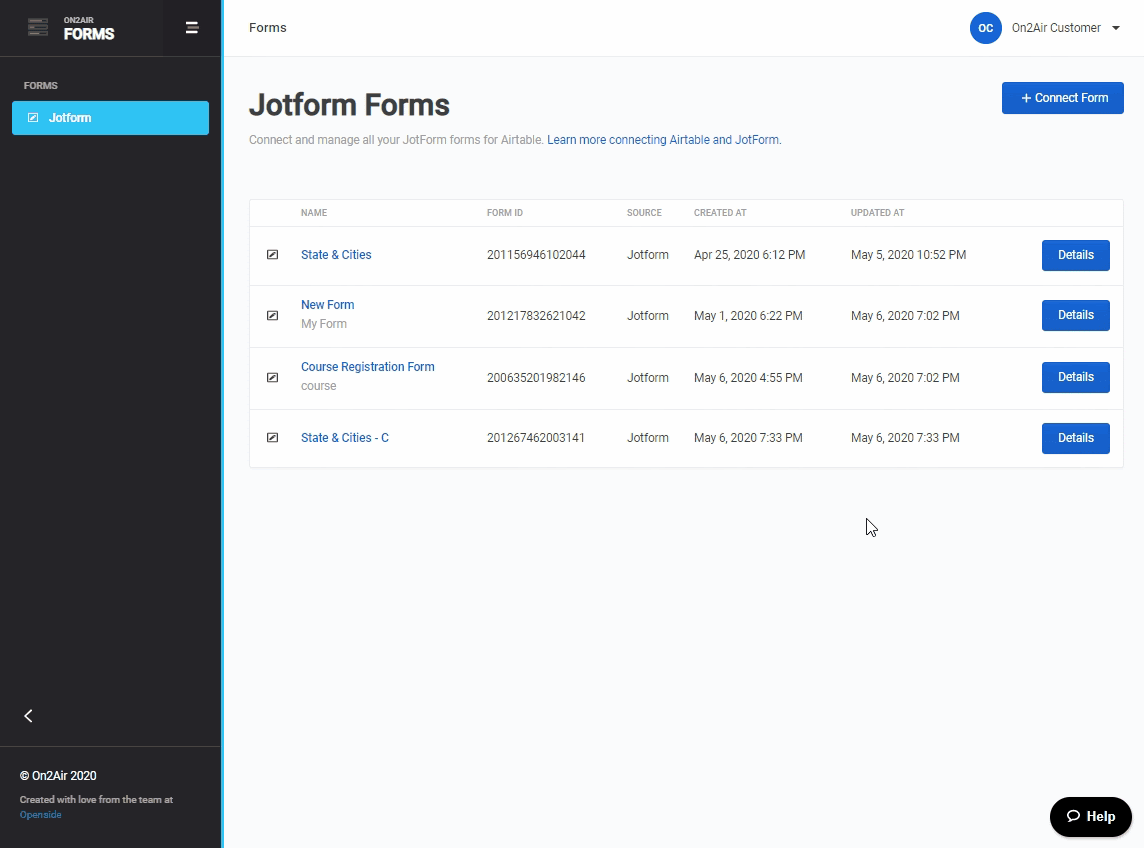
We integrate with third-party form solutions and currently support JotForm.
In this article
-
On2Air Fields
-
Links - Prefill Form Fields with Airtable Data
-
Destinations
-
JotForm Fields
-
Settings
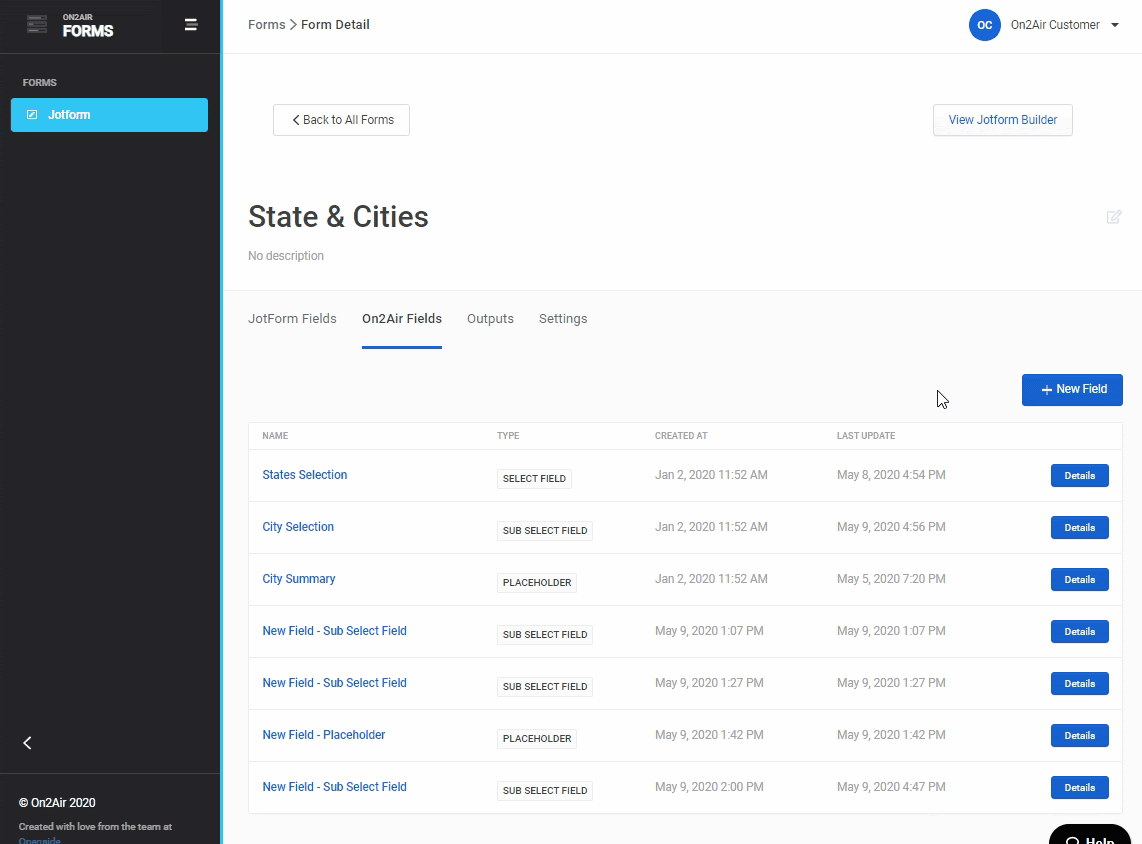
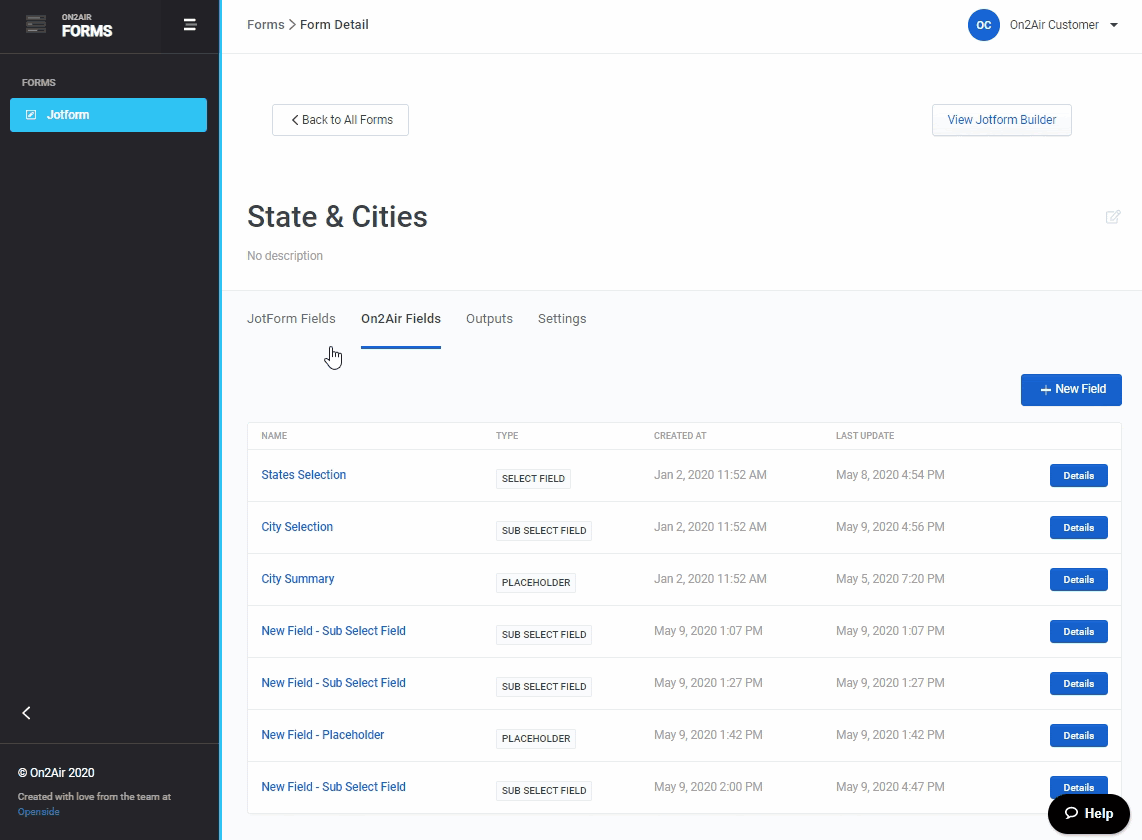
On2Air Fields
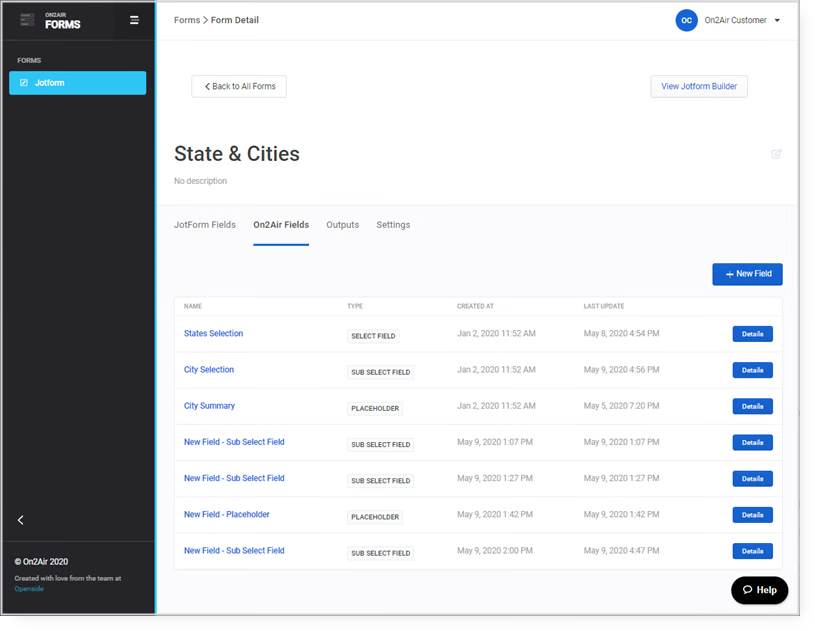
Section titled “On2Air Fields”This contains a list of every field, field type, created date, and updated date from your form.
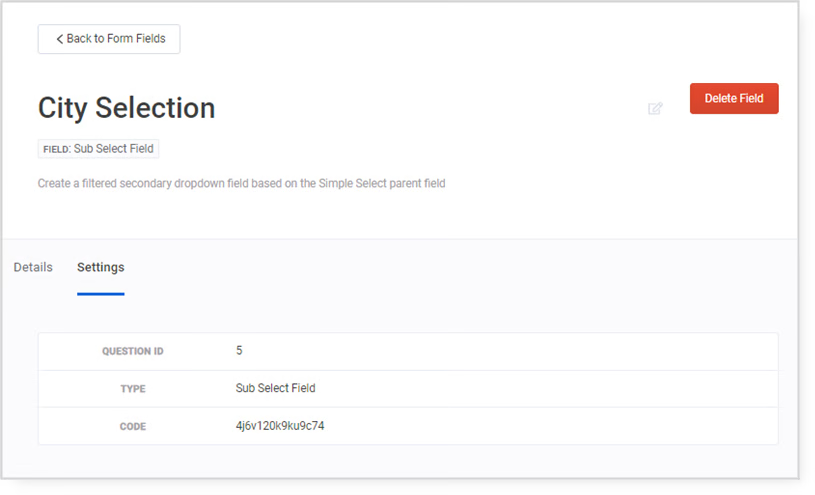
Field Details
You can update your Form Field configurations from this dashboard
- Select Details
- Select Update Details
- This will open your configurations table allowing you to set up or change your configuration

Settings
- Question ID - The order of your field
- Type - Displays whether this is a Select Field, Sub-Select Field, or Placeholder Field
- Code - Displays a unique ID
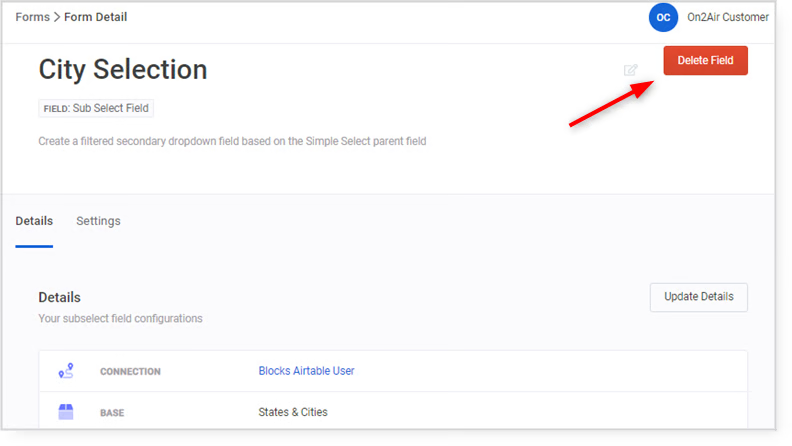
Delete Field
- To delete your field, click the Delete Field button on the right-hand side
- In the popup, click Yes, I want to delete this field
- WARNING: This action cannot be undone
To return to your form fields
- Select Back to Form Fields
Add a New Field
- Click New Field
- Click View JotForm Builder
- You will be redirected to your JotForm editing page
Links - Prefill Form Fields with Airtable Data
Section titled “Links - Prefill Form Fields with Airtable Data”⭐
Learn more about how to prefill your form fields with Airtable data -  Links - Prefill Form Field with Data
Destinations
Section titled “Destinations”⭐
Learn more about how to send data to Airtable -  Destinations - Send Data Back to Airtable
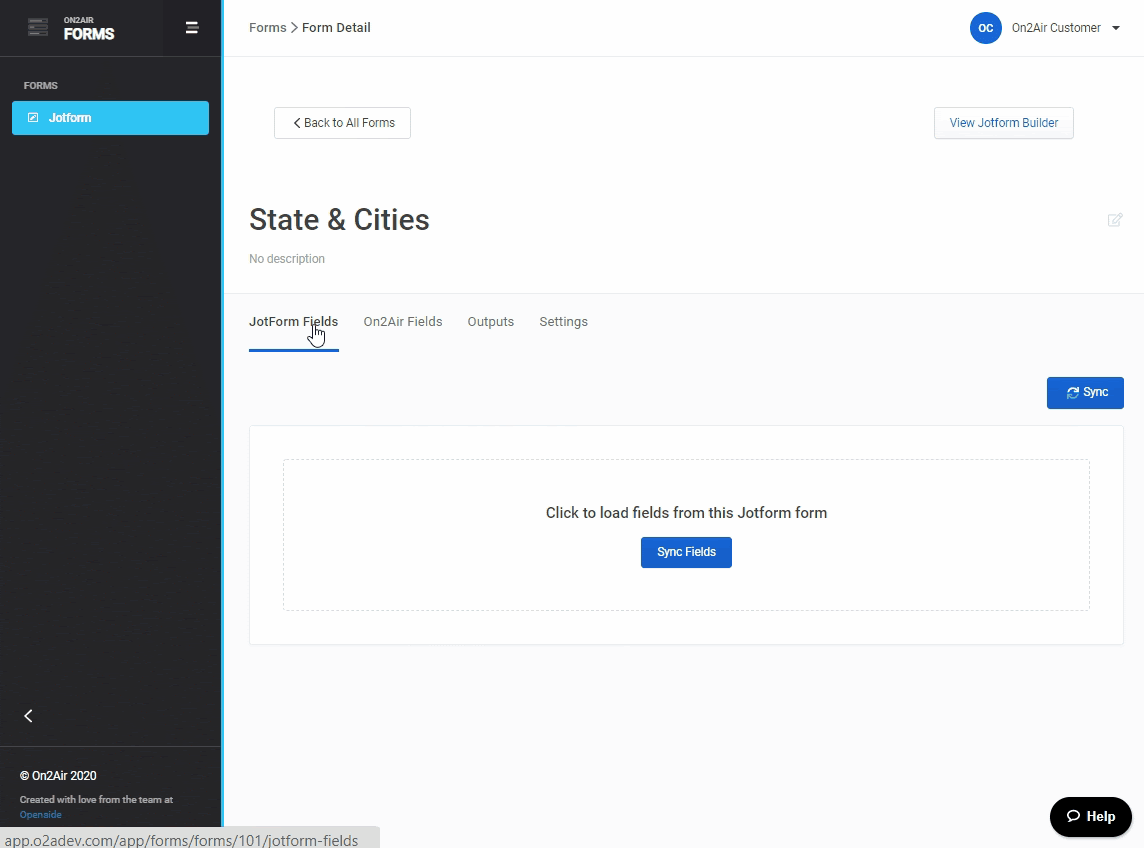
JotForm Fields
Section titled “JotForm Fields”This contains a list of all the fields on your form. It will automatically generate based on current and new fields. This is a useful utility tool to help you manage your form fields.
To sync your fields
- Select the JotForm Fields tab
- Click the Sync Fields button
- You can also click Sync on the right-hand side
You will see columns for
Order - Field order on form Question ID - JotForm Field ID Field Name - JotForm Unique Name label (Located in Field properties in JotForm)
Field Source - Field Source of either and On2Air field source or a JotForm field source Type - Field type Text - Form field label Gear icon - Allows you to change the name of a field
Change the Name of a JotForm Field
To change the name
Please note this only changes the name in the On2Air dashboard, not your form in JotForm
- Select the JotForm Fields tab
- Click the Sync Fields button
- Select the Gear icon next to your form field
- Select Update Name
- Change your field name
- Select Update Name or Discard Changes
Settings
Section titled “Settings”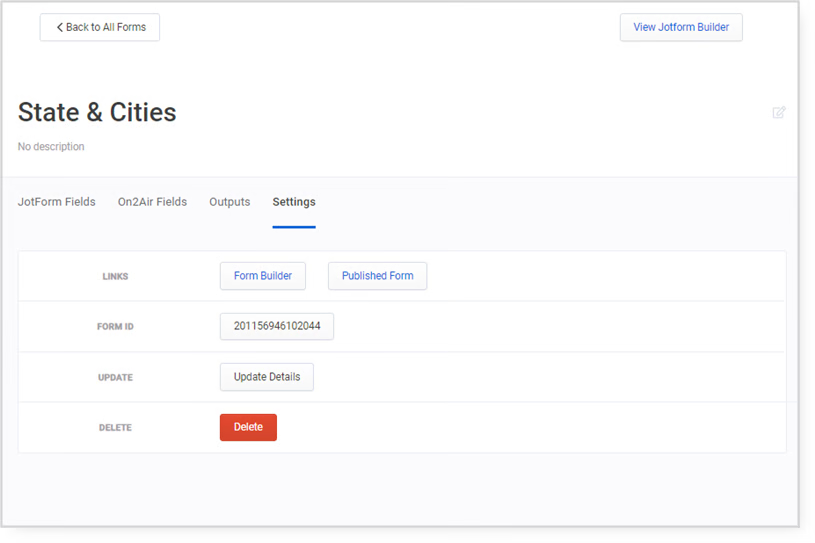
- Form Builder - This will direct you to your form builder on JotForm
- Published Form - This will direct you to your published form
- Form ID - A unique form ID
- Update - Select Update Details to change the name of your form and add a form description Note: This only changes the form name in the On2Air: Forms Dashboard
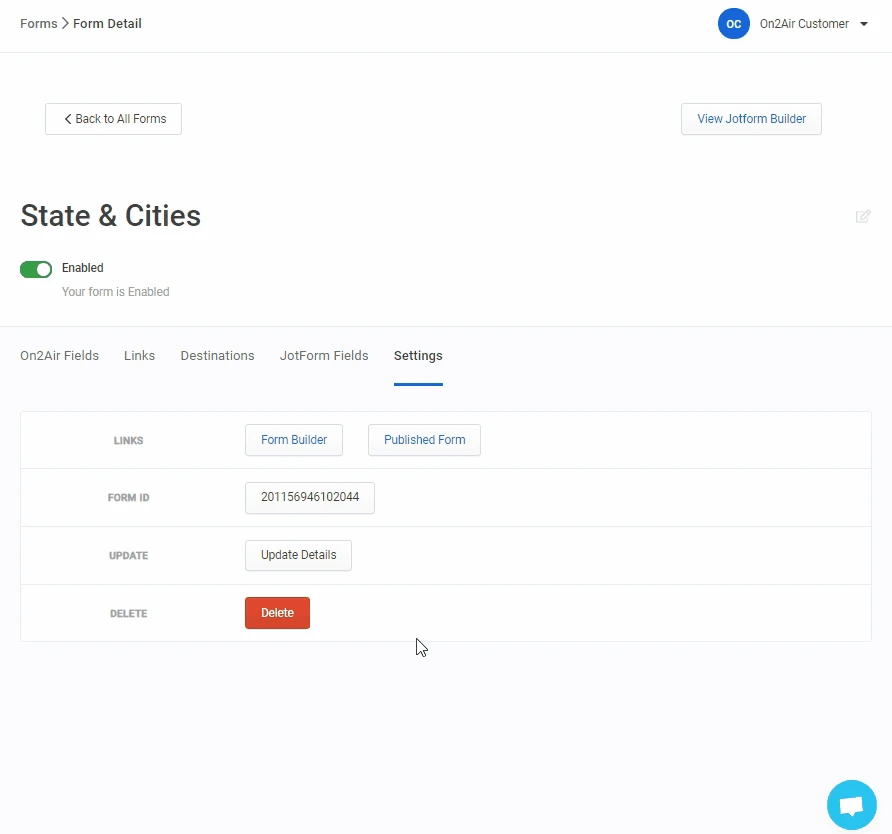
- Delete - Click Delete
- Click Yes, I want to delete this form and its fields
- WARNING: This action cannot be undone
- View JotForm Builder - Click this button in the top right-hand of the screen to be directed to the JotForm Builder