Build a Dashboard using Airtable Data with On2Air Forms
🔴 On2Air Forms has been shutdown to focus on our On2Air Backups Airtable app Learn more about automated Airtable backups - on2air.com
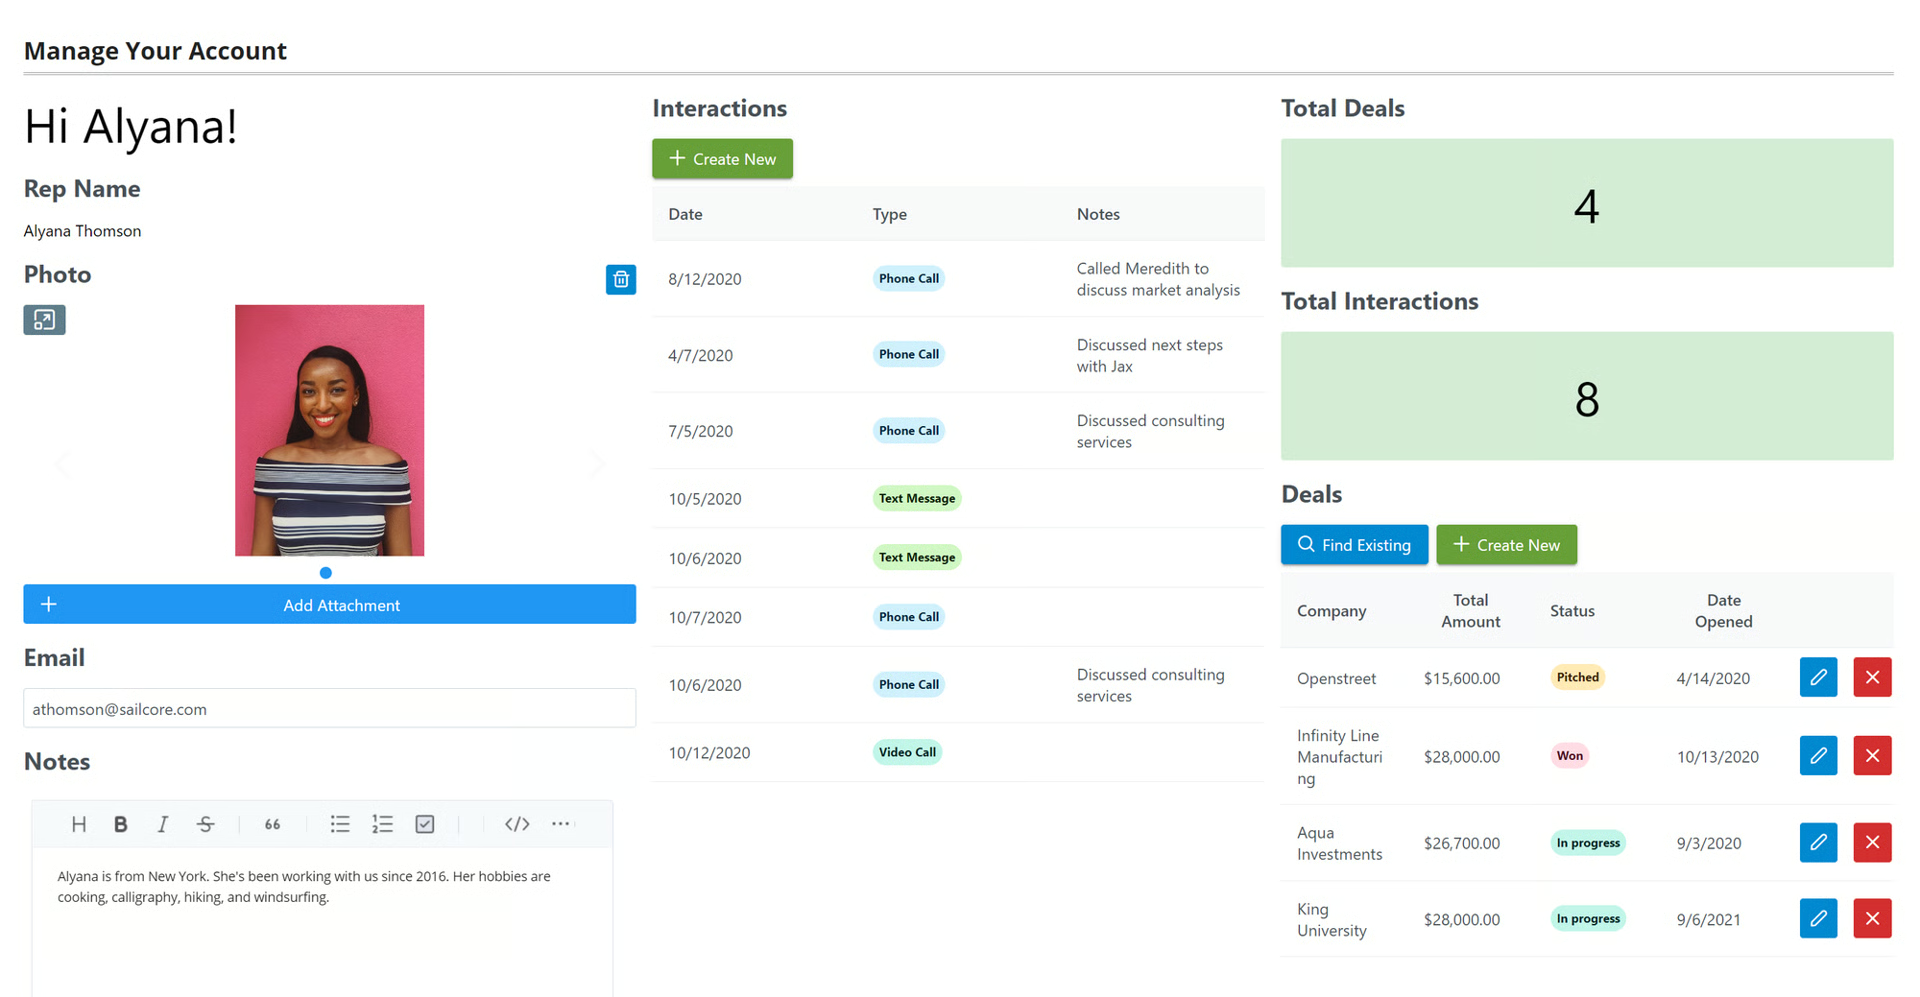
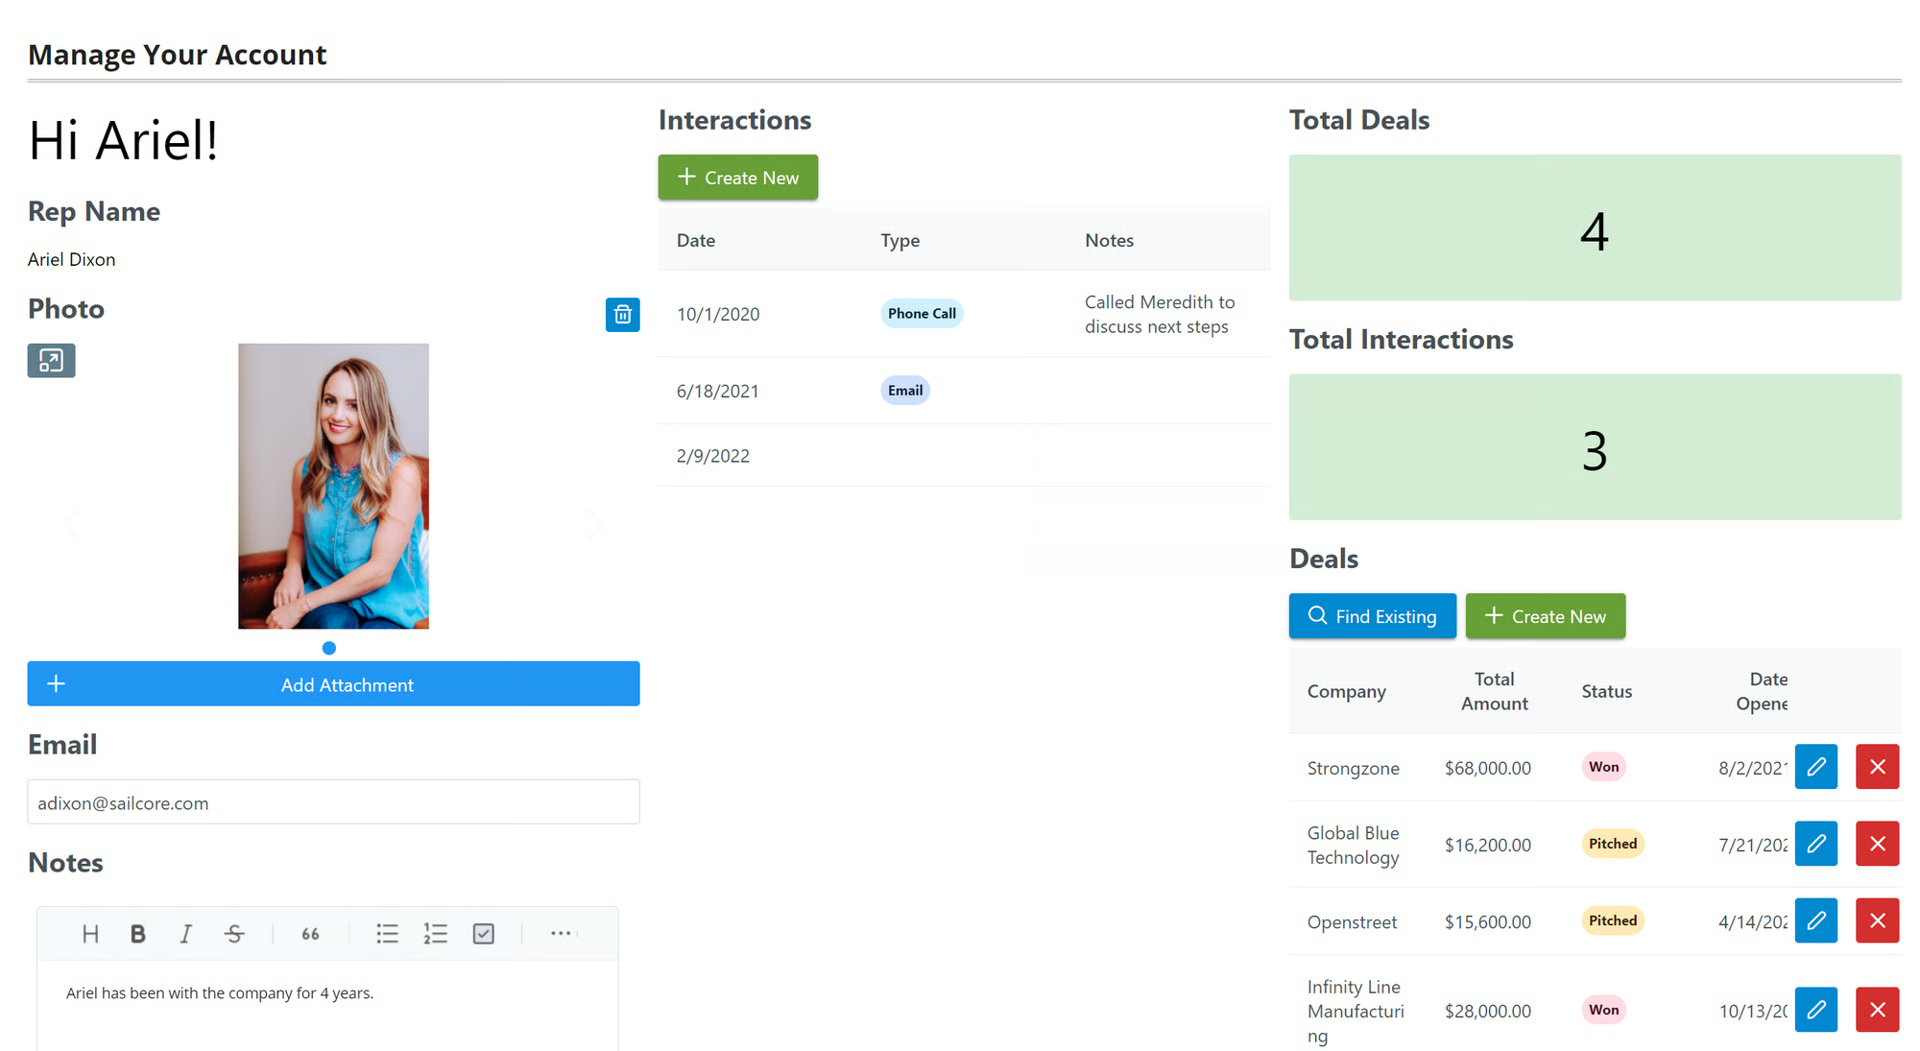
You can create dashboards showcasing Airtable data for your clients, teammates, and non-Airtable users with On2Air Forms! You can allow your user to view data from their own Airtable record, allow them to update information, and/or allow them to add new data to their record.
Note: Dashboards are viewed using unique, custom URLs per Airtable record - see format. We don’t currently have a Login feature, but it’s on the product roadmap
In this tutorial
-
🎥 Build an Airtable Dashboard - Video Tutorial
-
Set up Your Form
-
Build Form
-
Change Layout
-
Add Fields
-
Use Automatically Updated Live Values on Dashboard (for Reporting)
-
Limiting Linked Records Displayed
-
Customize the Header and Add Custom Text to the Form
-
Remove the Submission Button
-
Preview the Dashboard
-
Generate a URL for Every Record in Your Table
-
Share the URL
🎥 Build an Airtable Dashboard - Video Tutorial
Section titled “🎥 Build an Airtable Dashboard - Video Tutorial”Set up Your Form
Section titled “Set up Your Form”Build Form
Section titled “Build Form”-
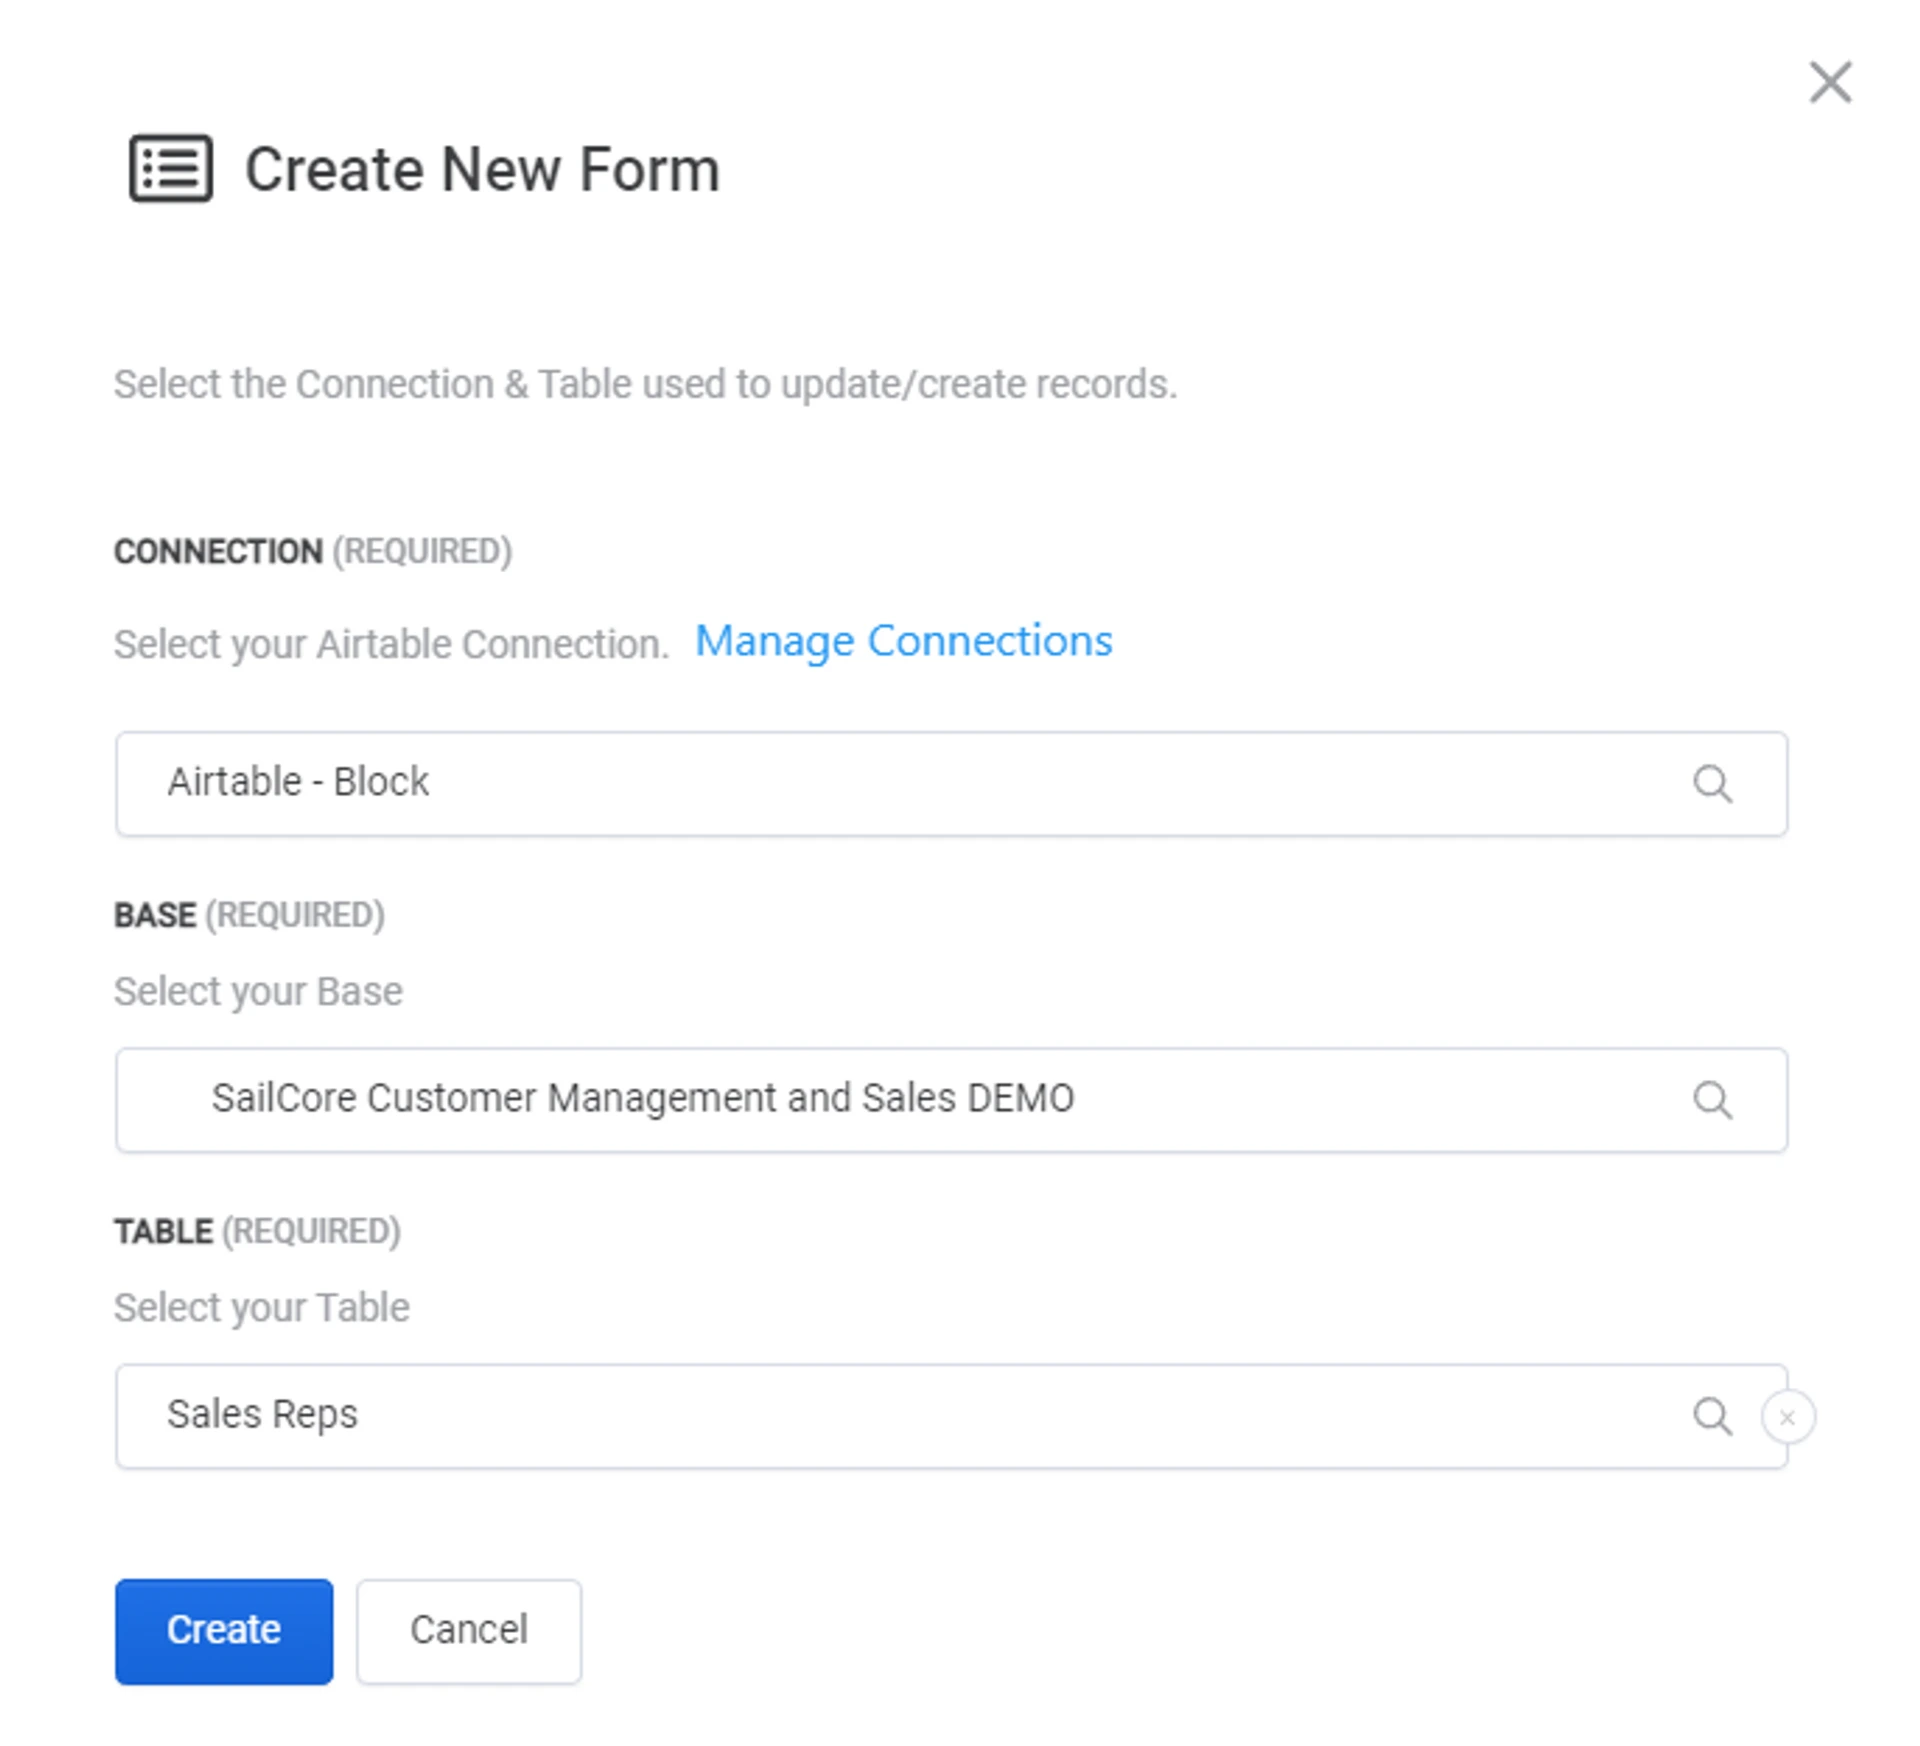
In the On2Air Forms dashboard, click Create New Form -
 How to Create a Form with Airtable and On2Air Forms
 -
Choose your Airtable Base and Table
- Click Designer to open the Form Designer
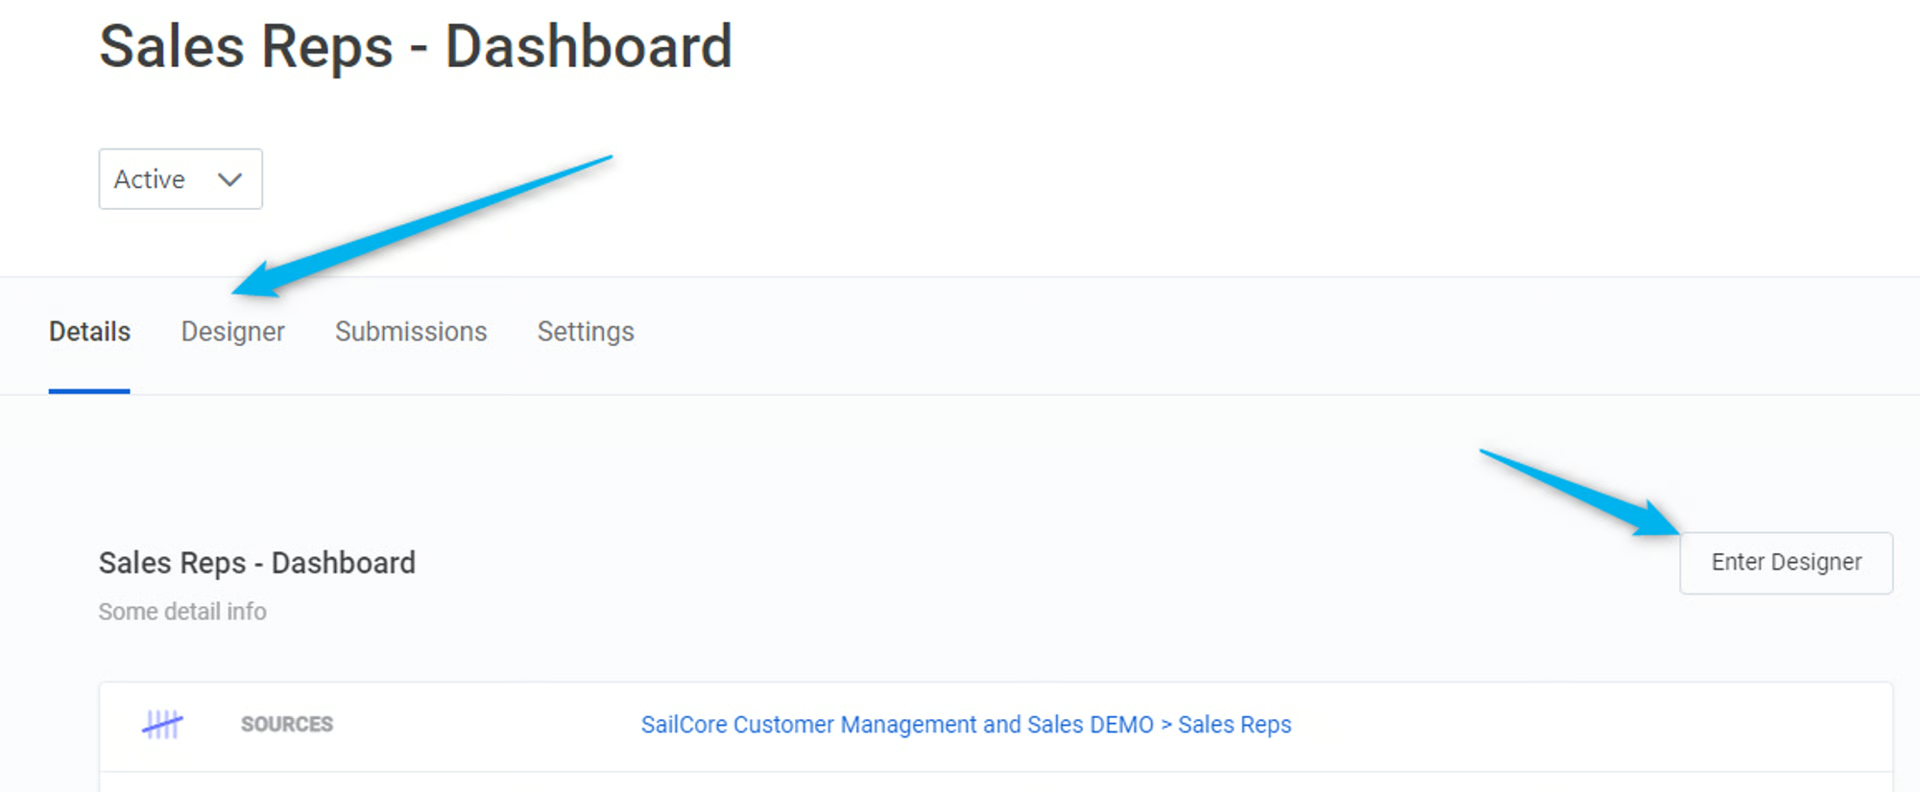
- In the Form Designer, click the Grid Options icon

Change Layout
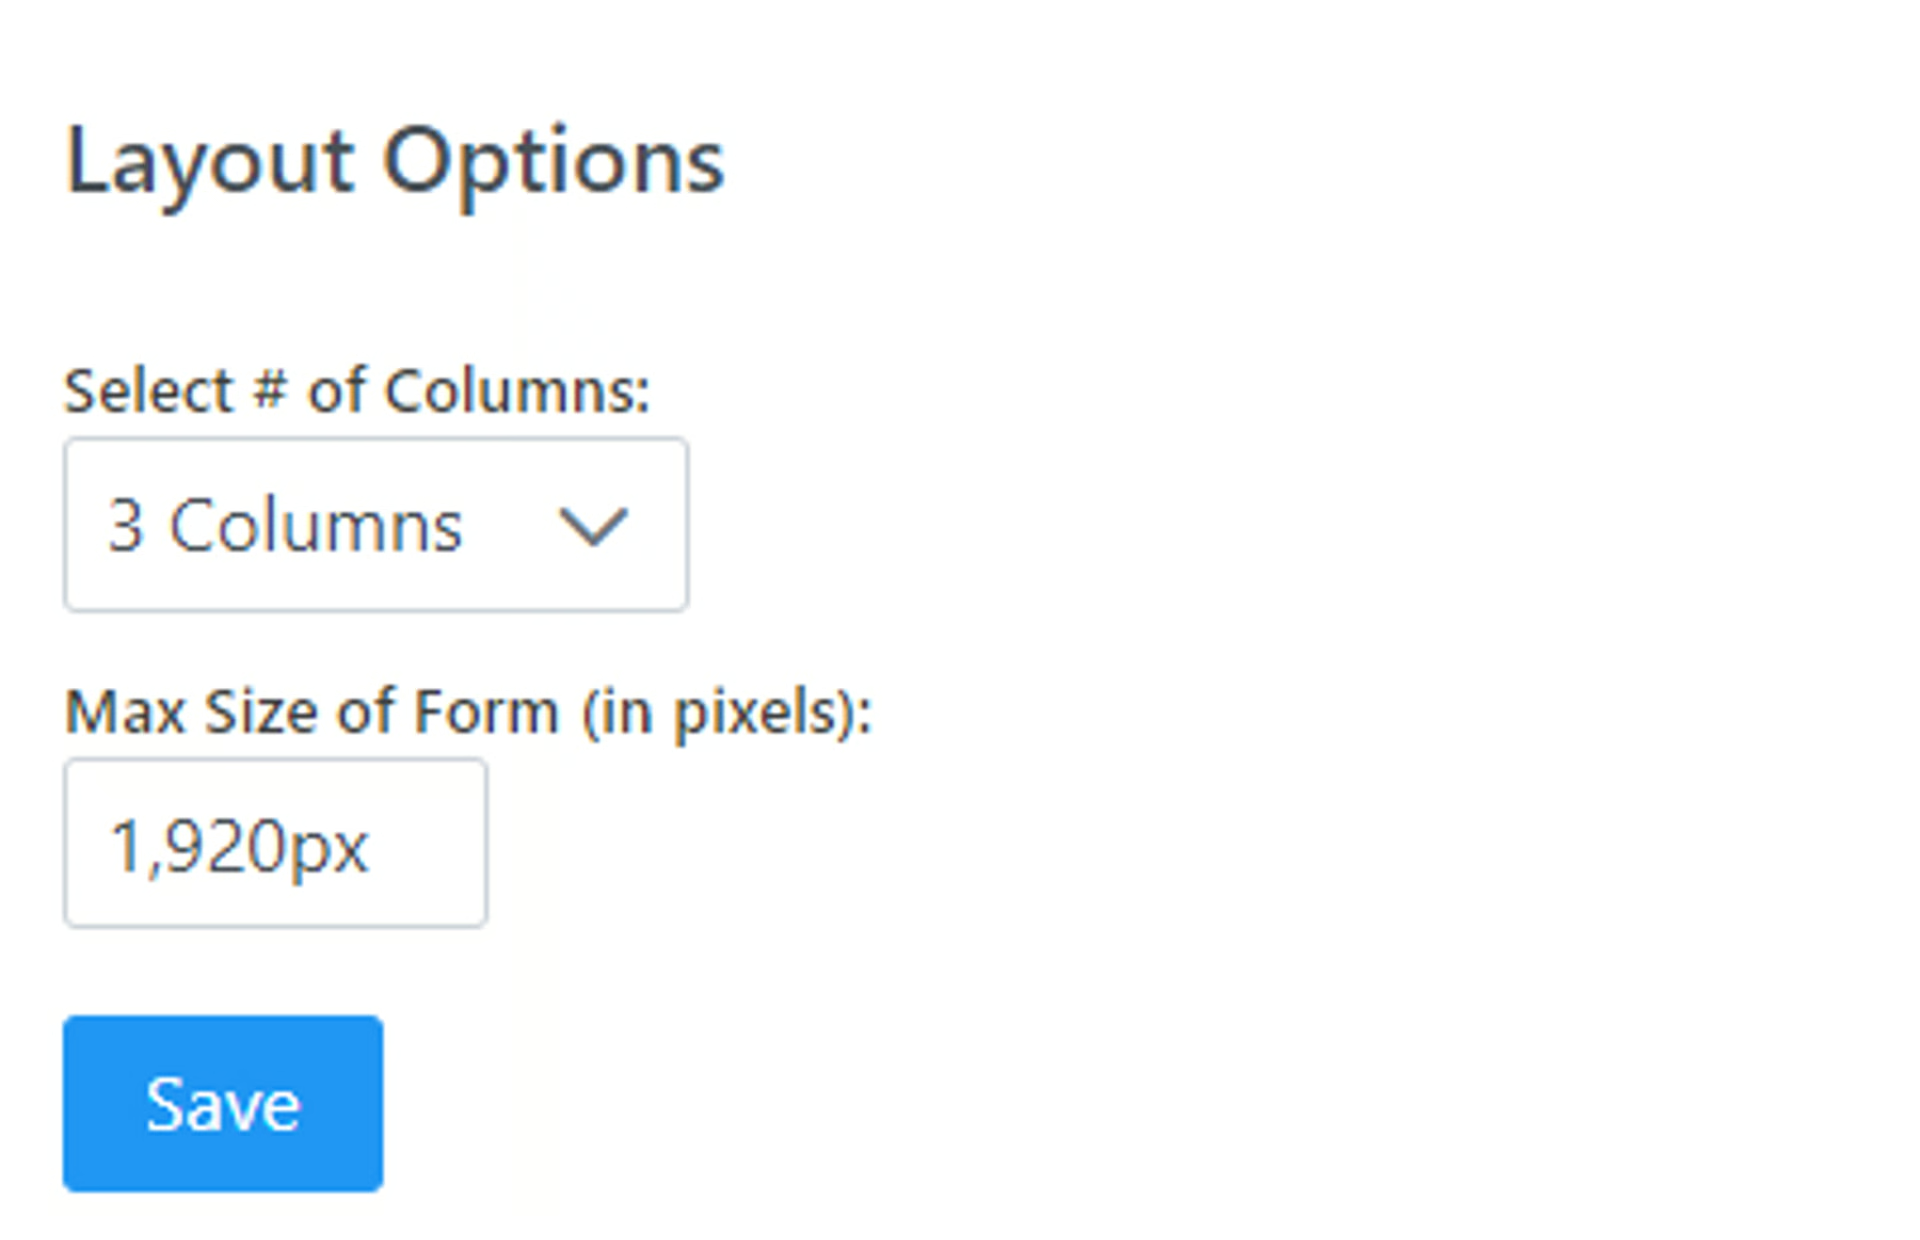
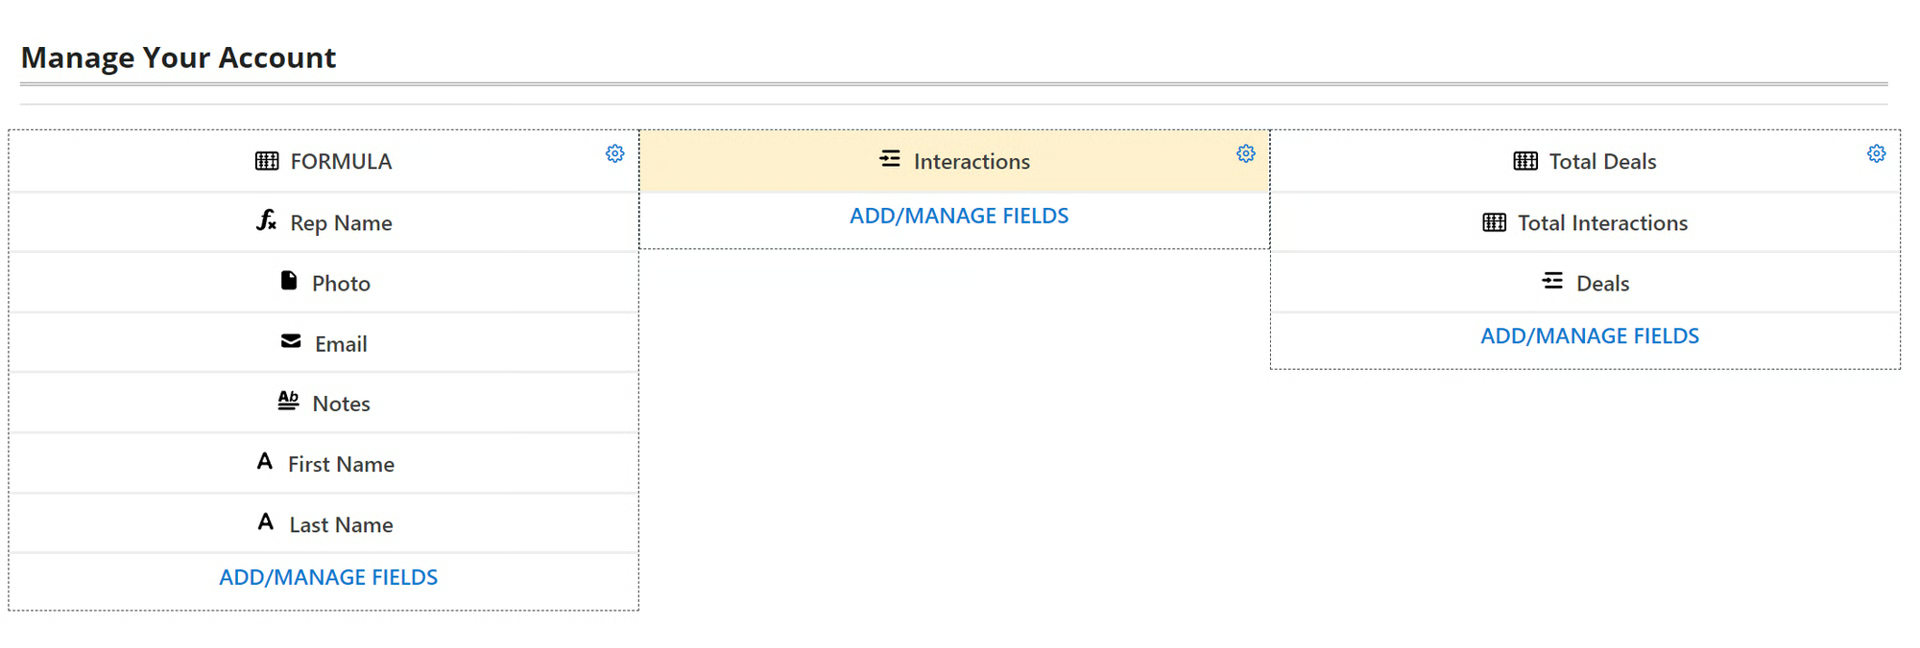
Section titled “Change Layout”- In the Grid Options, choose the Number of Columns you want and set the Max Size of the form, then click Save
In the example, there are 3 columns and the width is set to 1,920px
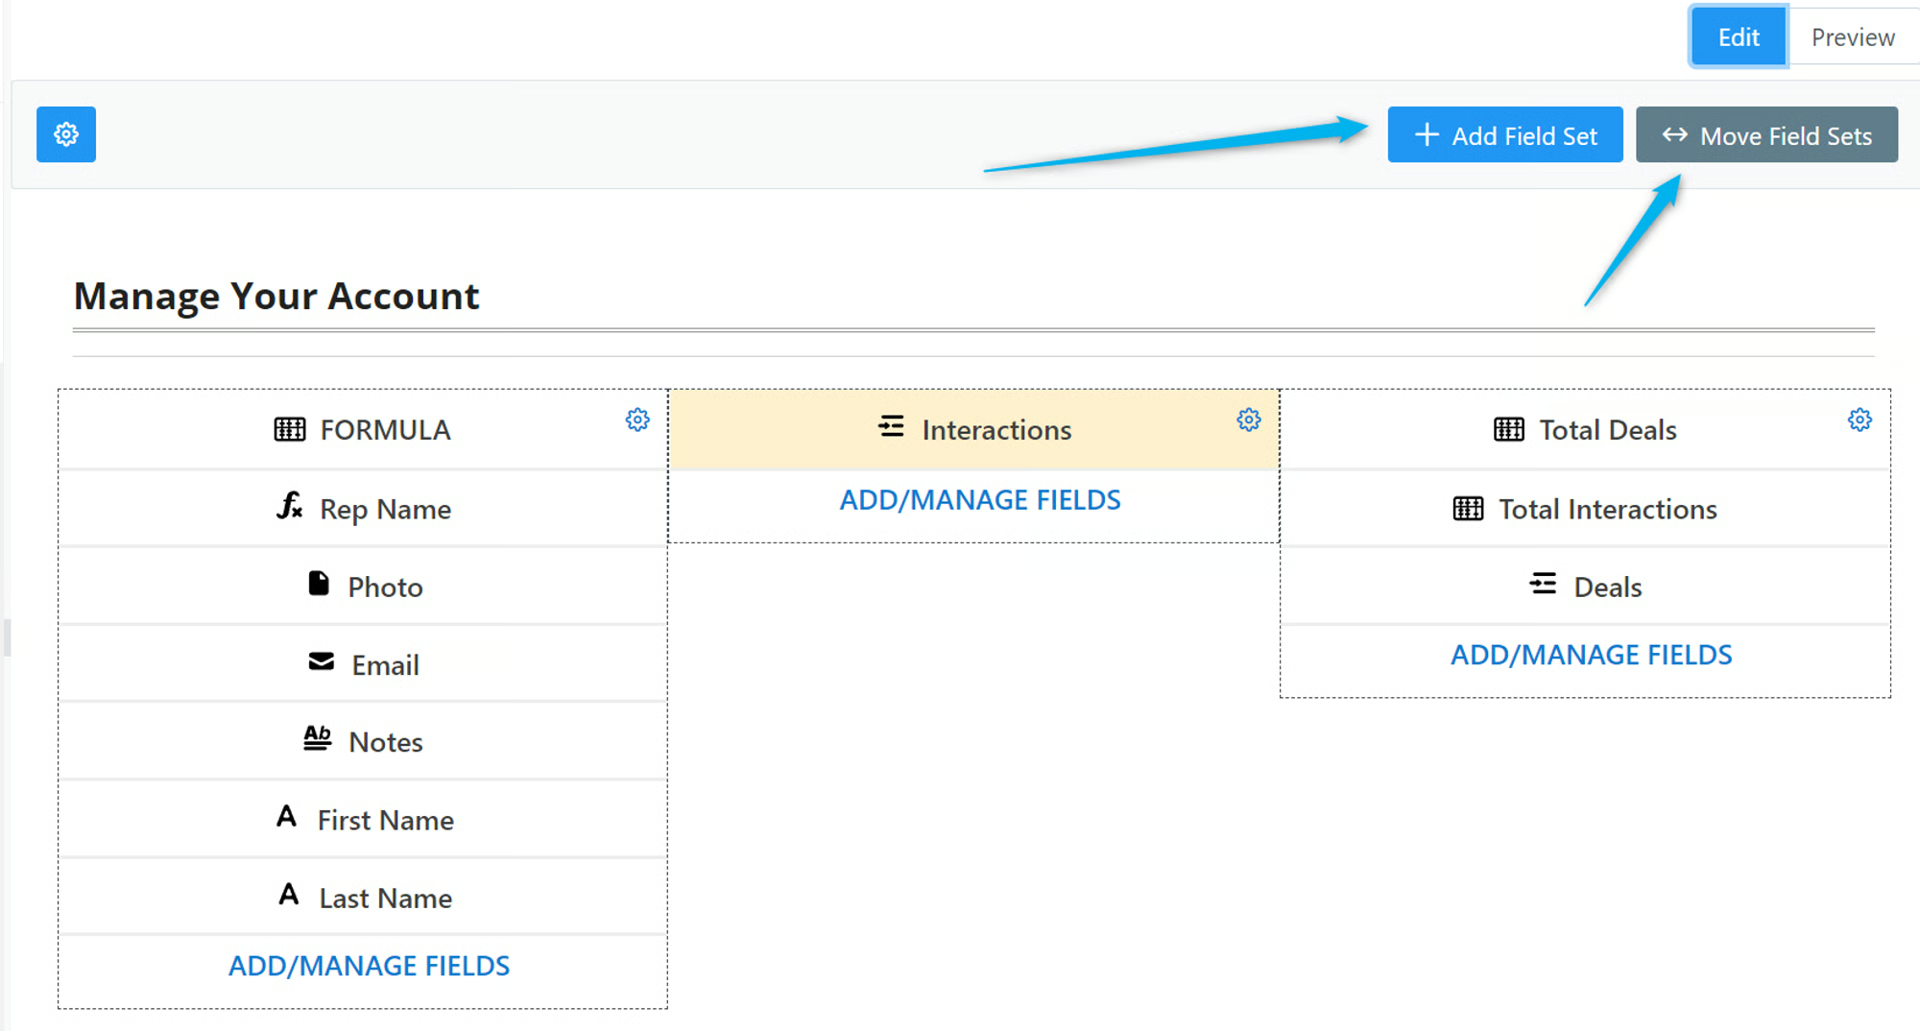
- Add a Field Set in each column by clicking Add a Field Set
You can also move the Field Sets around by clicking Move Field Sets
Add Fields
Section titled “Add Fields”- Click Add/Manage Fields and add any field you need in each of your Field Sets. See all available Airtable and On2Air Field Types
- Click Add Fields
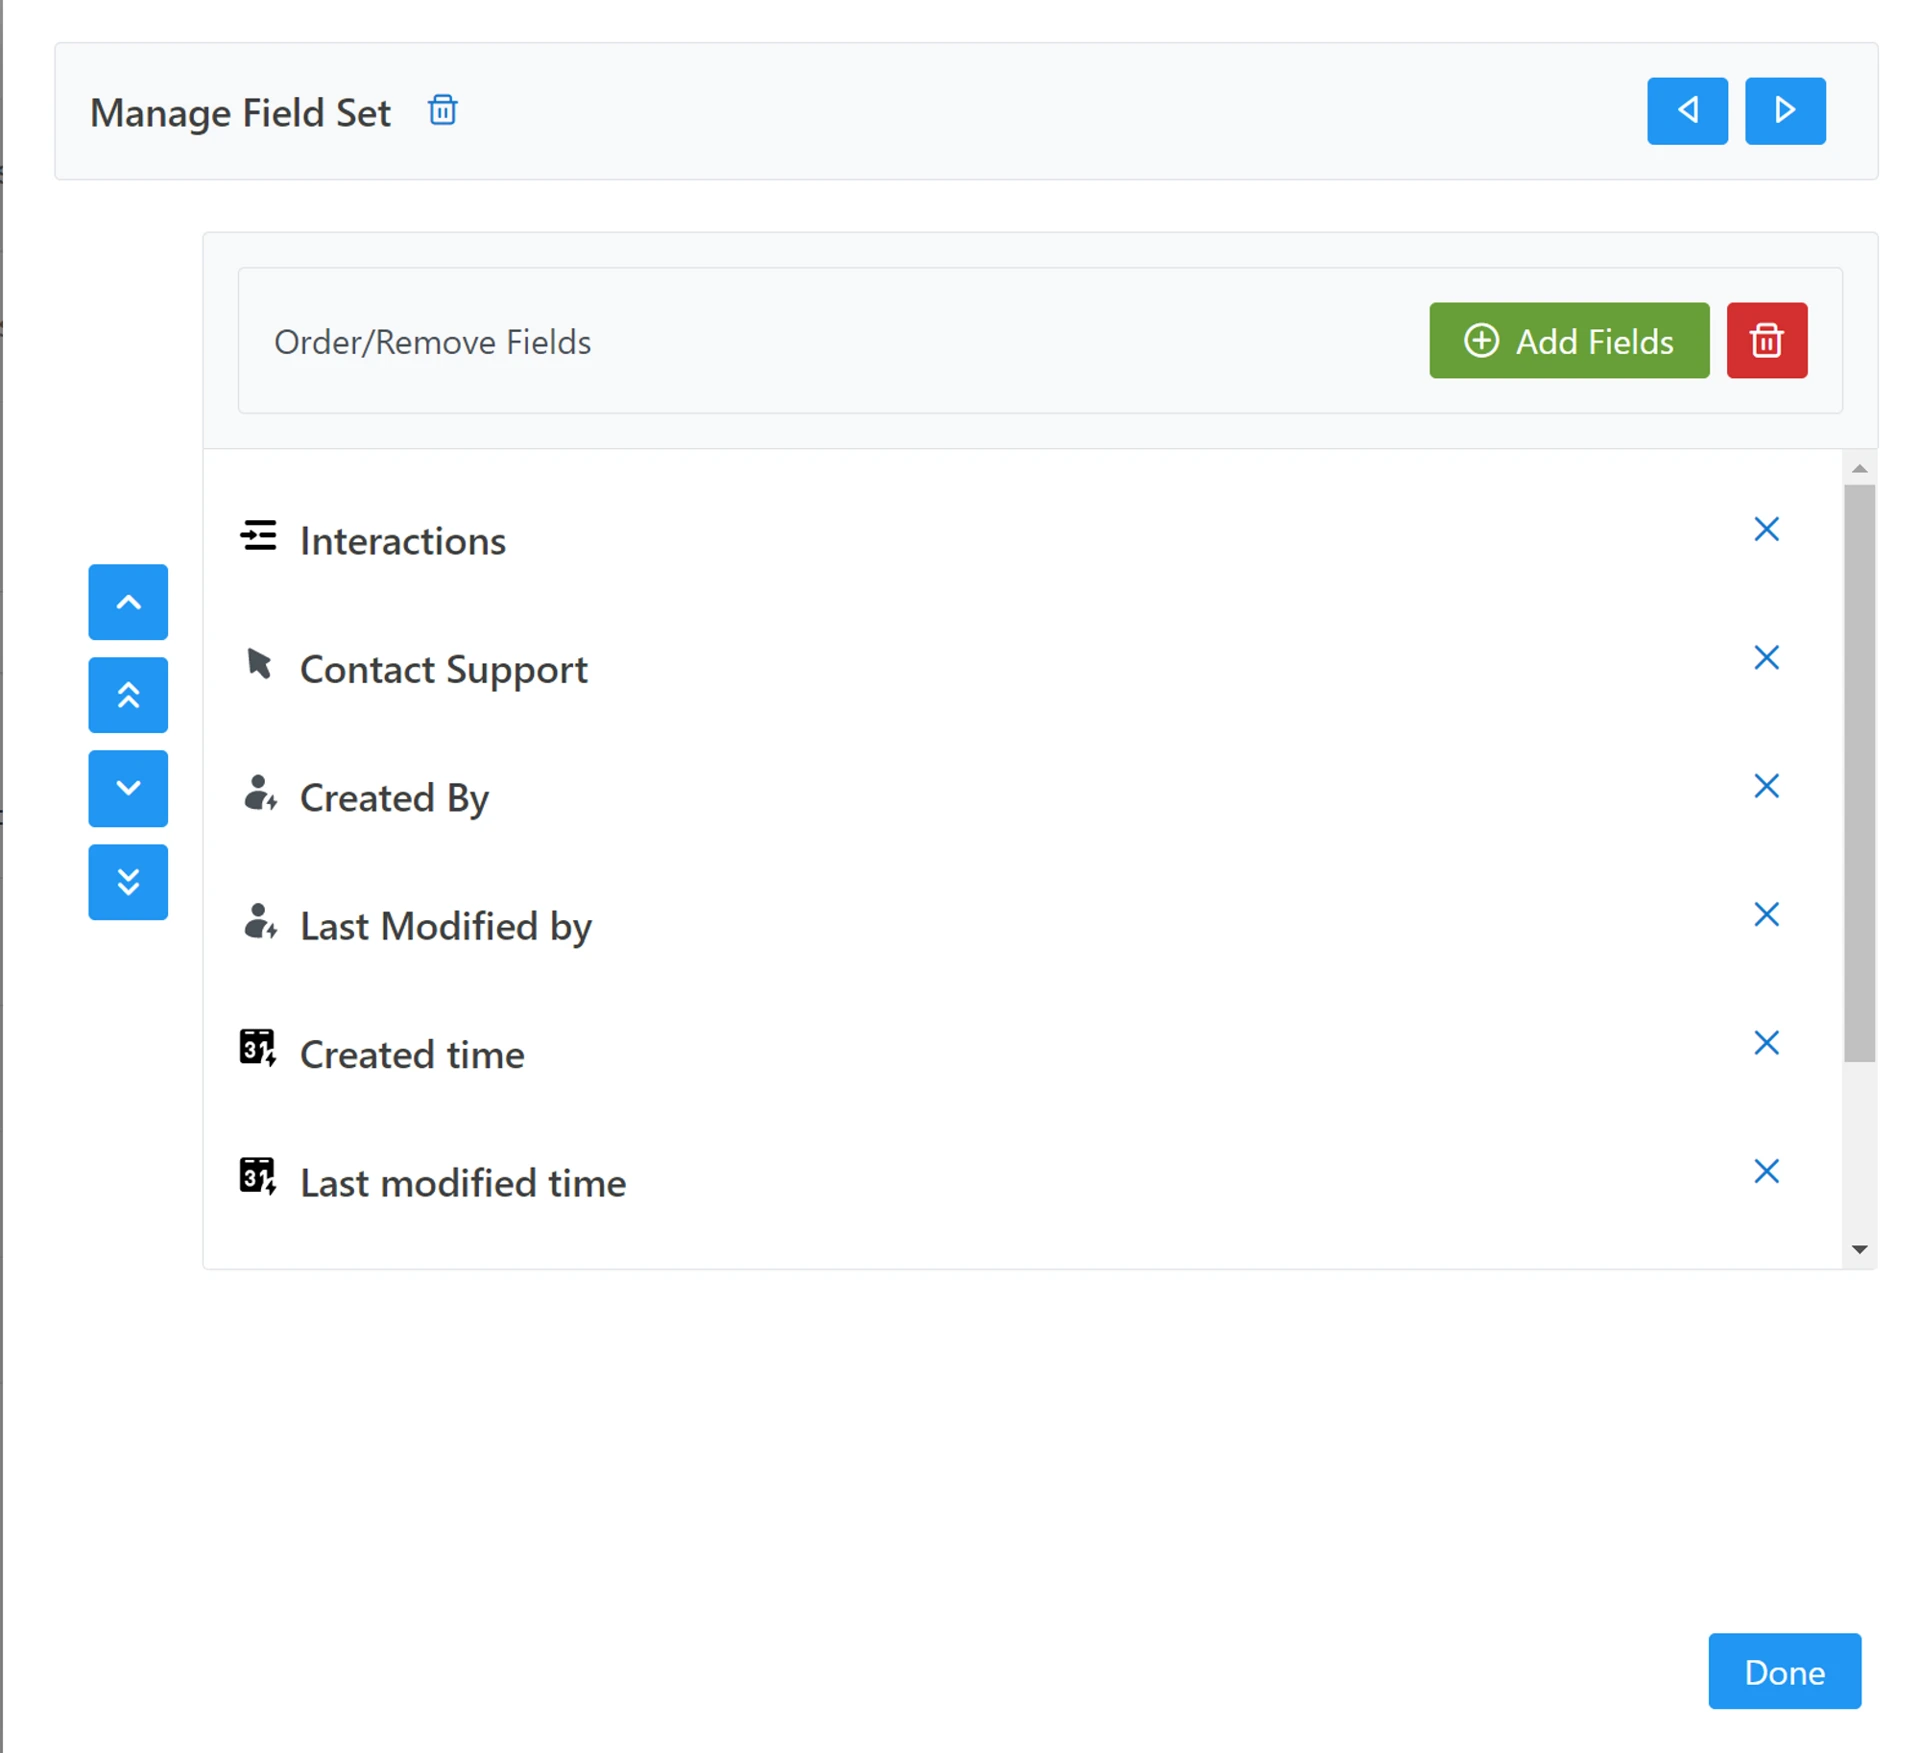
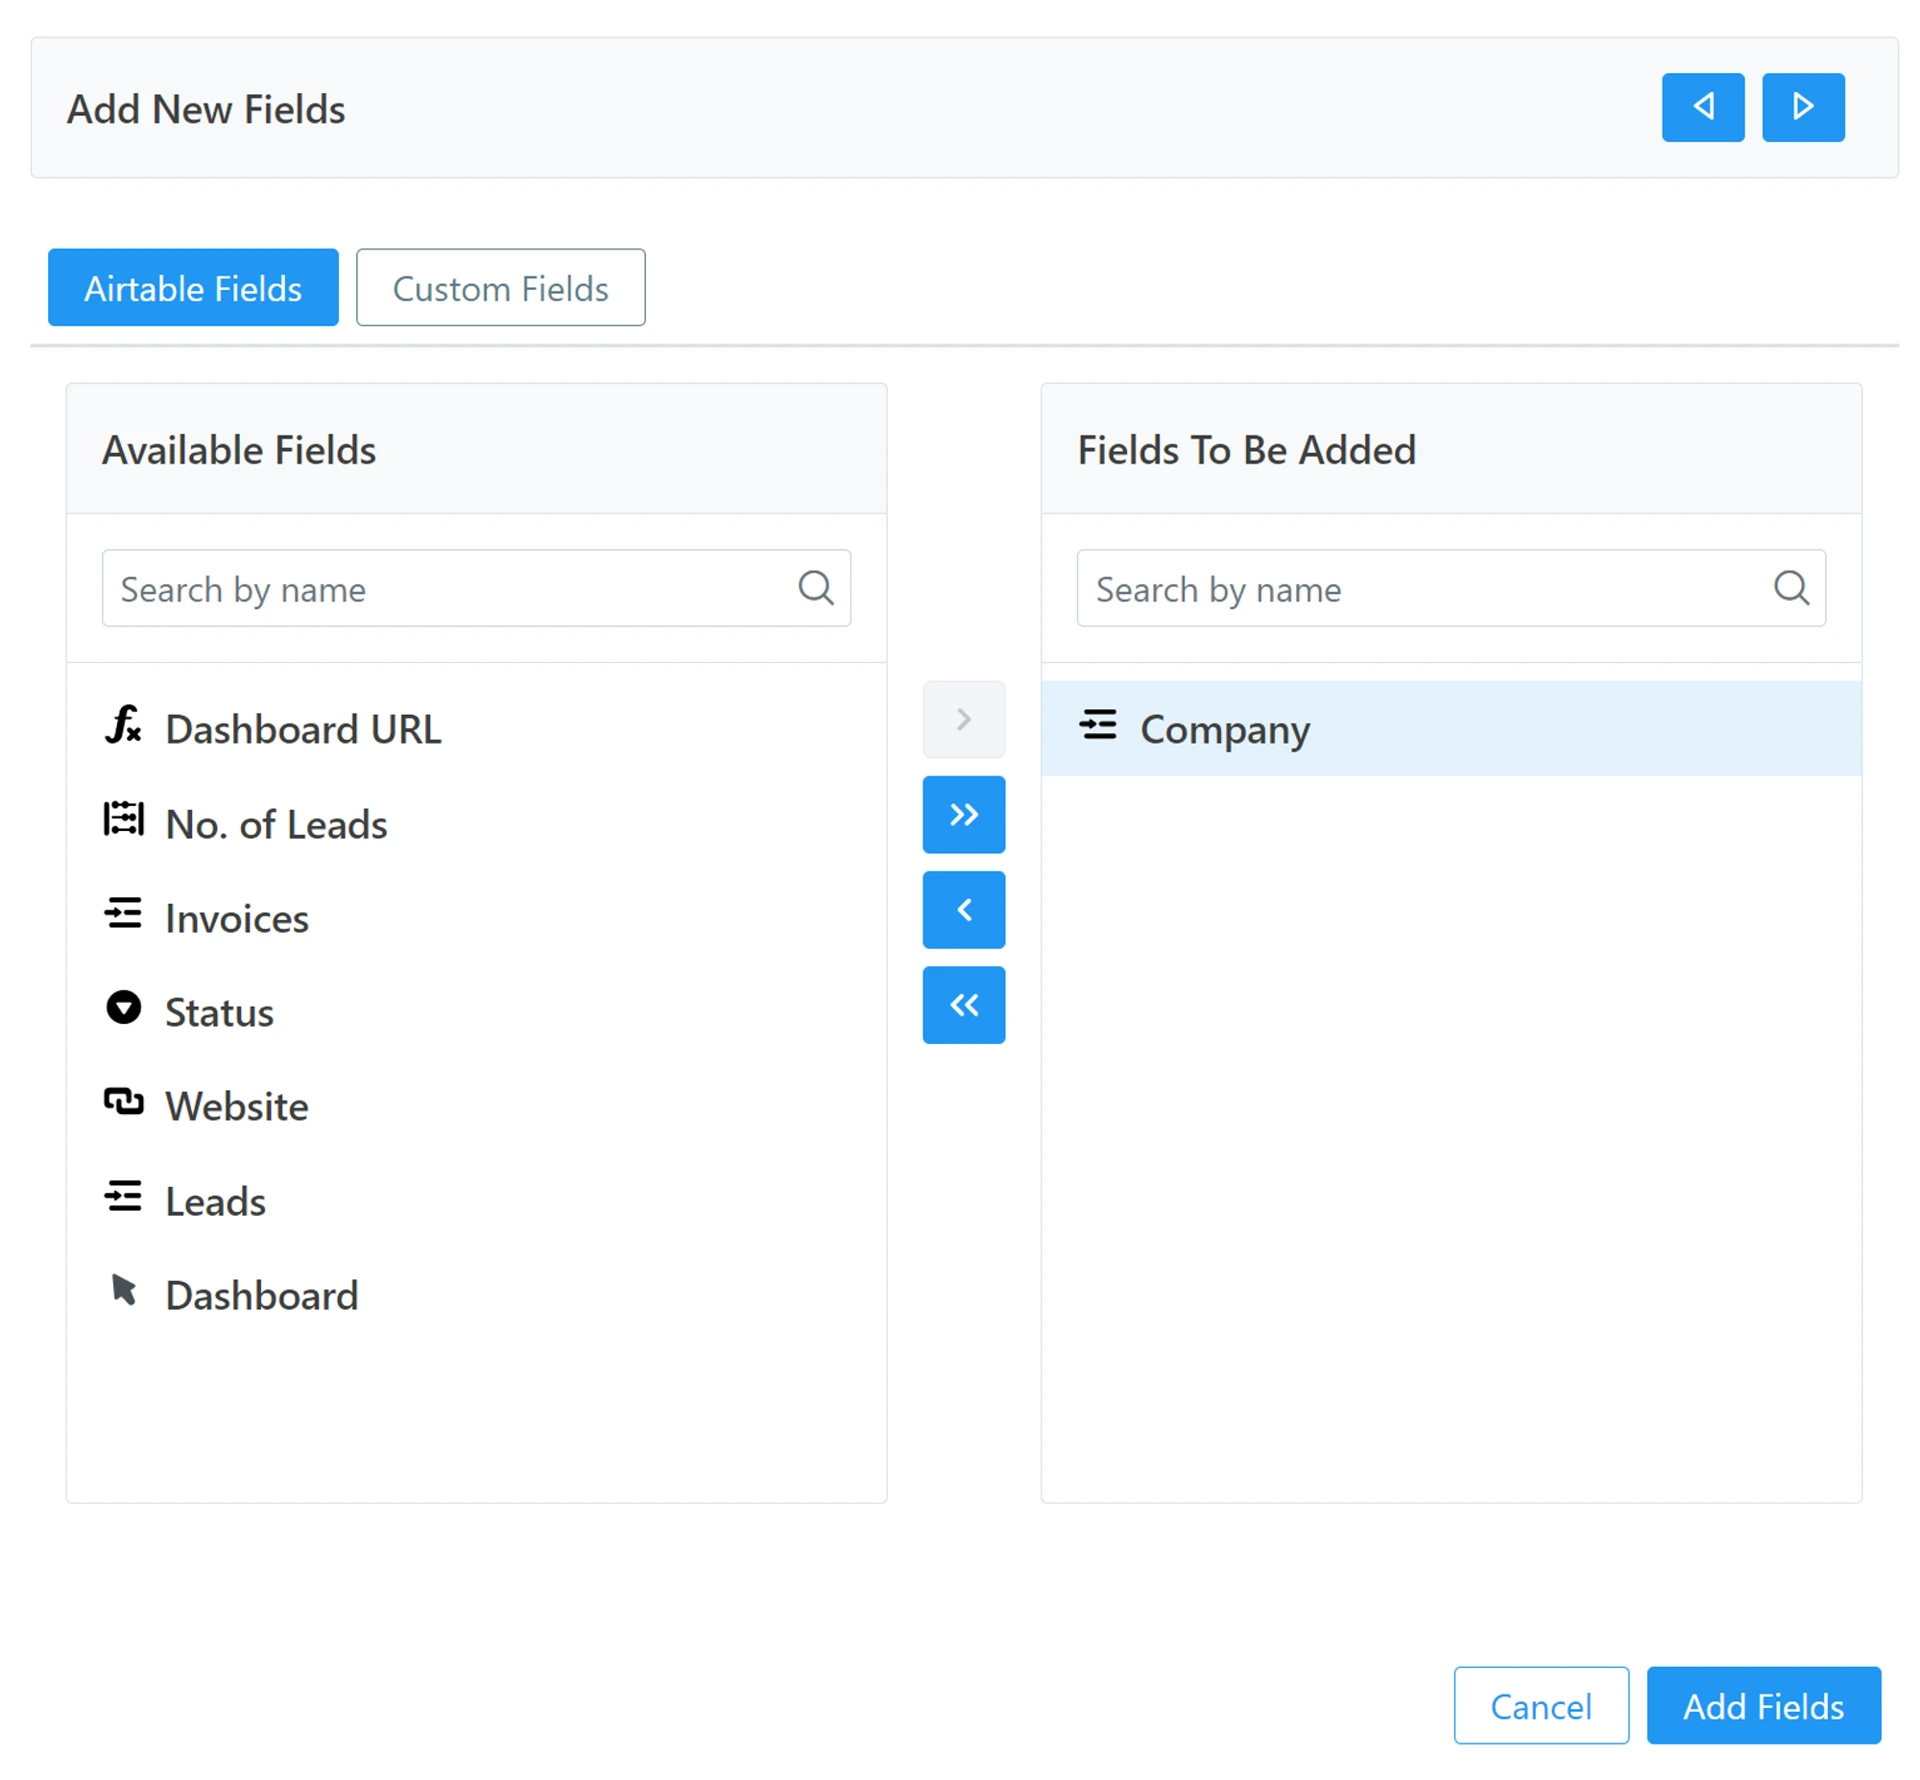
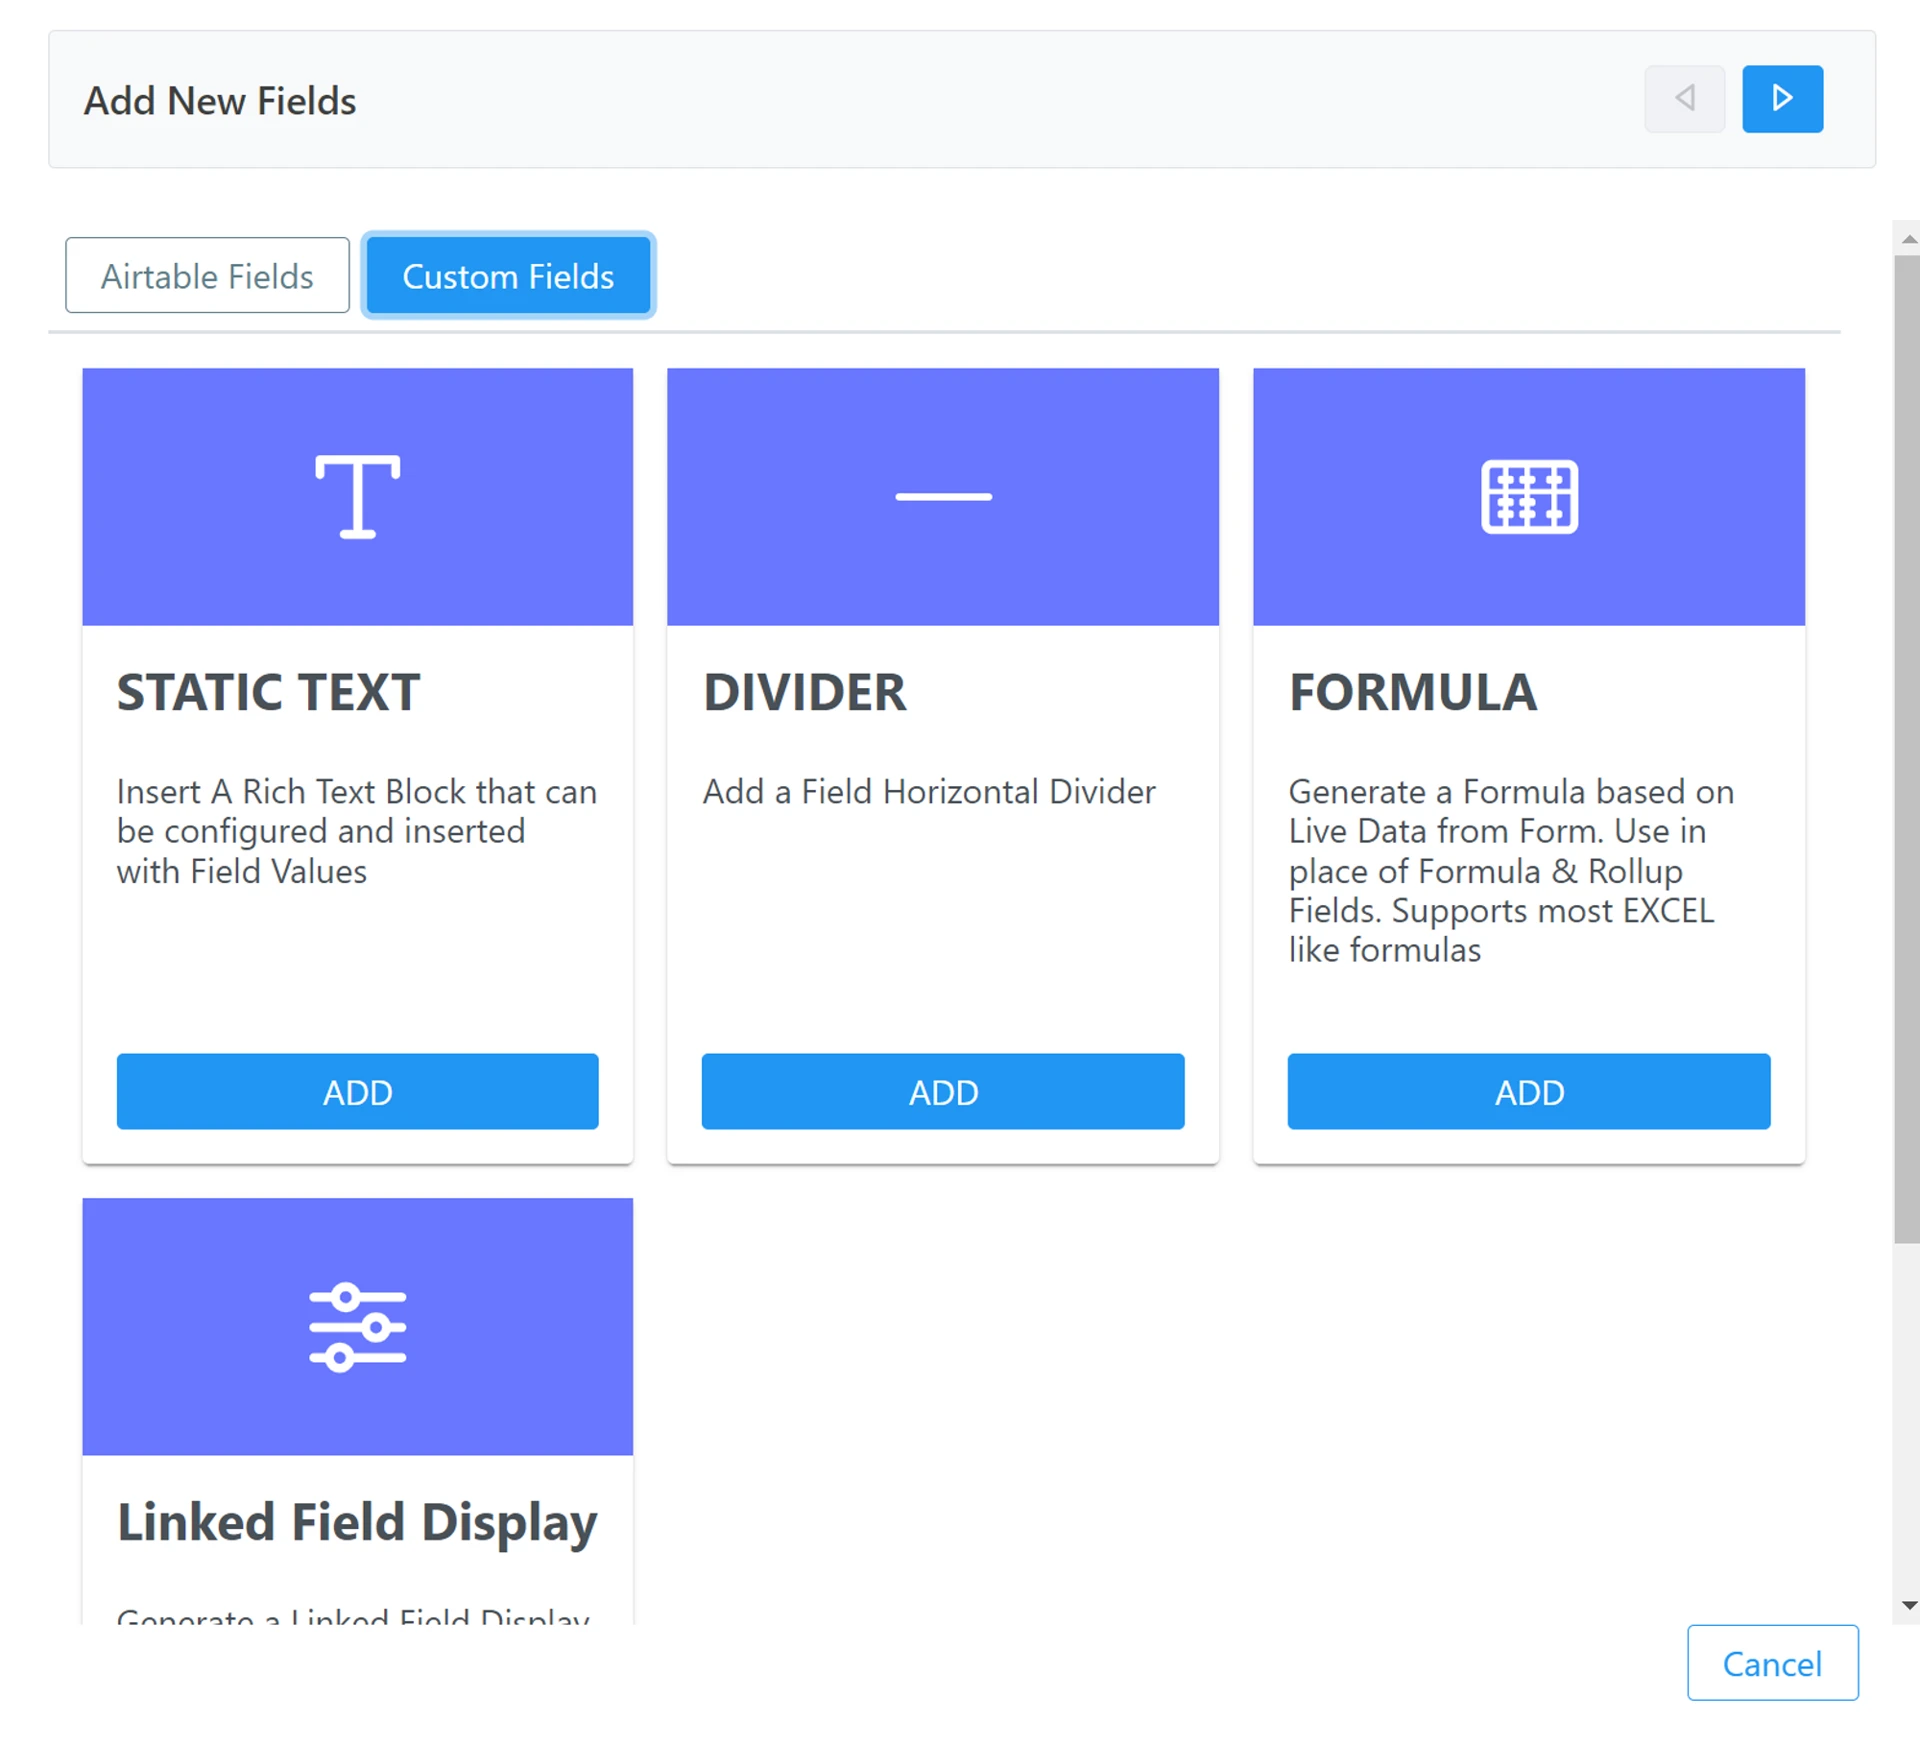
- Move fields to the right column to add them to your Form field set, click Add Fields, then click Done. You can add On2Air field types such as Static Text, On2Air Formula, Divider, and Linked Field Display by clicking Custom Fields
- Click each Field and configure the settings on each one, such as Field Visibility, SubForms for linked records, and any extra Configurations you need - See all field type options

Use Automatically Updated Live Values on Dashboard (for Reporting)
Section titled “Use Automatically Updated Live Values on Dashboard (for Reporting)”To display live data that stays automatically updated, such as for reporting on sales, numbers, totals, etc., you’ll need to use the On2Air Formula field.
You may or may not already have these calculations in your Airtable base as Formula fields, Rollup fields, or Lookup Fields. While these will display for ‘Edit’ Record mode, they will not automatically calculate for ‘Create’ Form mode.
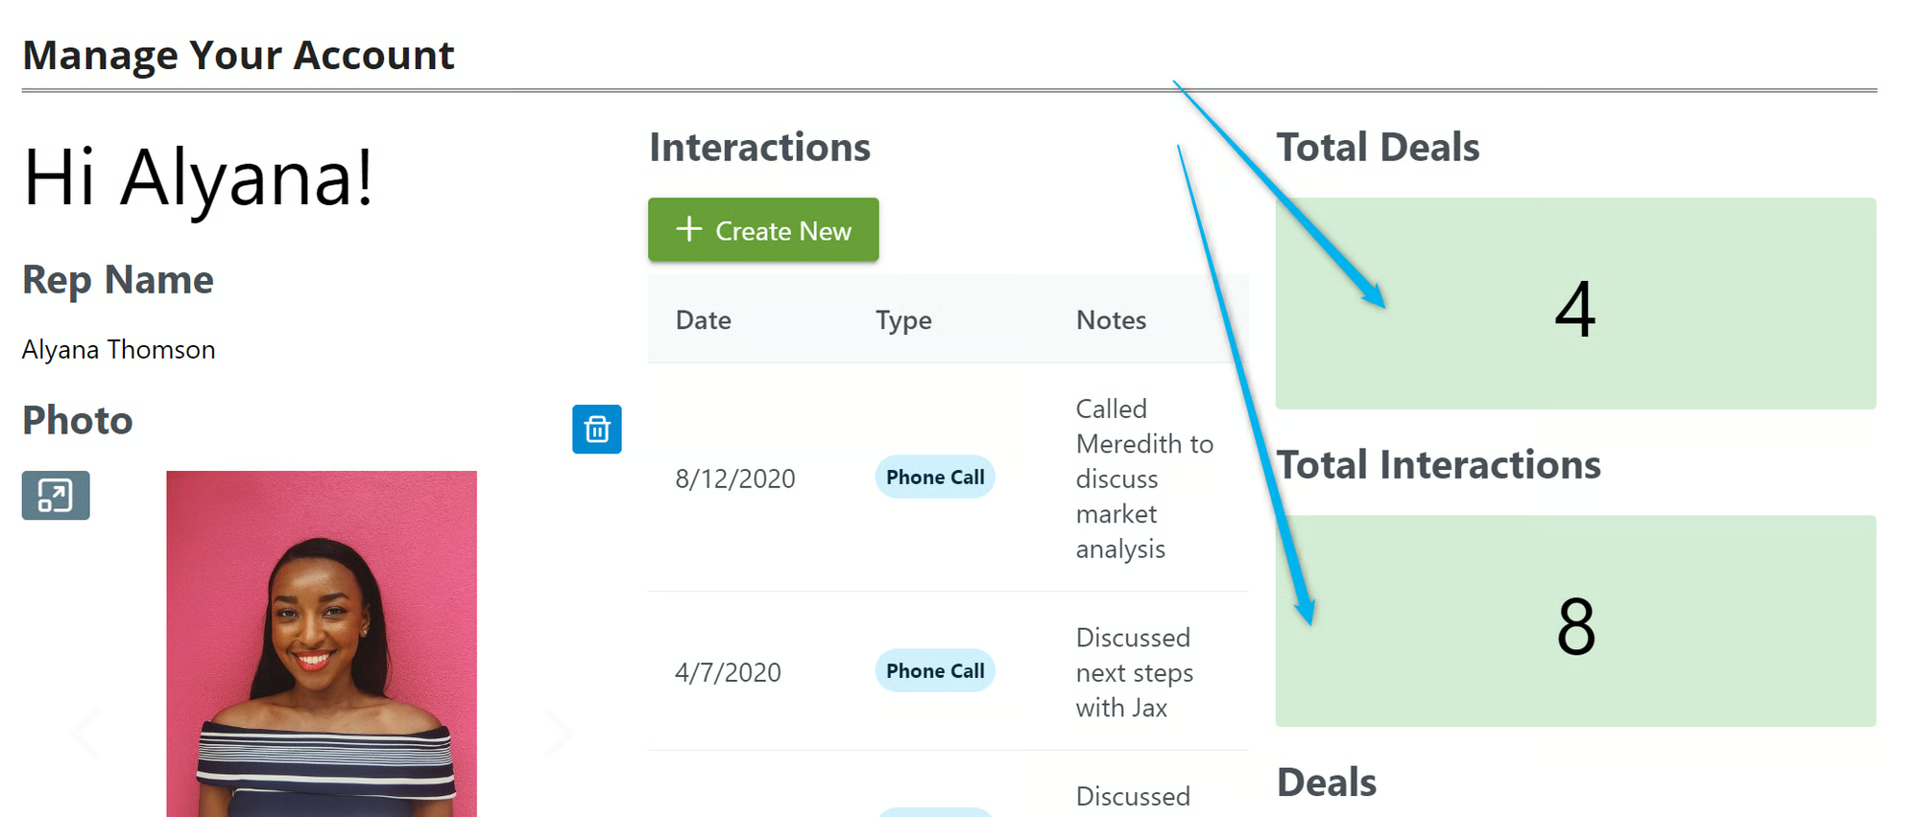
In this example, we’ll show you how to count linked records to display the Total Deals and Total Interactions values
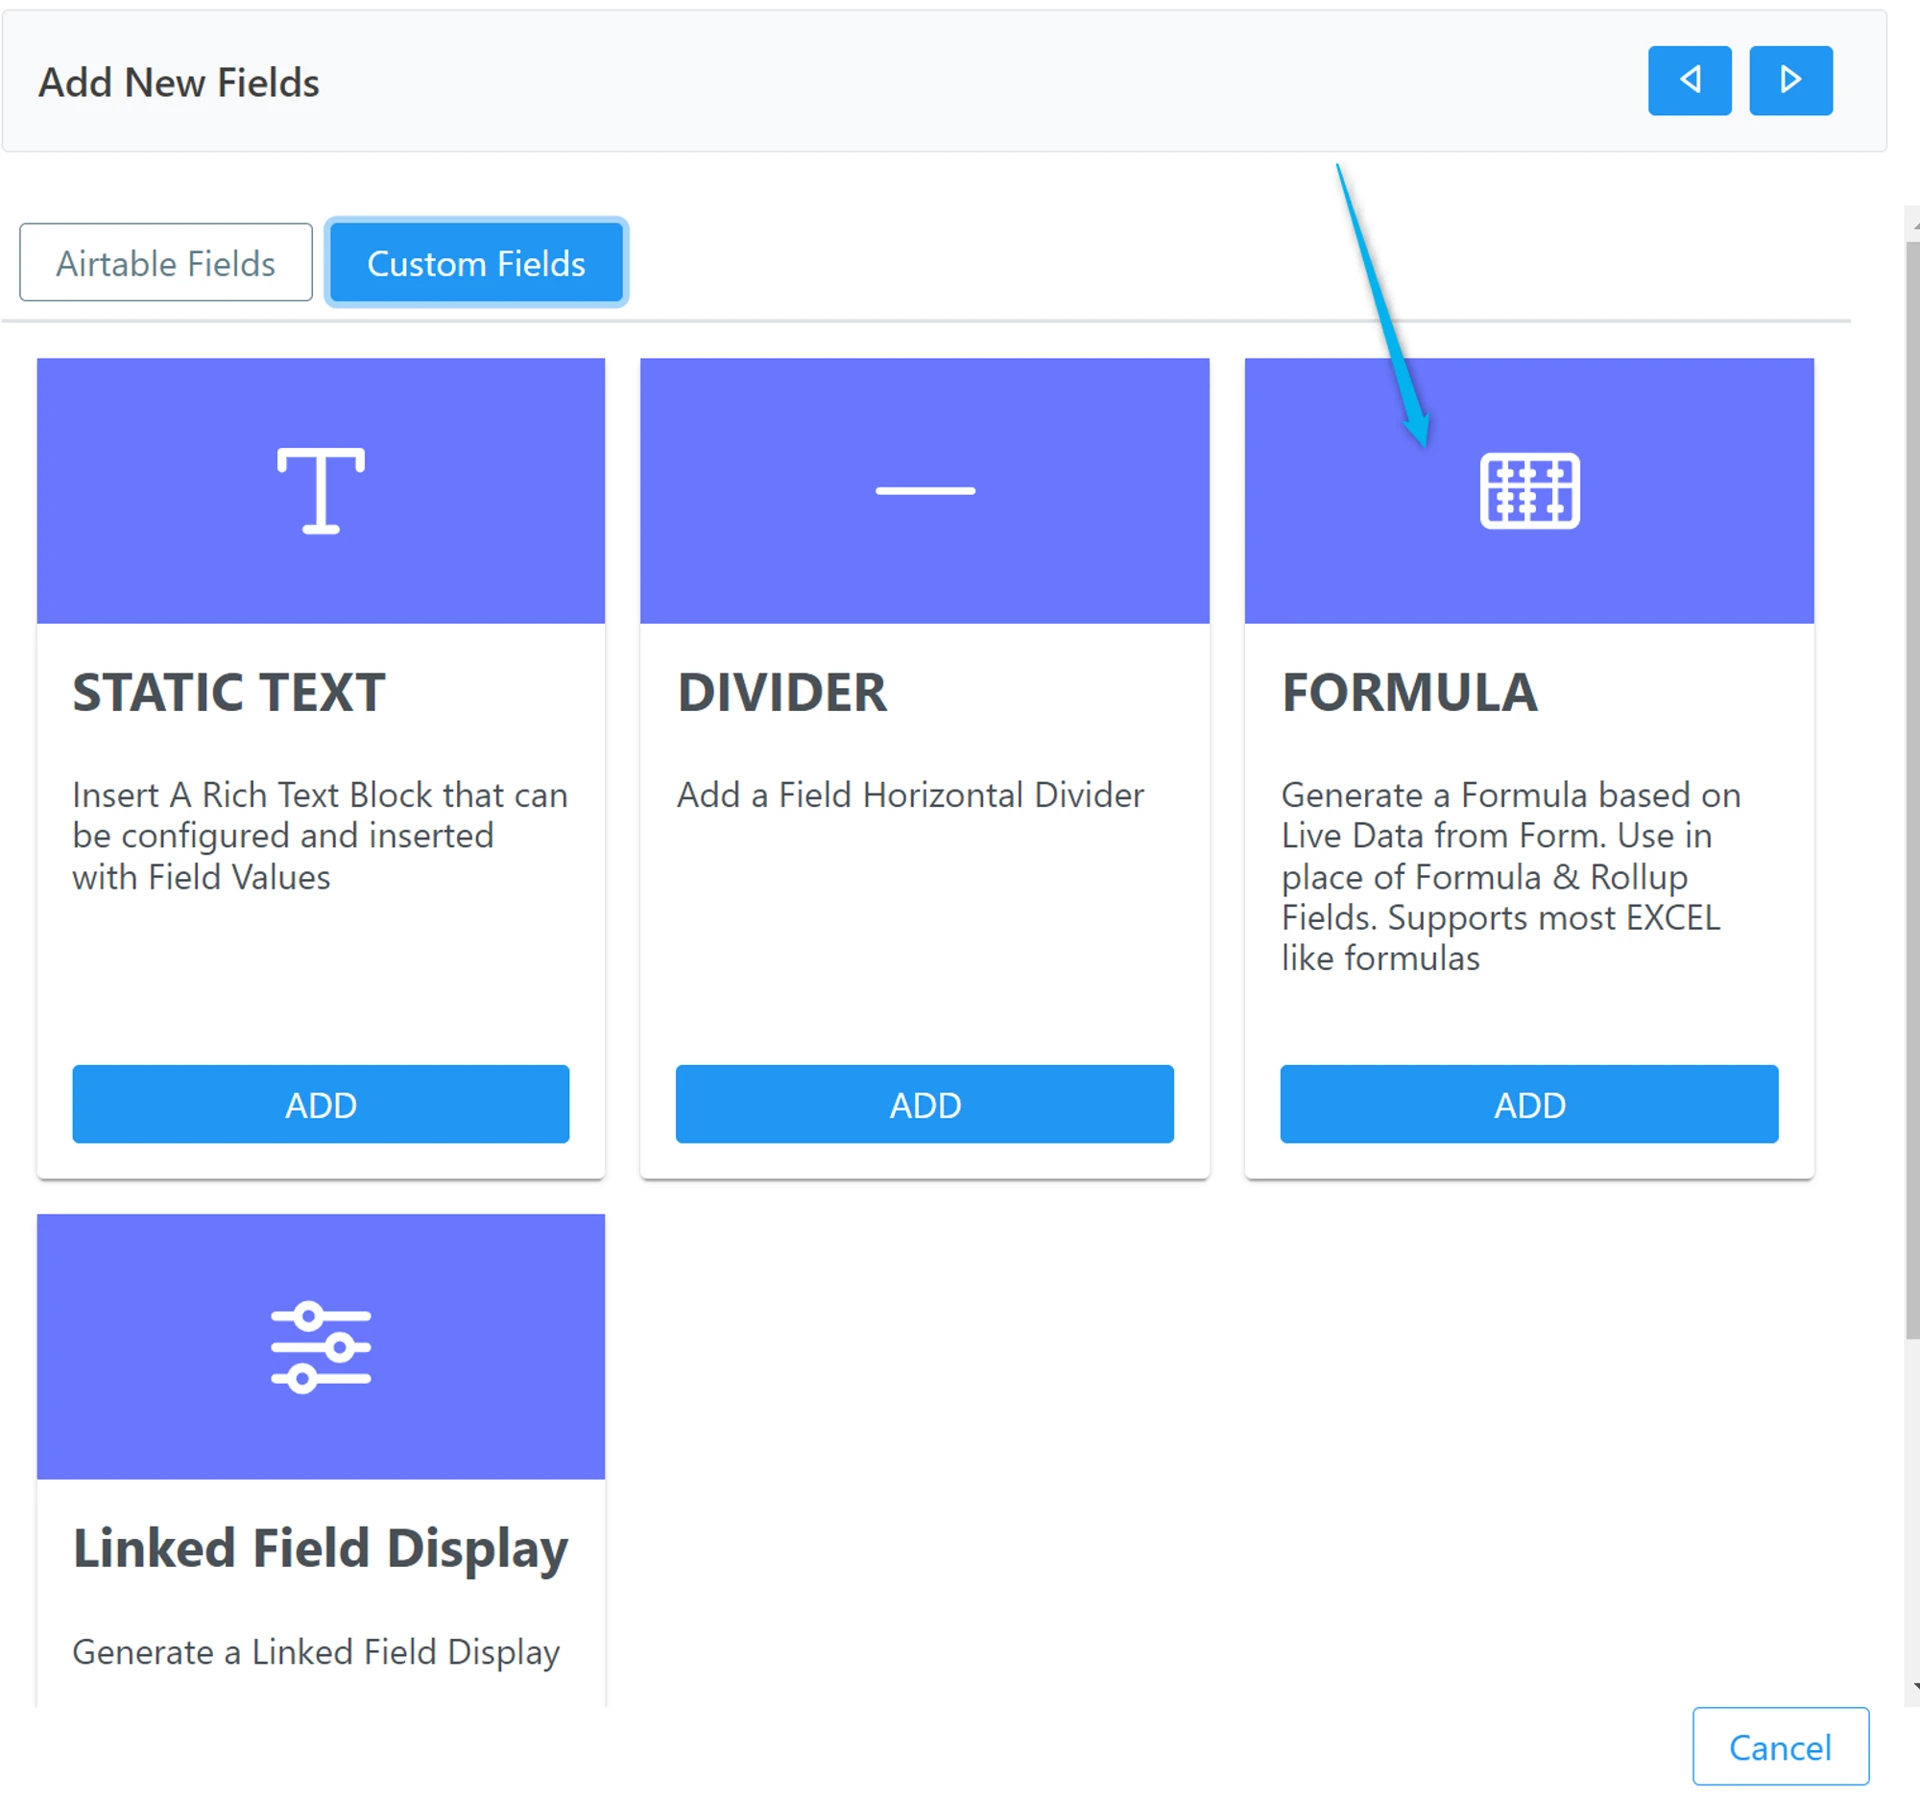
- Add an On2Air Formula field to your form by clicking Add/Manage Fields > Add Fields > Custom Fields, then choose Formula and click Done
- Click your Formula field and click Formula Configuration in the field menu.
- For any field you need to use in your formula, be sure it has been added to your form, even if you need to use the Hidden mode. This allows it to be used as a Variable
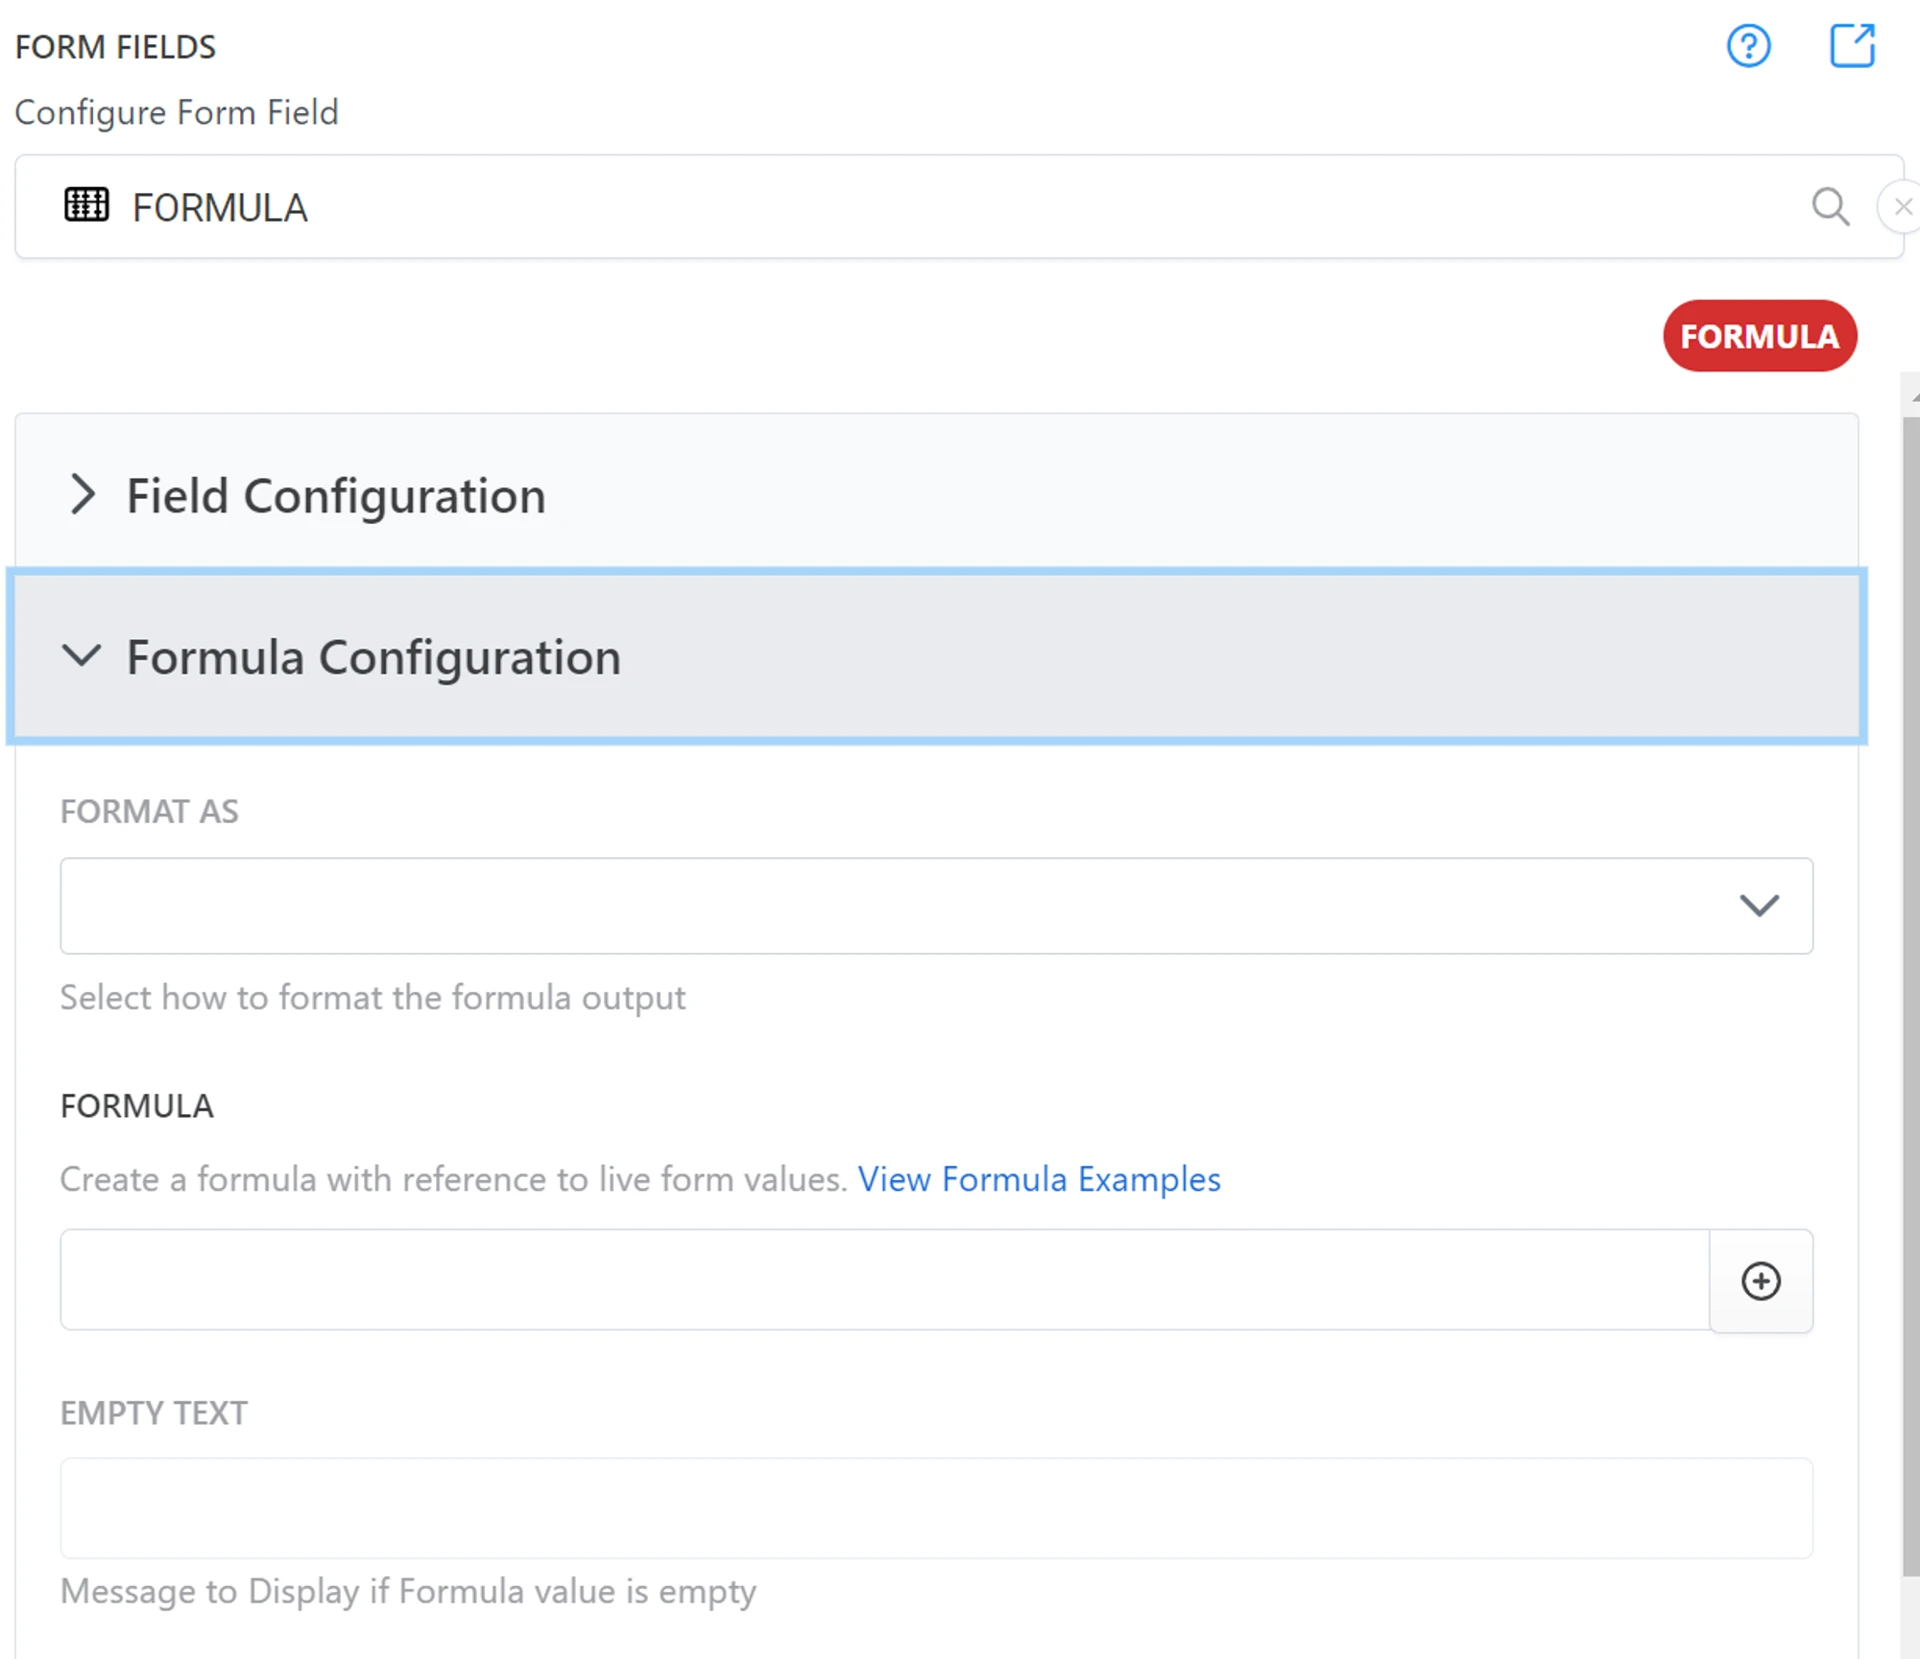
- In the Formula, add your Formula and then insert any Airtable field as a Variable - See a full list of available formulas
💡
Learn  How to Live Calculate Data on Your On2Air Form (Estimates, Quotes, and more)
In the Deals field, we use the formula COUNTA, then add a parentheses, then insert the Airtable field Deals::Deal ID, then close the parentheses
Our formula is:
Copy
COUNTA({Deals::Deal ID})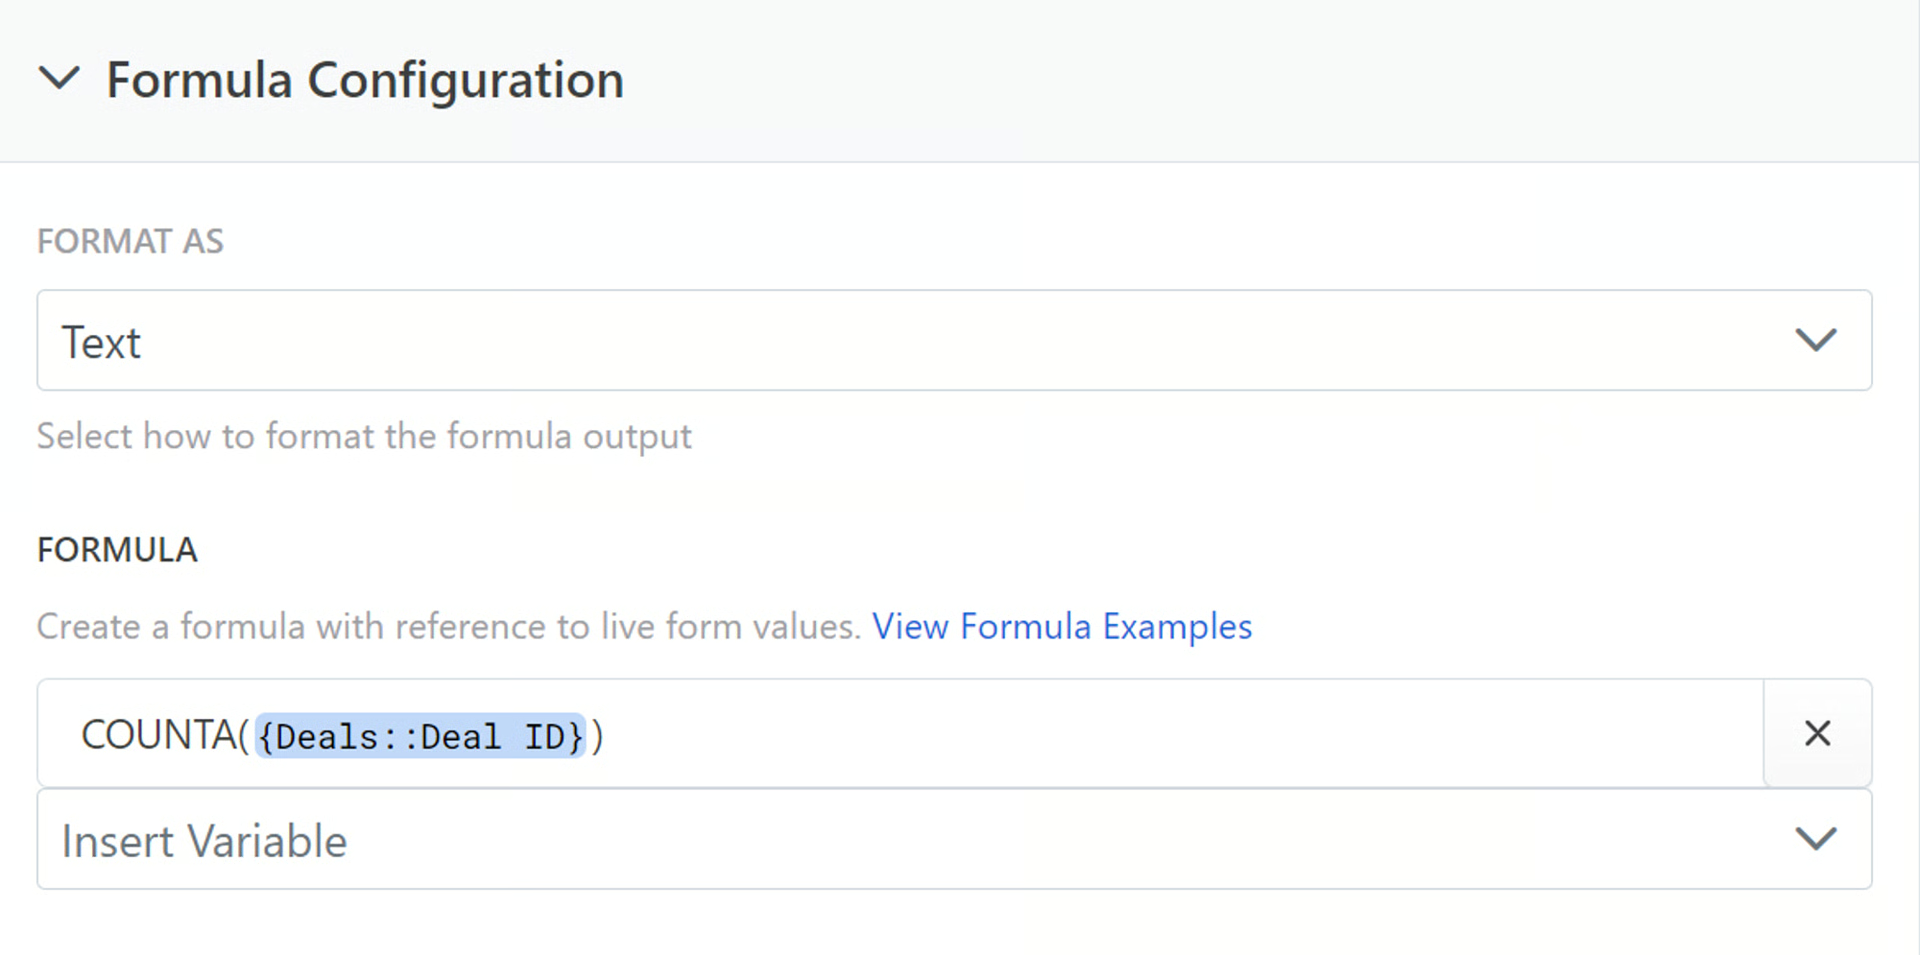
- Then changed it to Format As Text

- We then adding some styling in the CSS Class Styling field to make the number bigger and add the green background

💡
Learn how to  Style Your Forms and Fields - CSS Class Styling
- We then have the final result that will automatically calculate each time a new deal is added.

Limiting Linked Records Displayed
Section titled “Limiting Linked Records Displayed”If you have Linked Record fields on your dashboard and you allow to option to Find Existing records, you may want to limit what Linked Records can be searched.
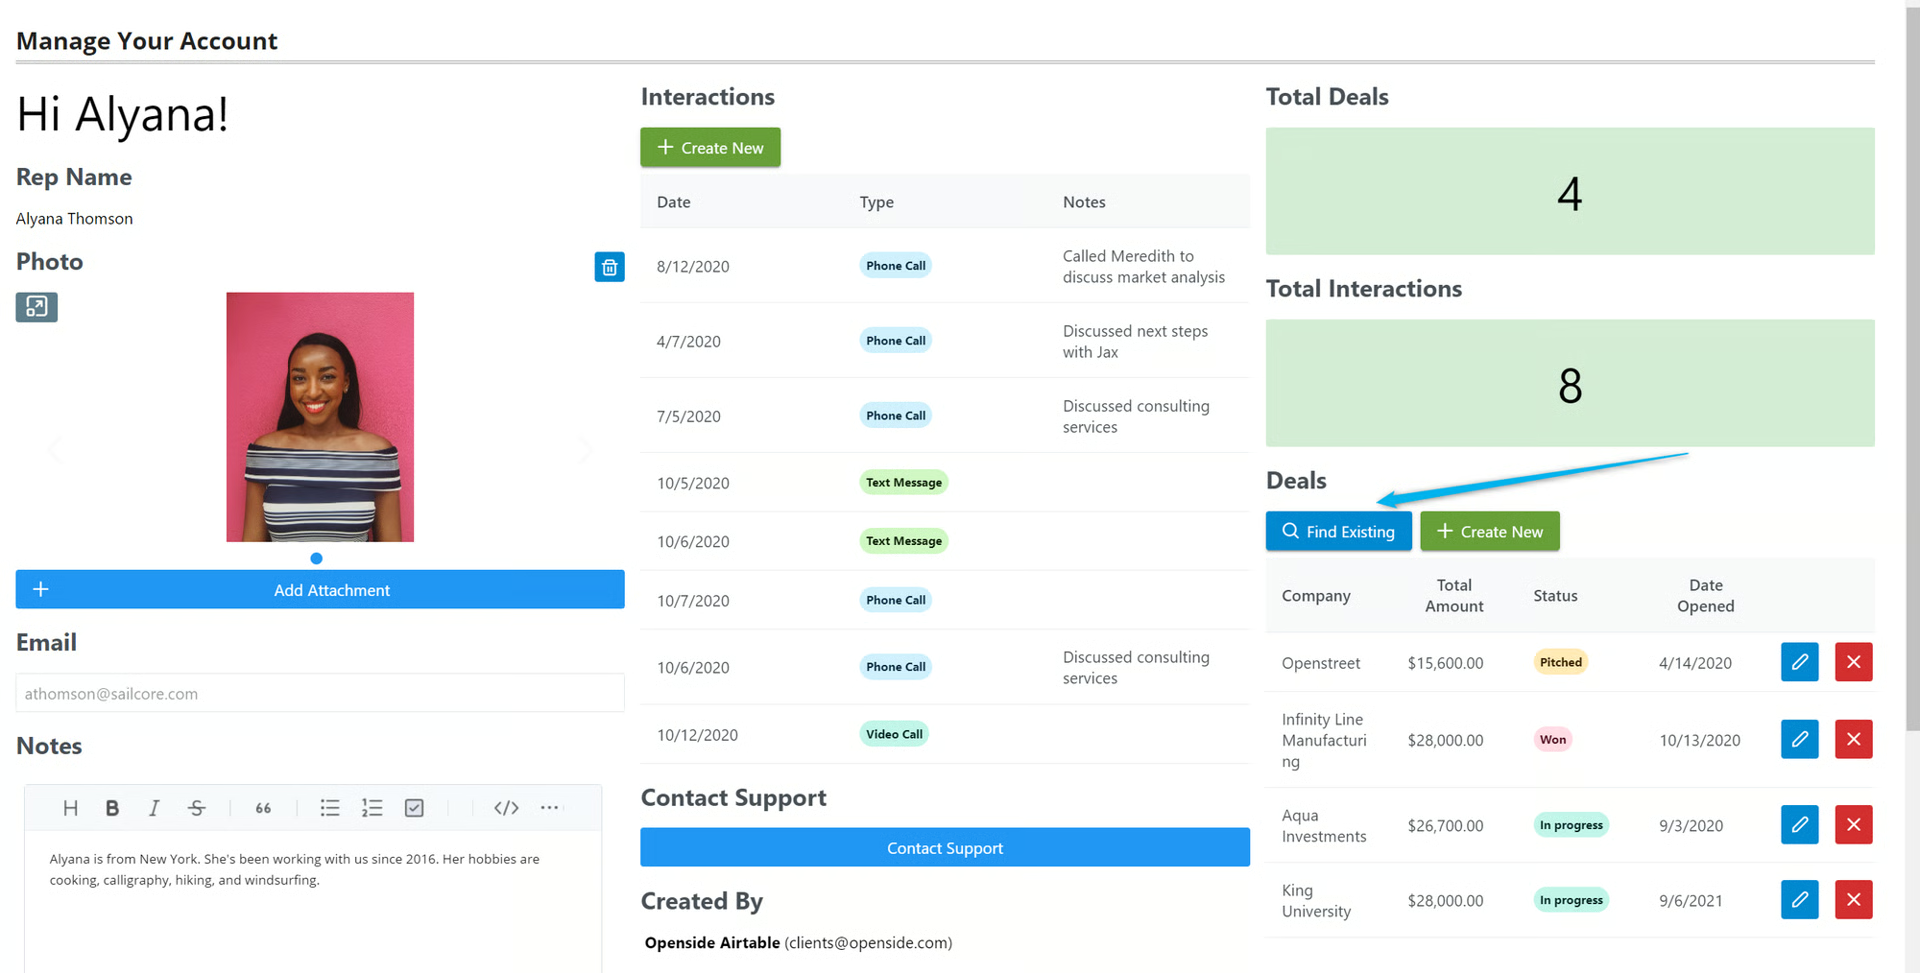
In this example, we want the Sales Rep to only be able to Find Existing Deals that are relevant to her.
To limit and filter records to that specific Dashboard’s records:
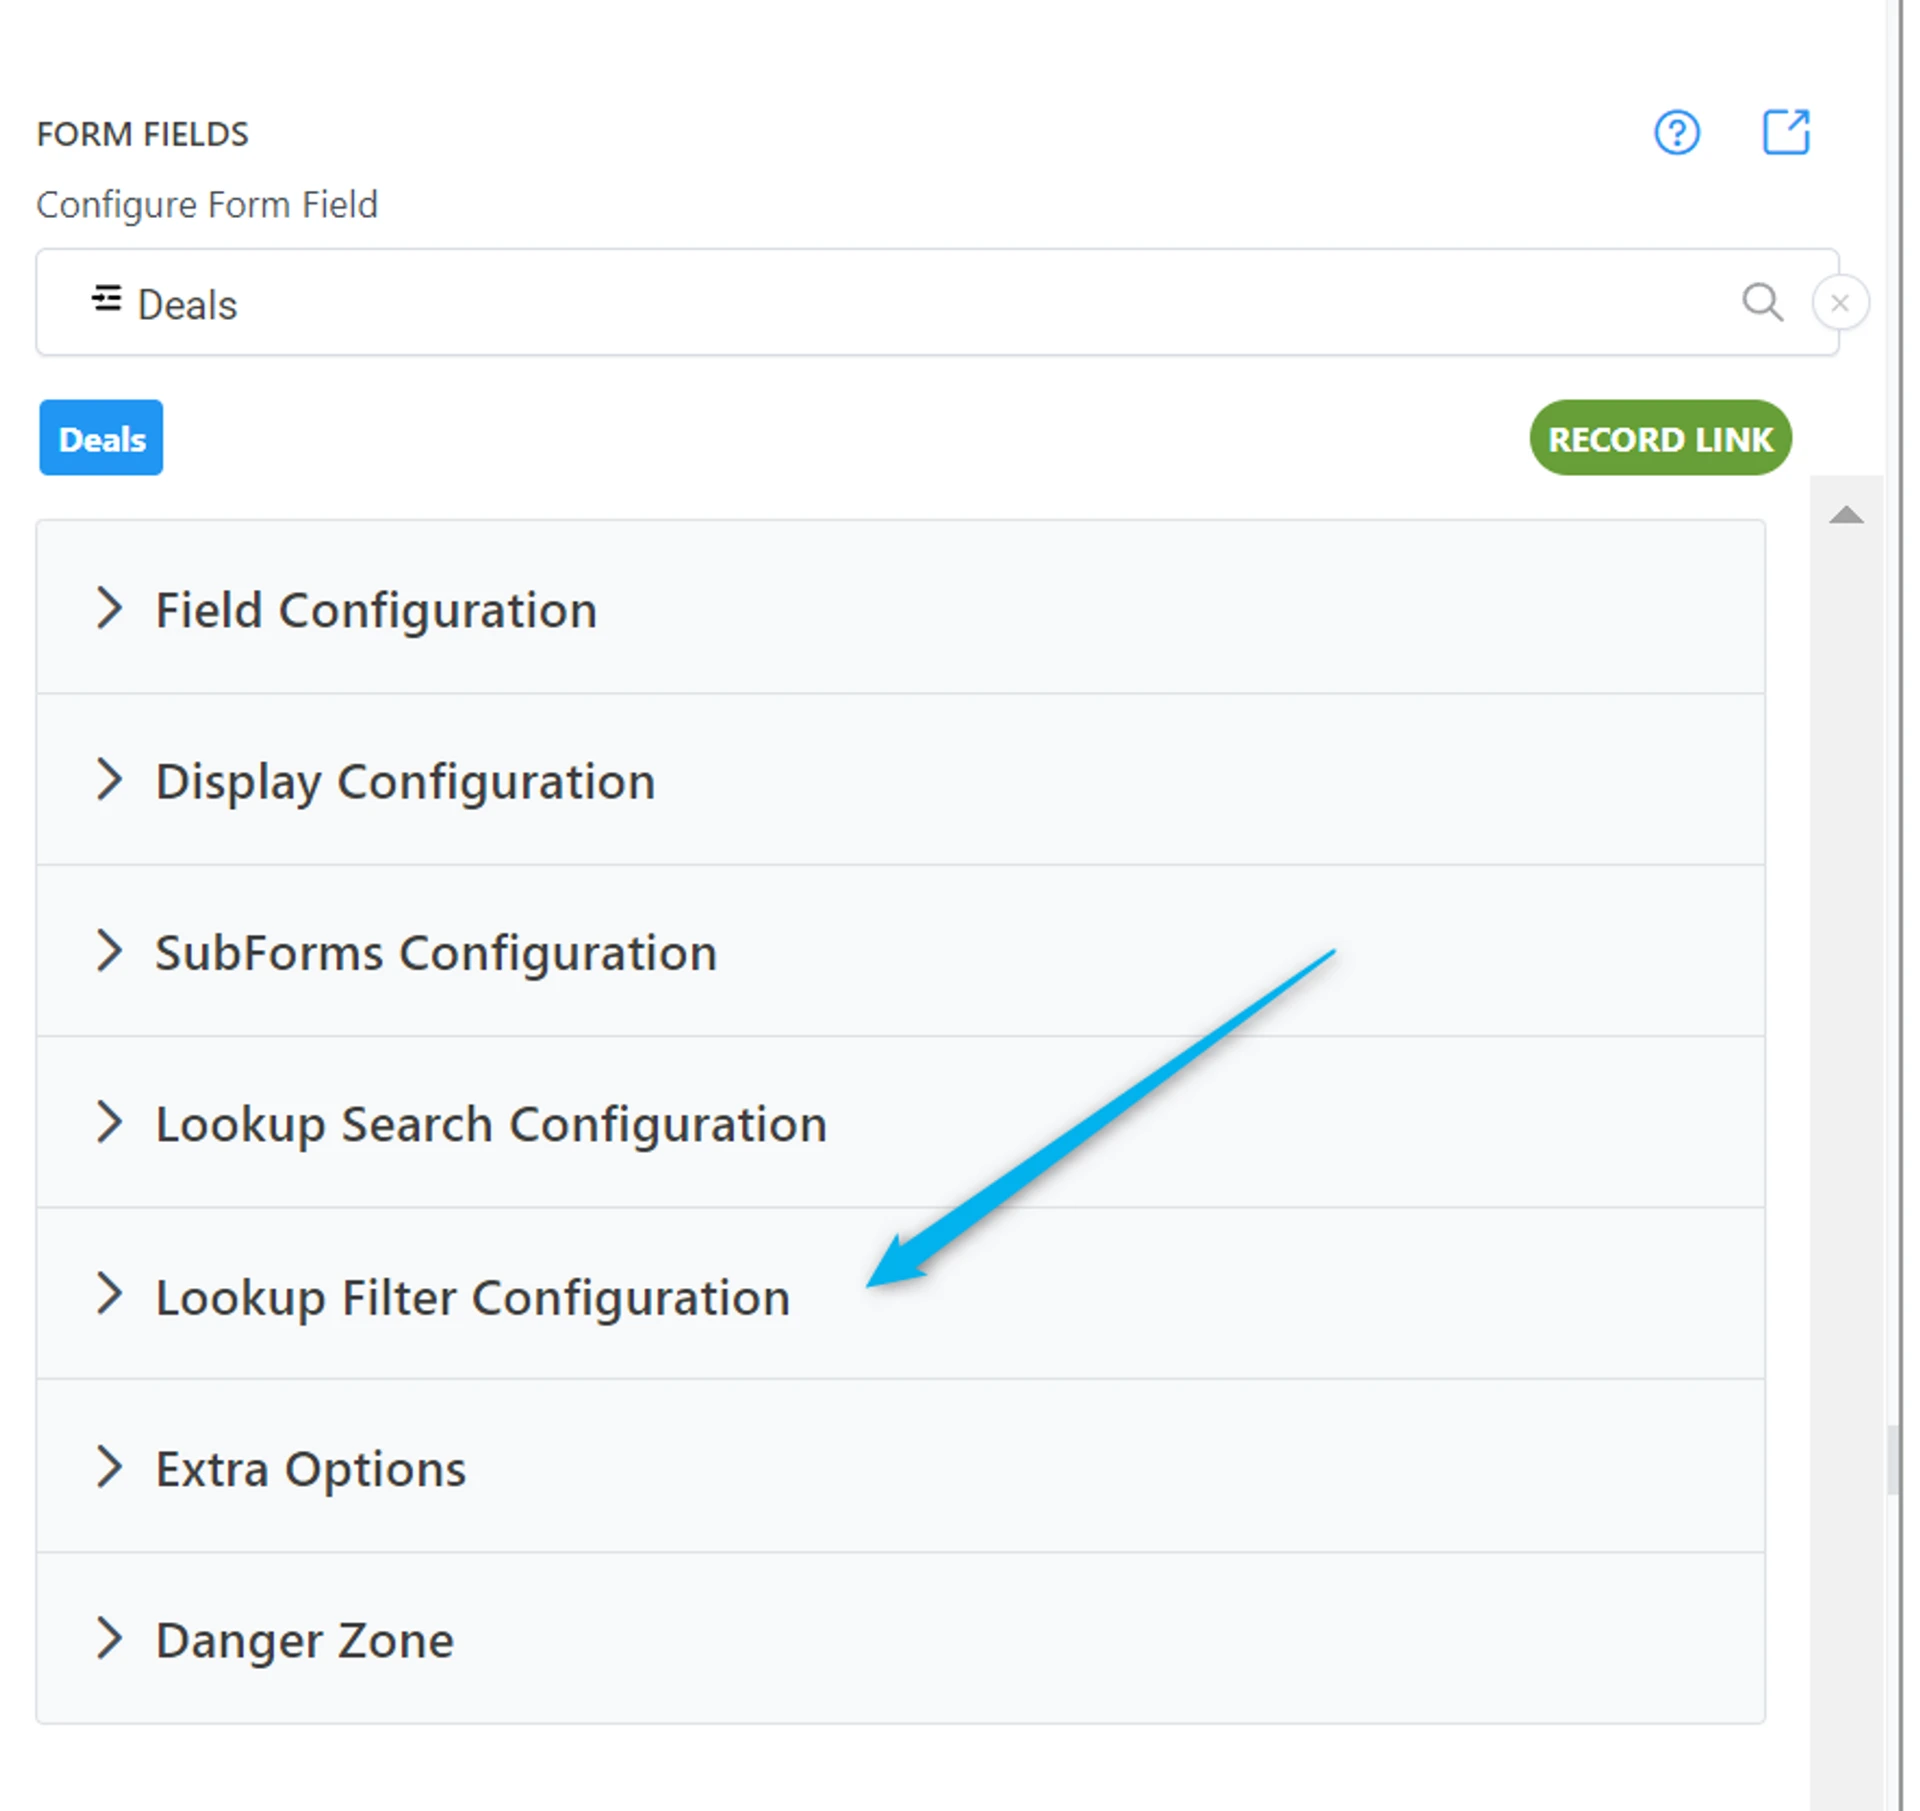
- Choose your Linked Record field in the Editor
- Choose the Lookup Filter Configuration
- In the Field Dependencies, choose Match On Fields, then click Select Fields
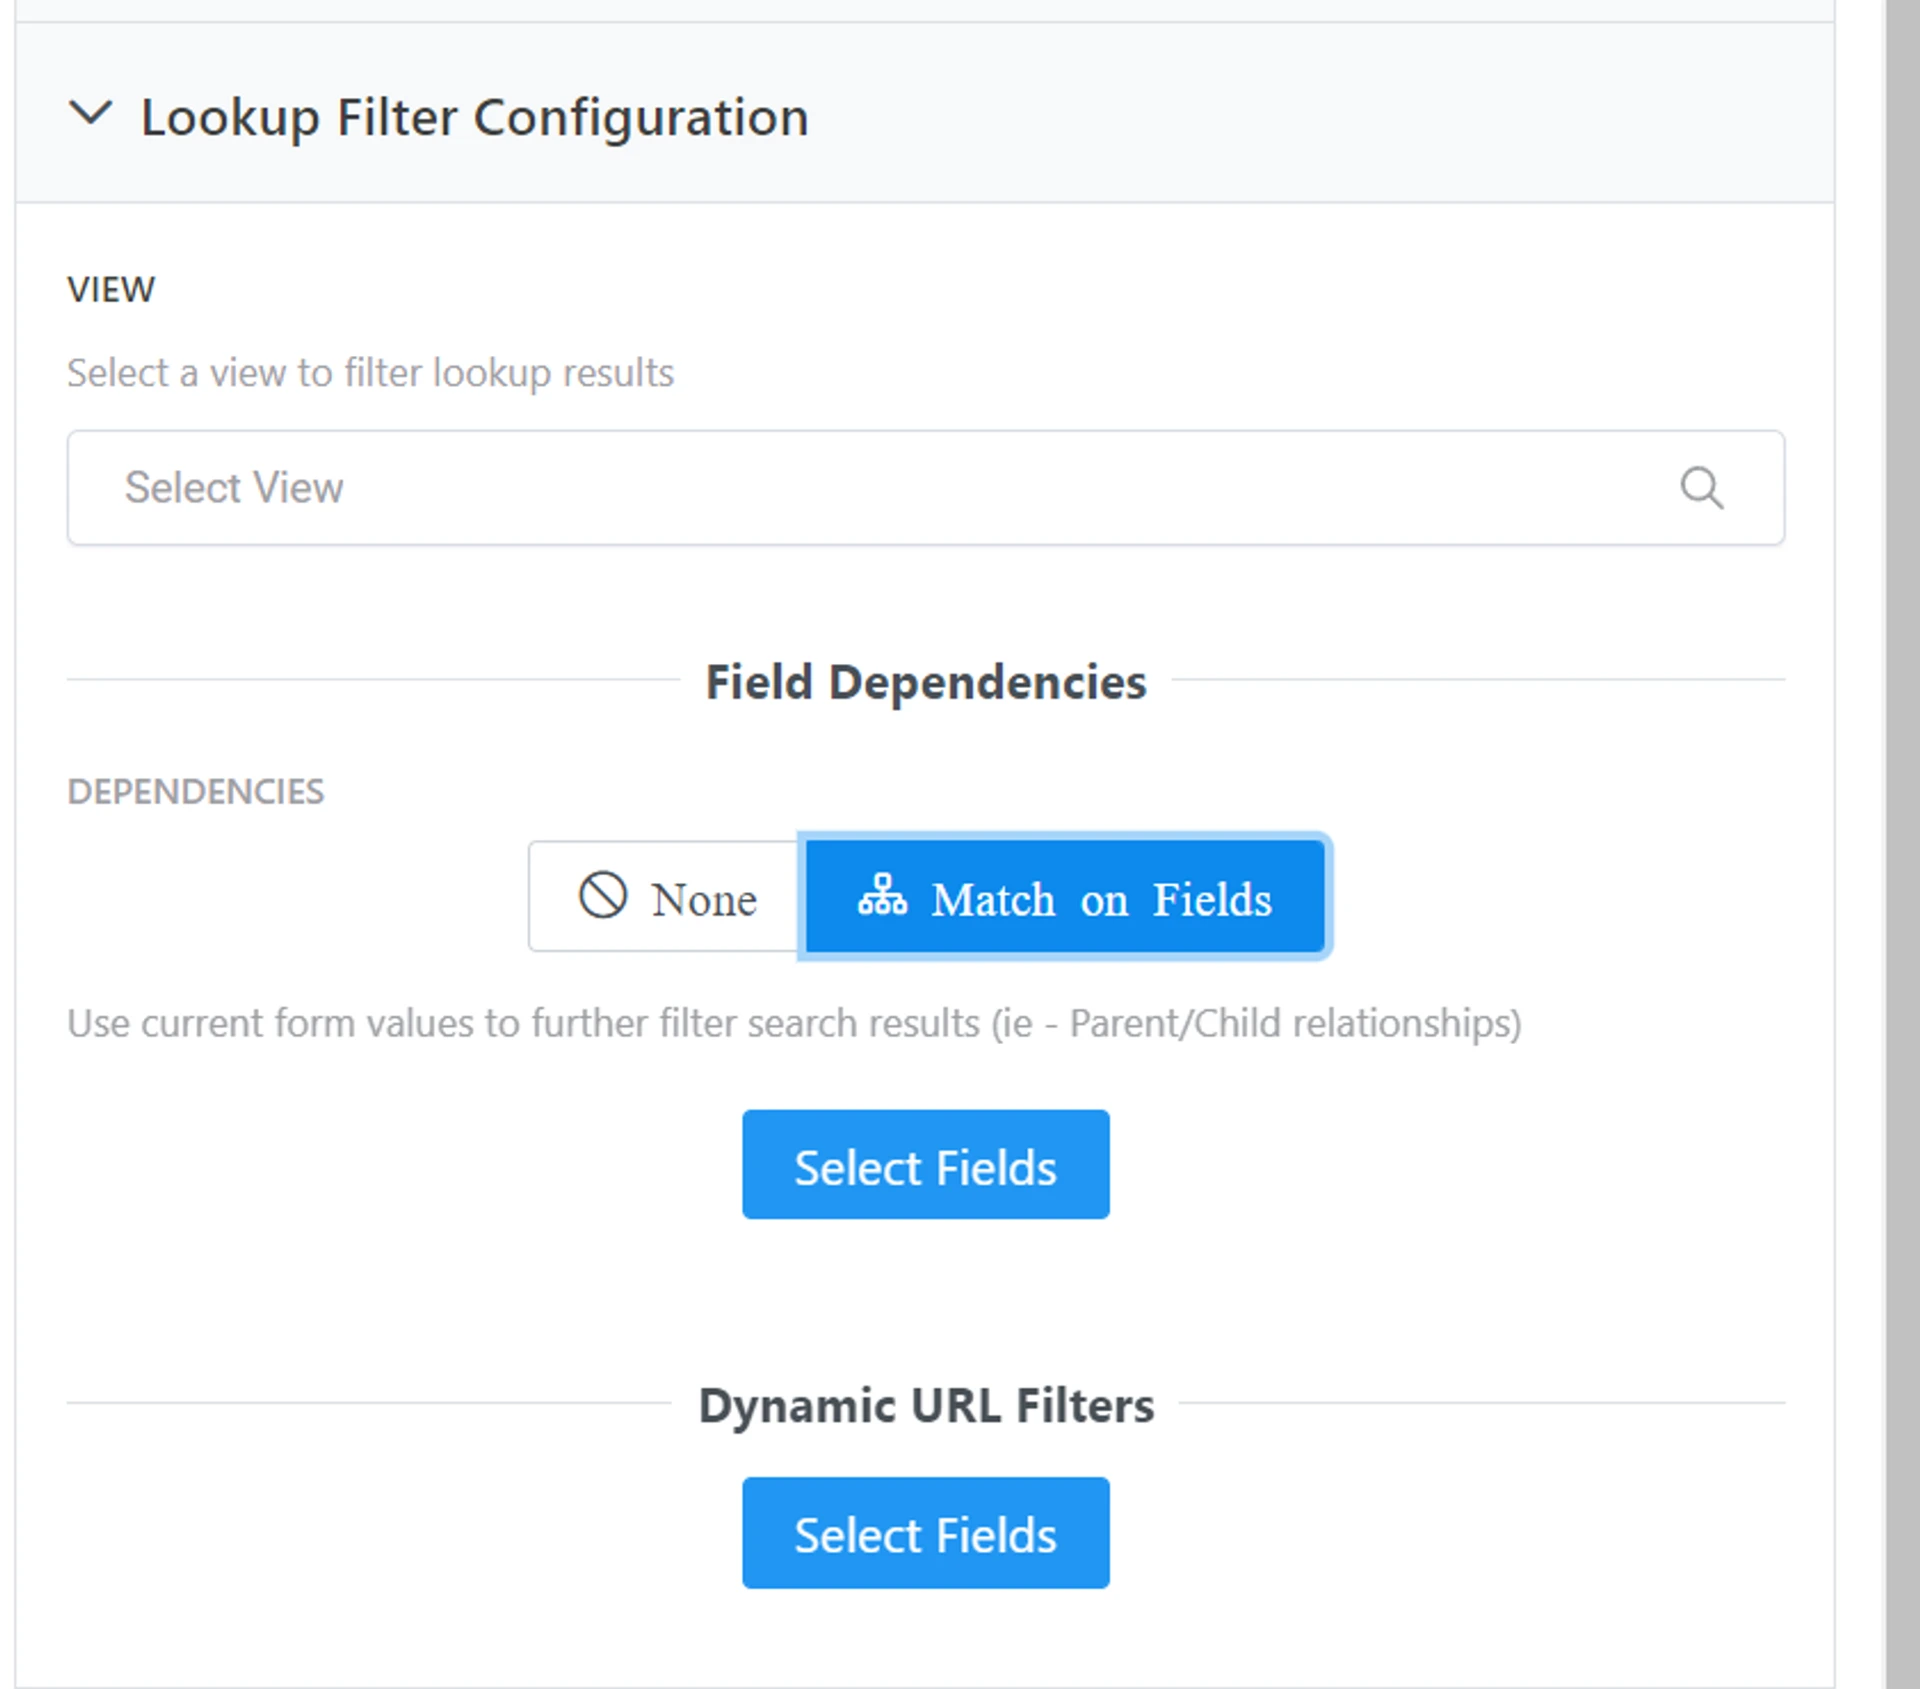
You’ll need to choose a Field or a Linked Record table that contains a field that can be matched exactly to limit the records displayed.
In our example, we’ll use the Sales Rep table because it contains the Sales Reps Name. We can match exactly to her name so she can only see those records.
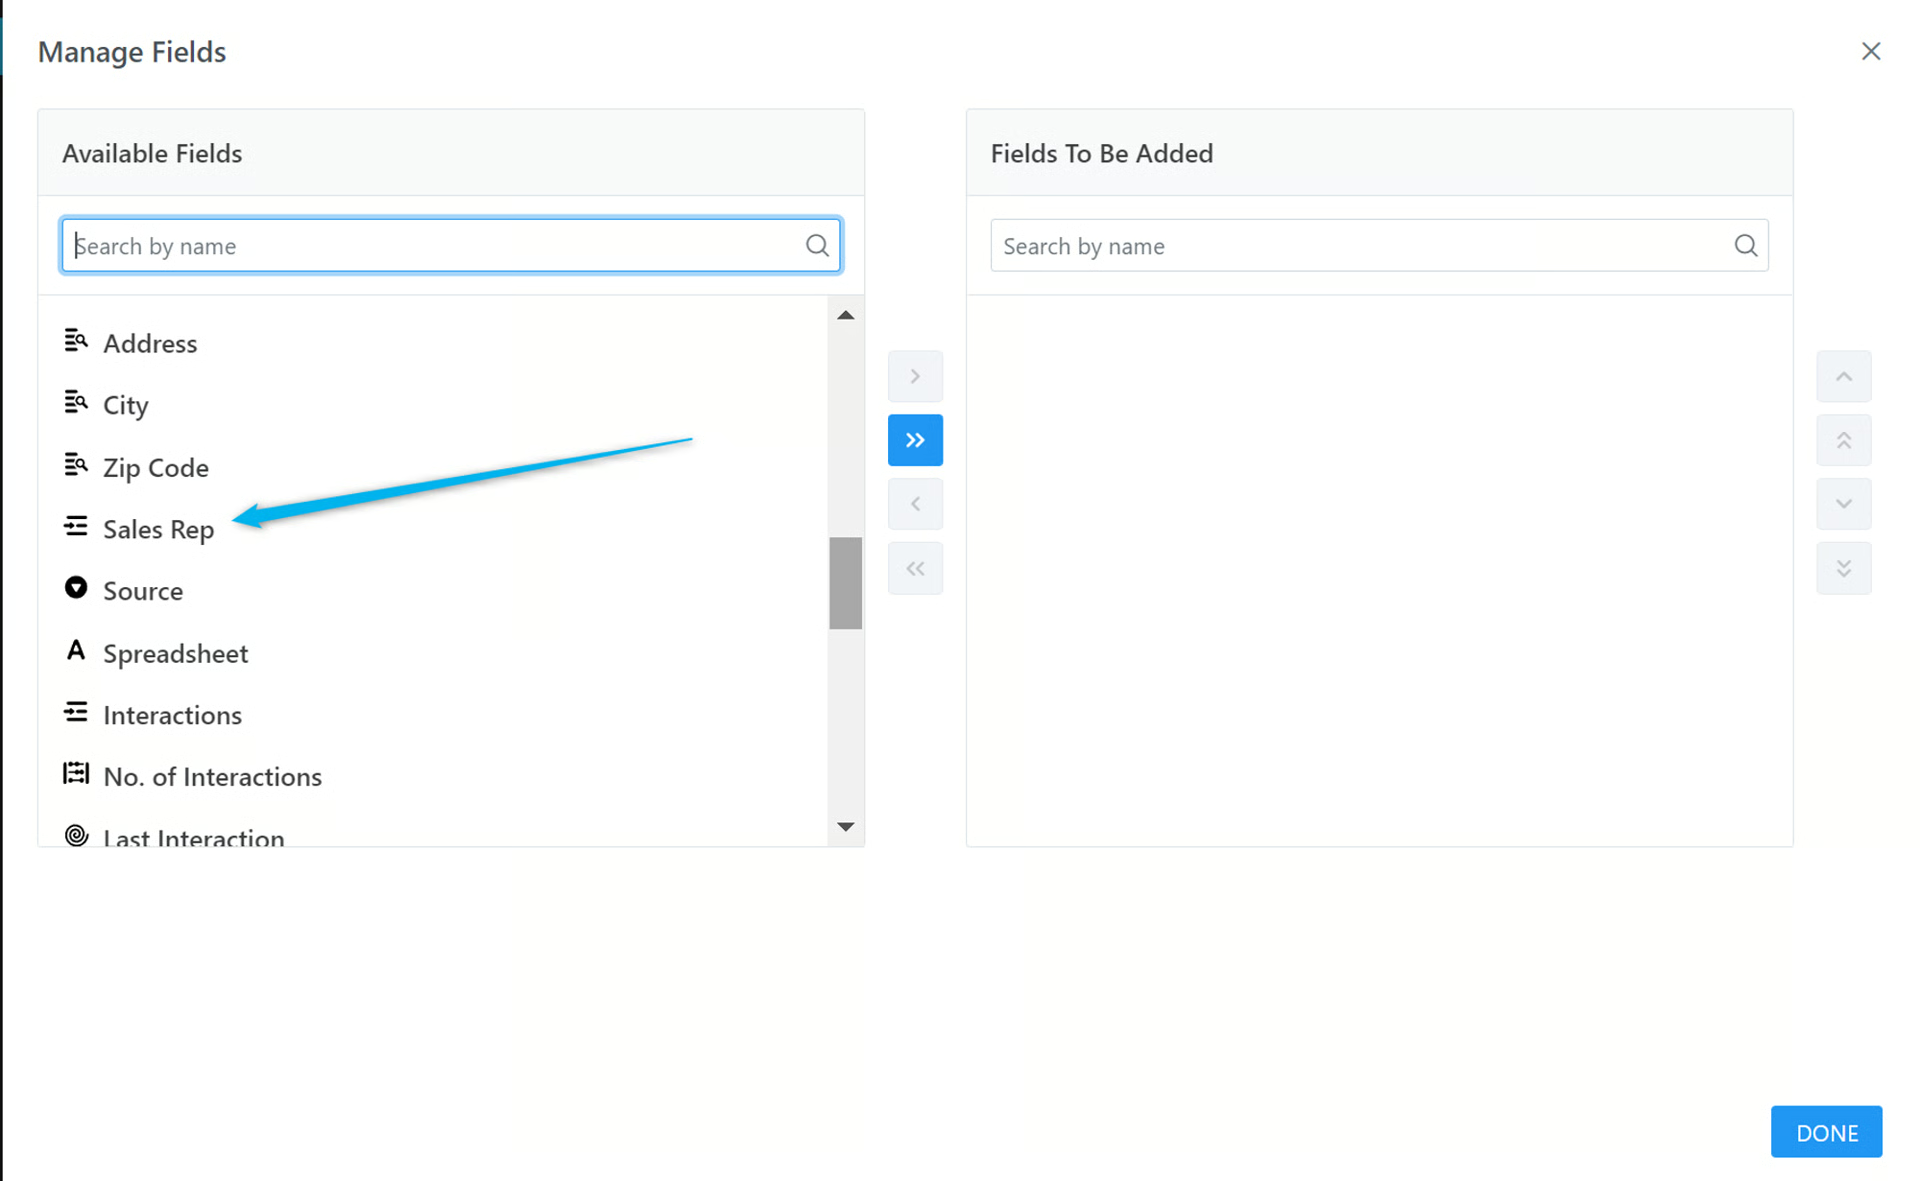
- Choose the field or linked record in Available Fields and then click the arrow to move it to Fields to Be Added
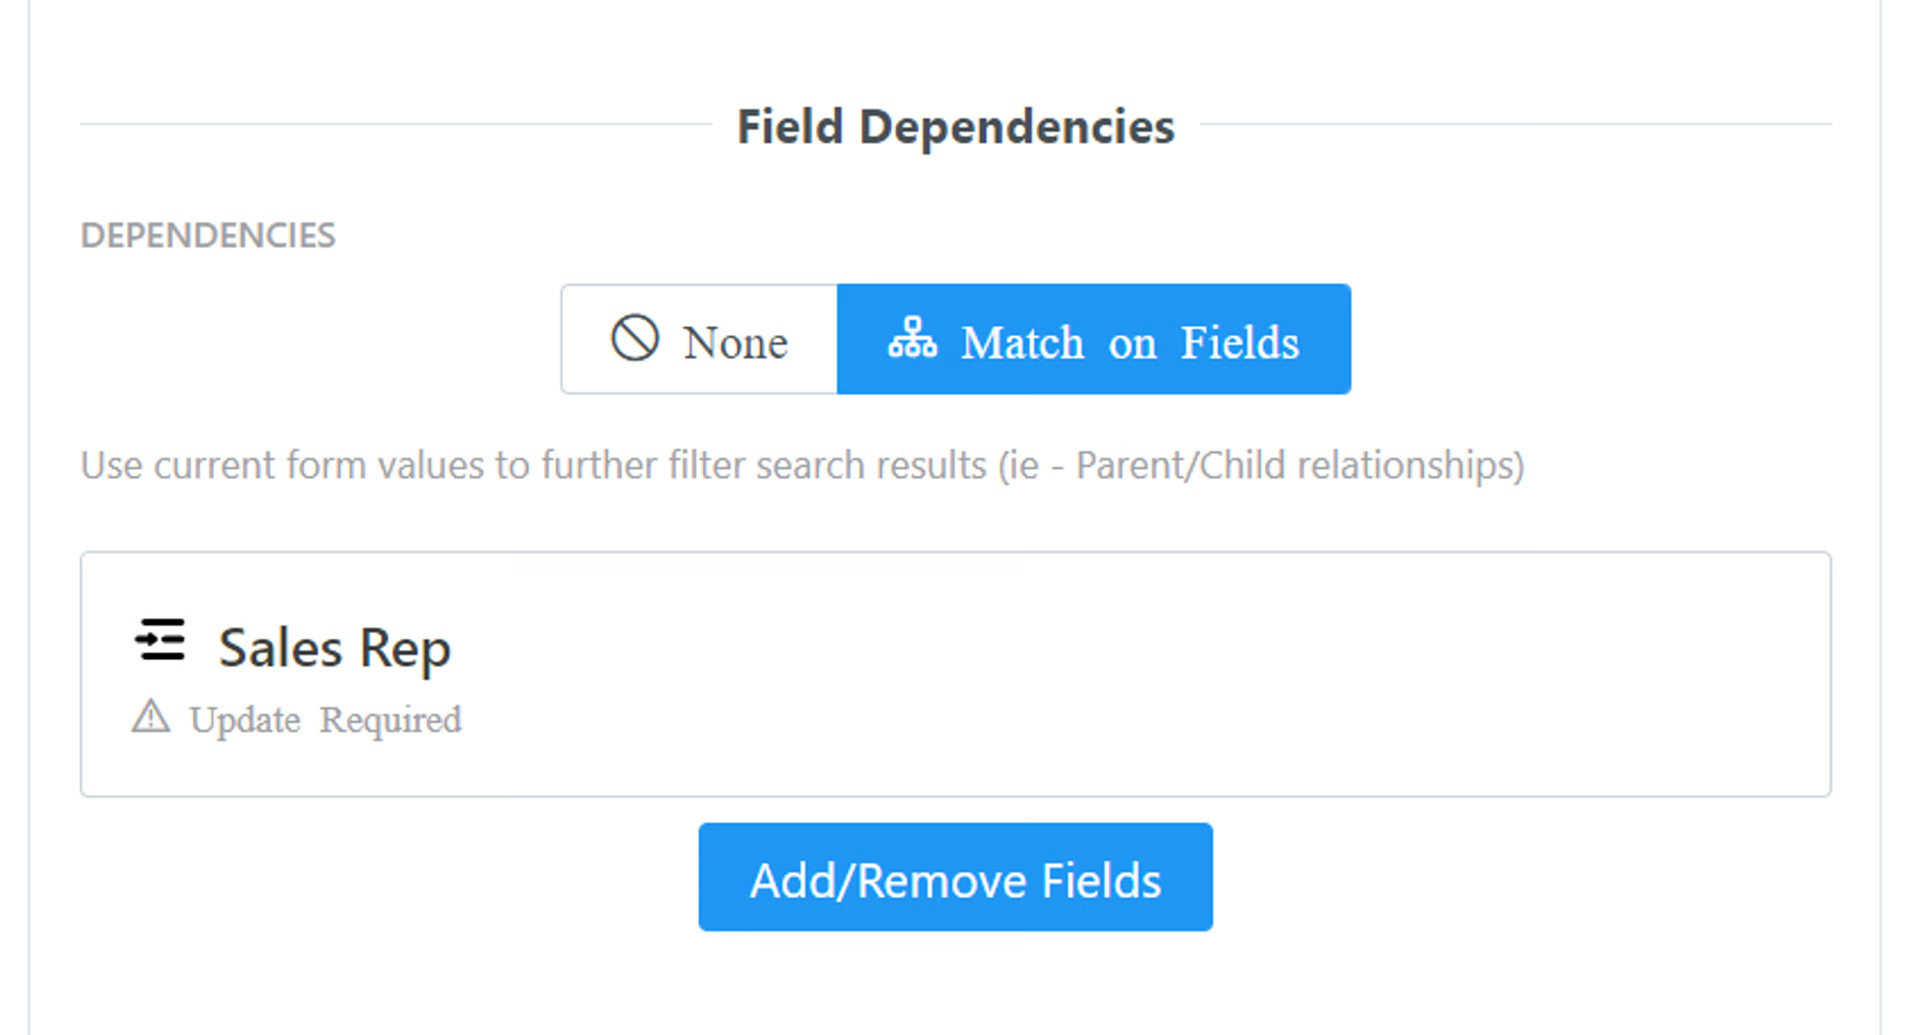
- Now, click on the field you just added (it will say Update Required)
-
In Form Value Match, choose the field that needs to be matched. In this example, we chose the Rep Name to match the Sales Reps name. Since she may have Deals in her name and also share Deals with other Sales Reps, the Field Matching Style needs to be Contains
-
The Field Value Required is enabled
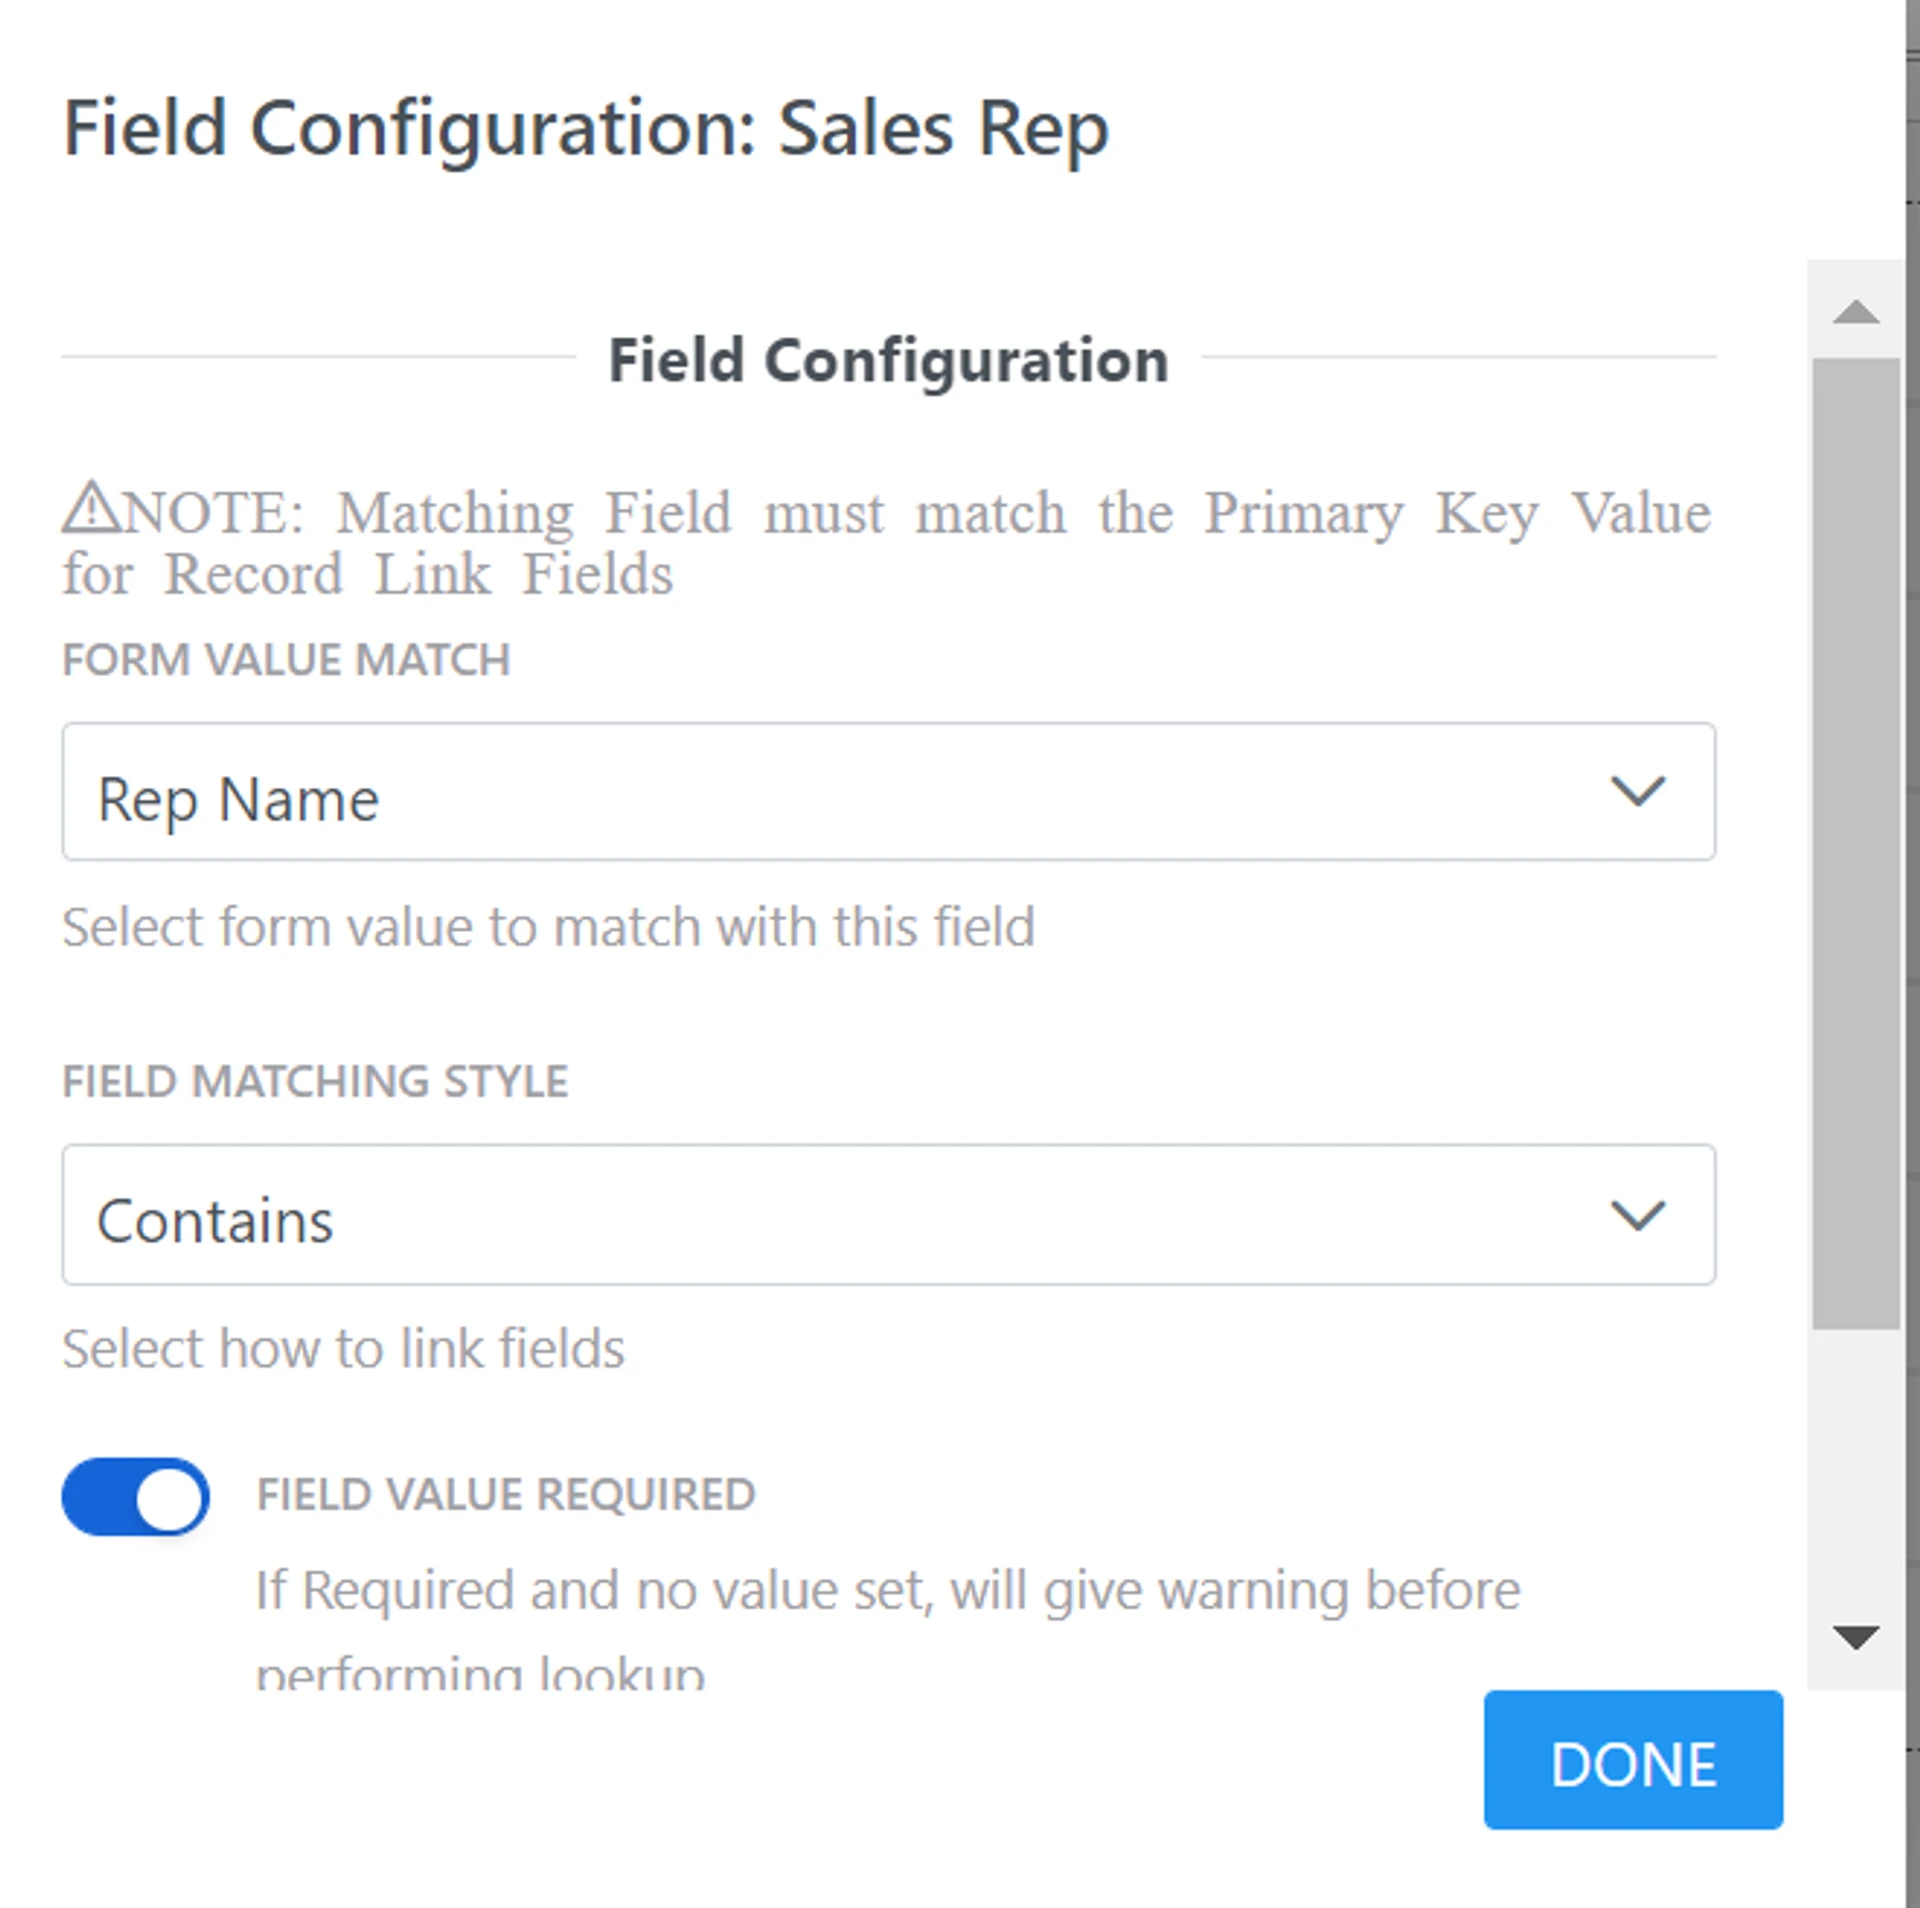
-
Click Done
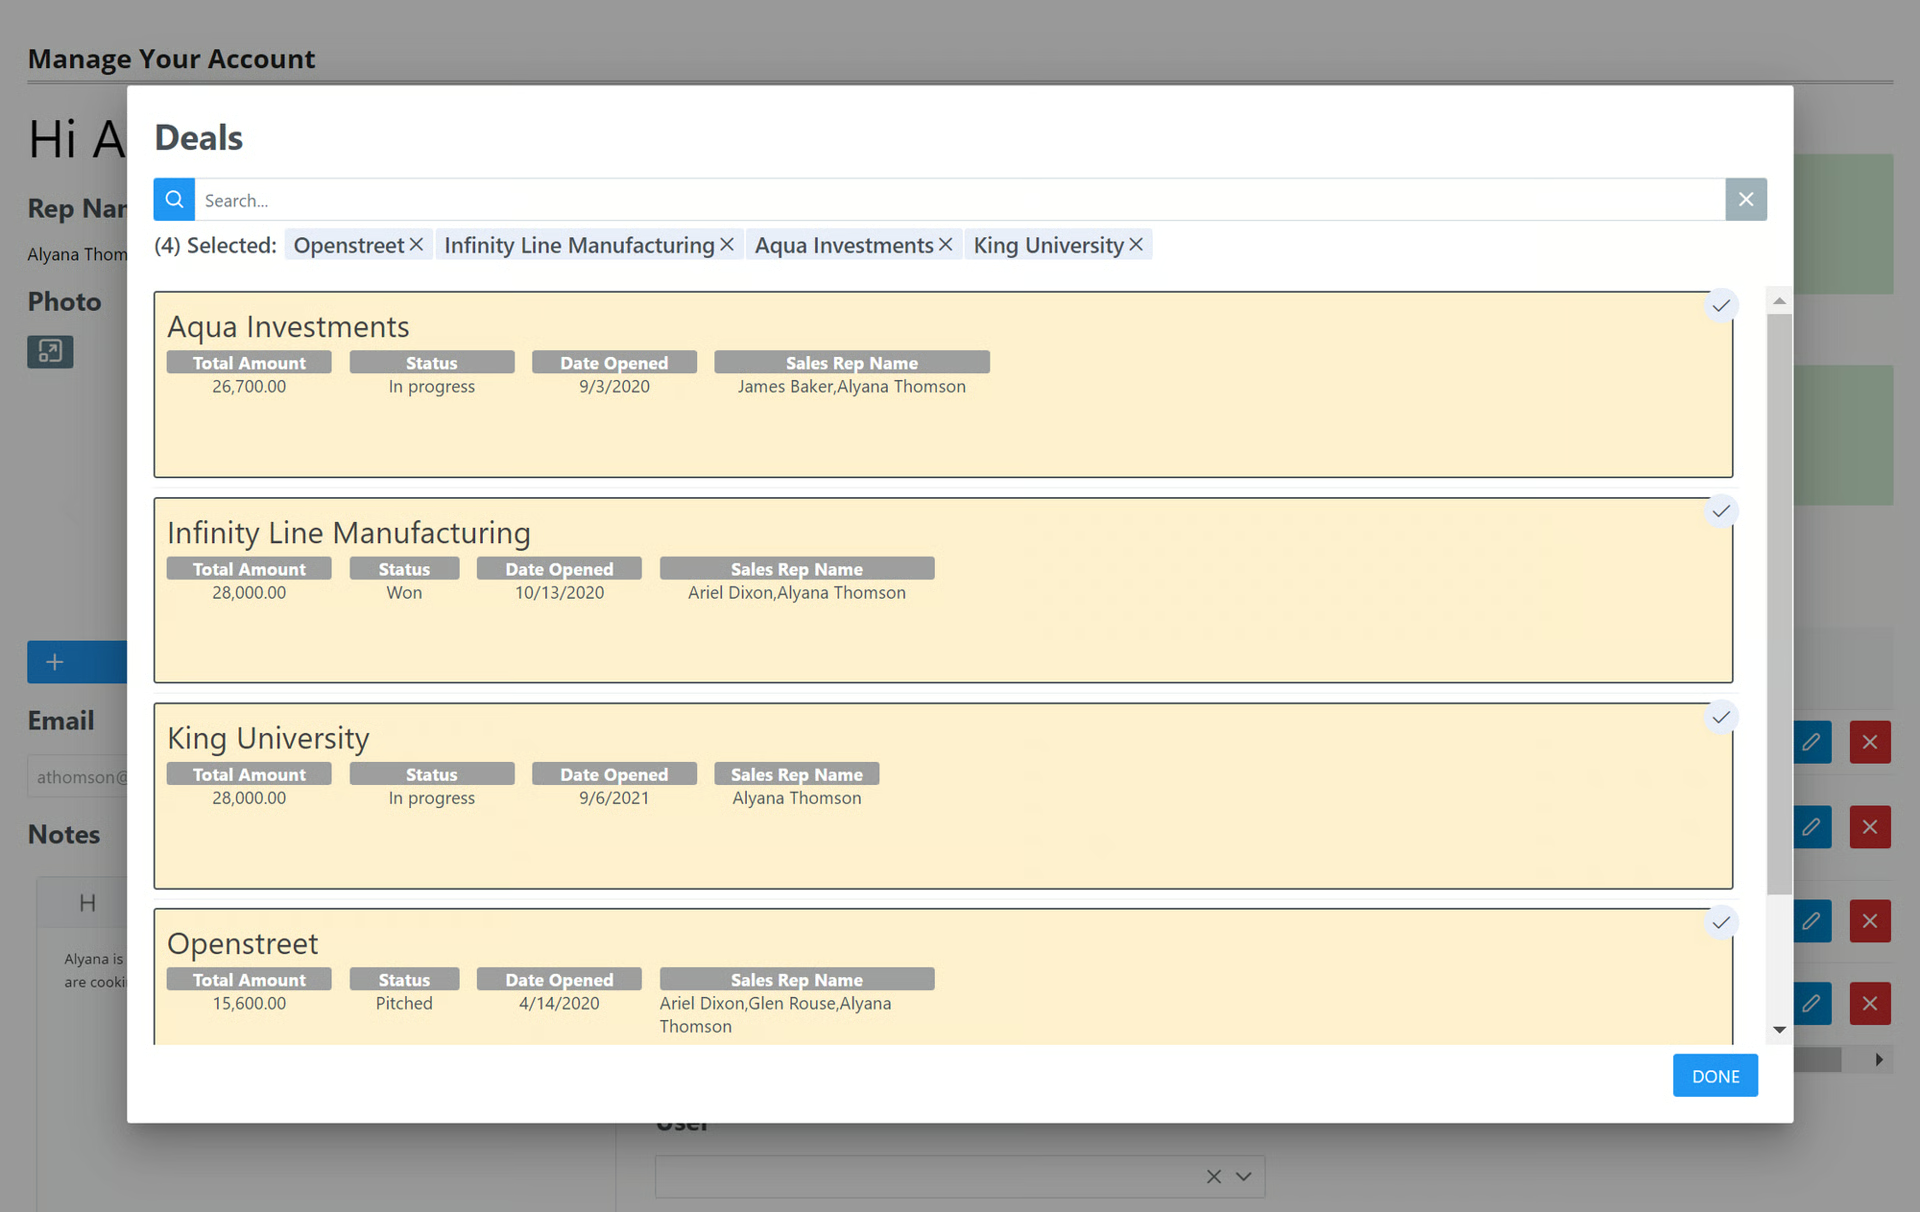
-
Now when a person clicks Find Existing on the linked record, it will only show Deals where it contains their Rep Name
Customize the Header and Add Custom Text to the Form
Section titled “Customize the Header and Add Custom Text to the Form”- You can further customize the dashboard like in the example by adding a Header and/or OnAir Static Text fields
➡️
Related:
 Design the Form Header
 Static Text
Remove the Submission Button
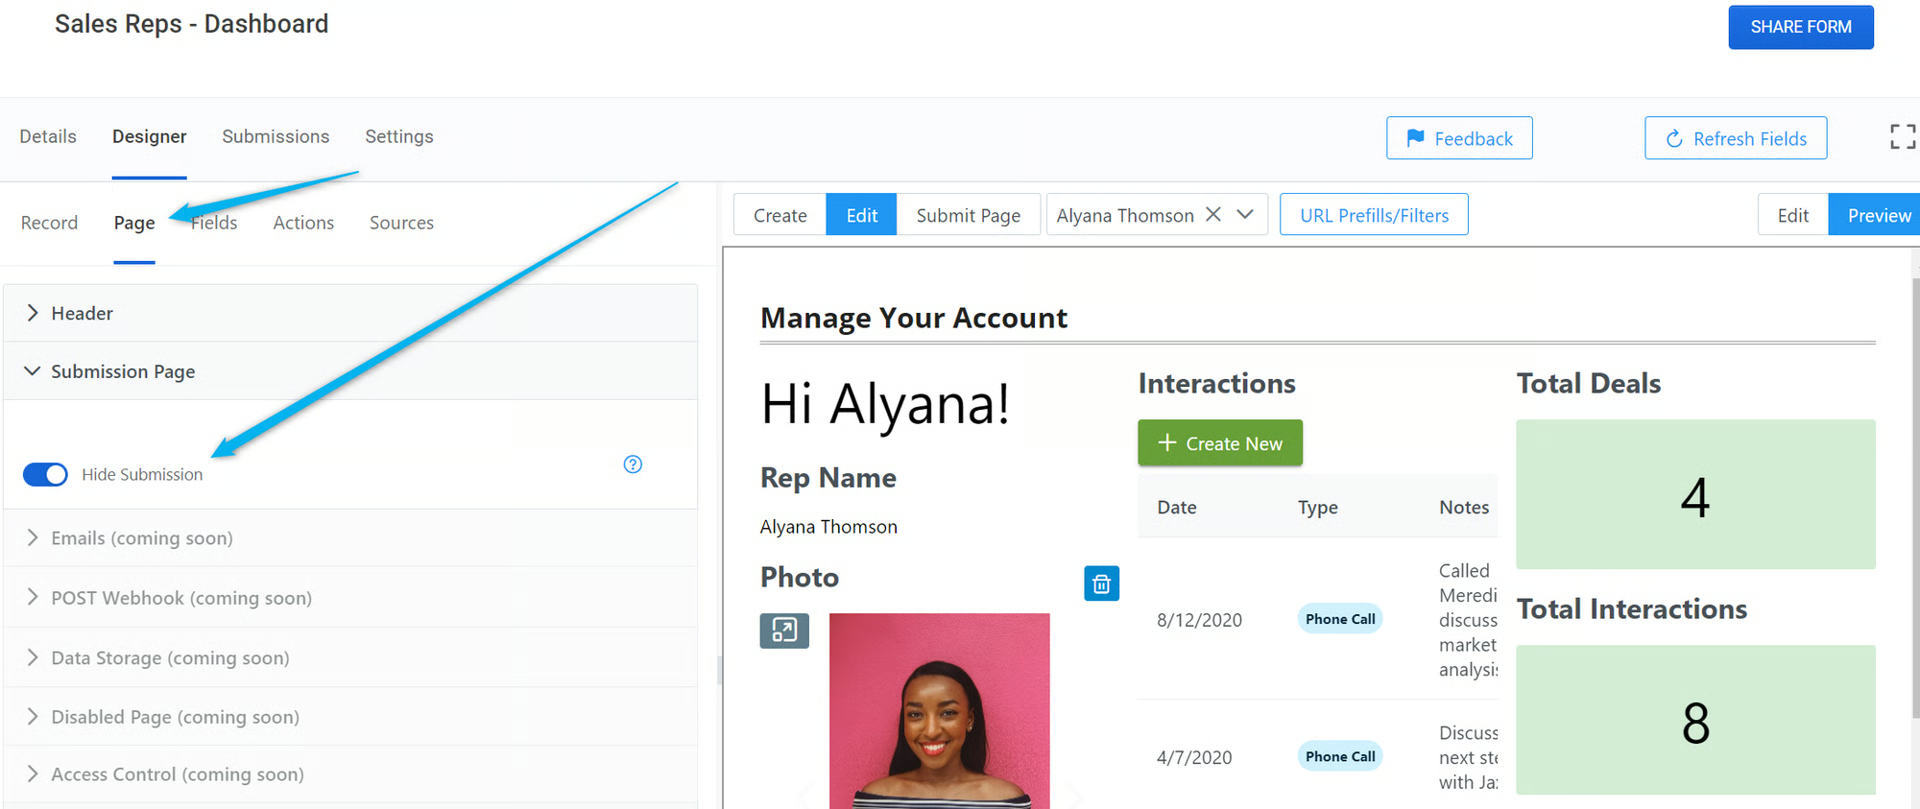
Section titled “Remove the Submission Button”To finalize making your form look like a full dashboard, you can remove the Submission button. This will disable any changes that can be submitted to the main form source.
- Click the Page menu
- Click Submission Page
- Enable Hide Submission
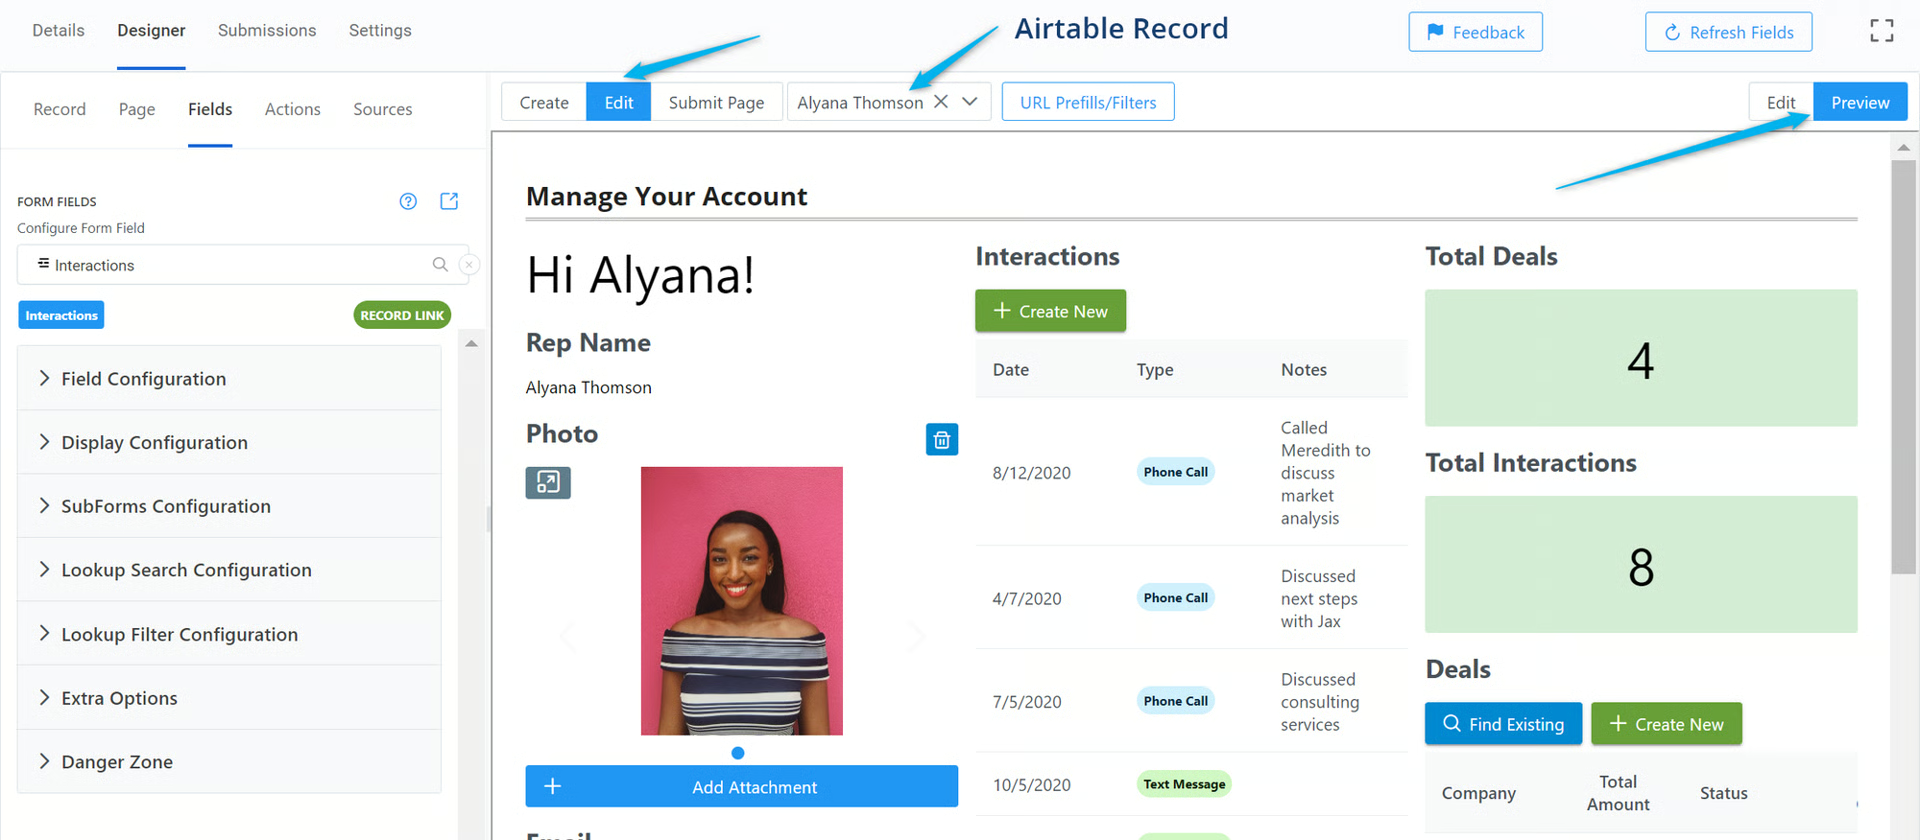
Preview the Dashboard
Section titled “Preview the Dashboard”- Preview your new dashboard by choosing Preview, then choose Edit Mode, then choose an Airtable record
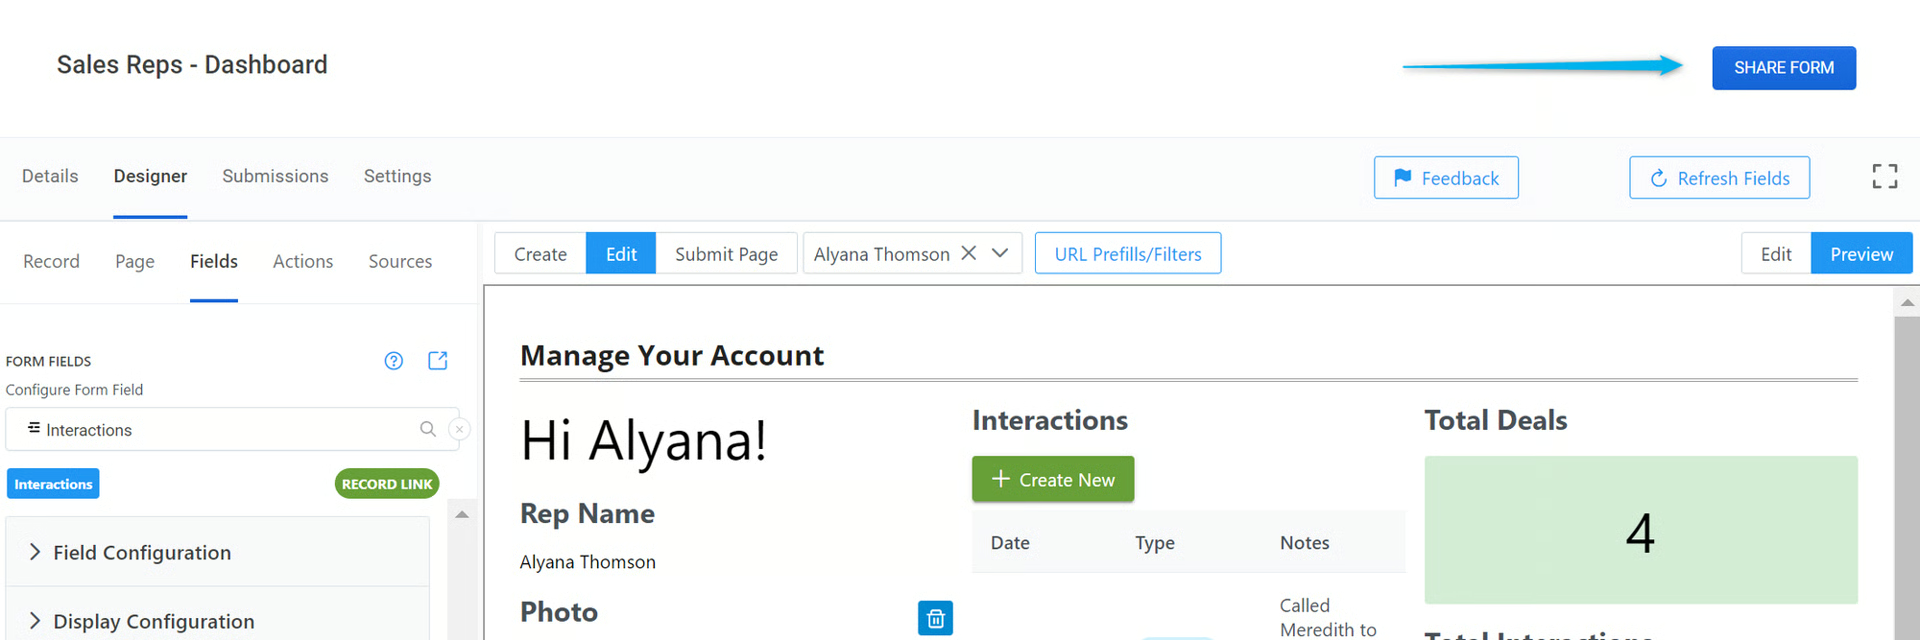
Generate a URL for Every Record in Your Table
Section titled “Generate a URL for Every Record in Your Table”Now that your dashboard is set up, let’s quickly generate unique URLs for every record in your table
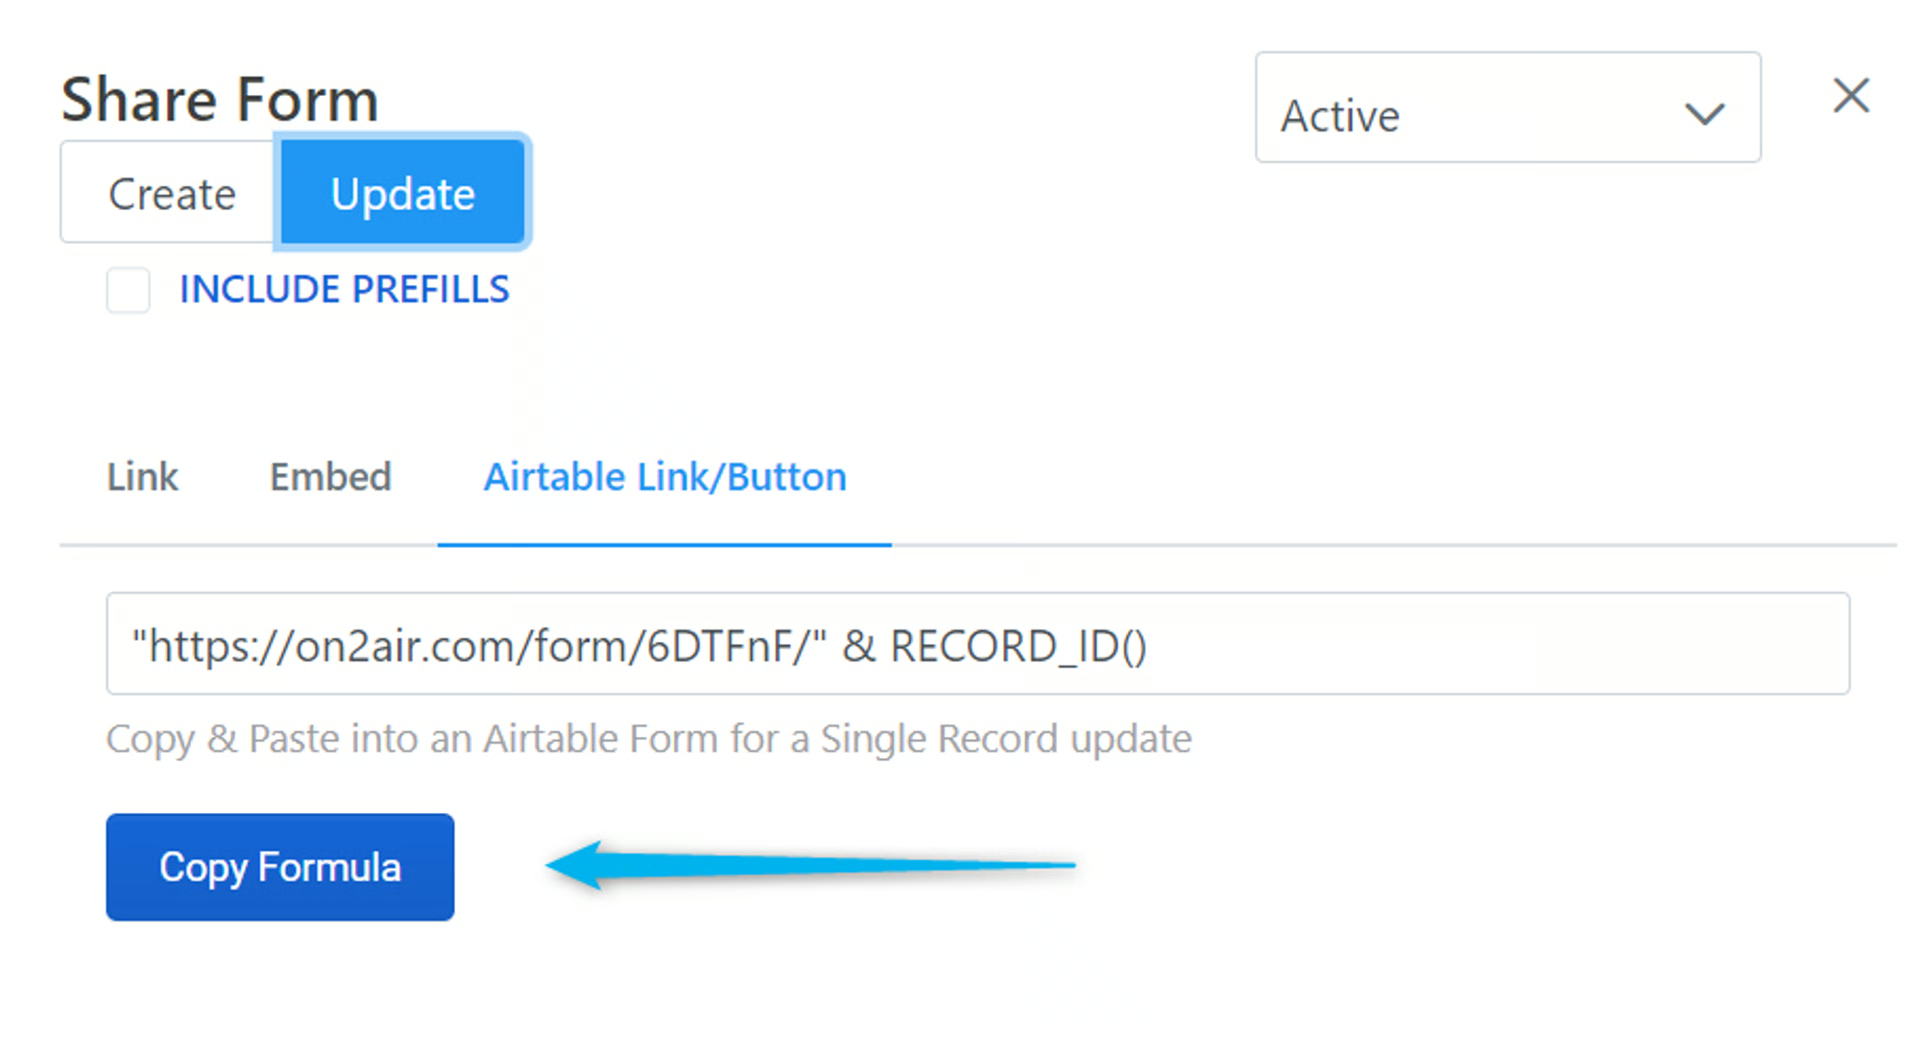
- Click Share Form
- Choose the Update option and choose Airtable Link/Button
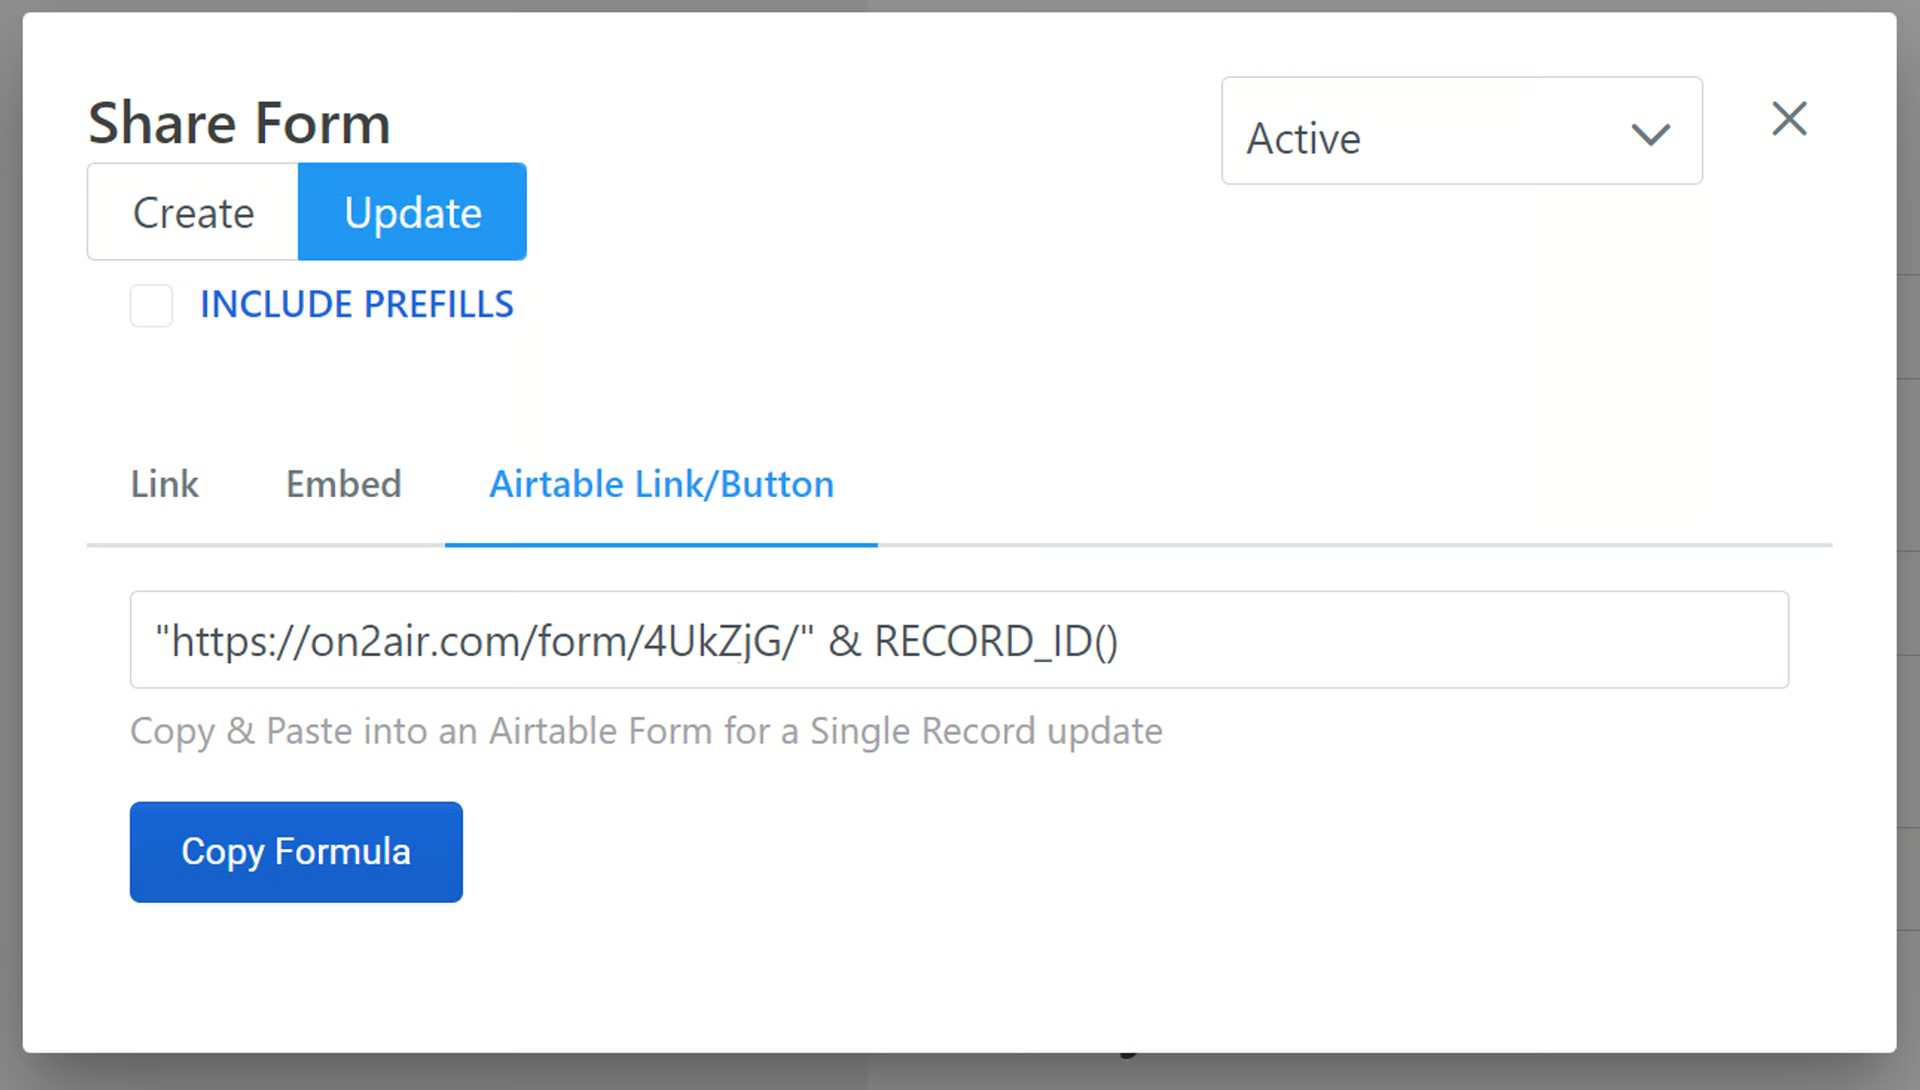
- Click Copy Formula
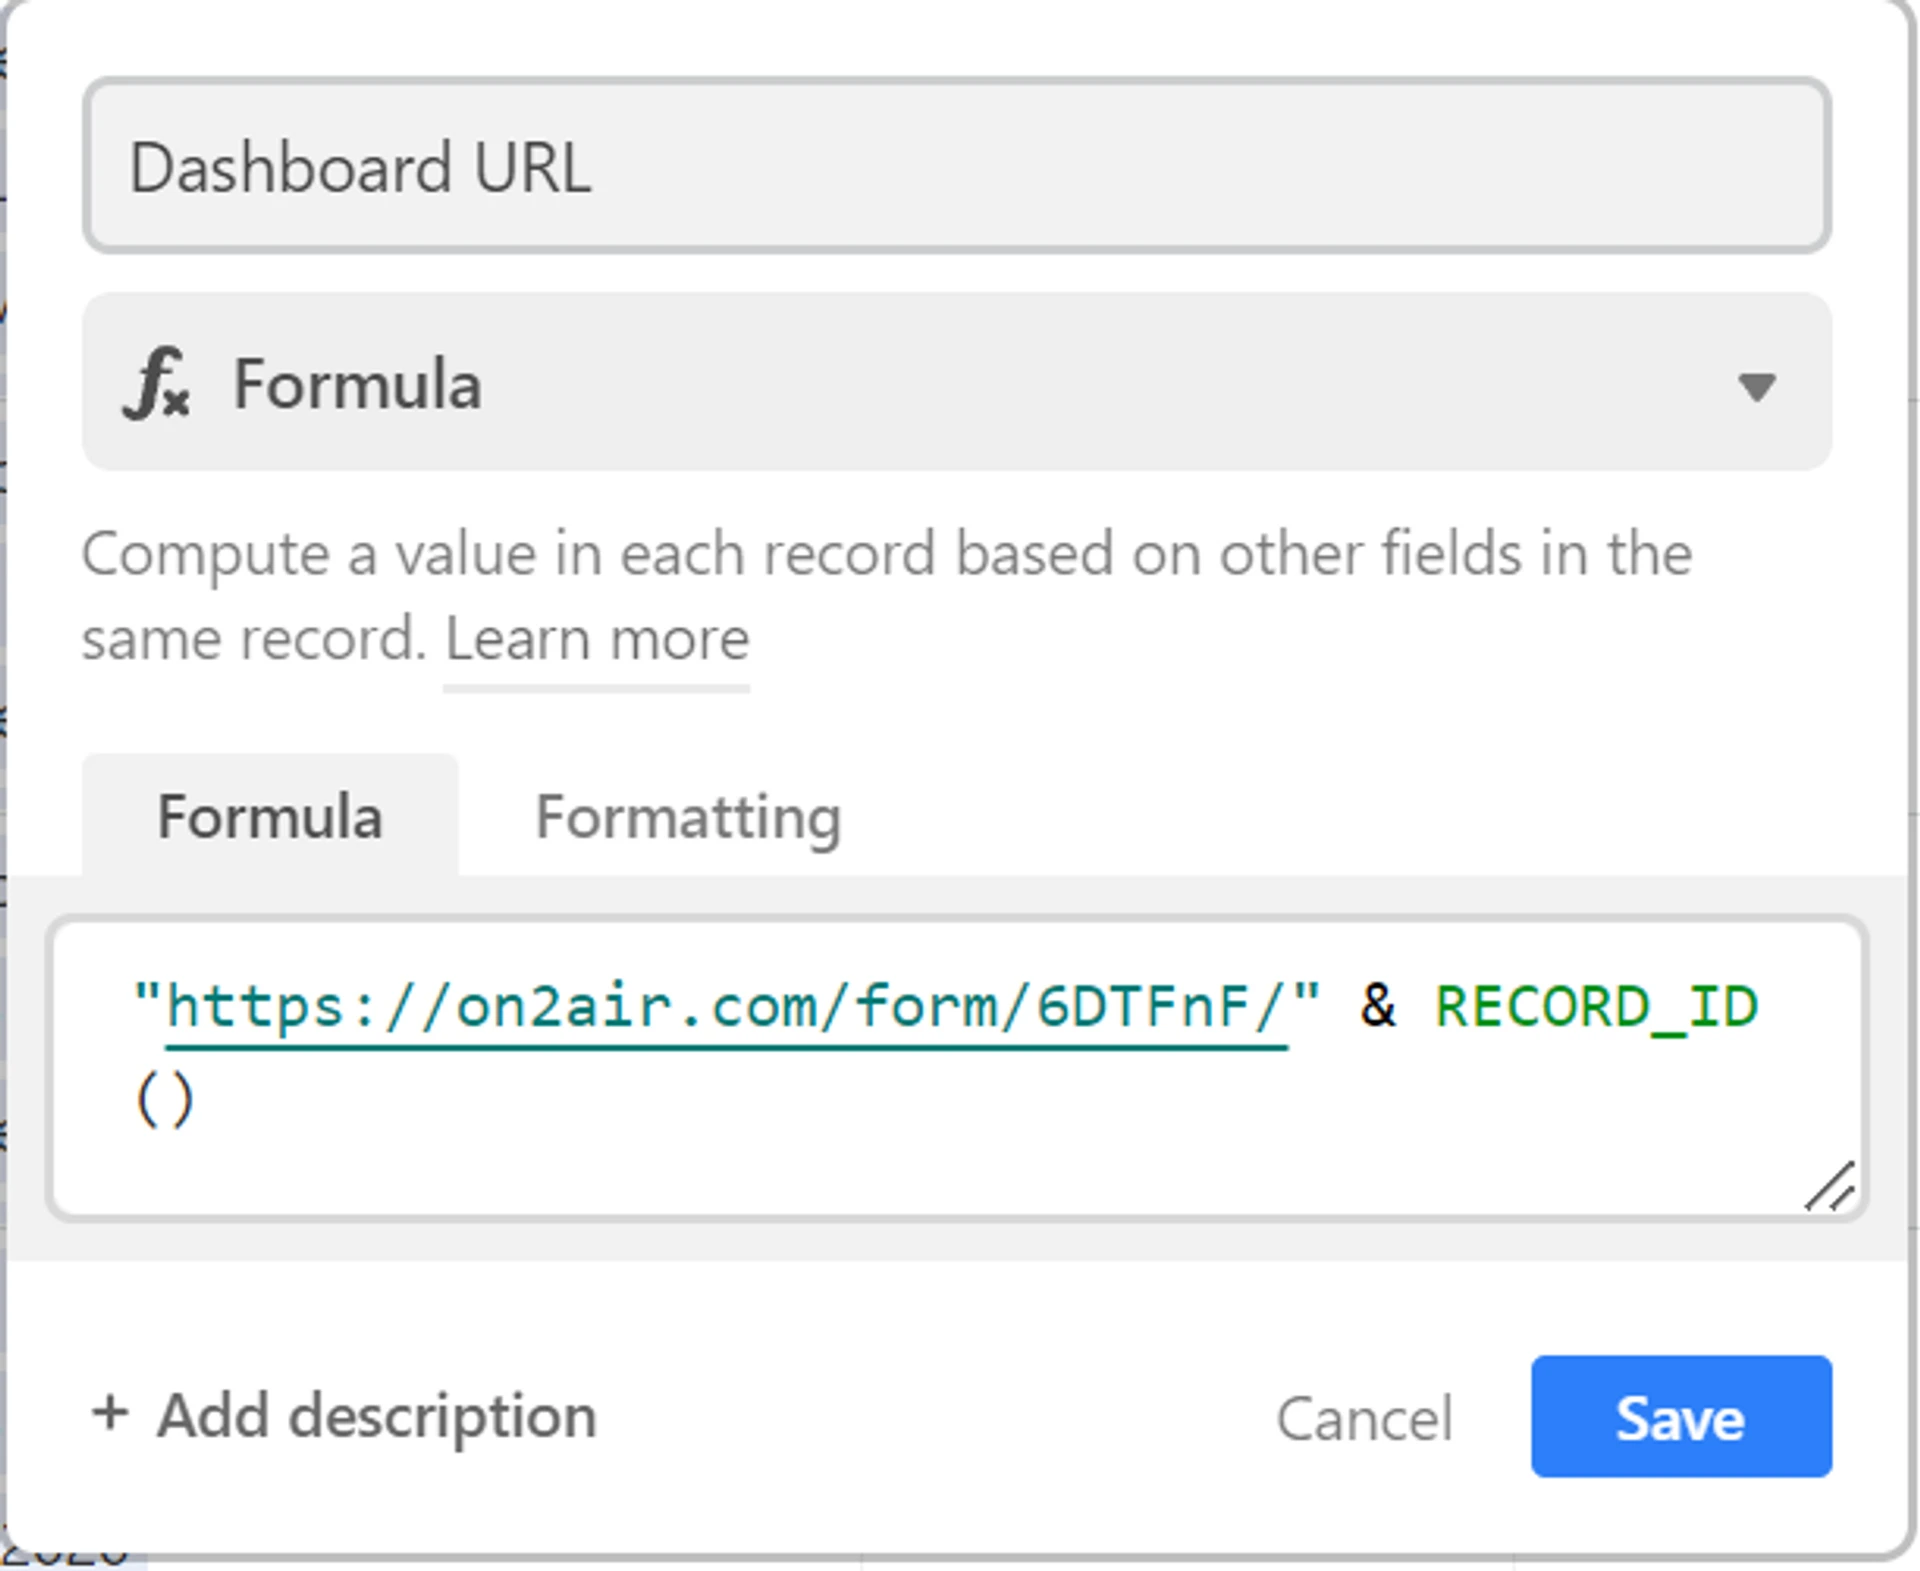
- In your Airtable source table that’s linked to your form, add a Formula or Button field and paste the On2Air formula into your Airtable formula field and click Save
We used a Formula field in this example, so you can see the actual URL. You can also add a Button with the formula if you want a button in your base.
- You’ll then see a unique URL created for every record in your table
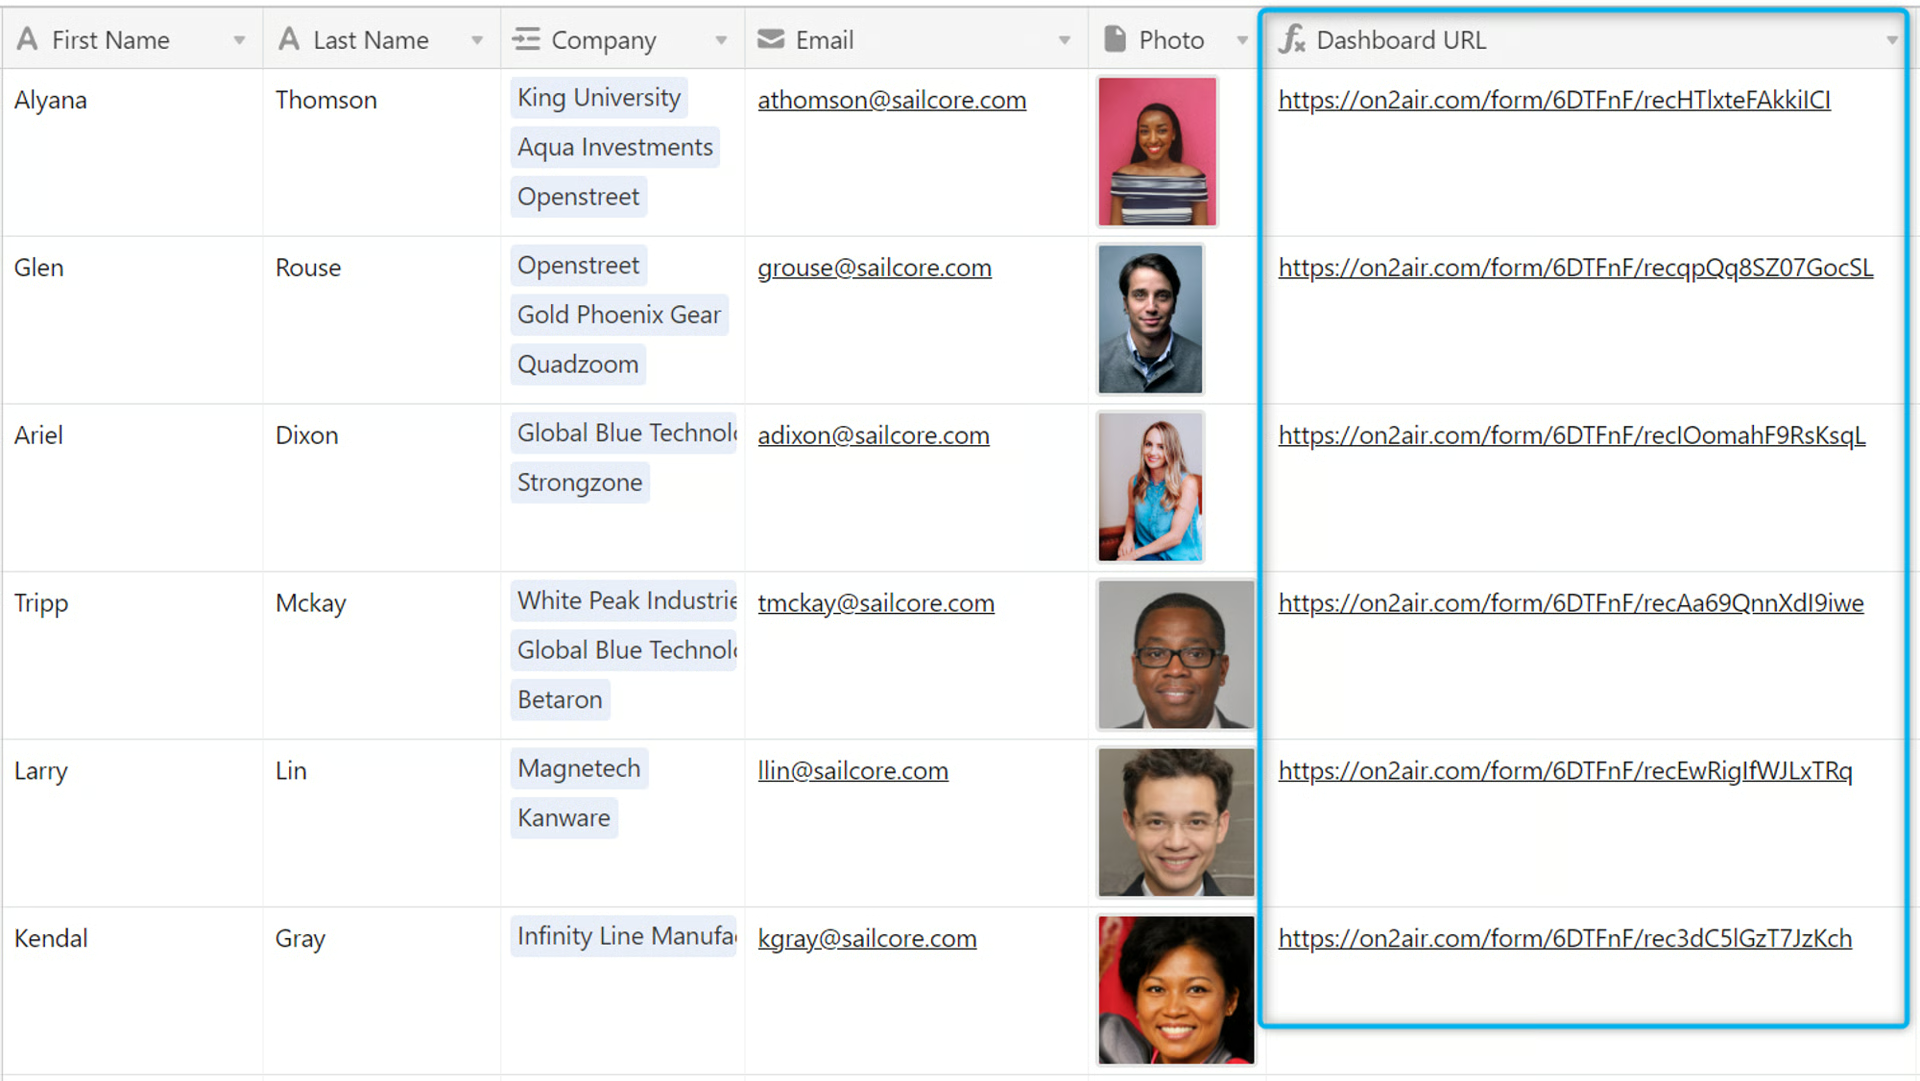
- Now, when you click on any of the URLs, you will see a dashboard for the record with their individual information
Examples
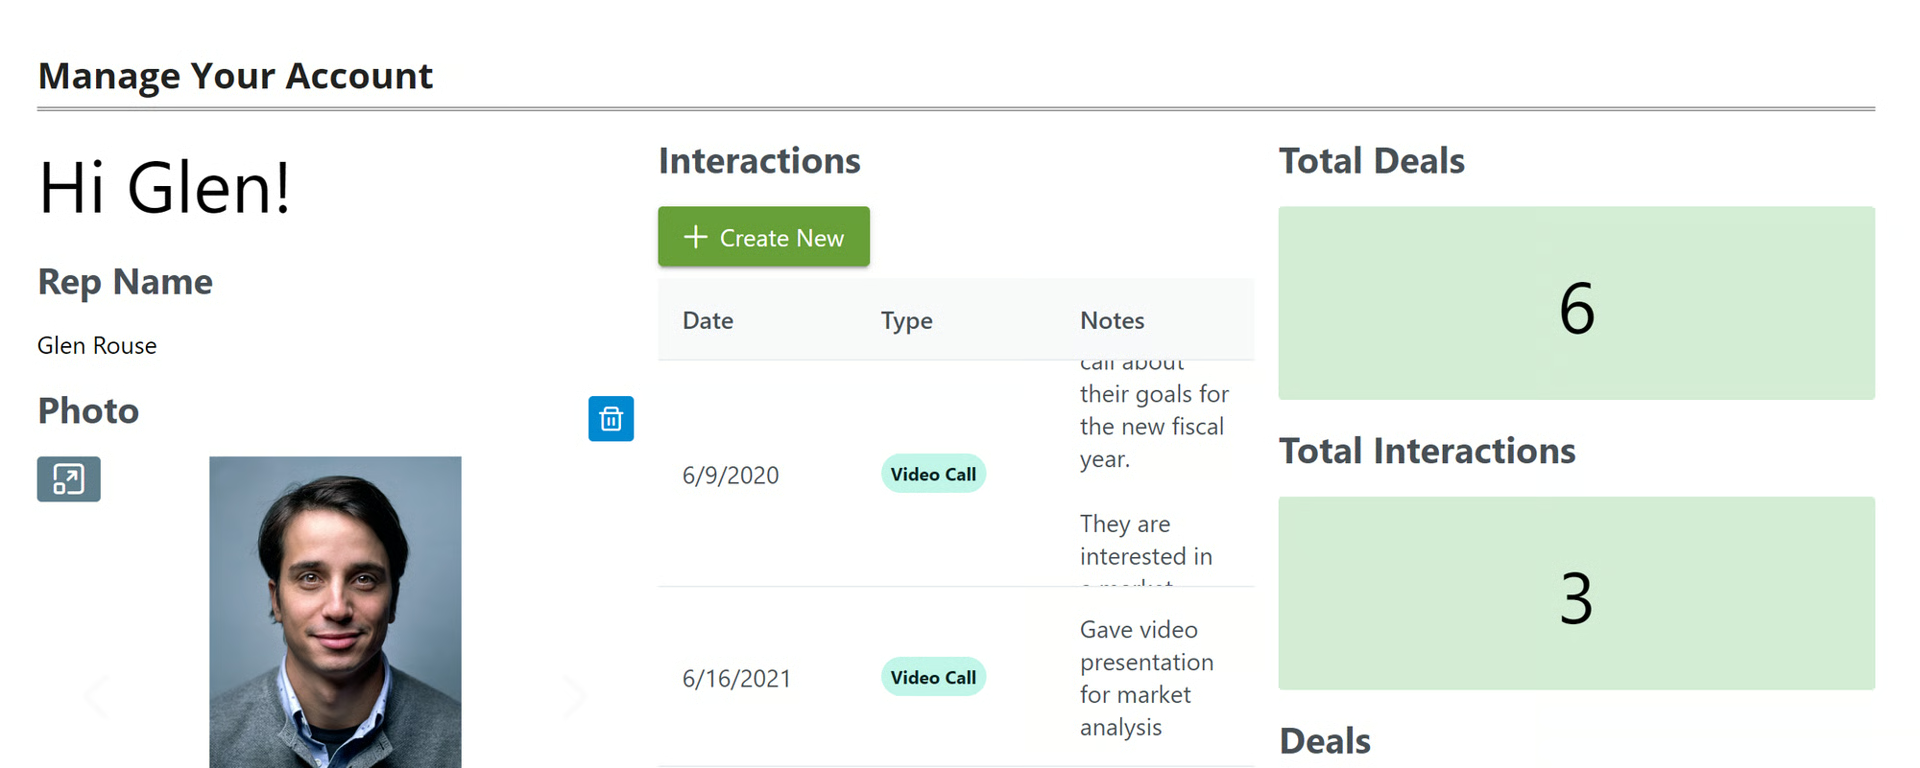
Example Dashboard
Example Dashboard
Share the URL
Section titled “Share the URL”- You can share each unique record URL to allow someone to view a dashboard and/or edit data if you have enabled field permissions