How to Display Records in a Table List
🔴 On2Air Forms has been shutdown to focus on our On2Air Backups Airtable app Learn more about automated Airtable backups - on2air.com
With On2Air Forms, you can display your Airtable records in a table-like format. In this tutorial, we’ll show you how to add a list of Airtable records in a table format.
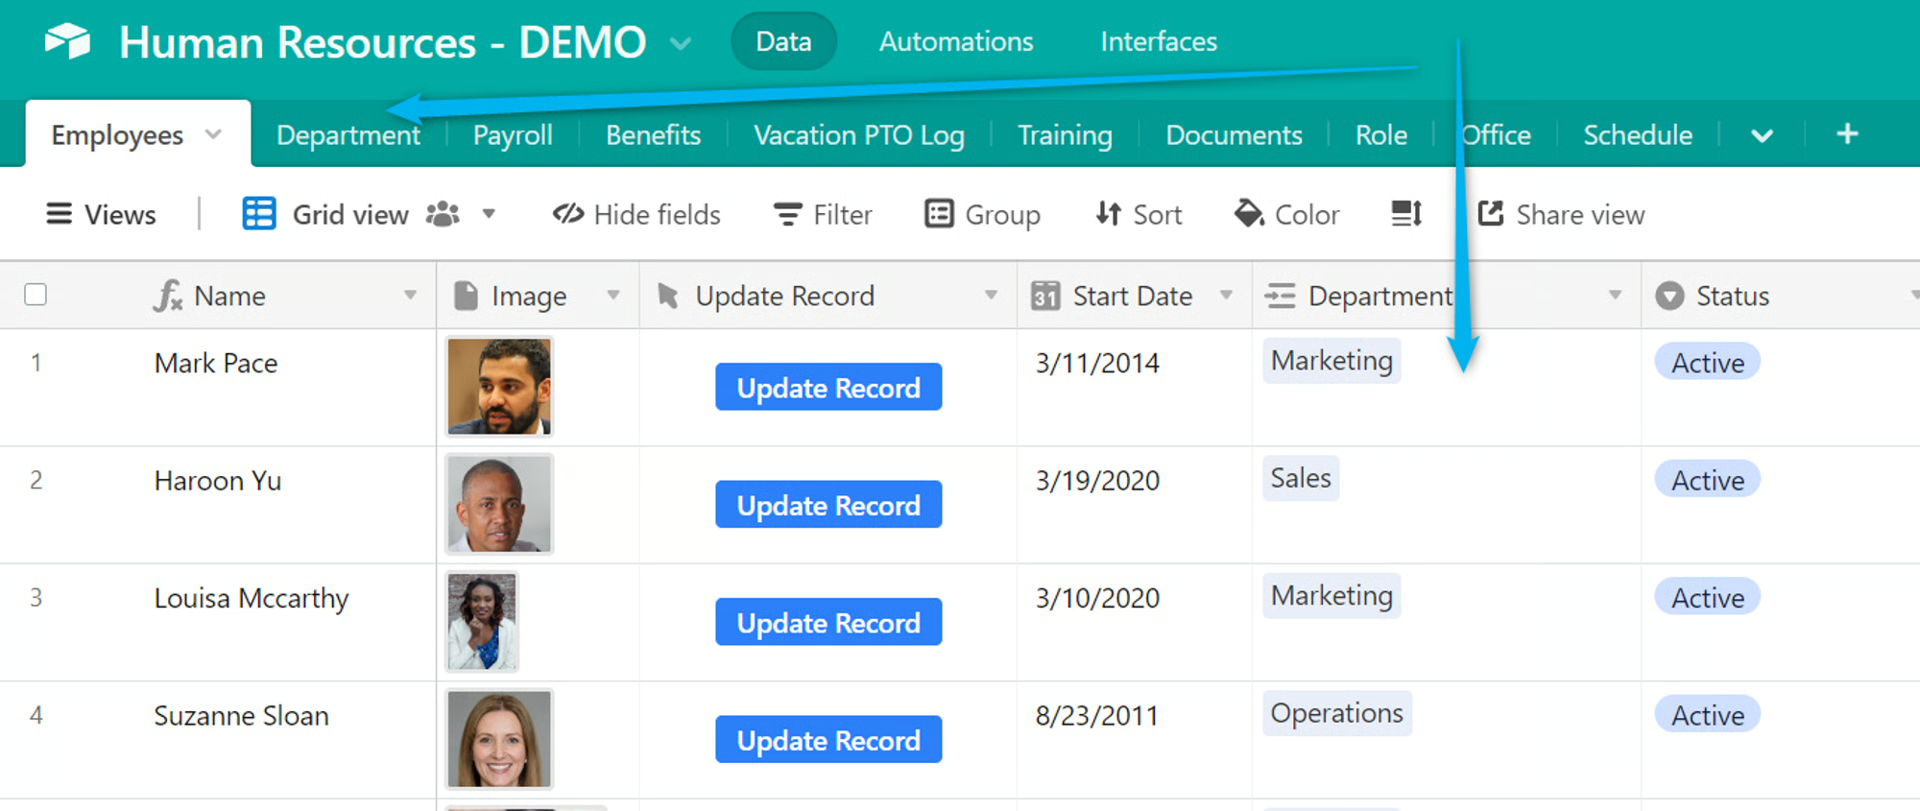
In this example, we want to display a table listing of all Employees from the Employees table.
In this tutorial
-
Create the Main Form
-
Add your Linked Record
-
Use a Field to Filter Records Displayed
-
Enable or Disable Editing Records from the Table
-
Disable Submission Button
-
Customize Your Table
-
Change the Layout Width of Your Table
-
Set Permissions to Enable/Disable Record Creating, Update, or Lookup for the Linked Records
Create the Main Form
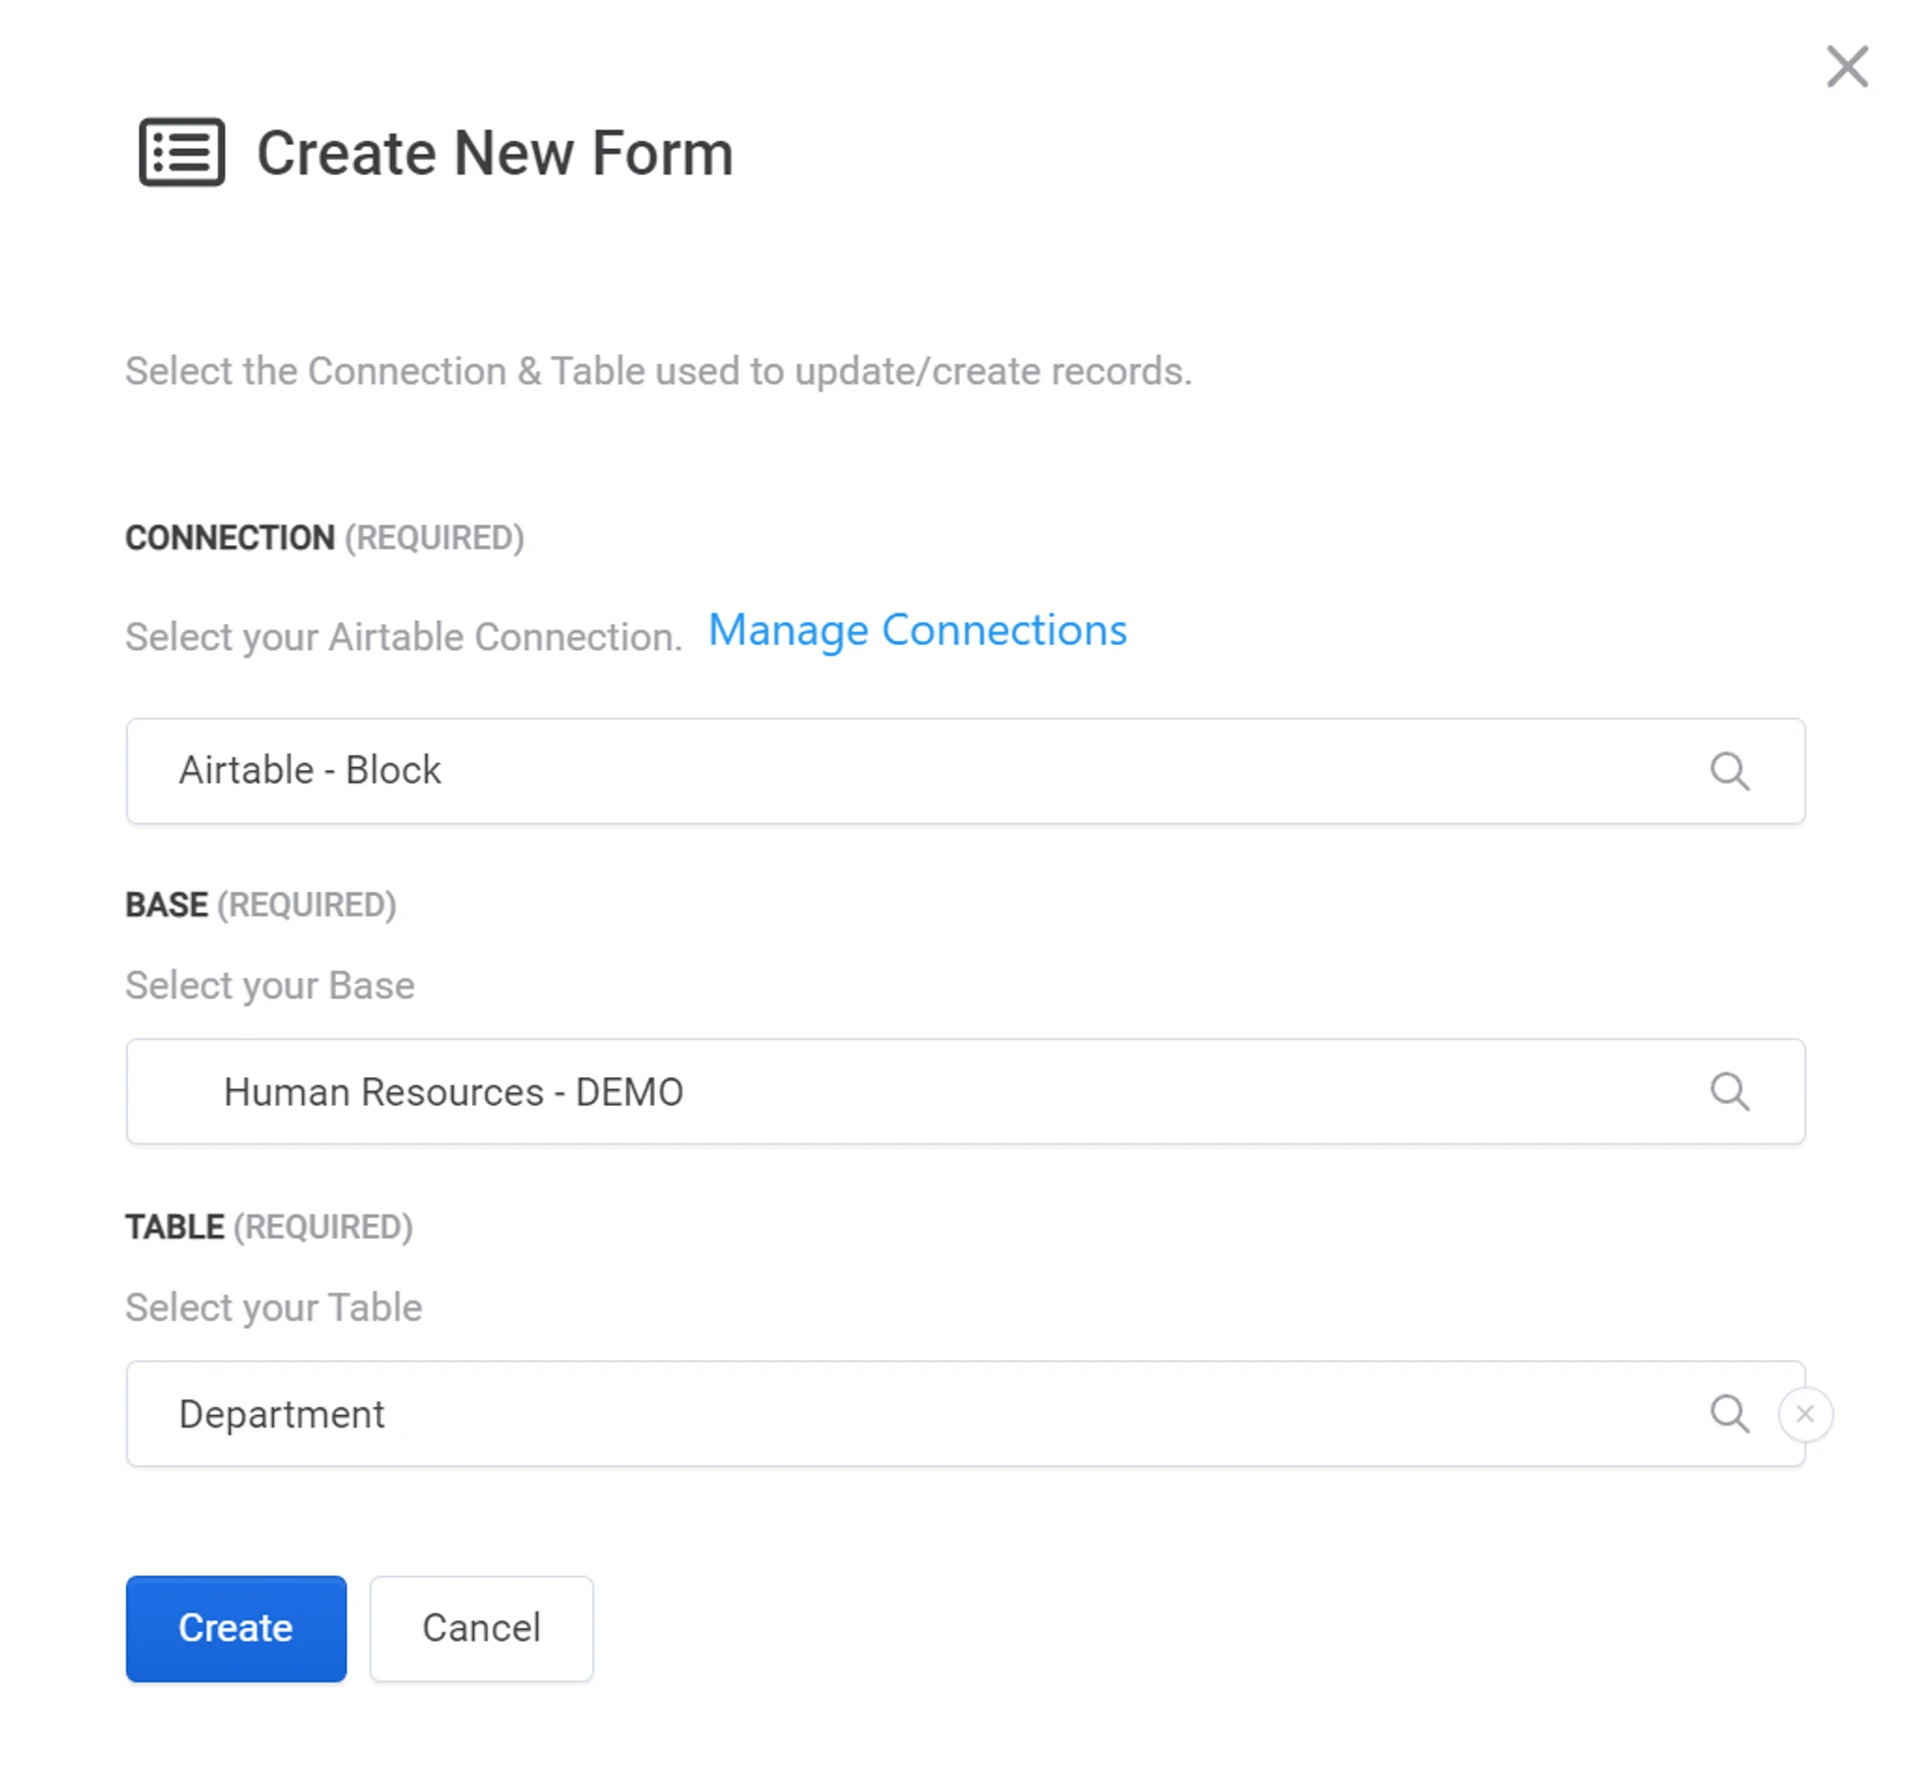
Section titled “Create the Main Form”To create a table list, you’ll need to create your main form based on a linked record field to the Employee table, such as your Departments table, or just create a new table called Display Table and link it to the Employees. You won’t have to display any data from the linked table.
- Create your main form with a linked record as the form source
Add your Linked Record
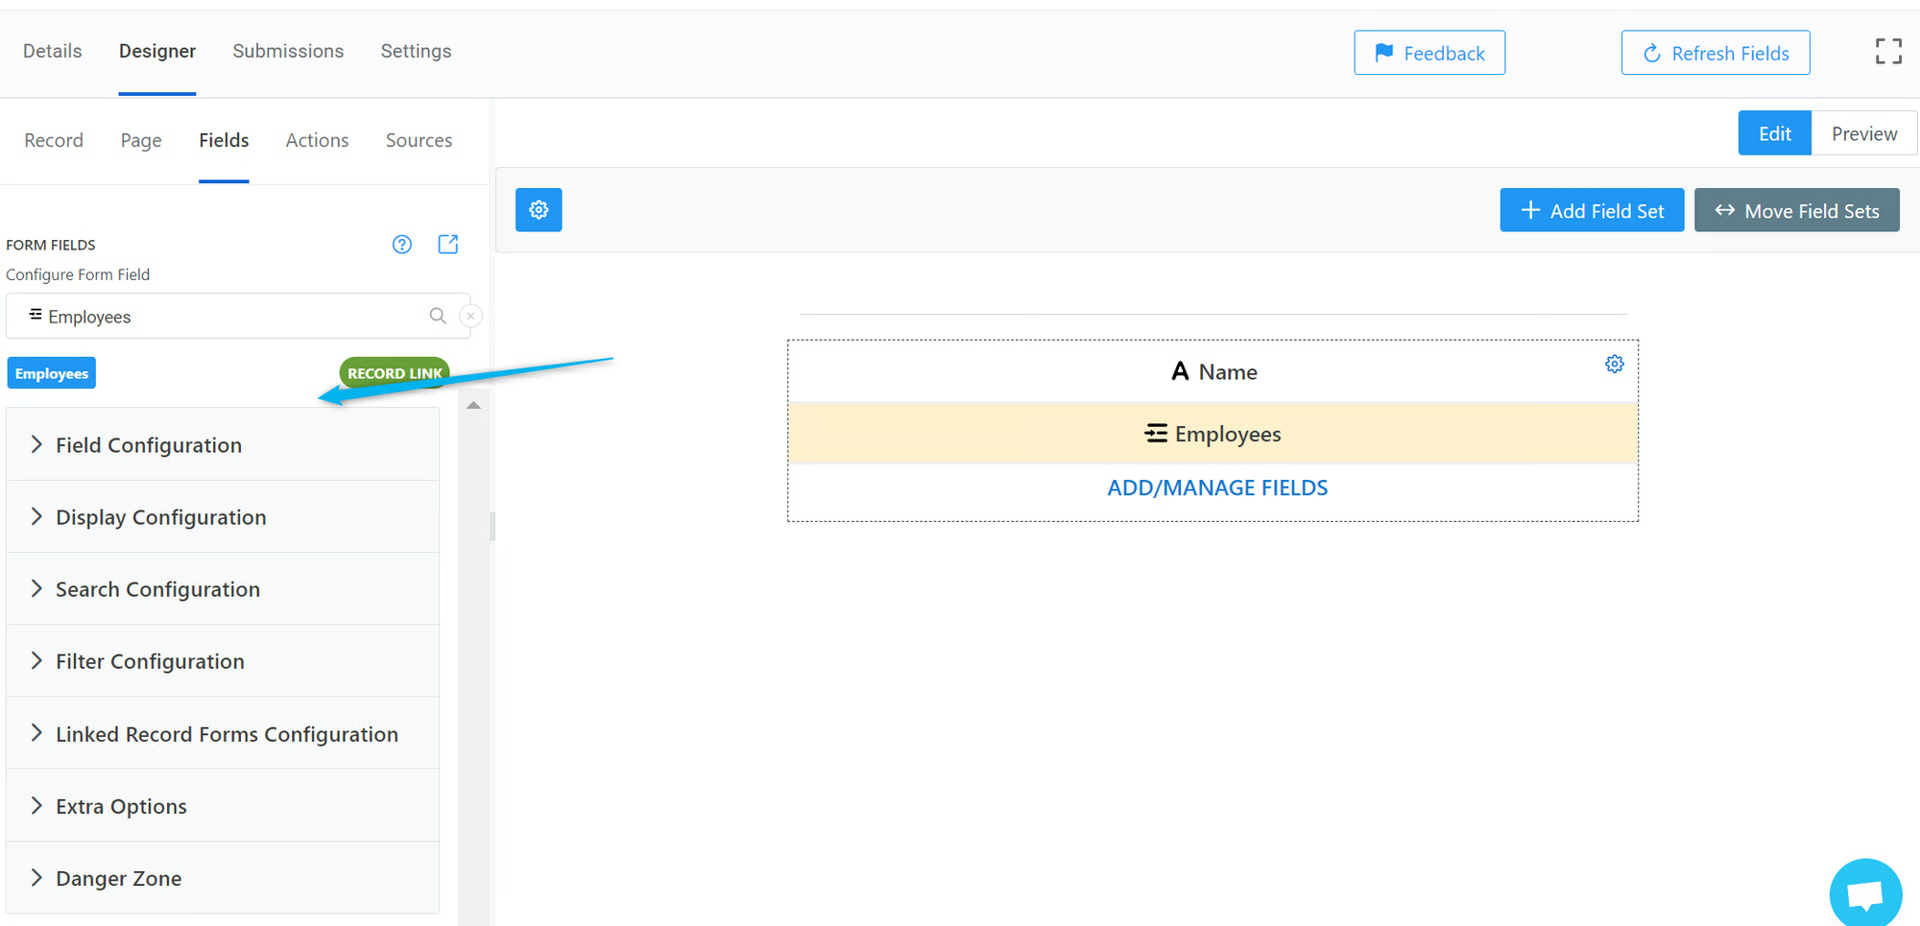
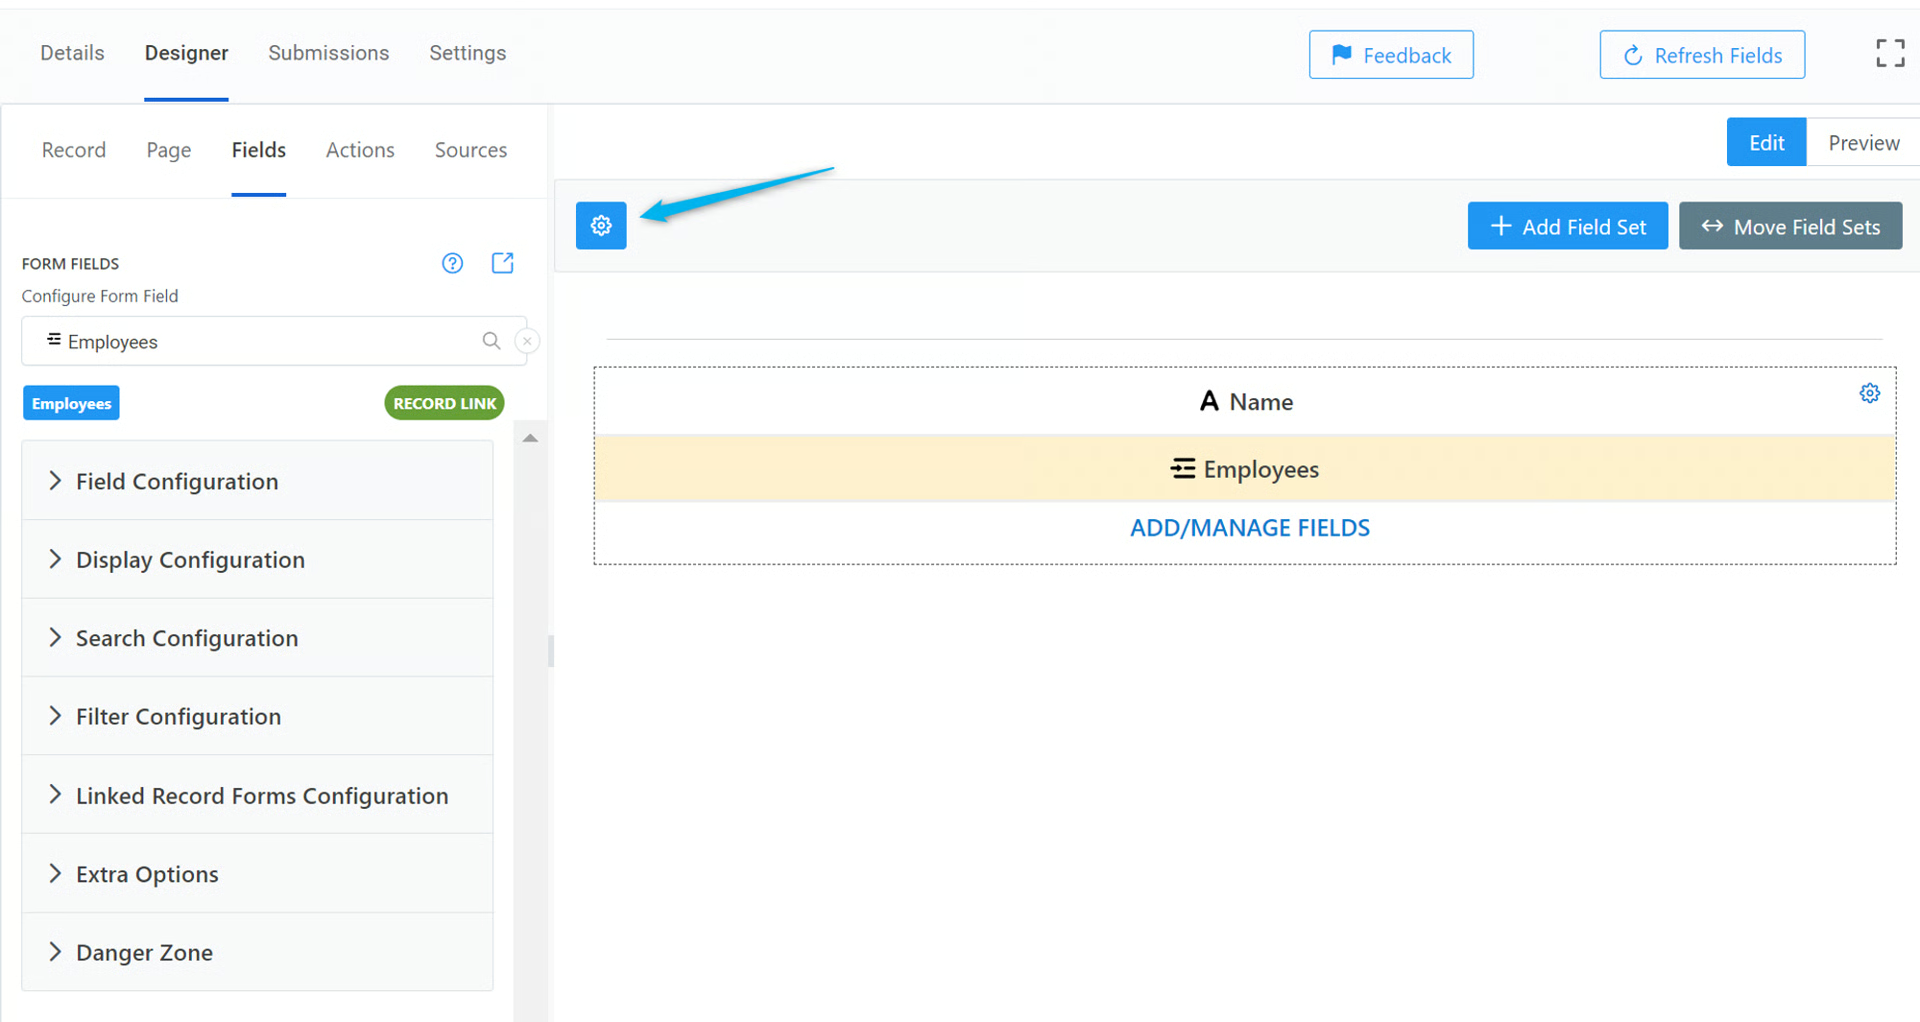
Section titled “Add your Linked Record”- Next, add your Employees linked record field to your form by clicking Add/Manage Fields
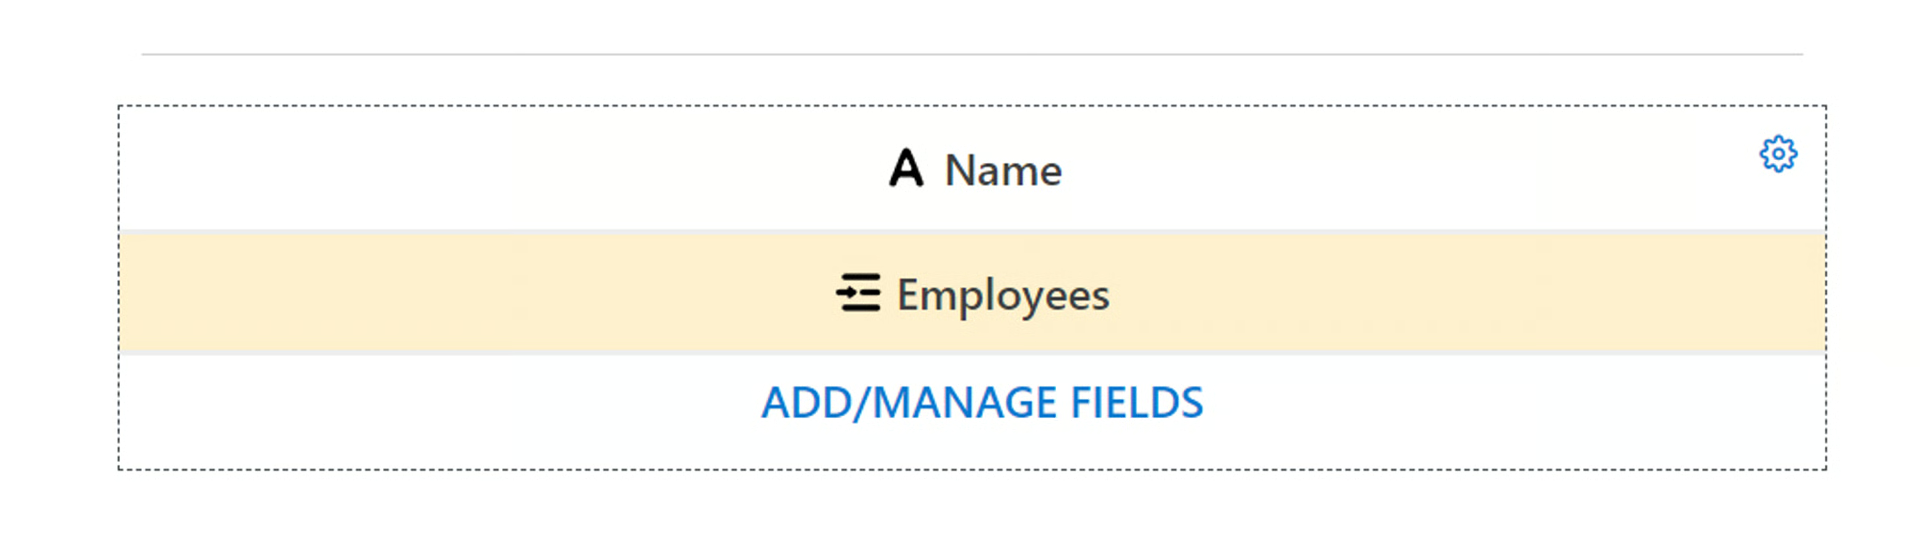
- Click on the Employees field and a menu on the left side will be displayed
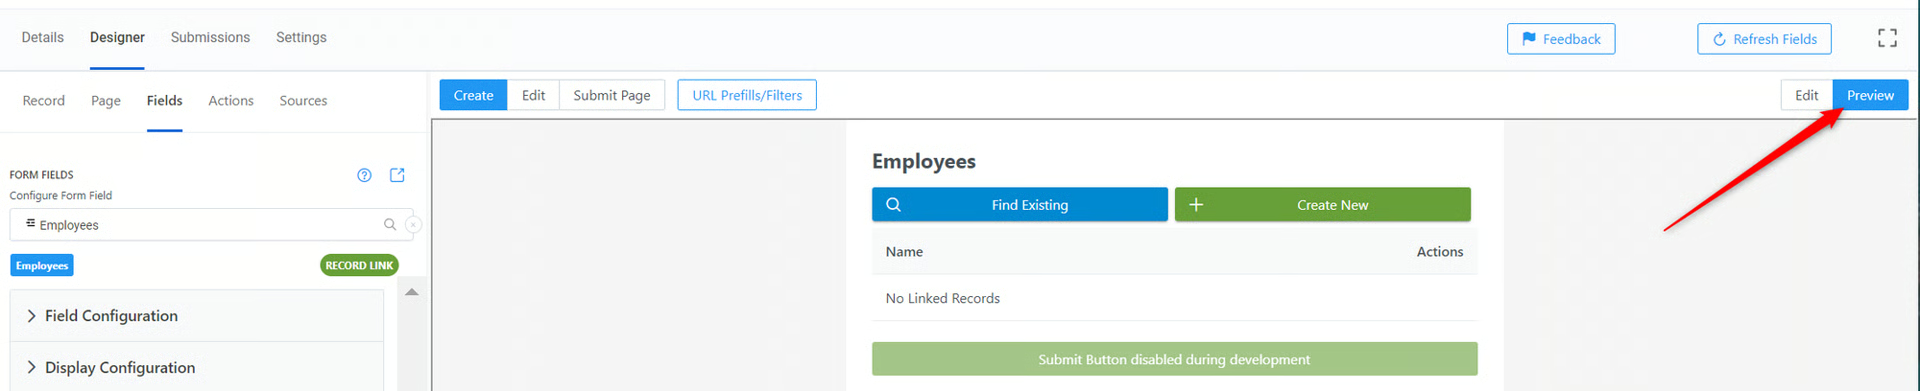
💡
Tip: At this point, it helps to switch your form to Preview mode while you’re editing the field settings, so you can see what it looks like
Use a Field to Filter Records Displayed
Section titled “Use a Field to Filter Records Displayed”In your Linked Record field, we’ll use the URL Linked Field option in the Field Configuration menu. This allows us to choose a field to filter (match) for the records we want displayed on the table.
- In this instance, we want to display all Employees with the Status of Active
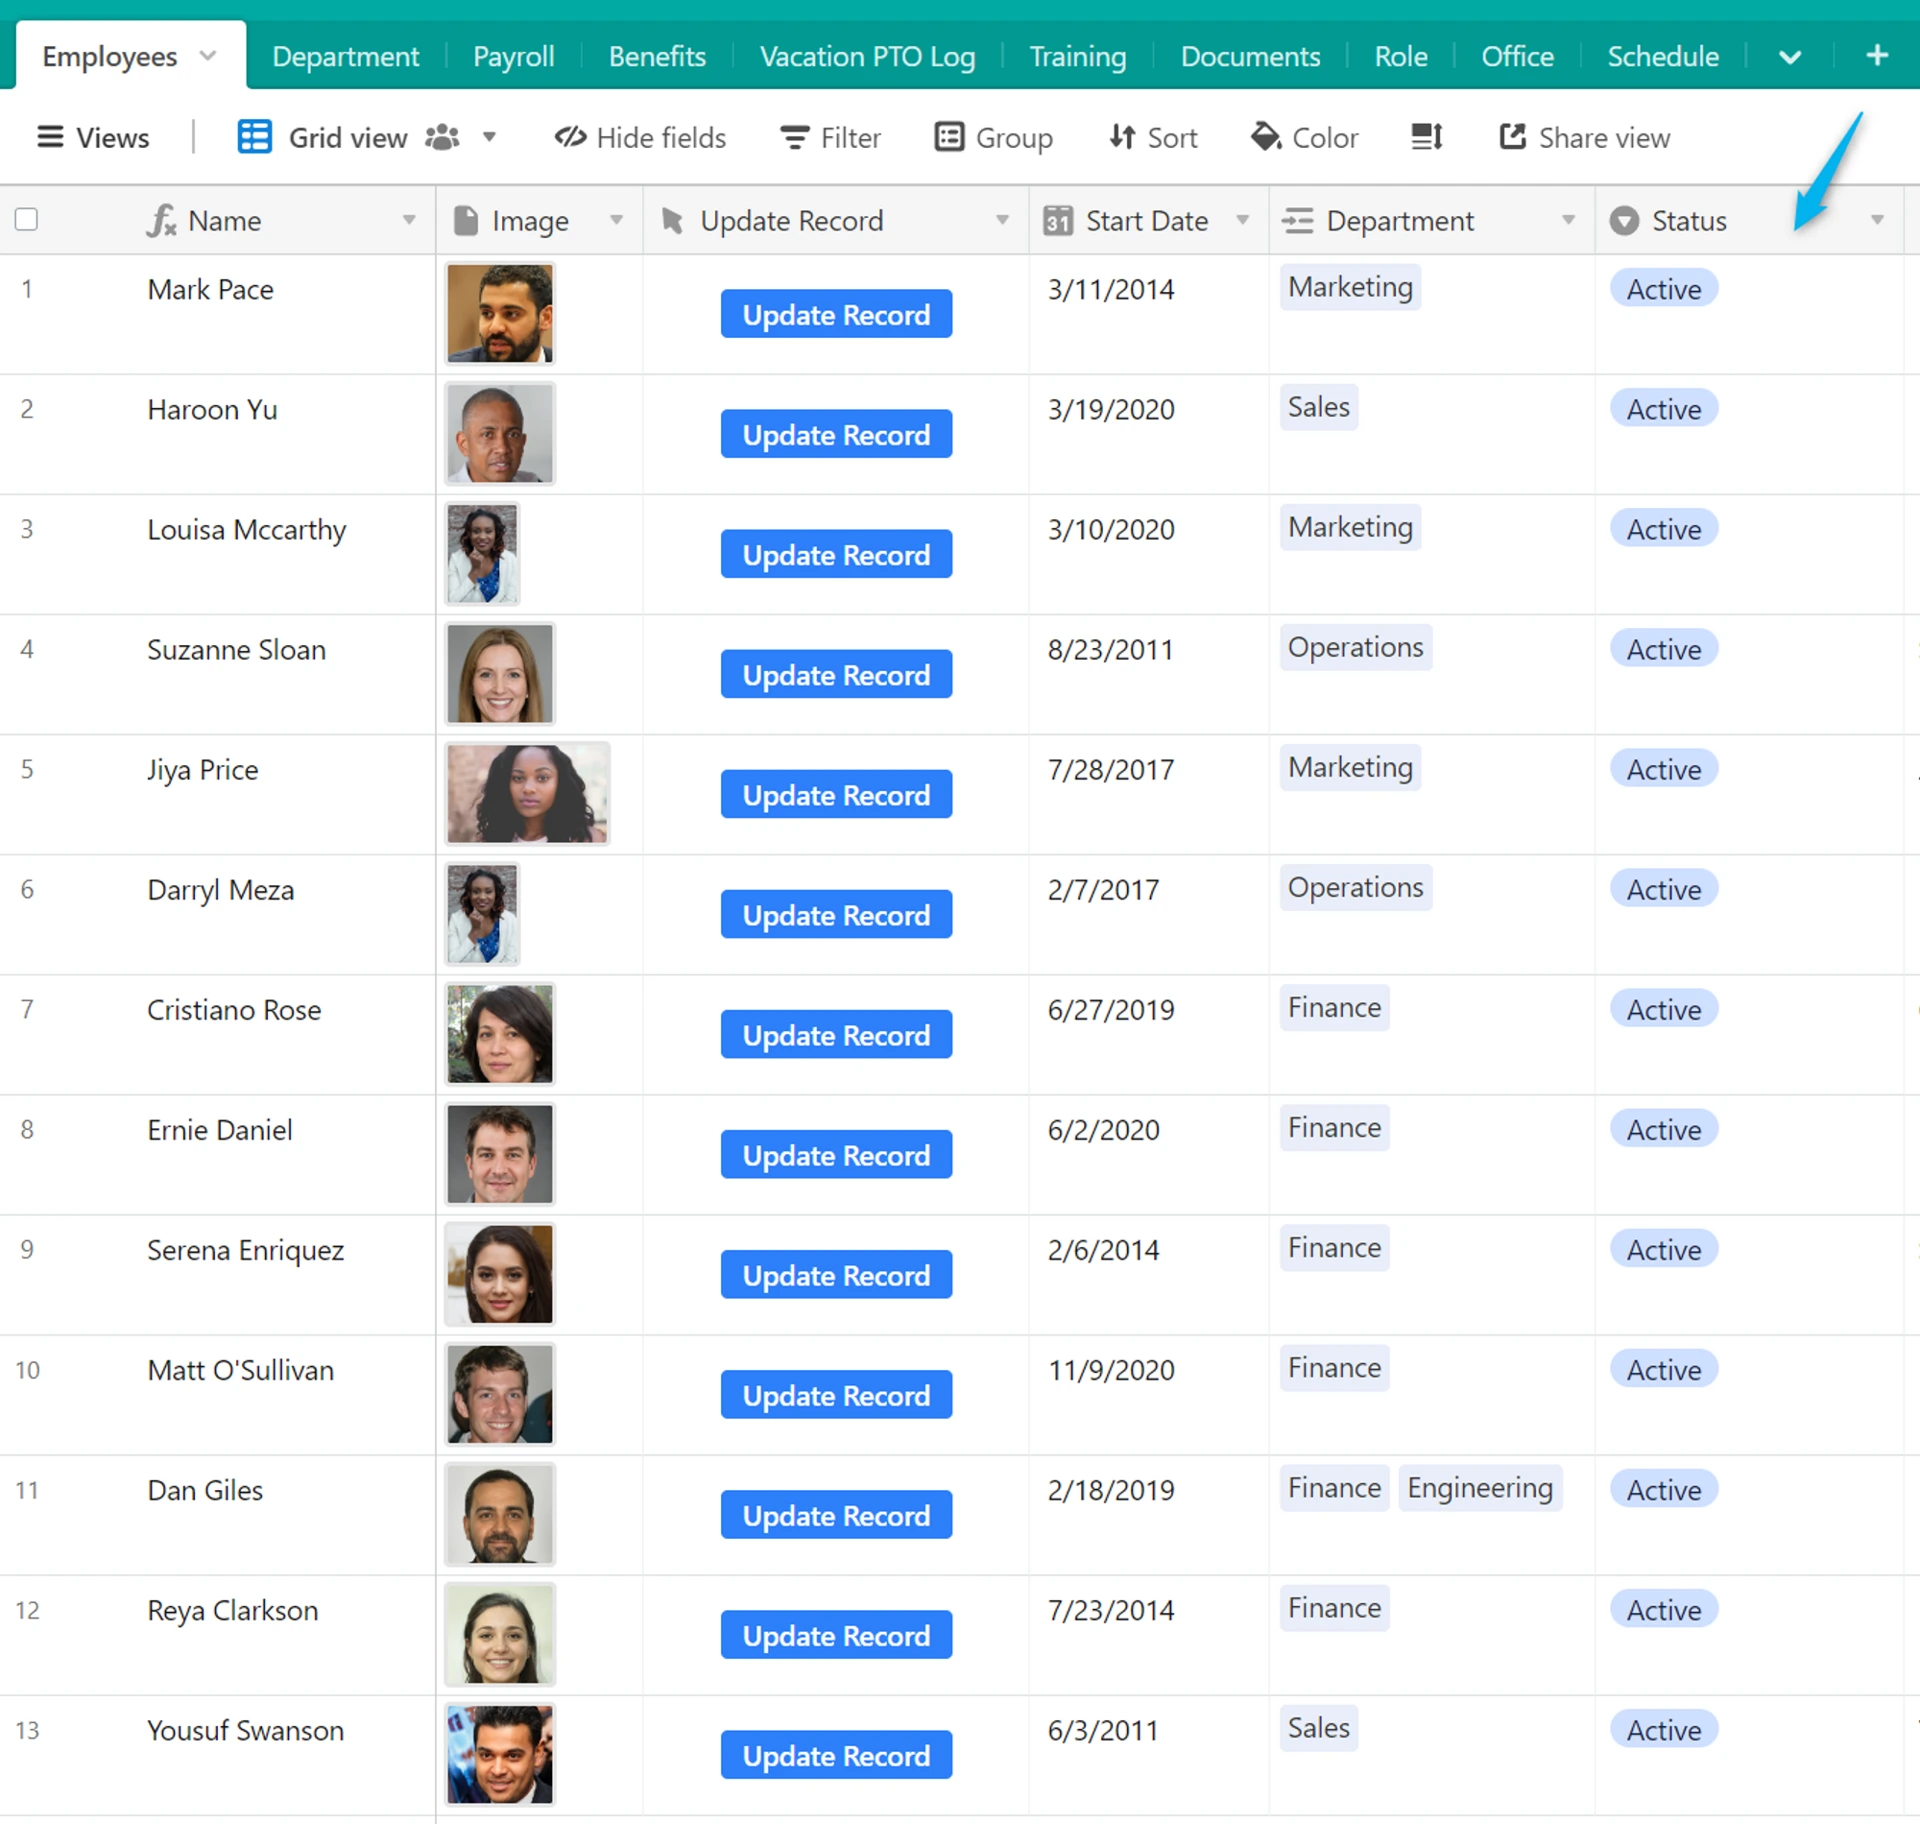
- In the Employees field > Field Configuration menu > URL Linked Field option, we choose the Status field. In your setup, choose the field you need to filter with.
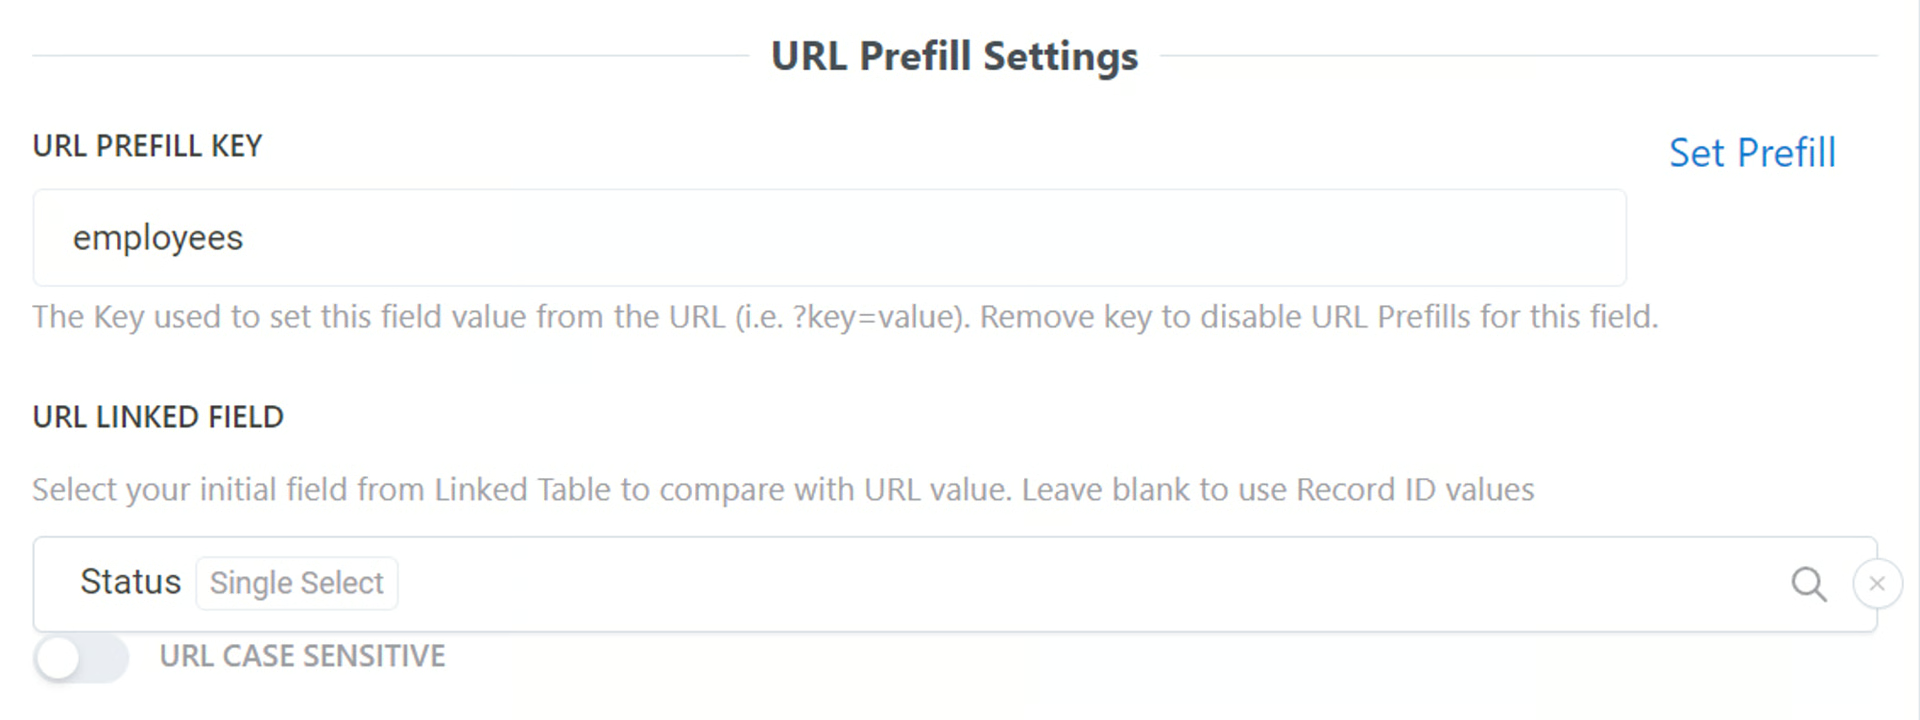
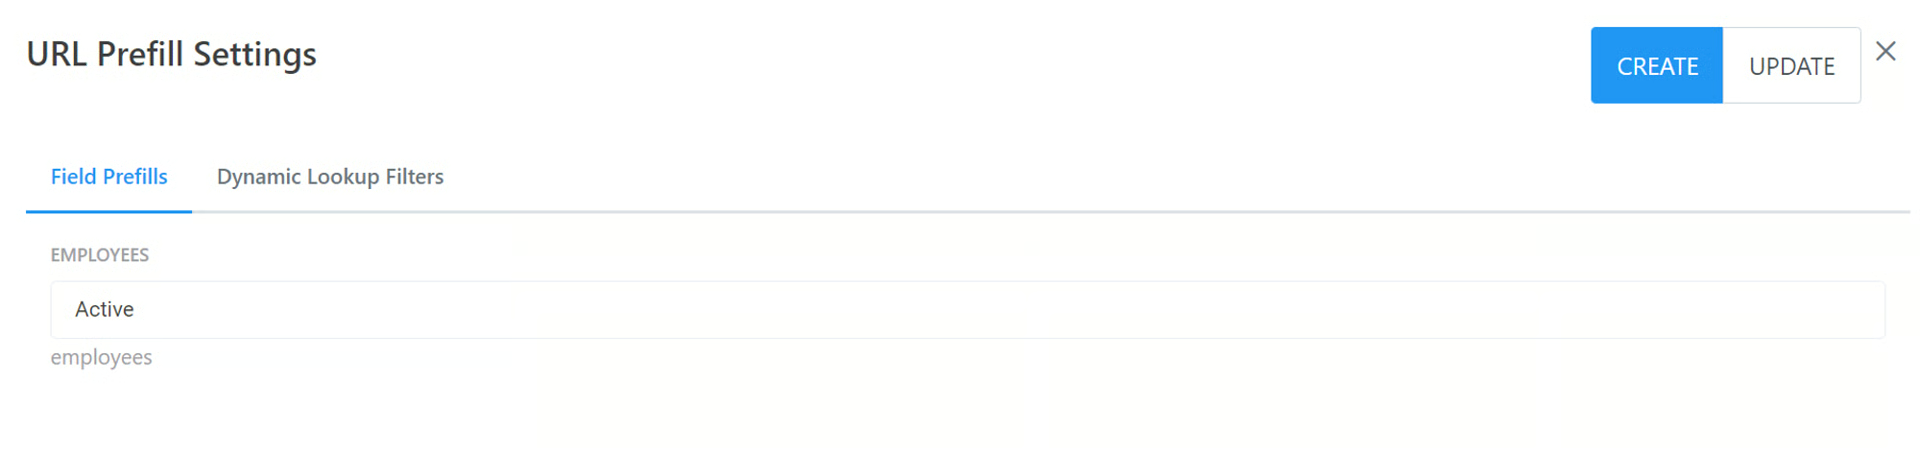
- Click Set Prefill

- In the Employees prefill settings, type the word Active and click Done
This will match any Employee who has a Status of Active and add them to the table
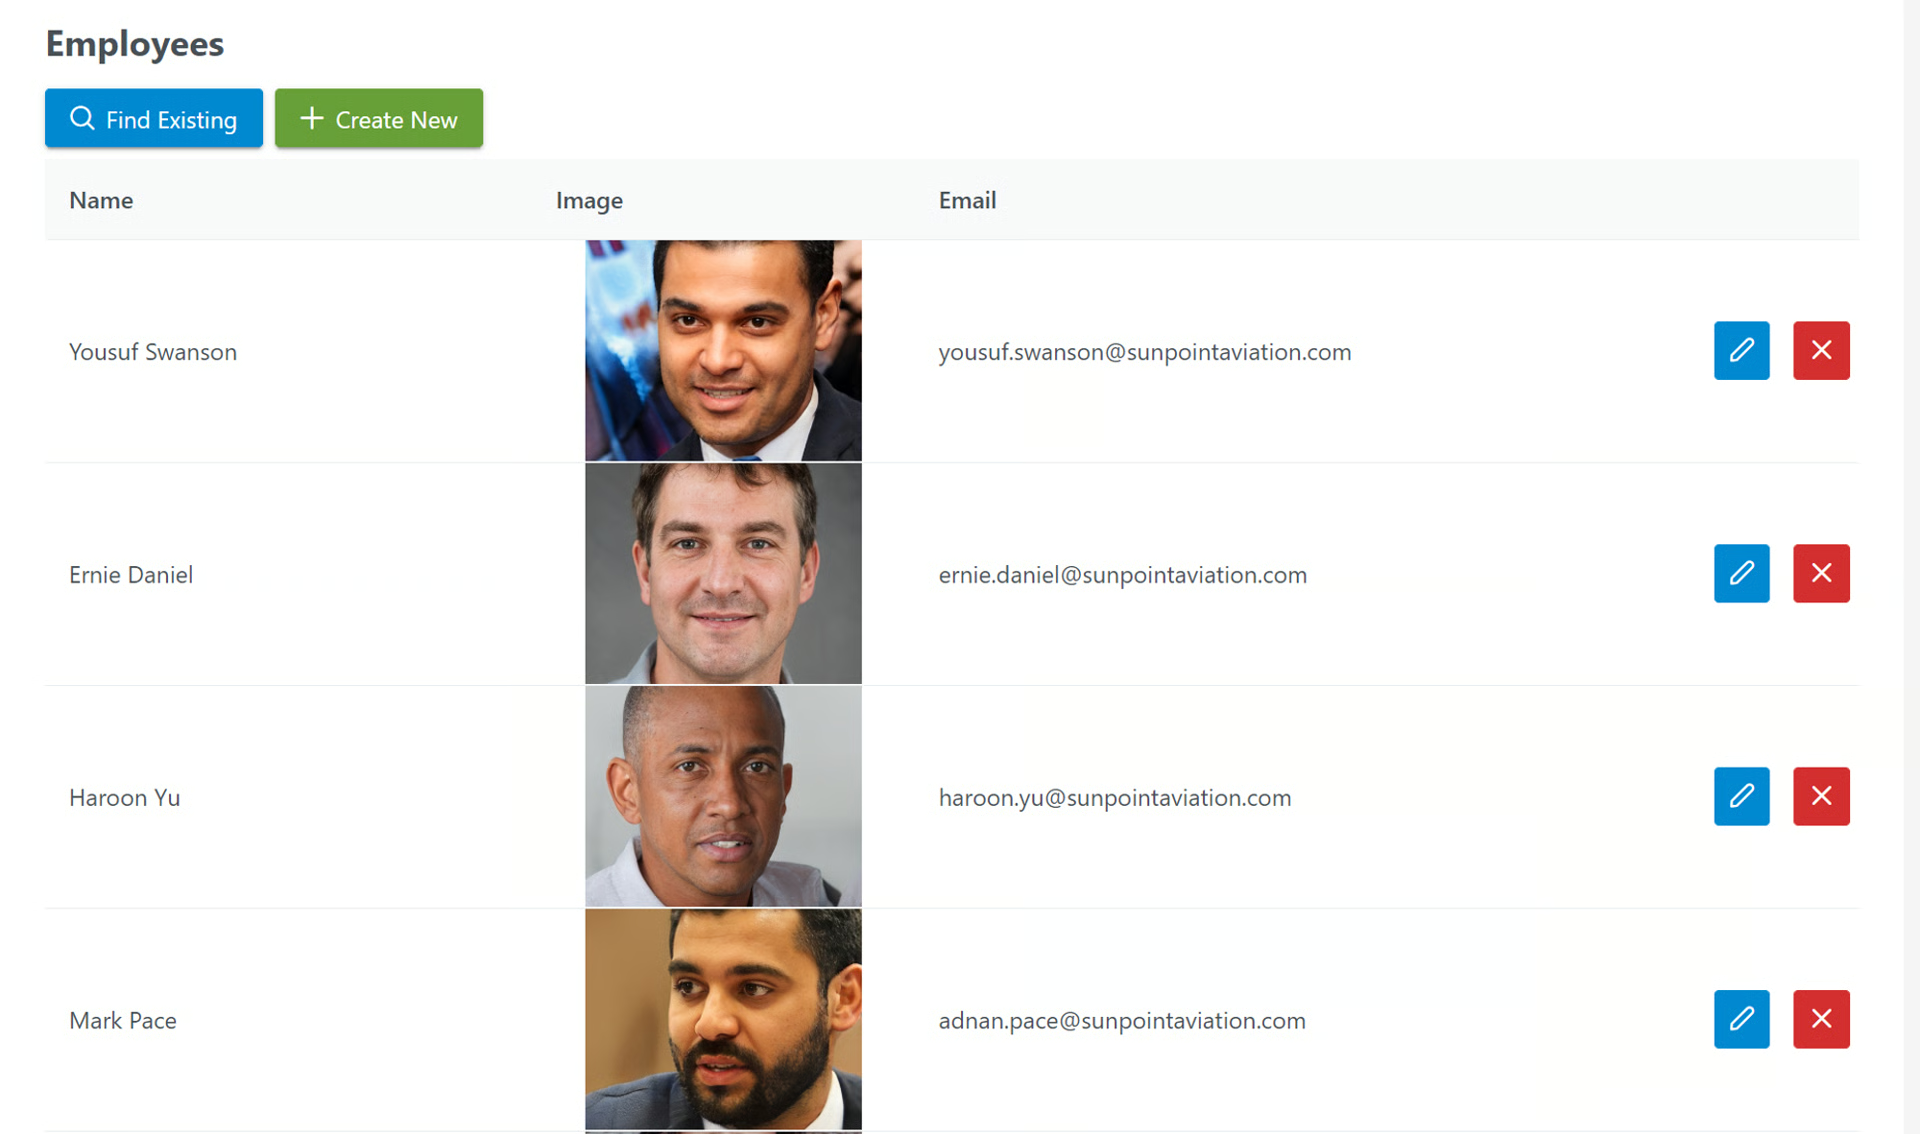
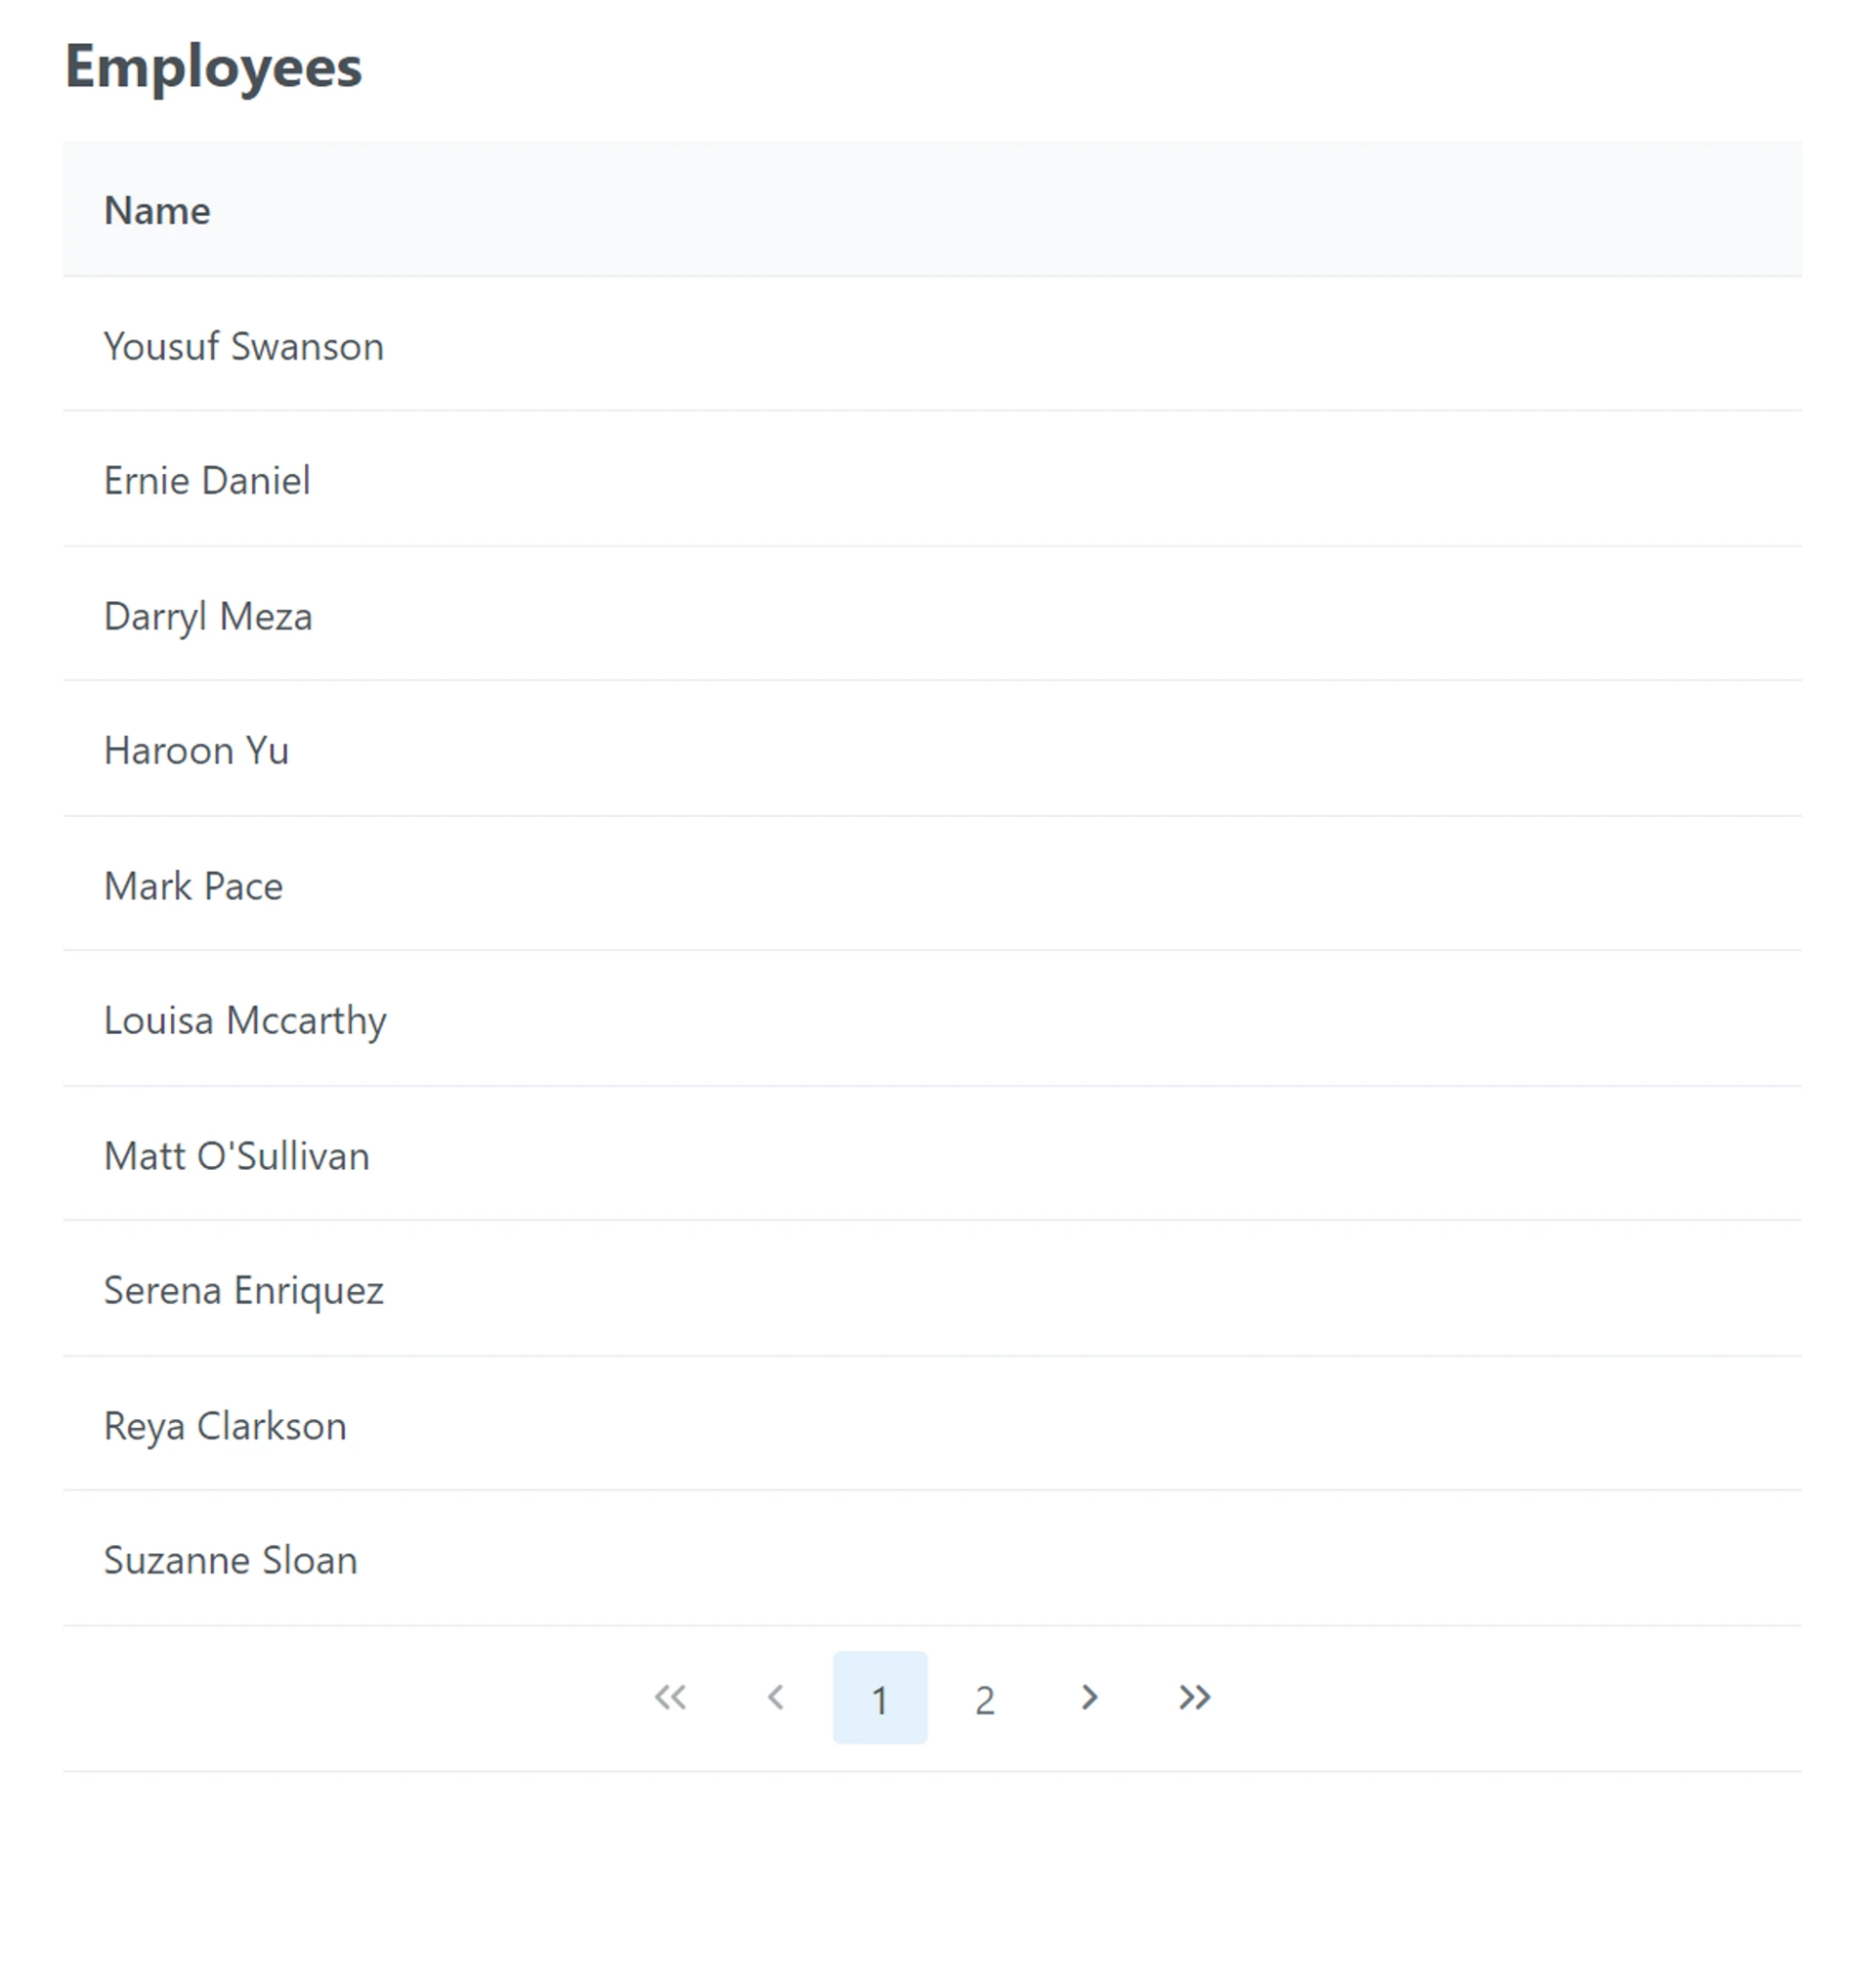
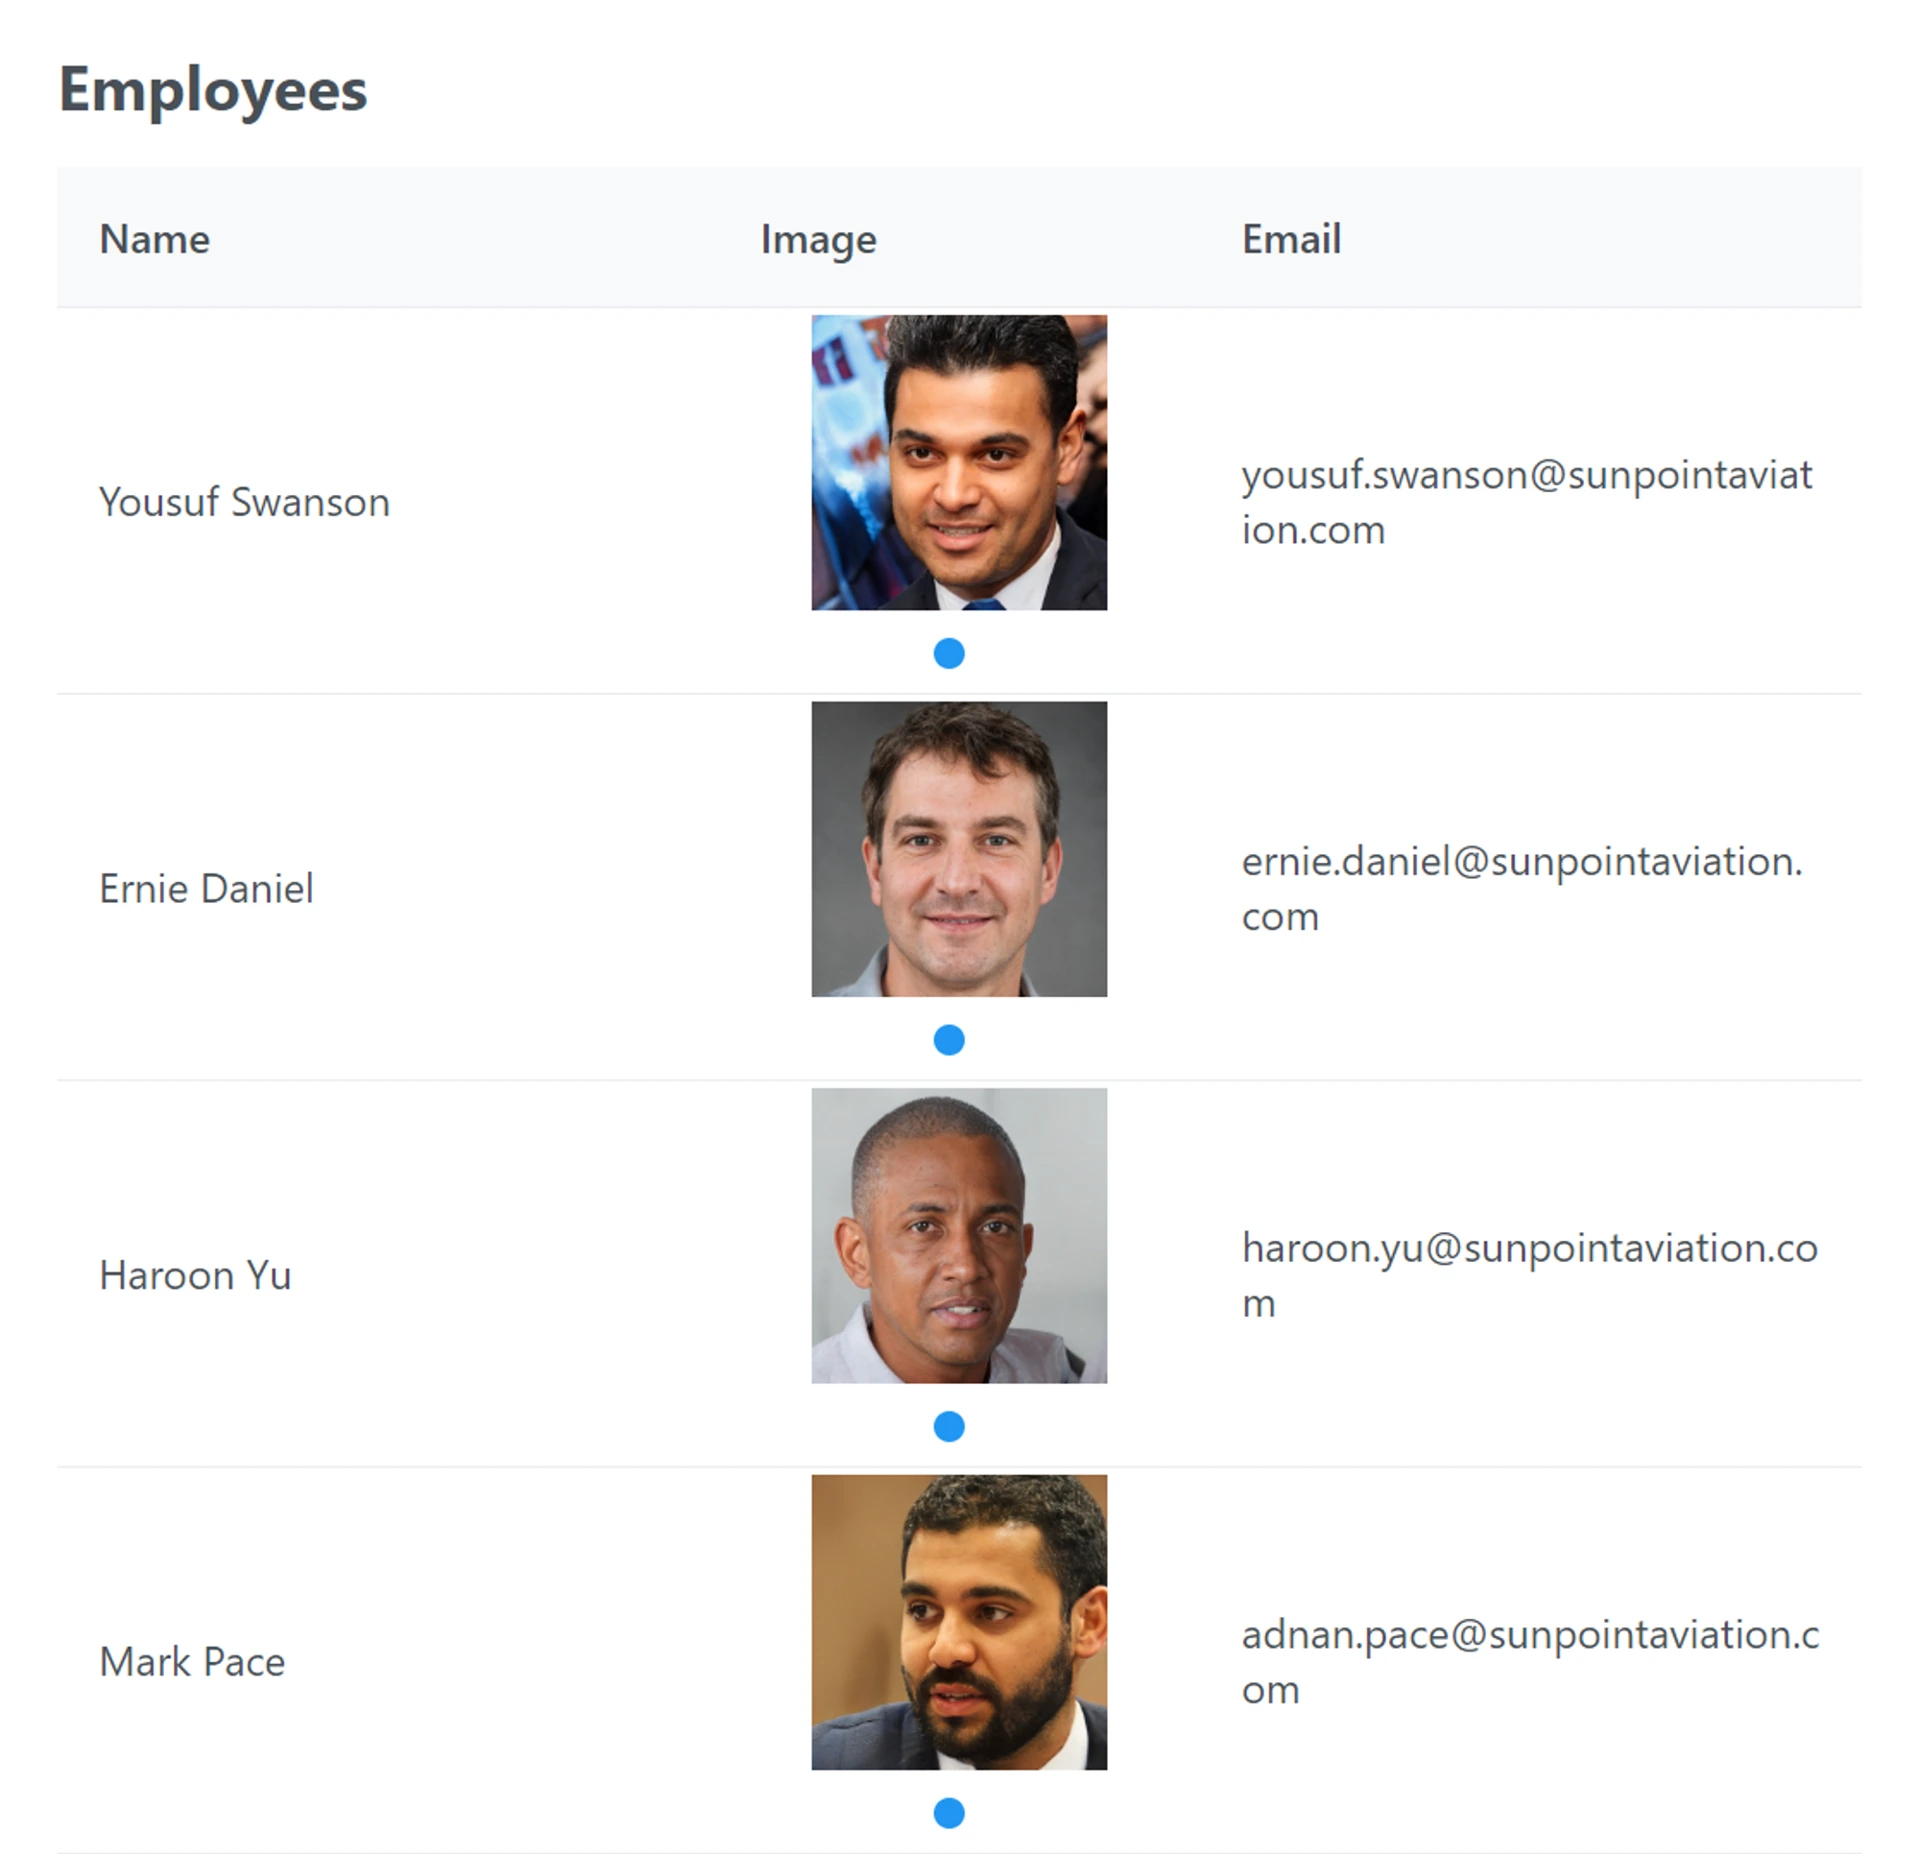
In the Preview, you should now see a list of Employees
Enable or Disable Editing Records from the Table
Section titled “Enable or Disable Editing Records from the Table”By default, the edit option is available to edit the records on the table (after you set up the Subform)
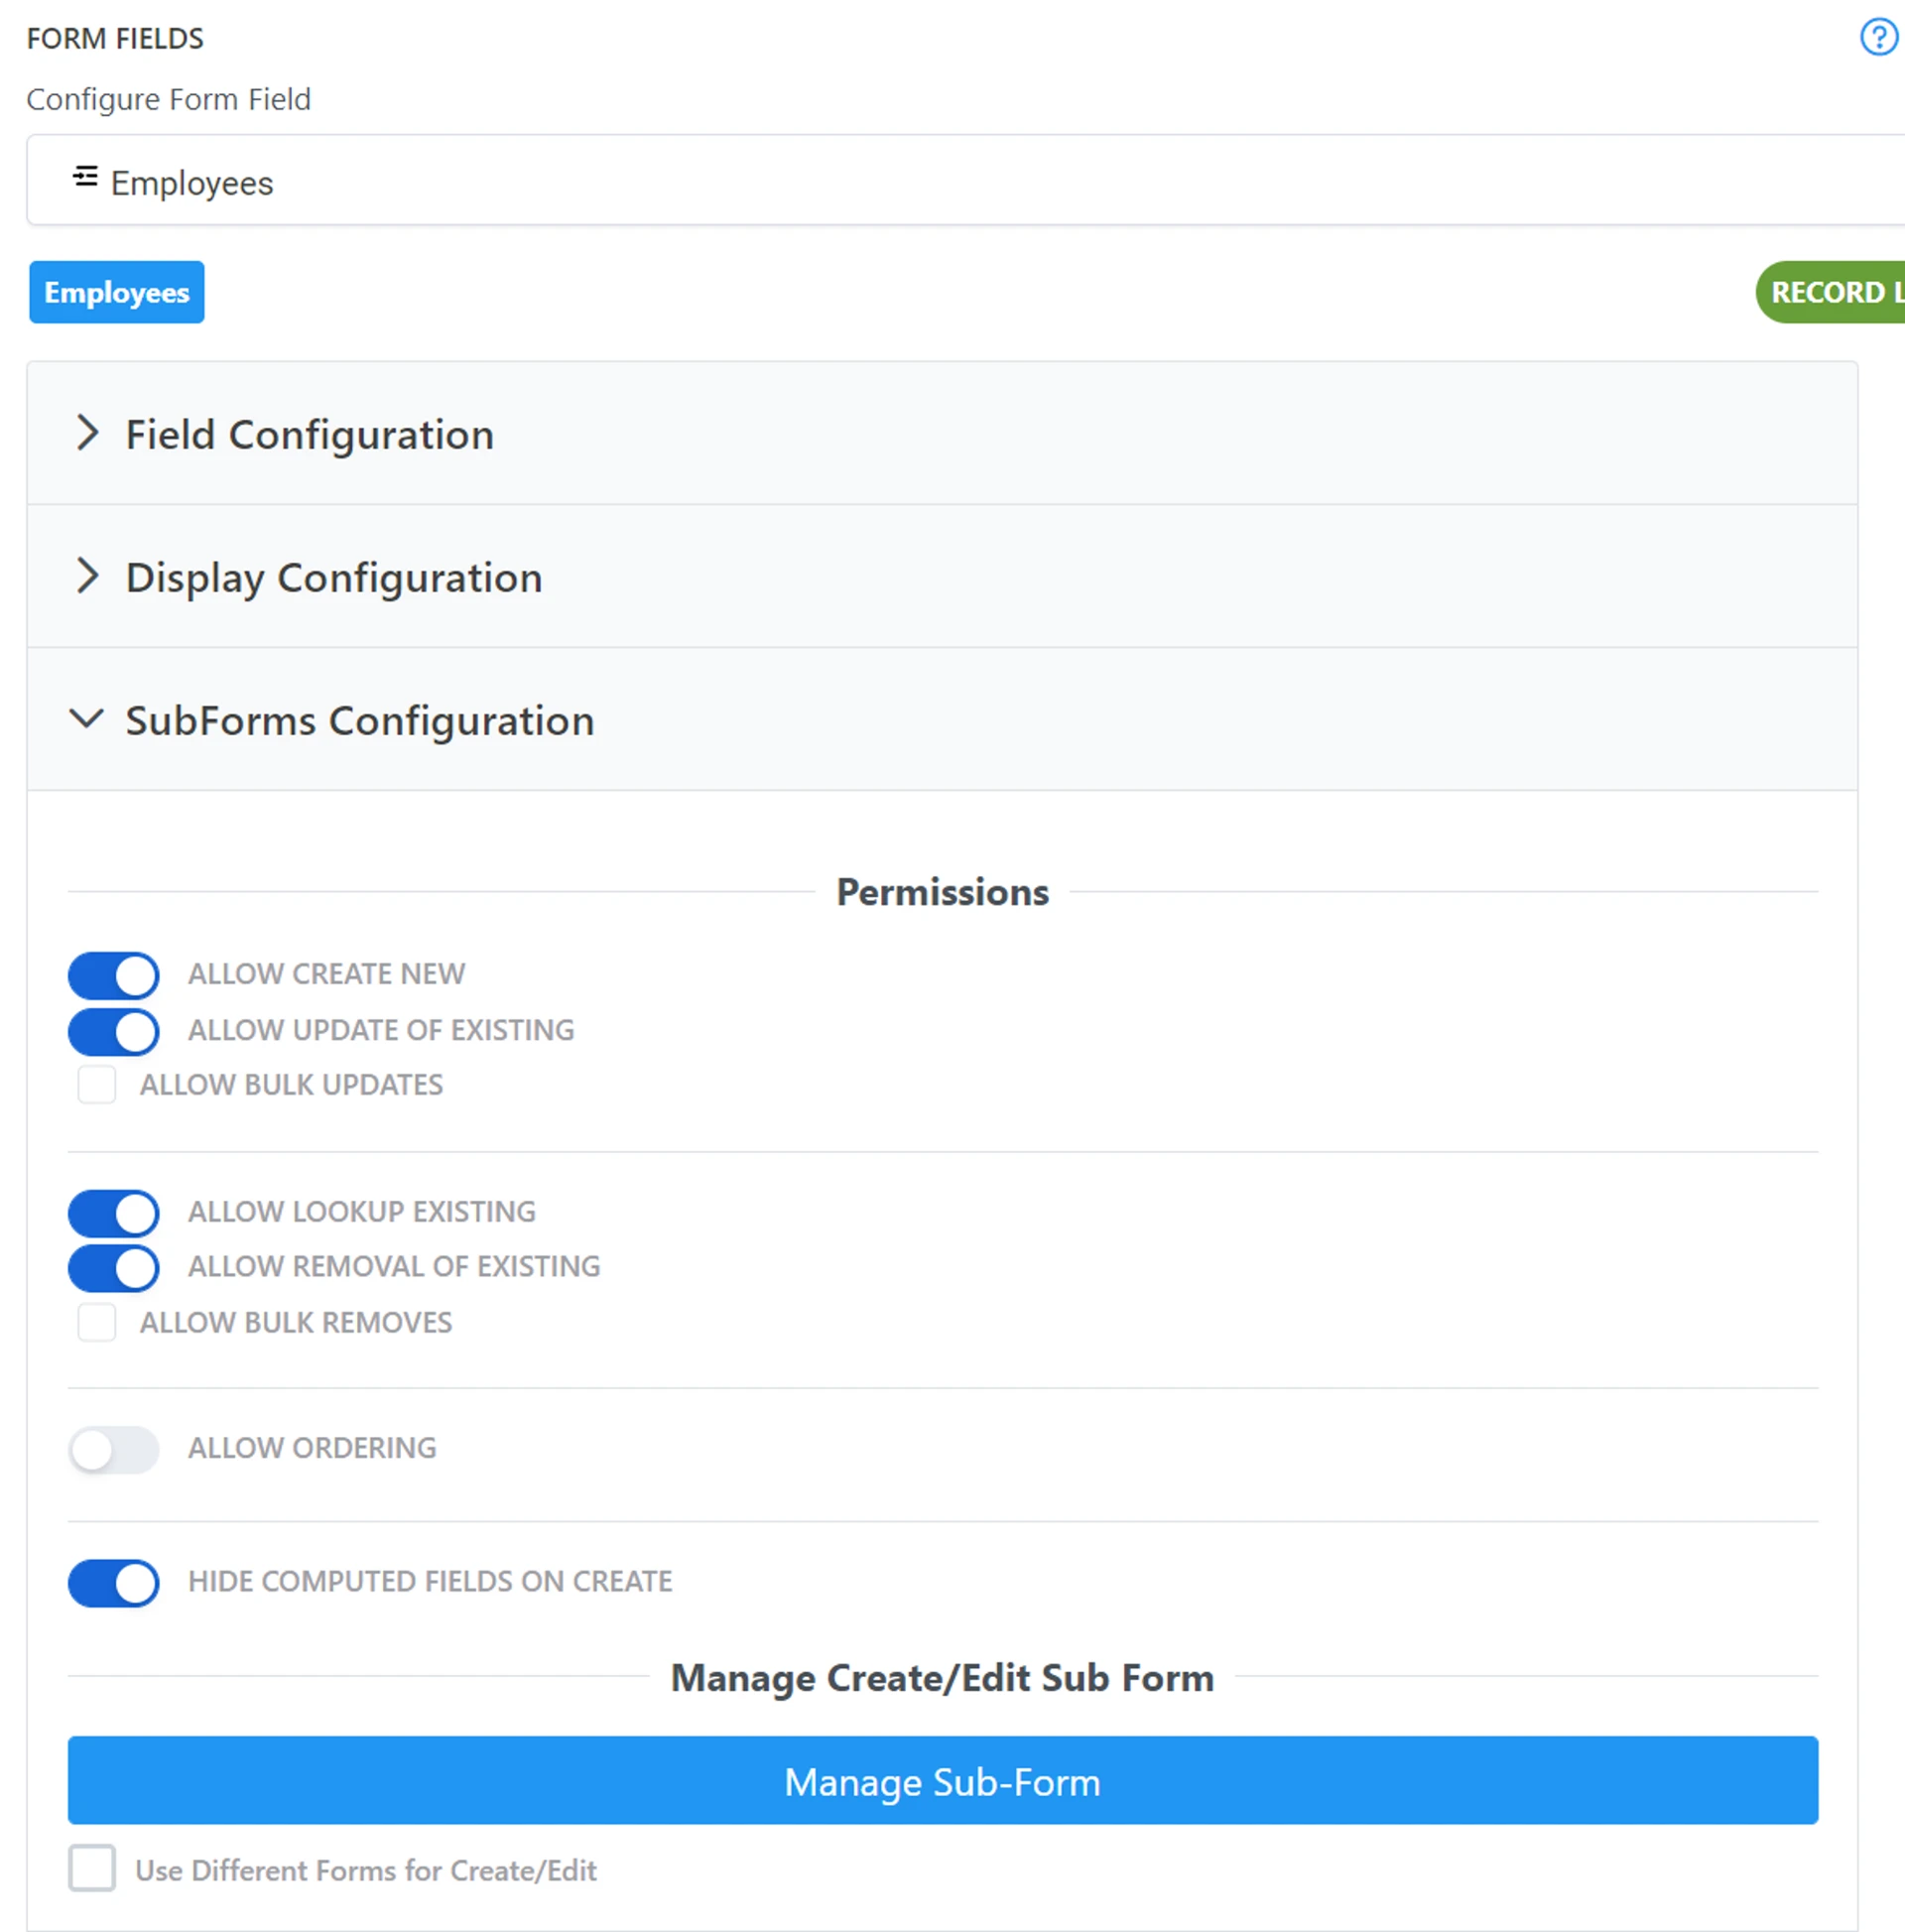
- You can disable this by disabling all Permissions in the Subform Configuration menu
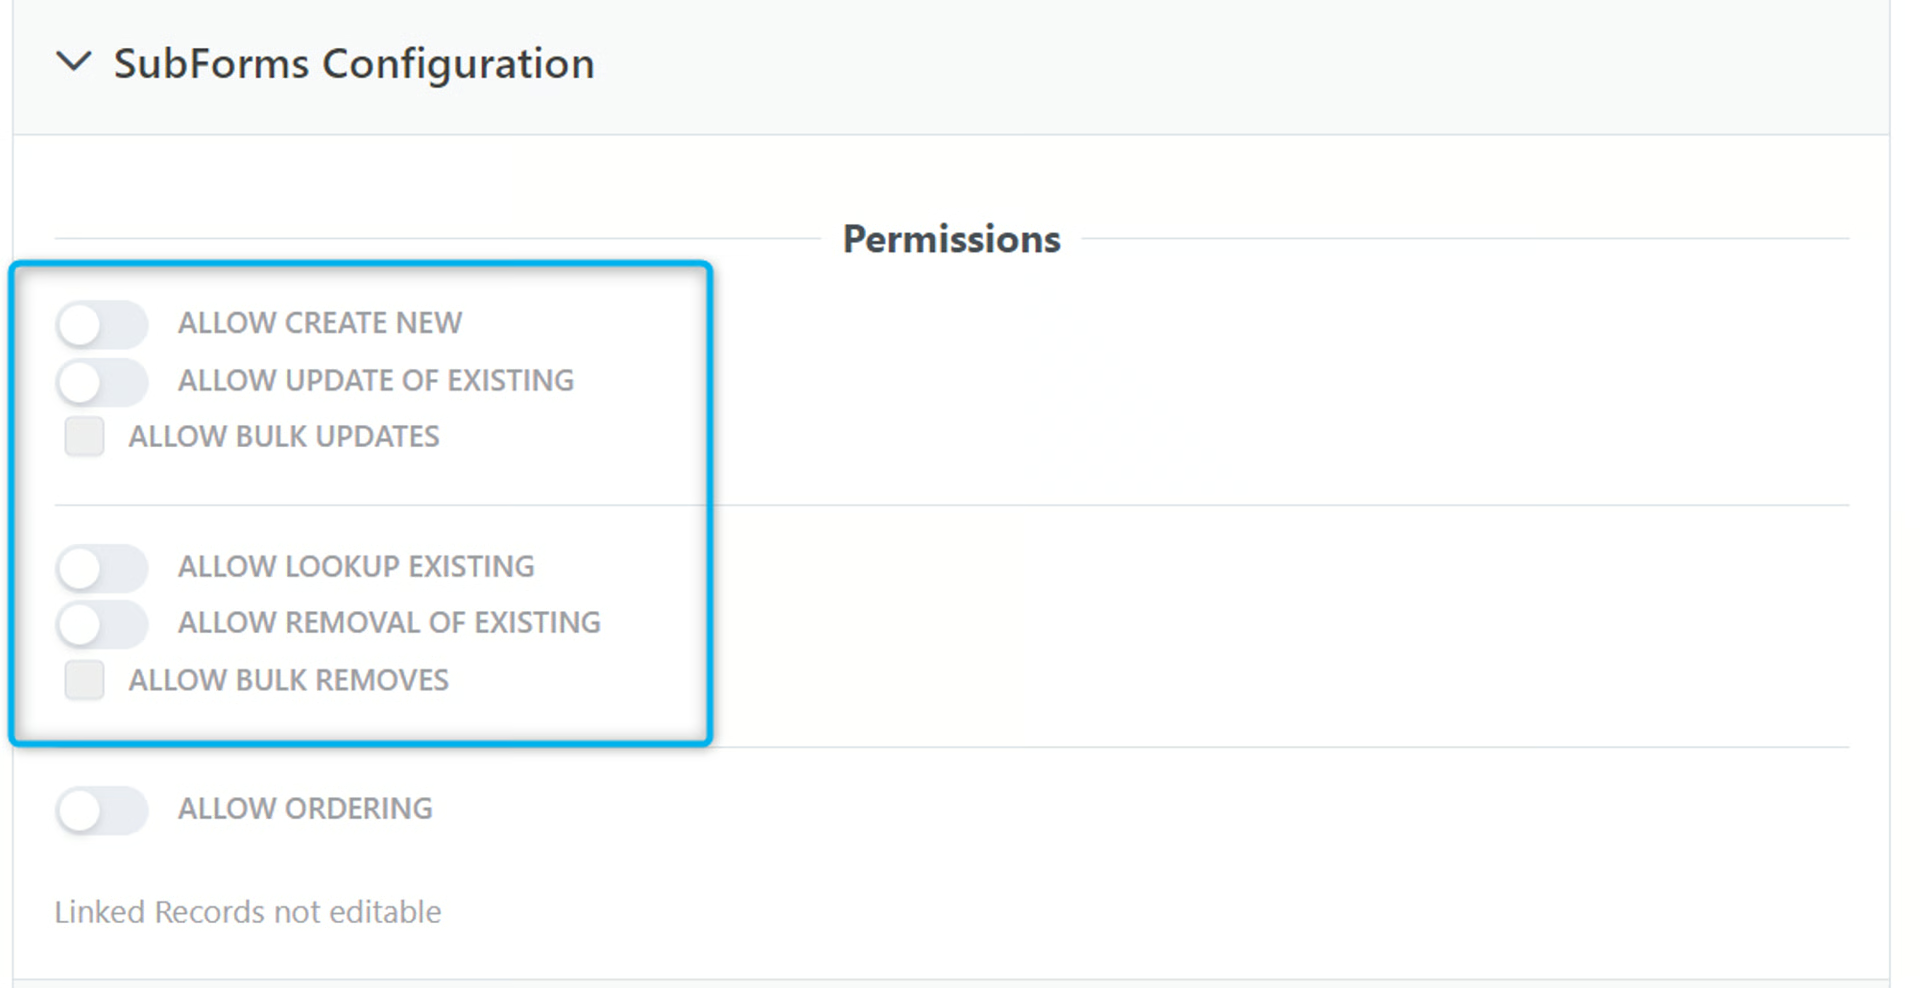
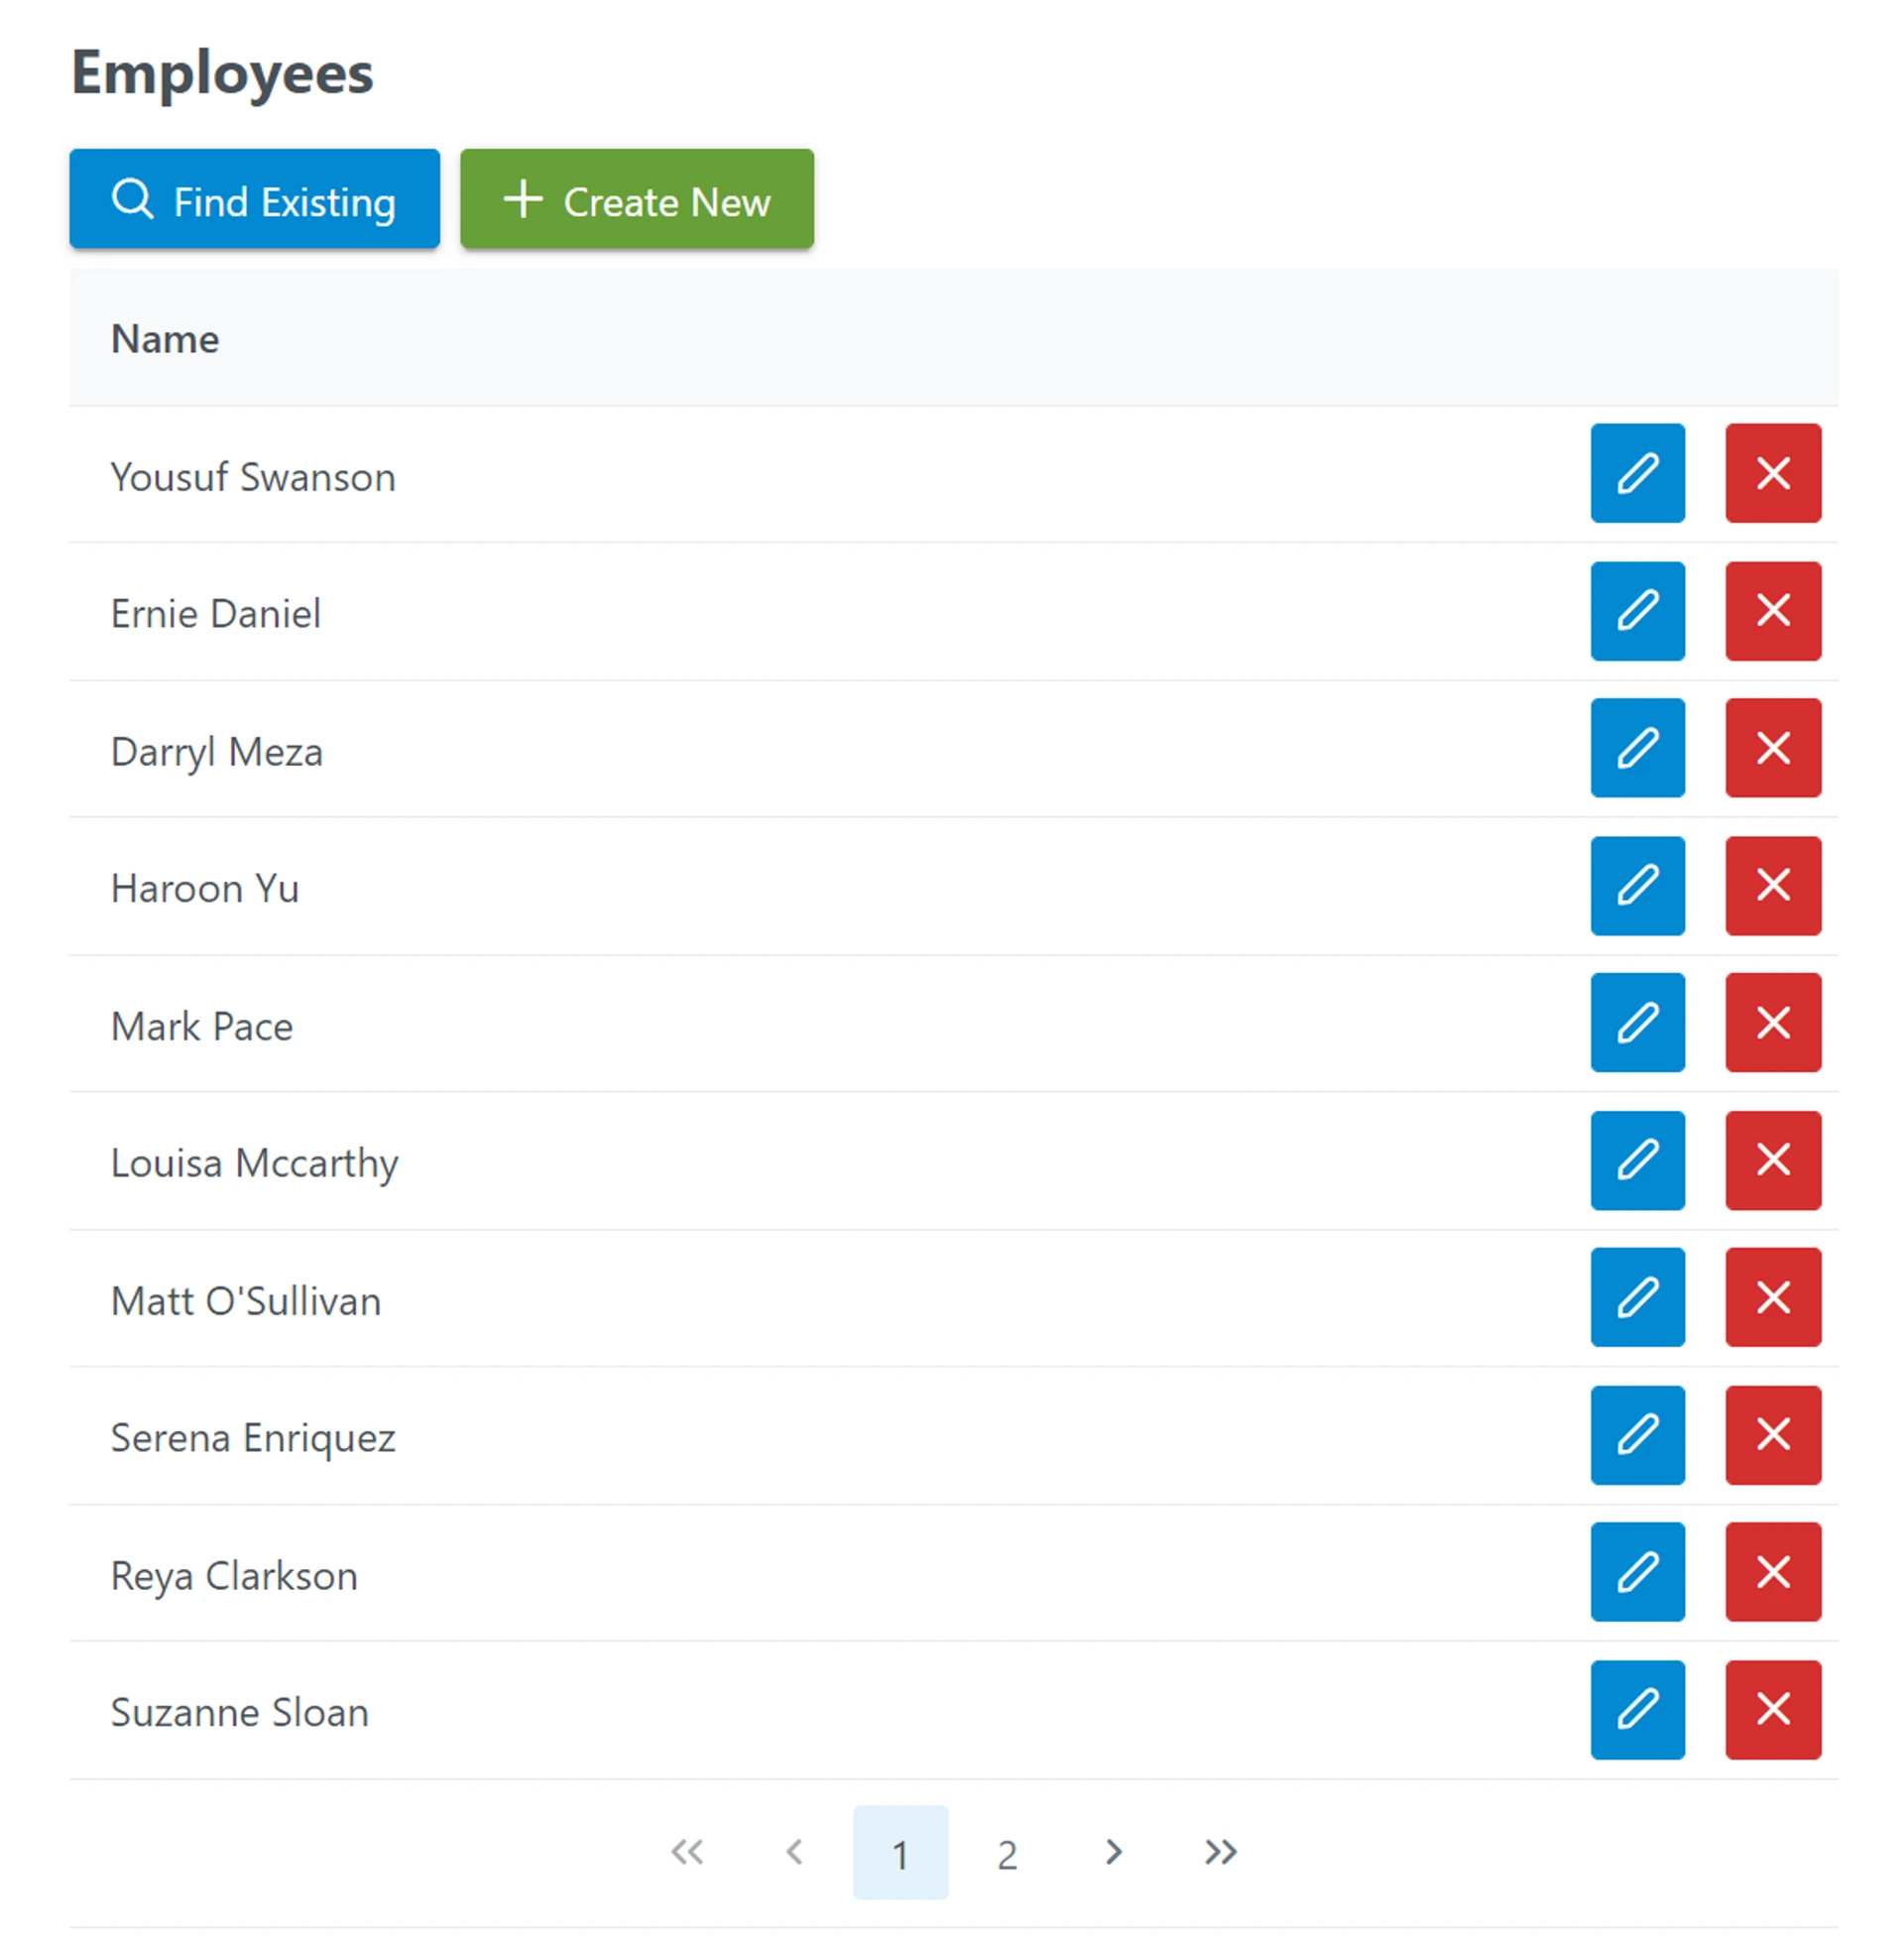
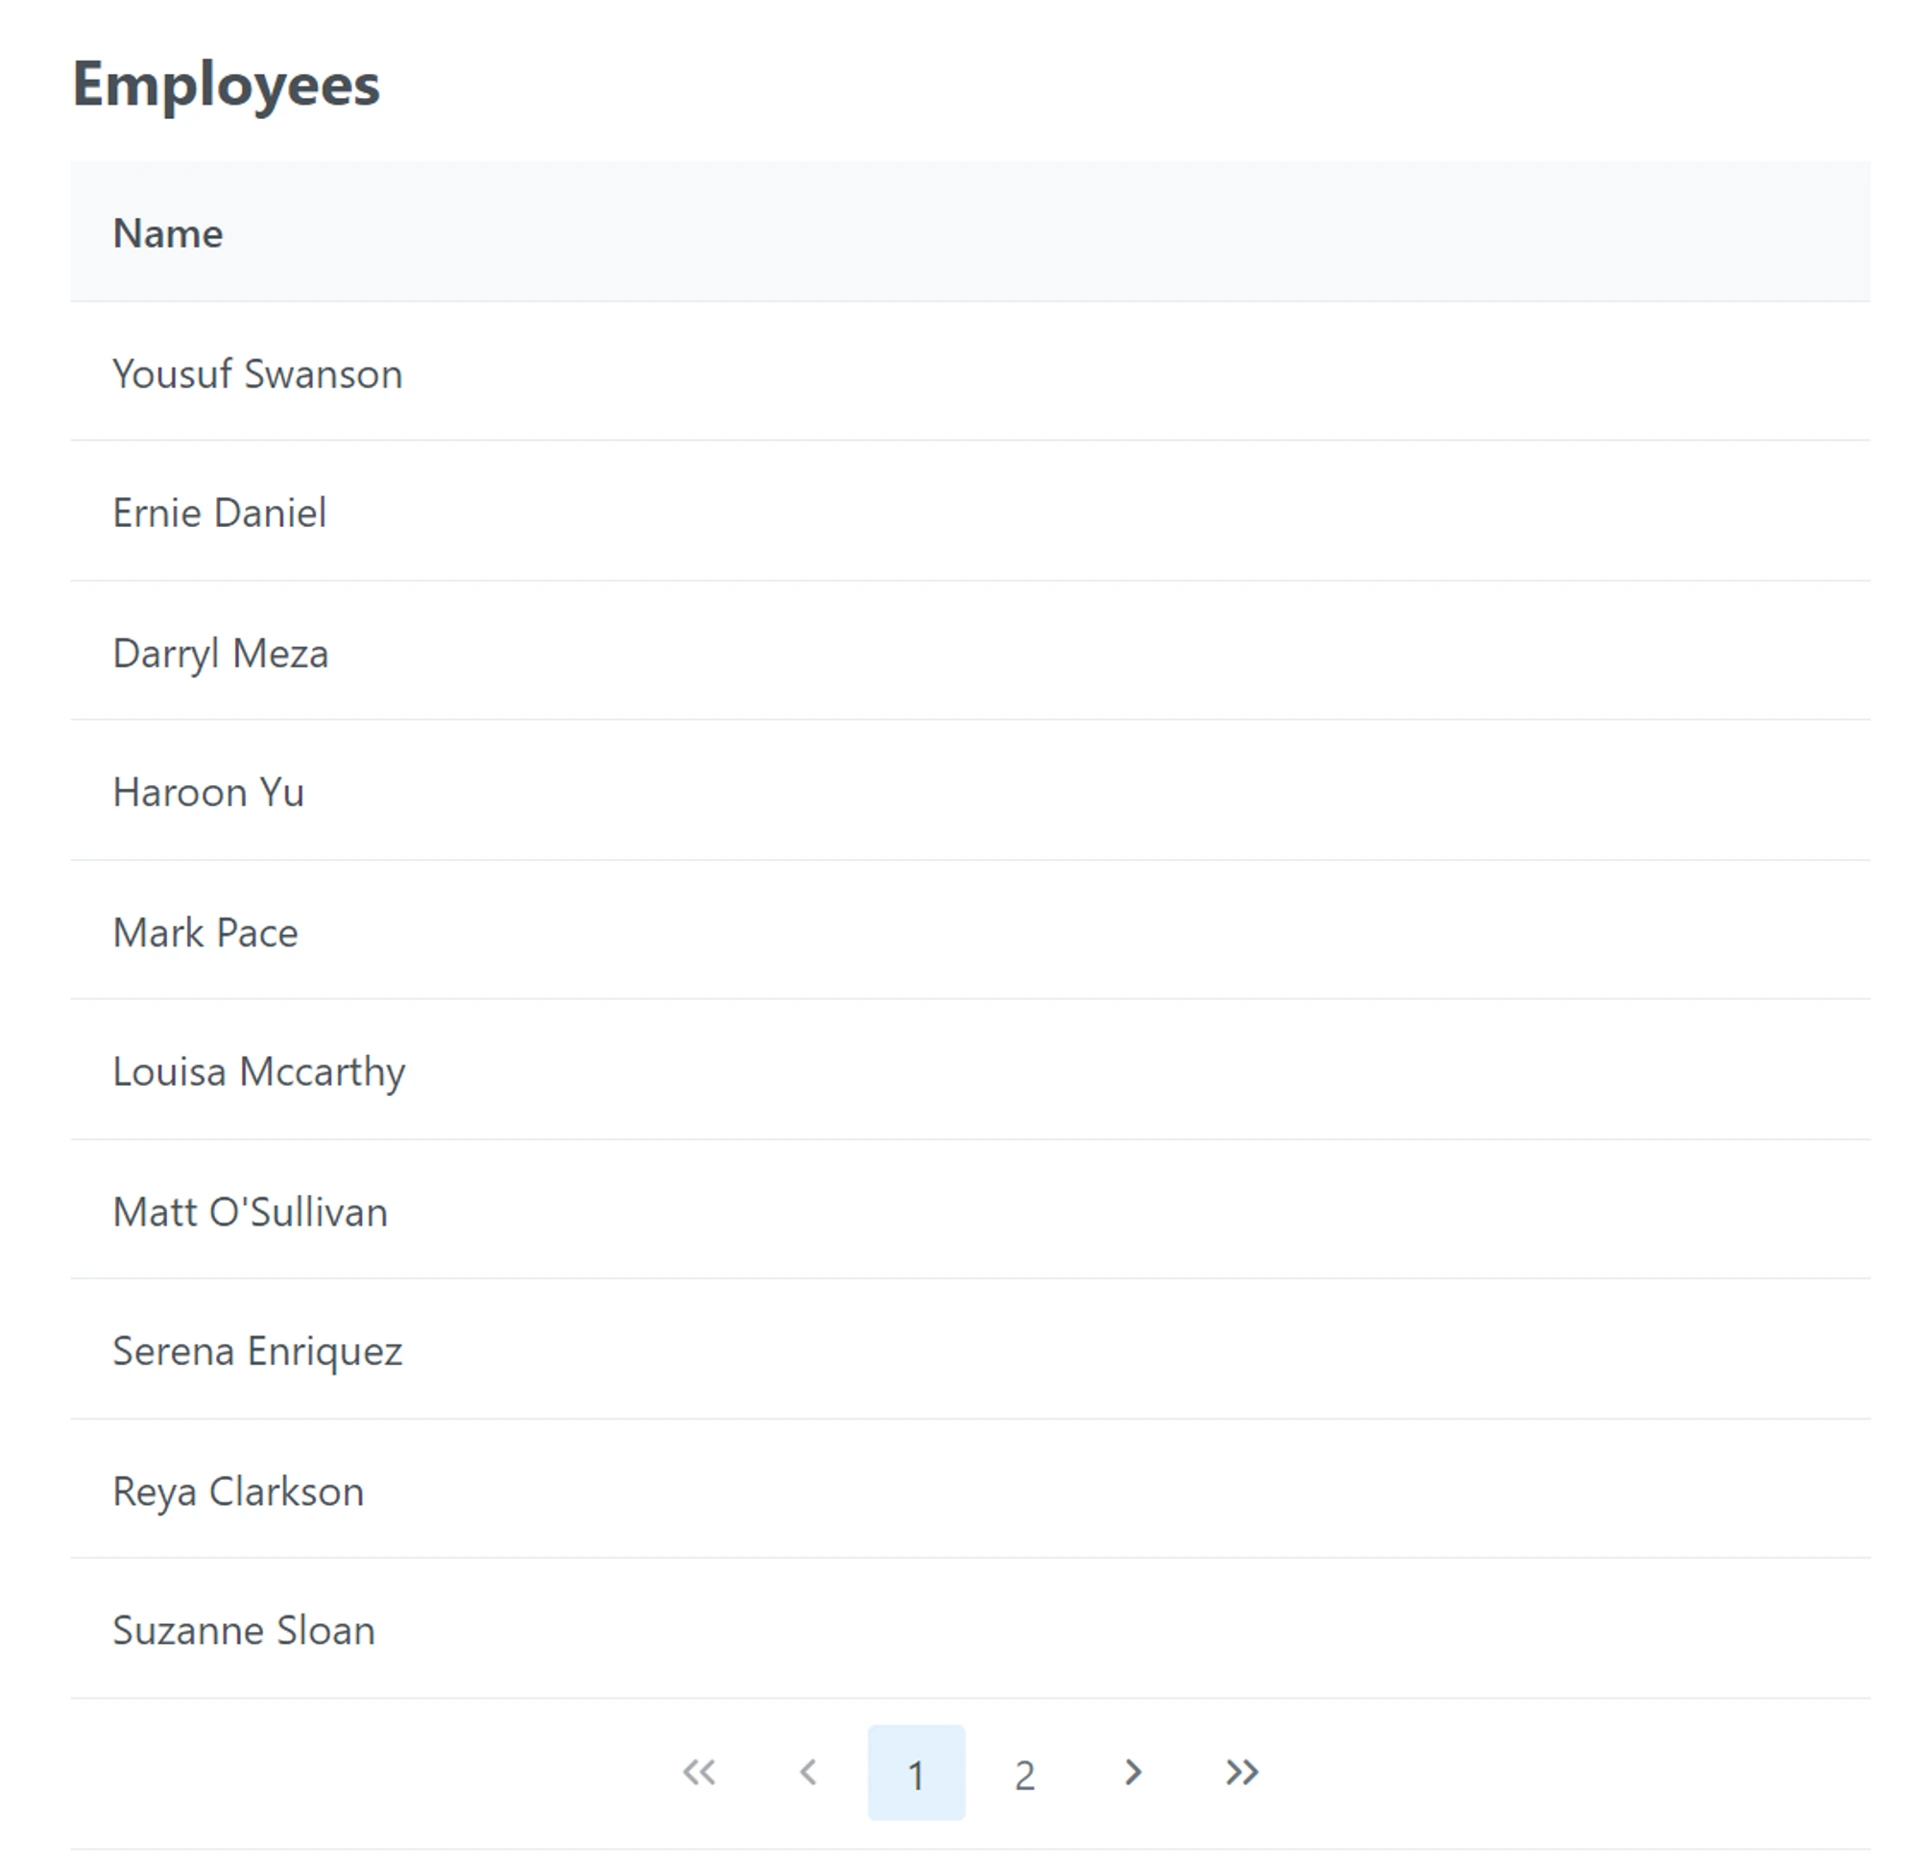
- Once you do this, all editing/updating/searching icons are removed
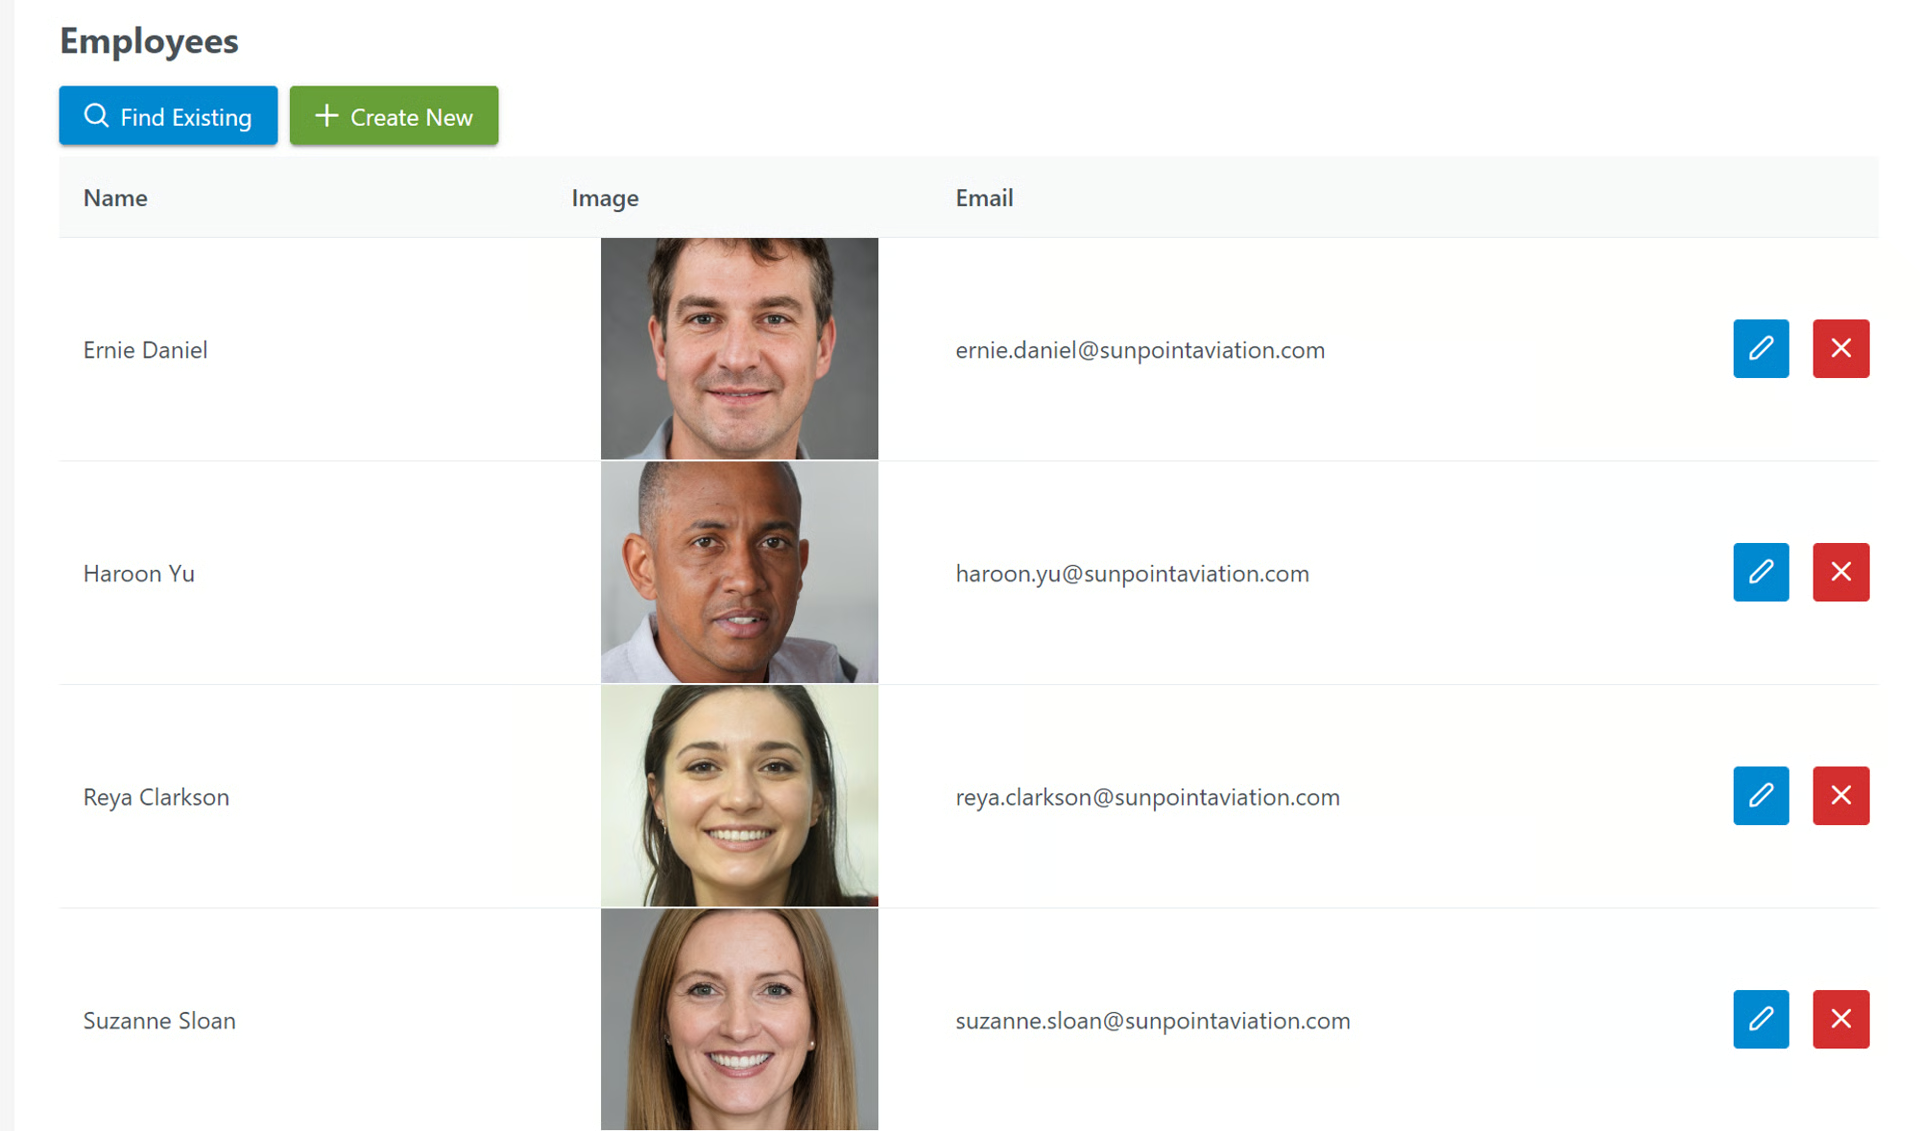
- If you want to allow Editing and Updating from the table, leave the Permission as-is and you will see various editing/deleting options
- In Subforms Configuration, click Manage Subform
➡️
Learn how to work with Subforms:  Create and Edit Linked Records with Subforms (Update Multiple Tables from 1 Form)
Disable Submission Button
Section titled “Disable Submission Button”To display your list of Employees as a table, you’ll want to disable the Submit button
- Click Page > Submission Page
- Then click Hide Submission
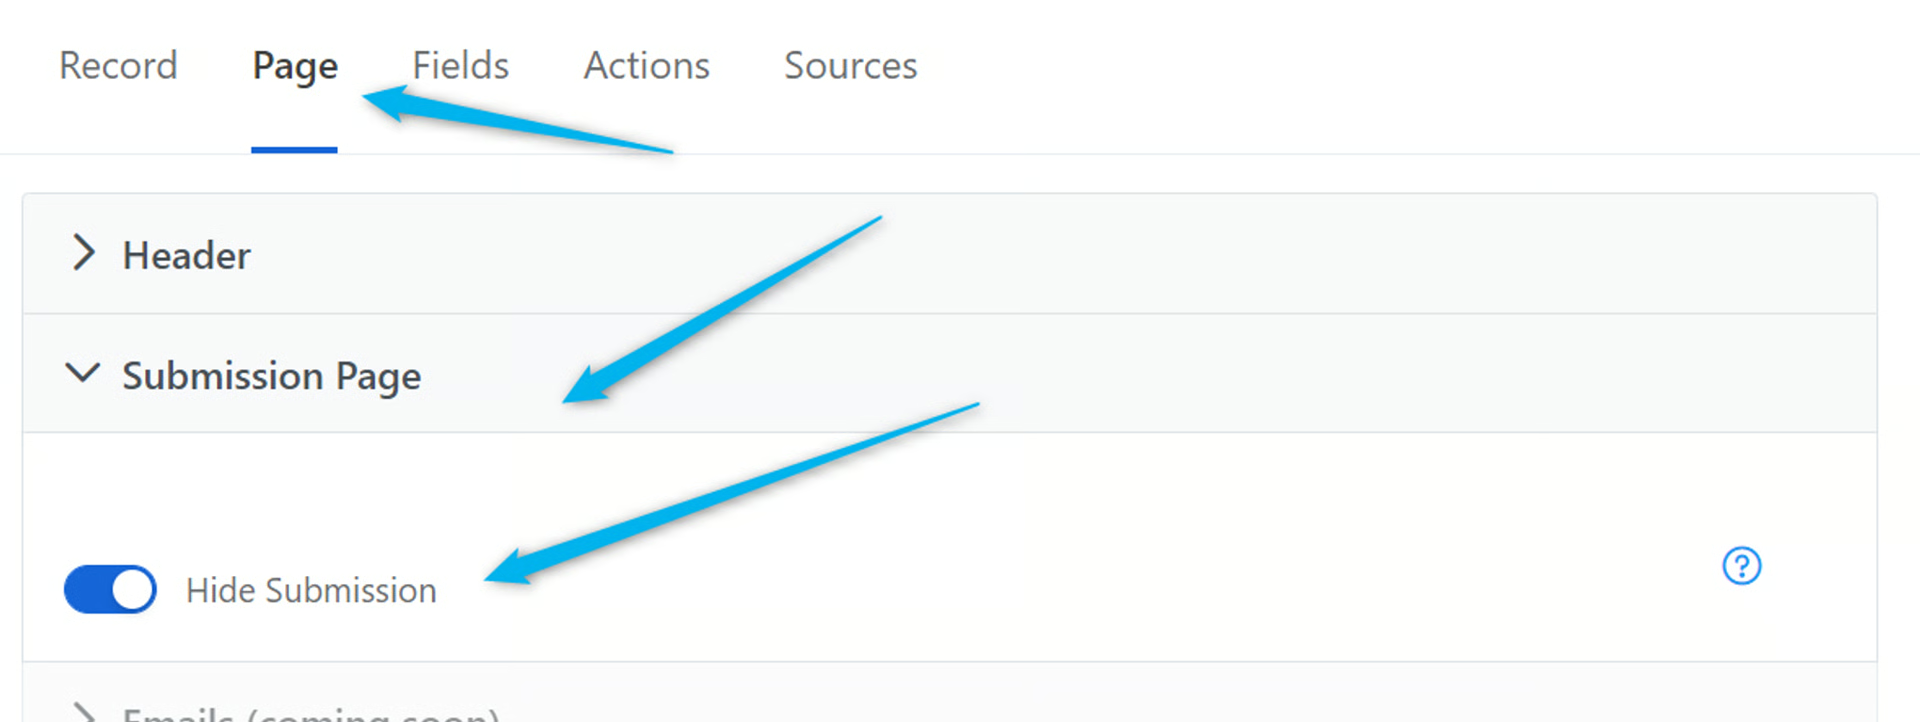
- The Submit button is removed
Customize Your Table
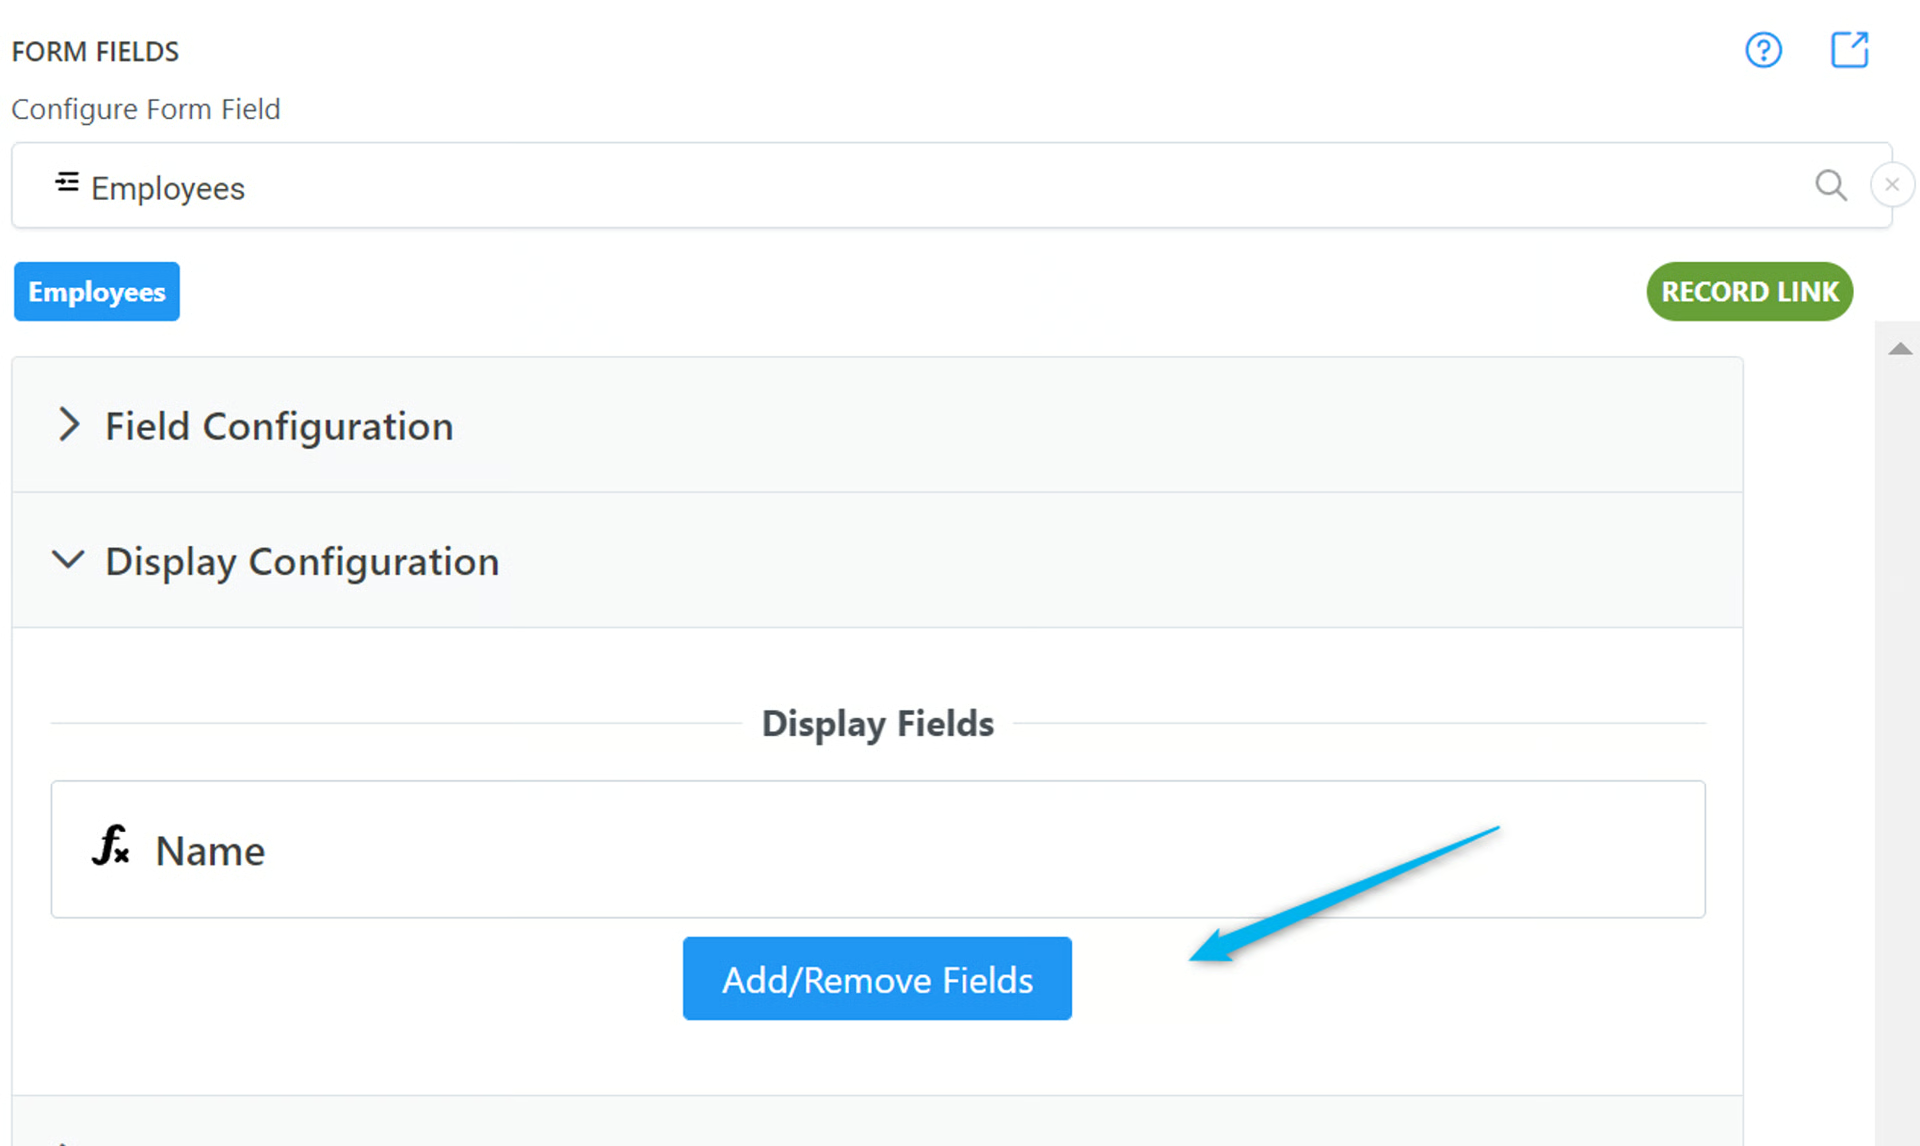
Section titled “Customize Your Table”Now that your table is created, you can customize it to display different fields
In Display Configuration, click Add/Remove Fields
- Choose the fields you want displayed on your table by clicking on the field name then clicking the blue arrow over
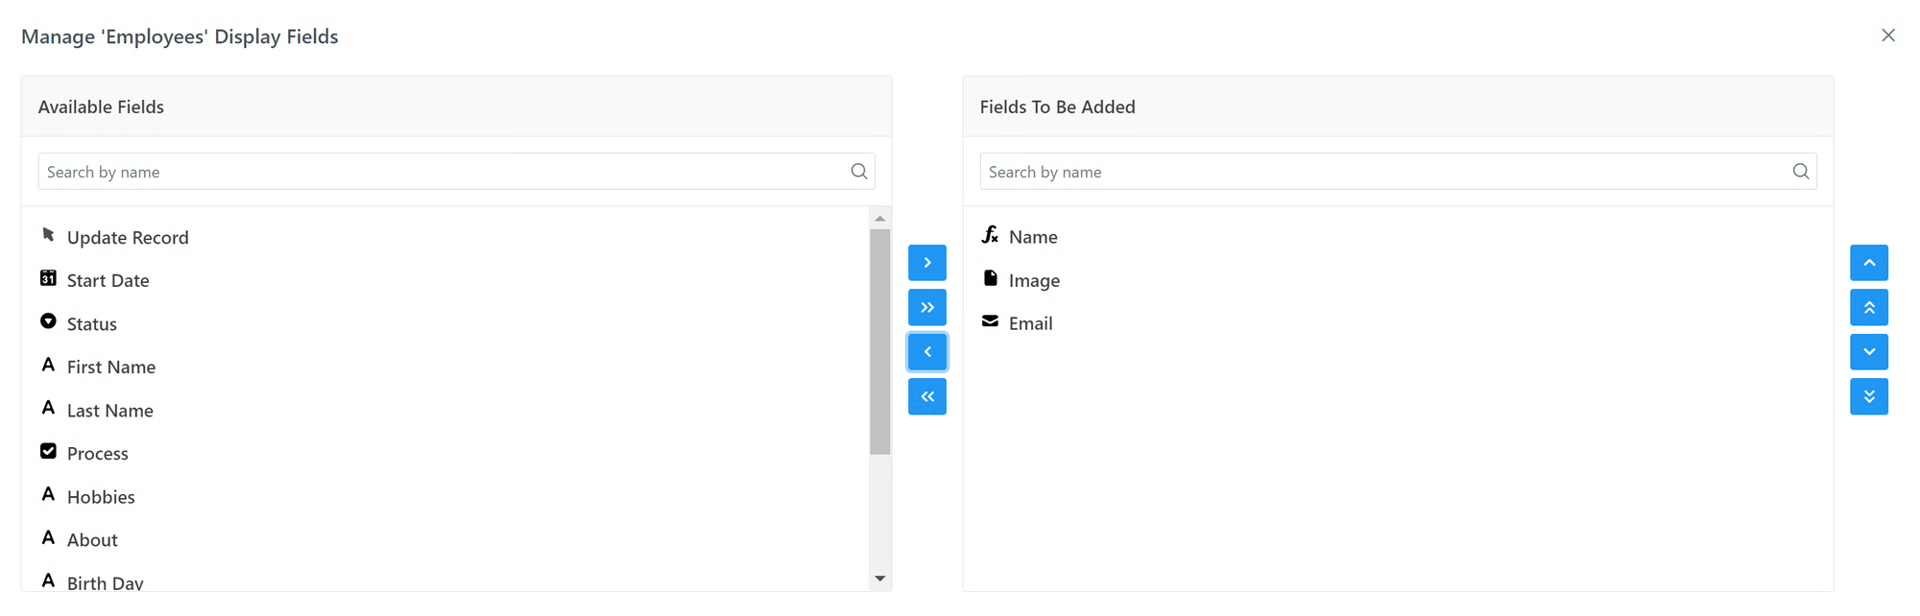
- Now, I can see the Name, Image, and Email on the table
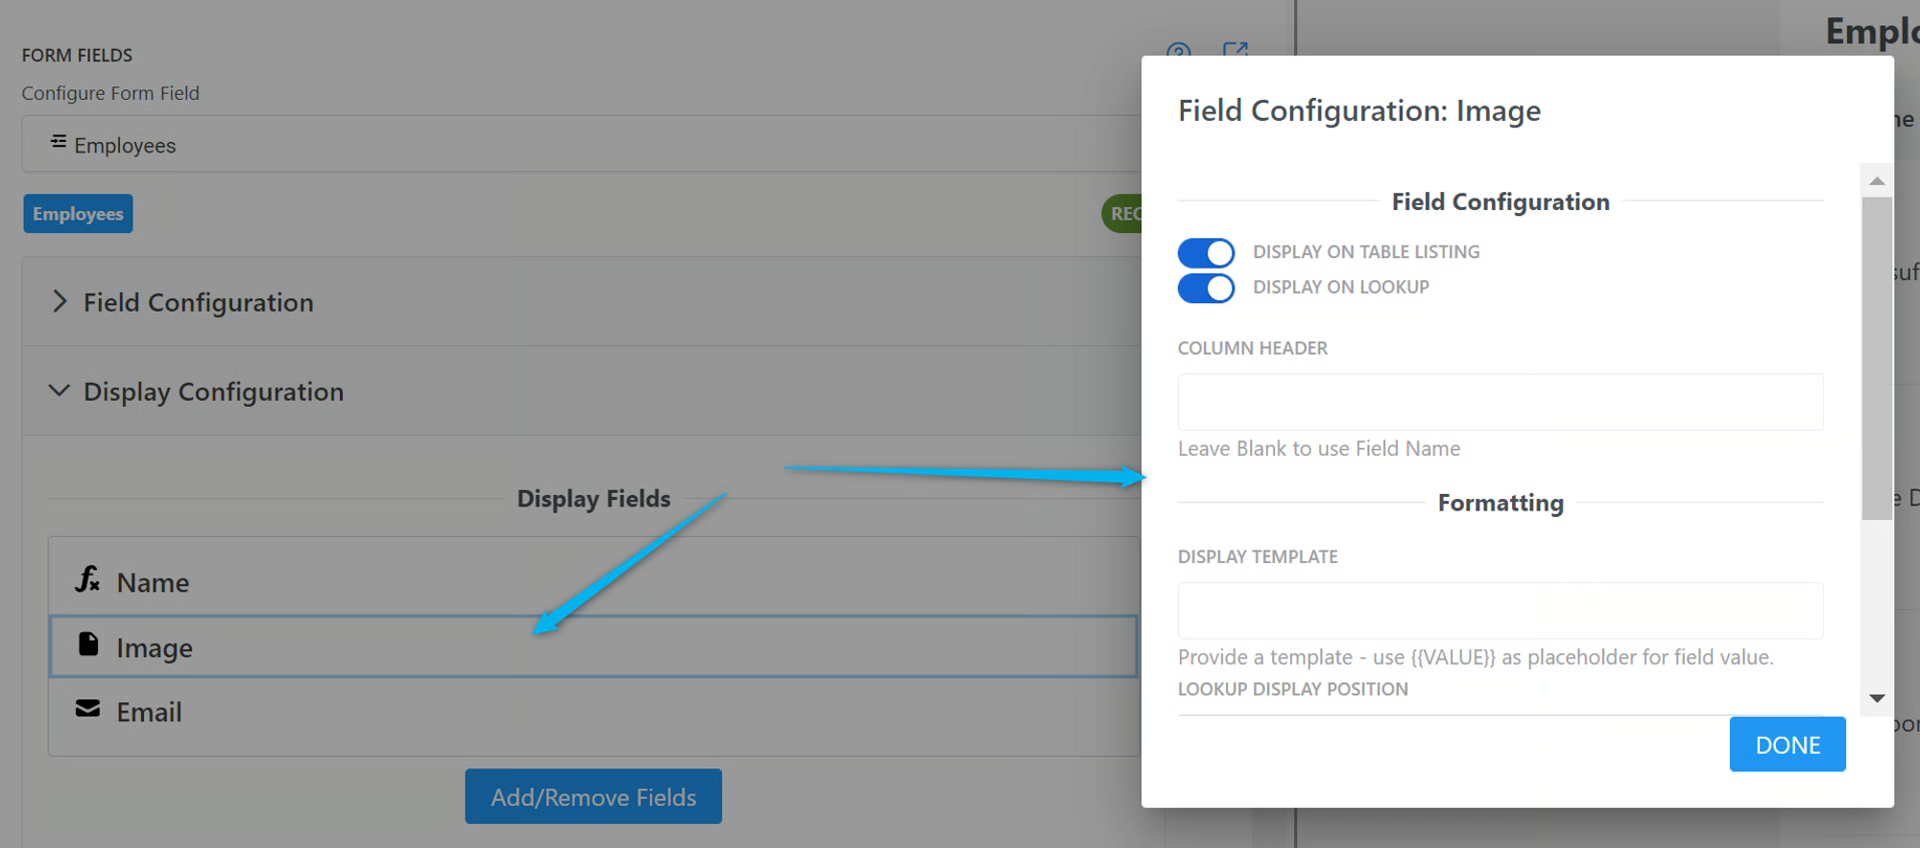
But in this example, I need to fix the image size on the table

-
We can do this by clicking on the Image field in the settings.
-
Each field has options where you can customize it further. You can change the Column Header title, add a Display Template, and choose the Lookup Display Position (Lookup Display not relevant in this tutorial)
- In Image settings, scroll down and click Advanced Format Options
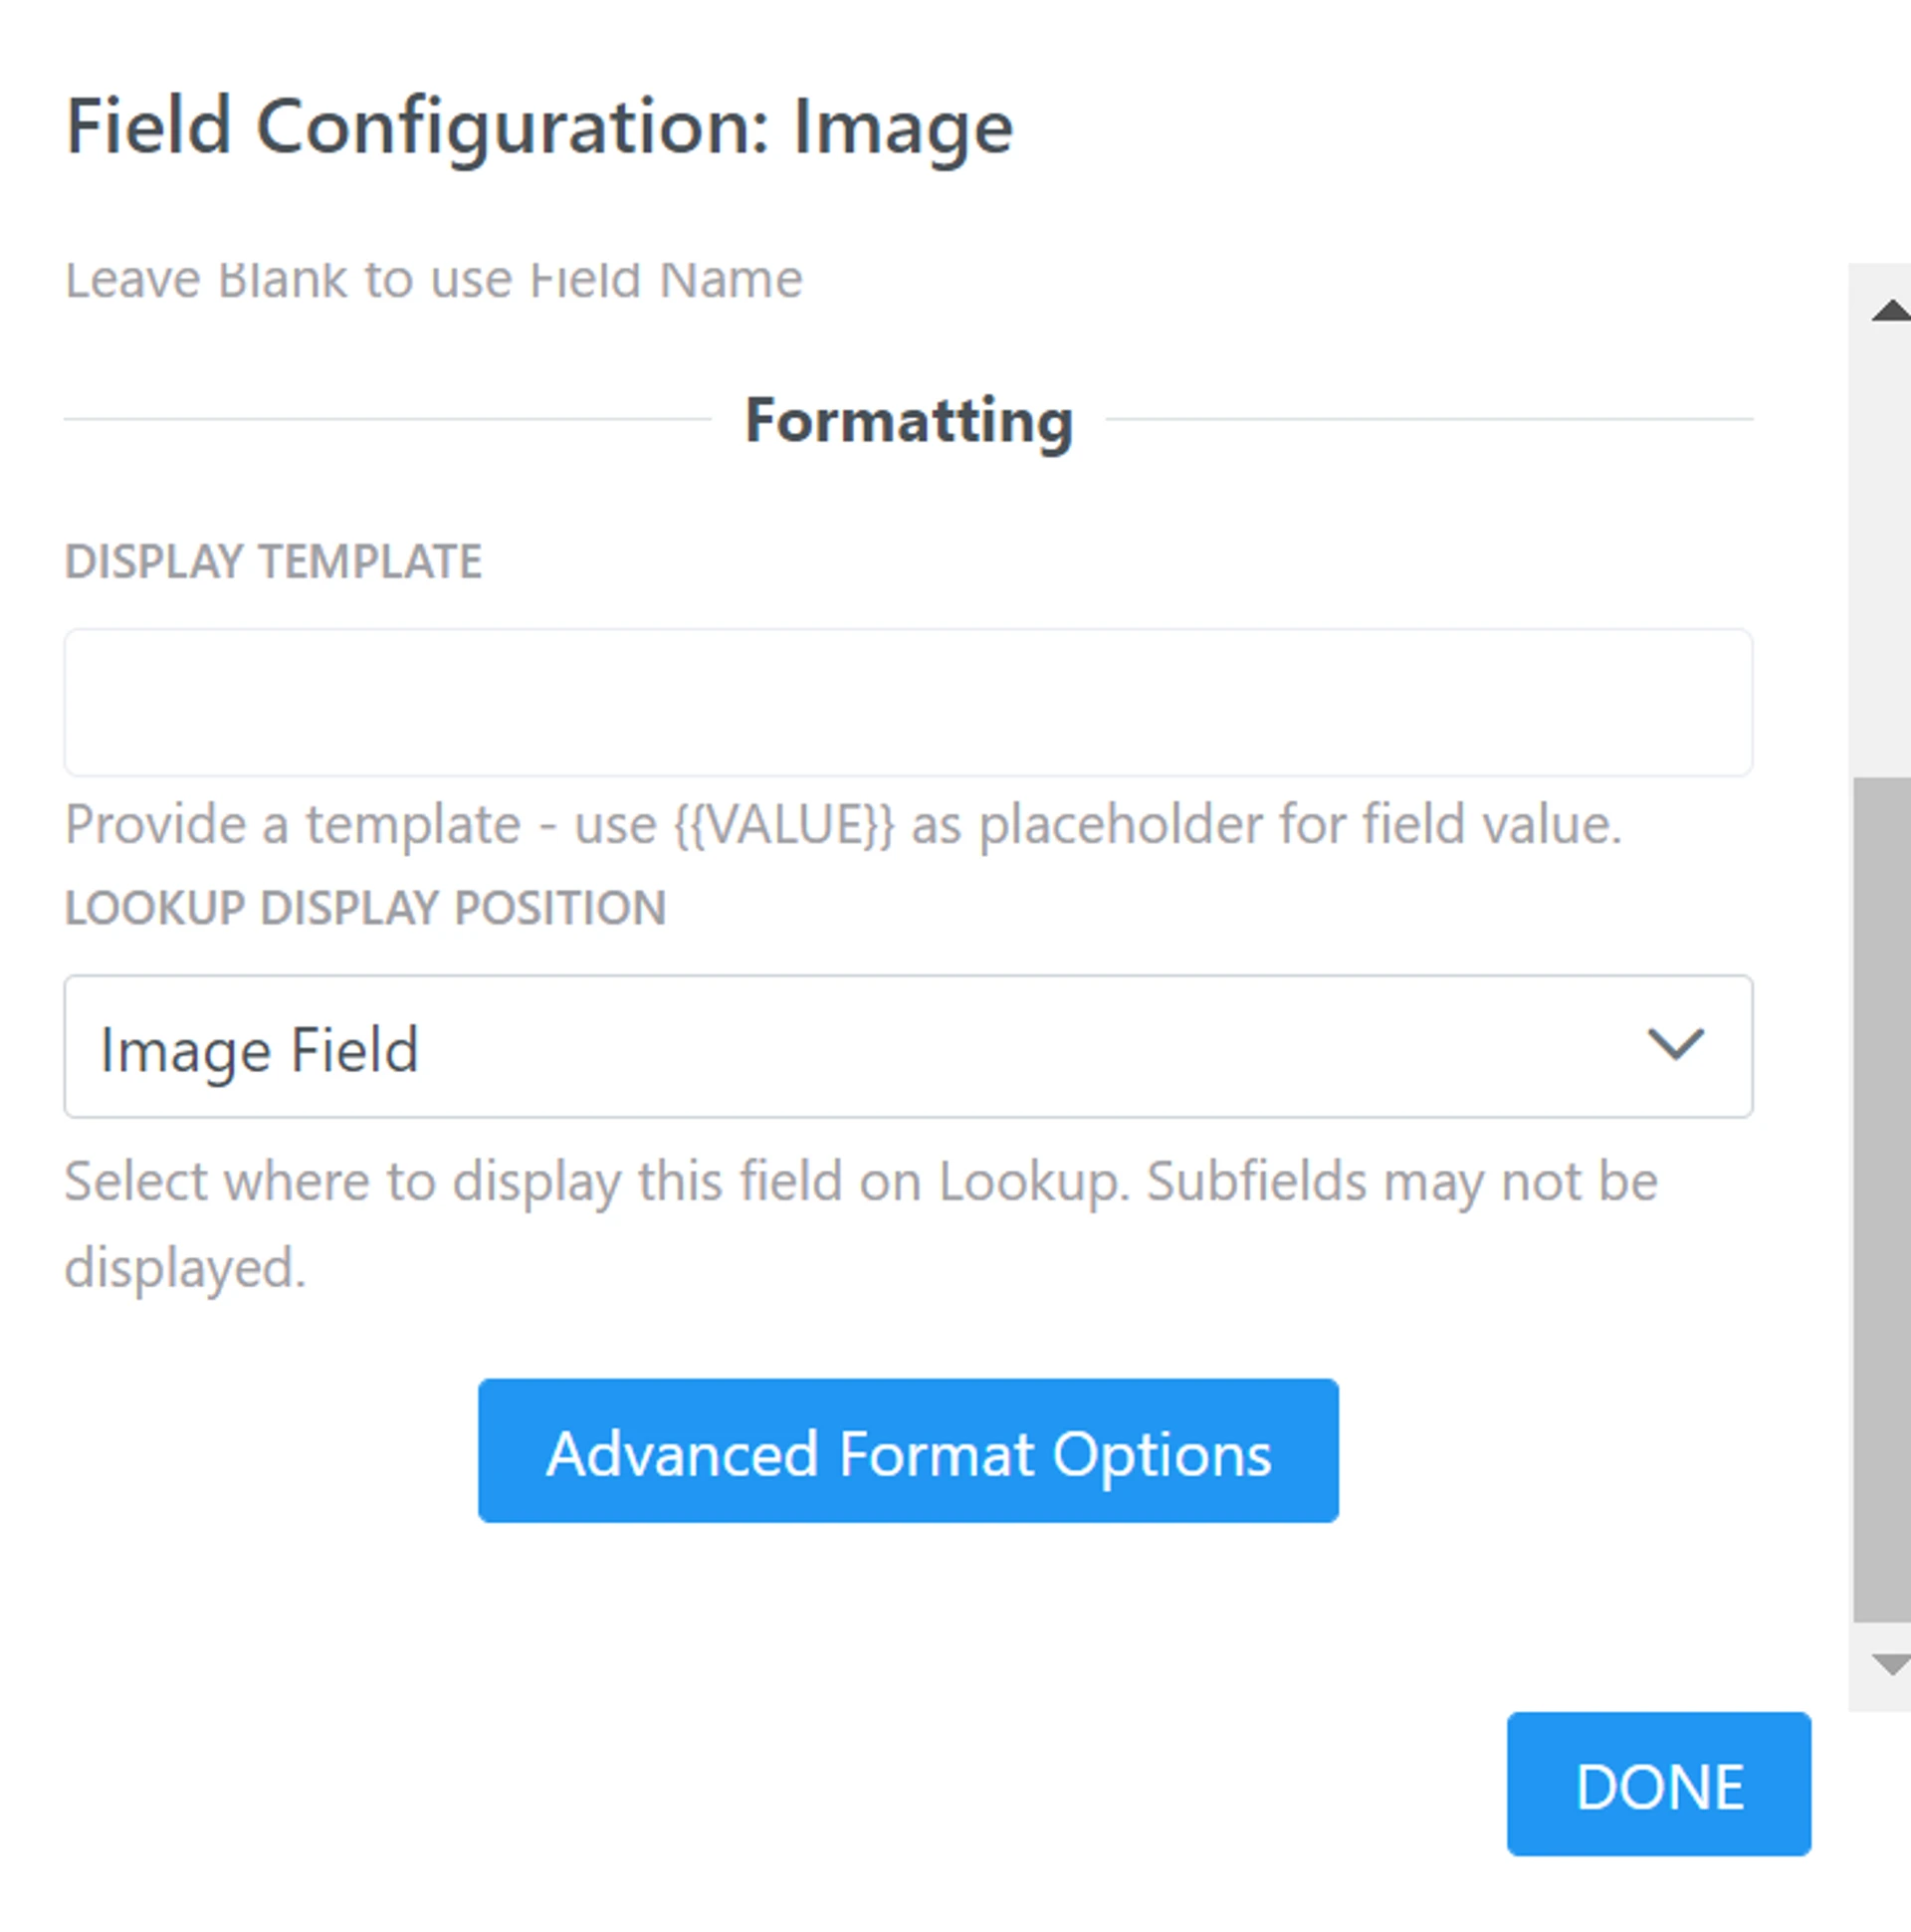
- Click table then columns. In the width field, enter 50px. This will limit the image size to 50px
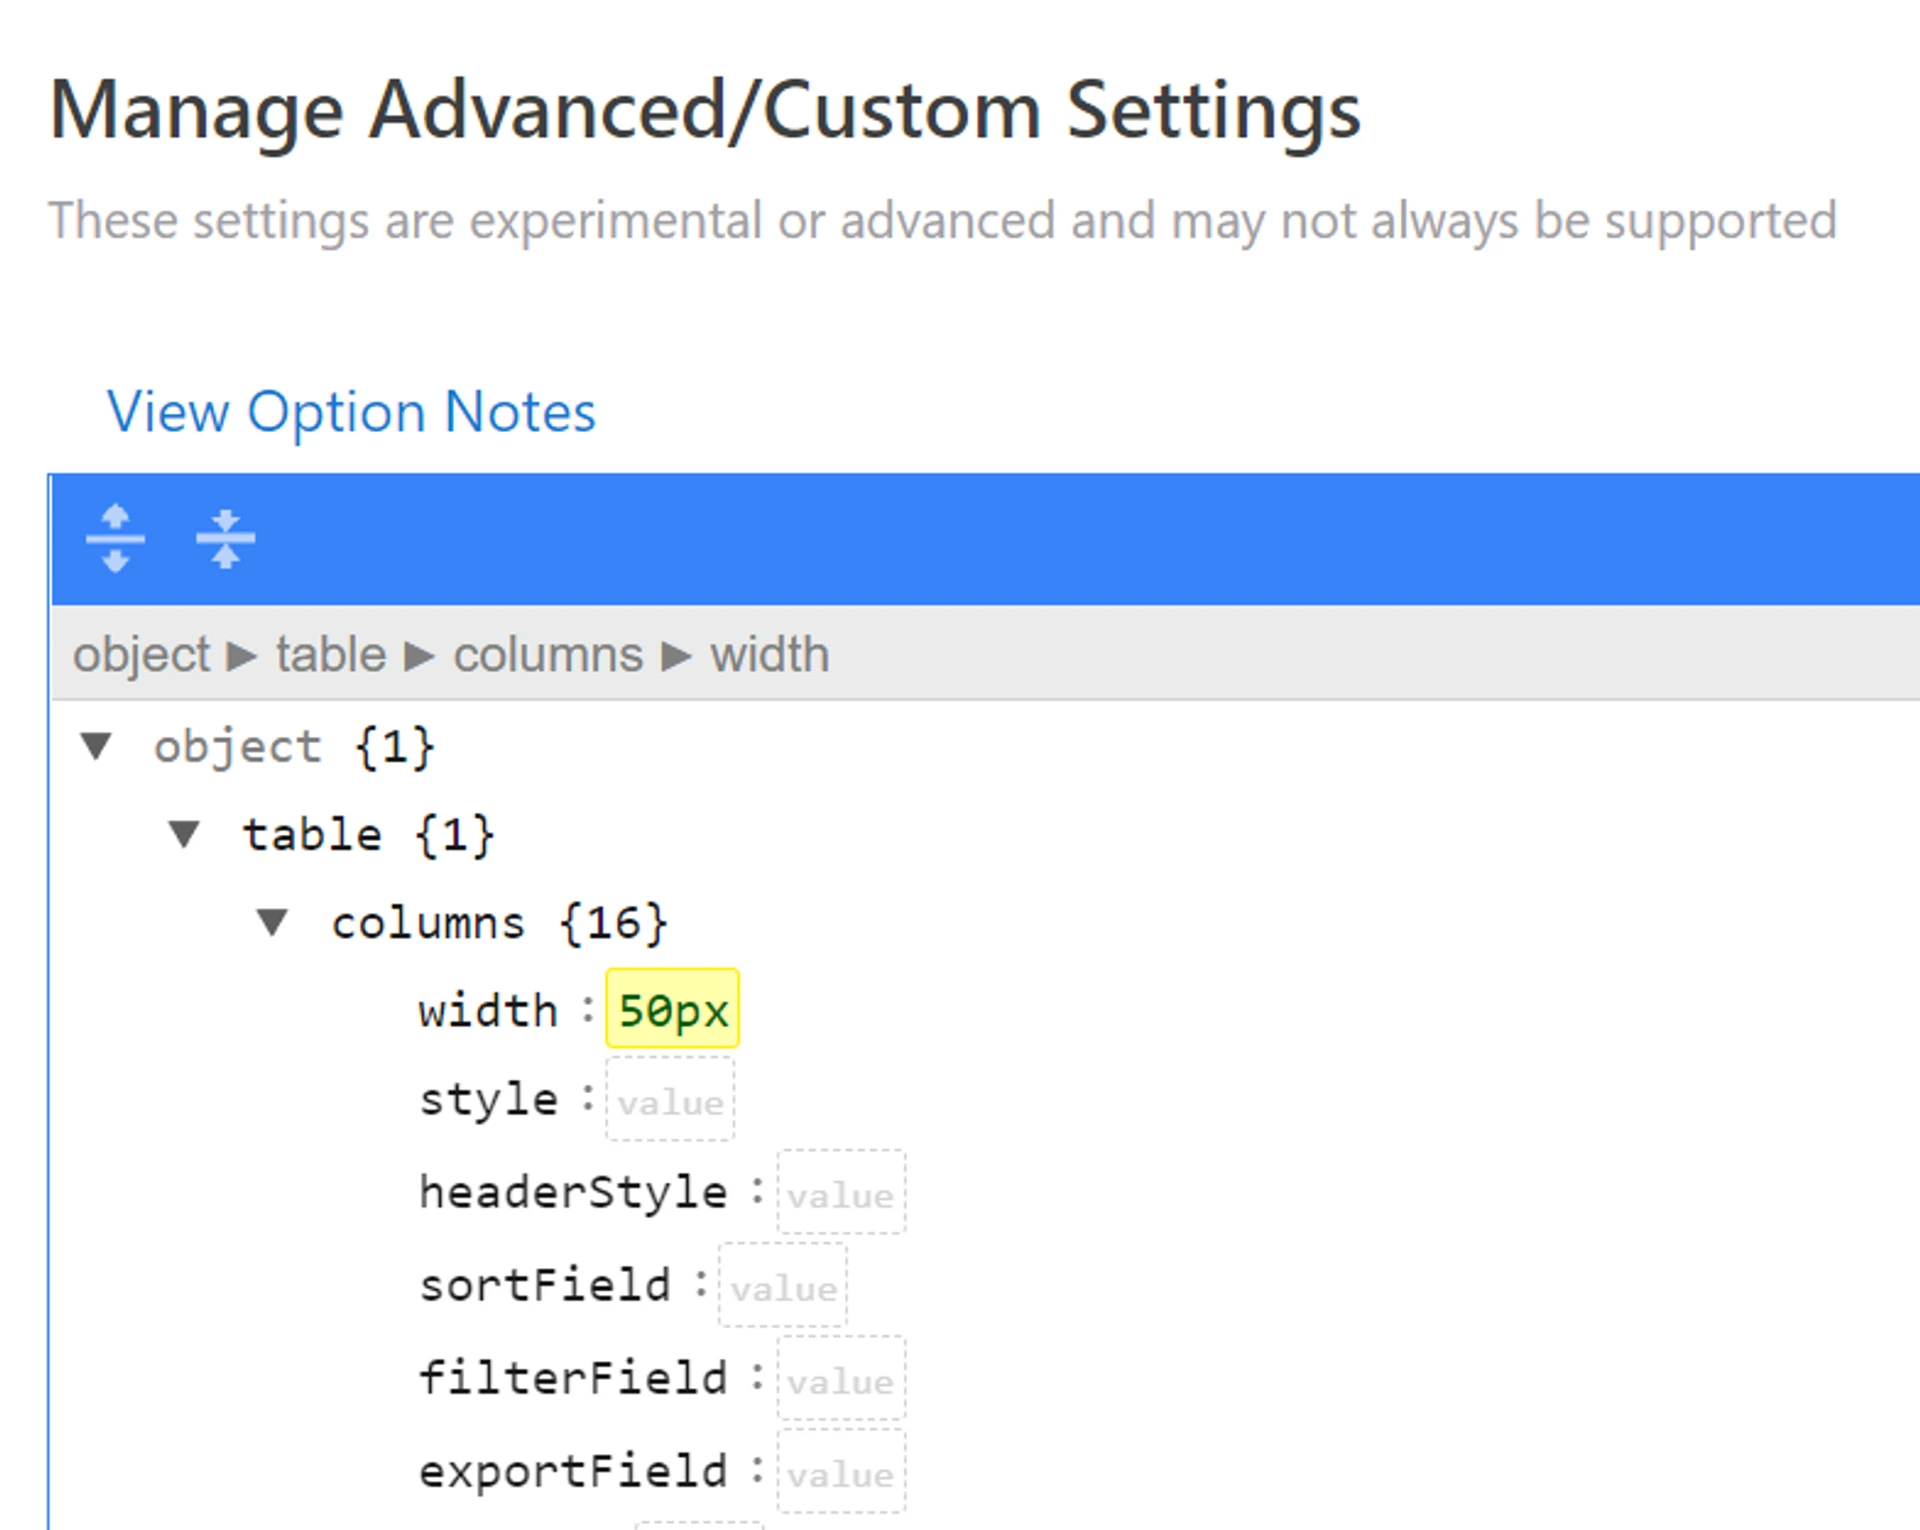
- You can now see the image sizes fit correctly in the table
Change the Layout Width of Your Table
Section titled “Change the Layout Width of Your Table”By default, a form’s max width is set to 760 pixels.
You can expand the width of the table by updating the width of the form
To change the default width:
- Click the Open Grid Options icon in the Form Designer
-
Enter the maximum width of your form in pixels
-
Default max size pixels: 760px

- Click Save
💡
Related:  Change the Layout of Your Form - Width and Multi-Column
Set Permissions to Enable/Disable Record Creating, Update, or Lookup for the Linked Records
Section titled “Set Permissions to Enable/Disable Record Creating, Update, or Lookup for the Linked Records”-
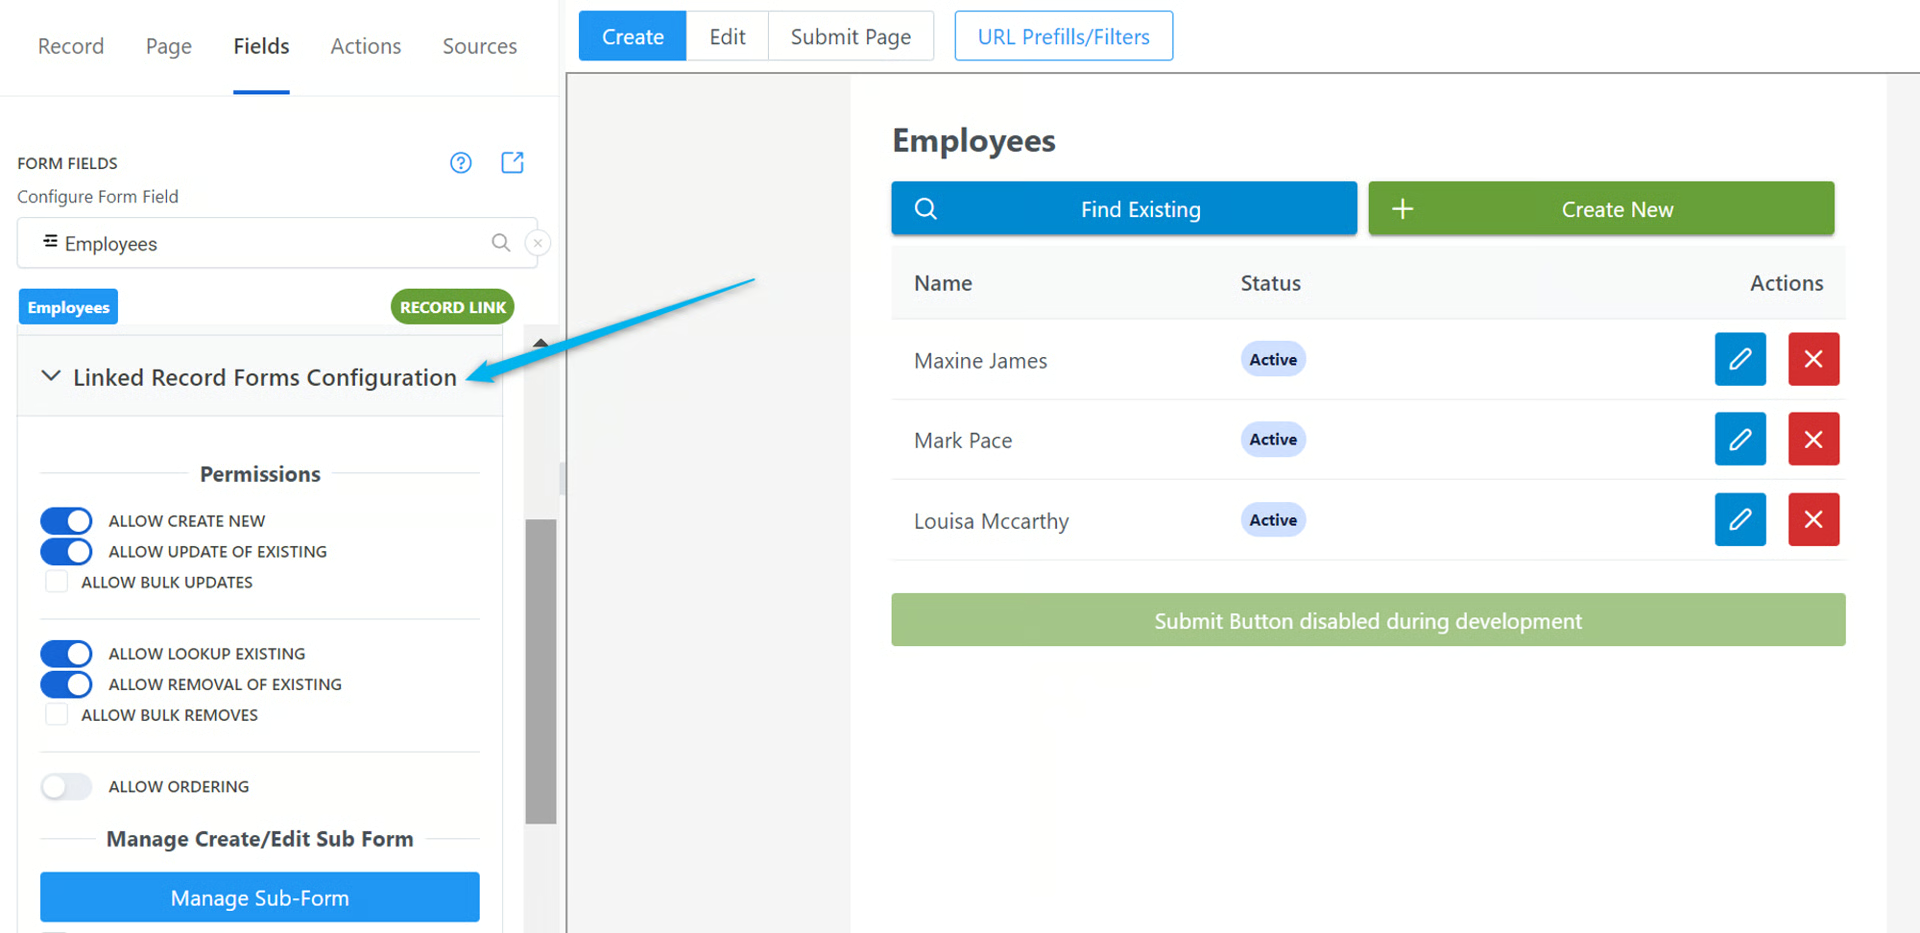
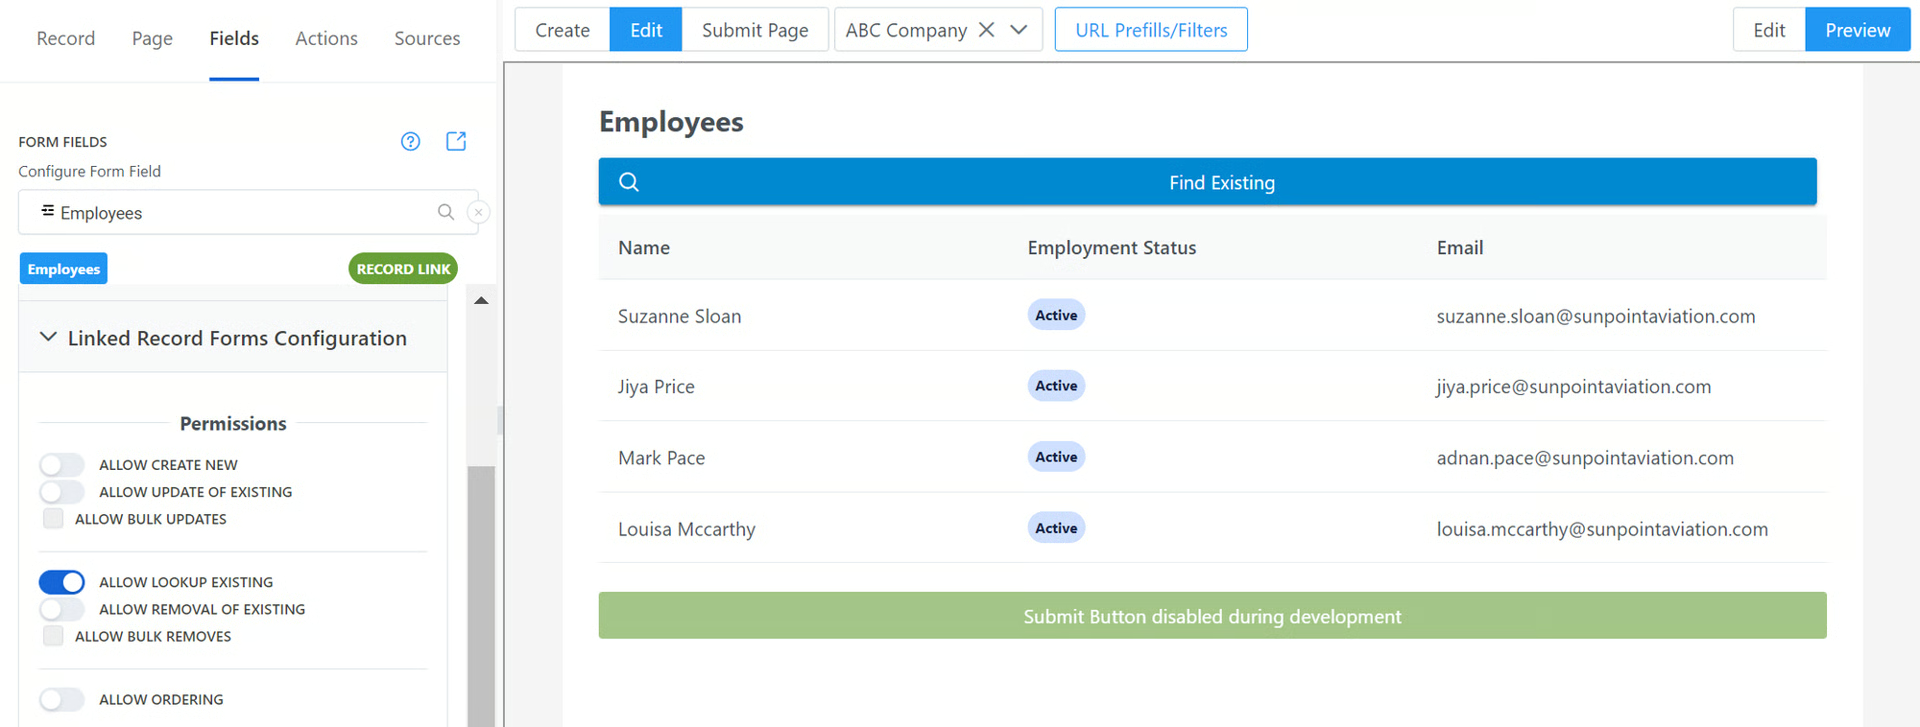
You can further limit how the form user can interact with the records in the Linked Record Forms Configuration
-
By default, all options for creating, updating, and looking up are enabled
Permissions Available
Allow Create New - Allow a form user to create new records (in this case, create new Employee records)
Allow Update of Existing - Allow a form user to update existing records
Allow Bulk Updates - Allow a form user to bulk update records
Allow Lookup Existing - Allow a form user to lookup existing records (determined by your filter or lookup all records if no filter enabled)
Allow Removal of Existing - Allow a form user to remove existing records from the table listing
All Bulk Removes - Allow a form user to bulk remove existing records from the table listing
Allow Ordering - Allow a form user to reorder records on the table listing
In this example, I only have Allow Lookup Existing enabled which means someone can lookup records from this table or from the filter.
You can do more with your linked records table by Editing the Subform - Learn: Create and Edit Linked Records with Subforms (Update Multiple Tables from 1 Form)