Automated Invoice Documents from Airtable with Google Docs (+Free Template)
In this guide, we’ll show you how to automatically generate invoices using your customer data in Airtable with On2Air Docs and Google Docs.
The app, On2Air Docs, mentioned in this tutorial has been shutdown. We are solely focused on our On2Air Backups app, automated backups for Airtable to Google Drive, Dropbox, and Box.
For documents with Airtable, we recommend Documint or DocsAutomator.
Invoicing makes the world go ‘round. Well, that may not be the exact phrase, but invoicing is essential to any business that provides services. You do the work, your customer pays the fee, and you profit.
In this guide, we’ll show you how to generate invoices in Google Docs using Airtable data with On2Air Docs. We’ve also provided a free Google Docs invoice template and Airtable base you can use to get started.
In this article
Automatically Generate Invoices from Airtable with On2Air Docs and Google Docs
Create the Invoice Template in Google Docs
Automated PDF from Google Docs with a Single Click
How to Send an Invoice Through Google Docs
View Your Google Doc Inside Airtable
What to include on an Invoice
You want to ensure your customer knows exactly what they’re paying for and when to pay. The most basic information on your invoice needs to include your company name and contact info, the client’s contact information, a unique invoice number, and your payment terms for when the invoice is due.
Depending on your business type or how you provide services, you might list an hourly rate and number of hours completed, multiple specific service deliverables, or list one overview description with a single amount that encompasses everything you completed.
You might want to include sales taxes or payment fees after your line items. Finally, you’ll want to list the total amount due for the invoice and how they can pay the invoice, whether it’s a link to pay through a payment processor like PayPal, Square, or by check.
Automatically Generate Invoices from Airtable with On2Air Docs and Google Docs
If you have many customers or multiple projects, creating an invoice for each one manually can consume a lot of time.
It’s quicker, easier, and less error-prone to create a single Invoice template in Google Drive and then automate your invoice creation with On2Air Docs by clicking a button. This is possible by storing your customer data and invoice details in Airtable and sending the information to Google Docs.
We’ve already made it easy for you and created a Customer and Sales Base template in Airtable. This base contains tables to track your Company clients, Contacts, Invoices, Deals, Invoice Line Items, Sales Reps, Deliverables, Services, Interactions, and Documents. All you need to do is fill in the fields in the Invoices table and the Order Line Items table with the specific information about your customer and the sale.
Once you’ve added all your information, let’s set up our Invoice template in Google Docs.
Create the Invoice Template in Google Docs
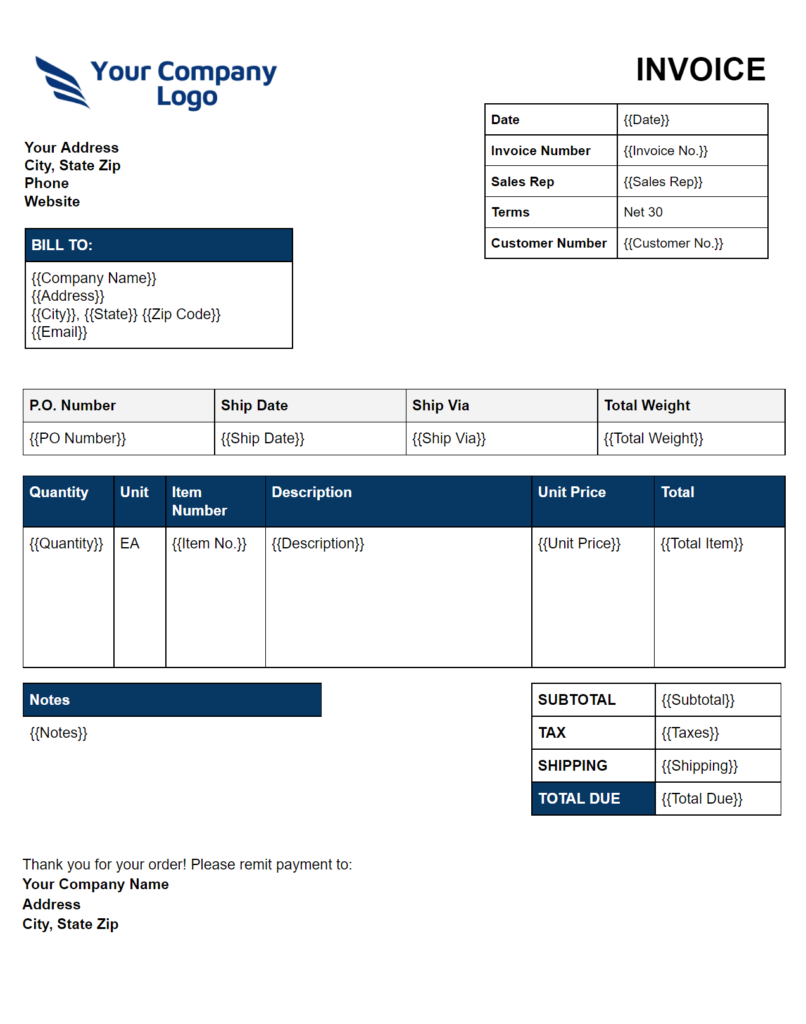
Using our Sales Invoice template in Google Docs, you can automate the process. This template will be used as a layout for any future invoice.
The template contains placeholders for your data. Each placeholder is a field name in Airtable with curly brackets around the name, like {{Company Name}}, {{Email}}, {{Zip Code}}, and more. Placeholders will be replaced with the actual information from your customer record in Airtable when the automation runs.
You can rearrange these placeholders, add more, or remove what you don’t need.
Add the Template to Your Google Drive
To add the template we’ve provided to your Google Drive, first, be sure you’re first signed in to your Google account.
Then, click File > Make a Copy. Choose the folder where you want the invoice stored.
Now that you have your template, go ahead and create a folder in Google Drive labeled Invoices. This will help us organize the invoices inside your workspace later.
Now, it’s time to set up the automation that will add customer data to the Invoice template and create an Invoice each time.
Set Up the Automation in On2Air Docs
You’ll only have to set this part up once!
If you haven’t yet, sign up for On2Air Docs to set up the automation. This requires a paid On2Air Docs plan.
- In your On2Air dashboard, choose the Docs app
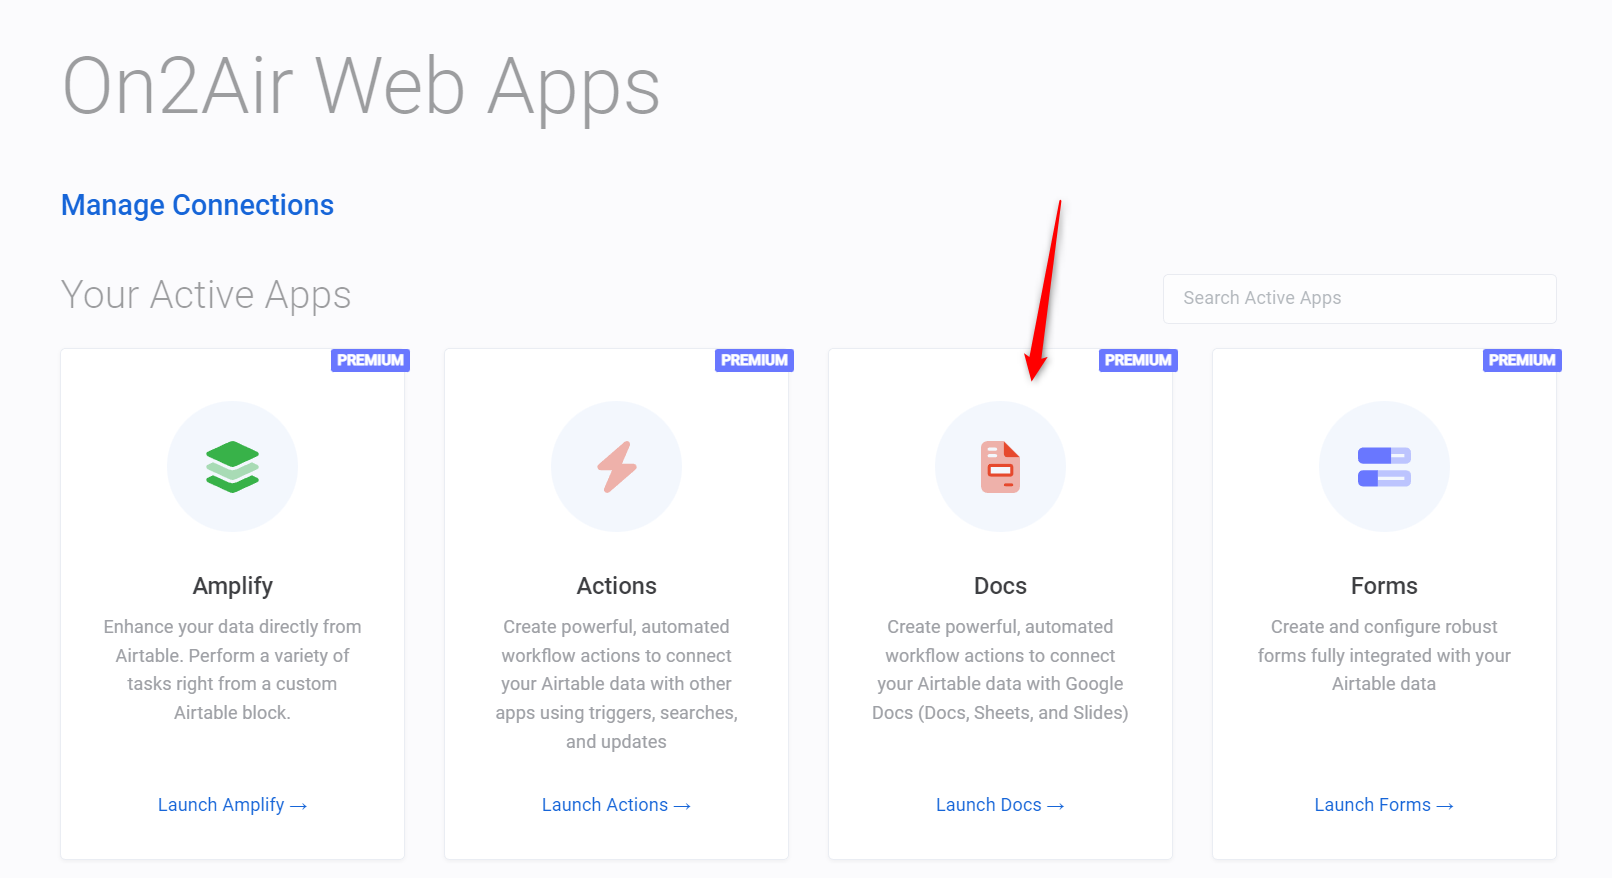

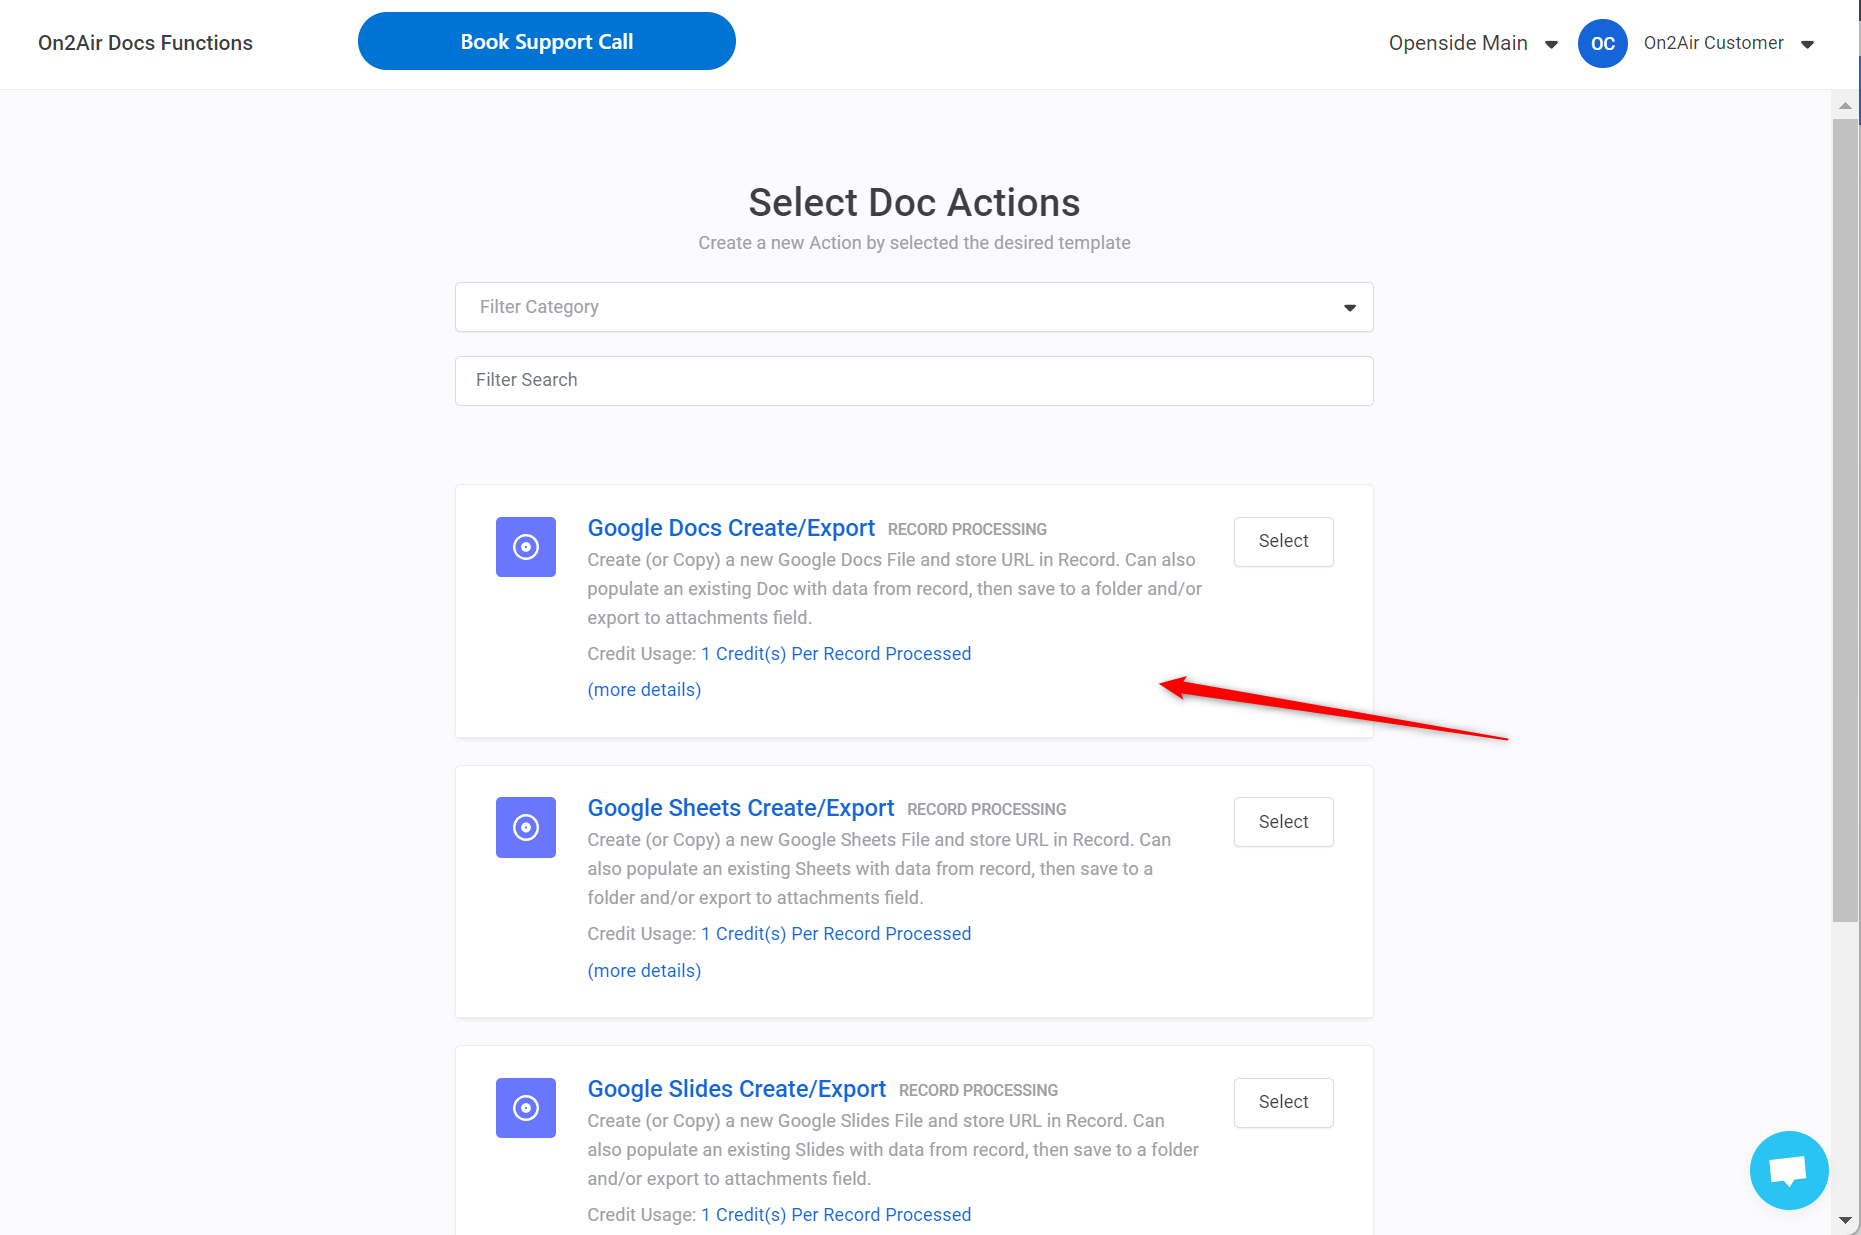
- Click Create New Action, then select Google Docs Create Export
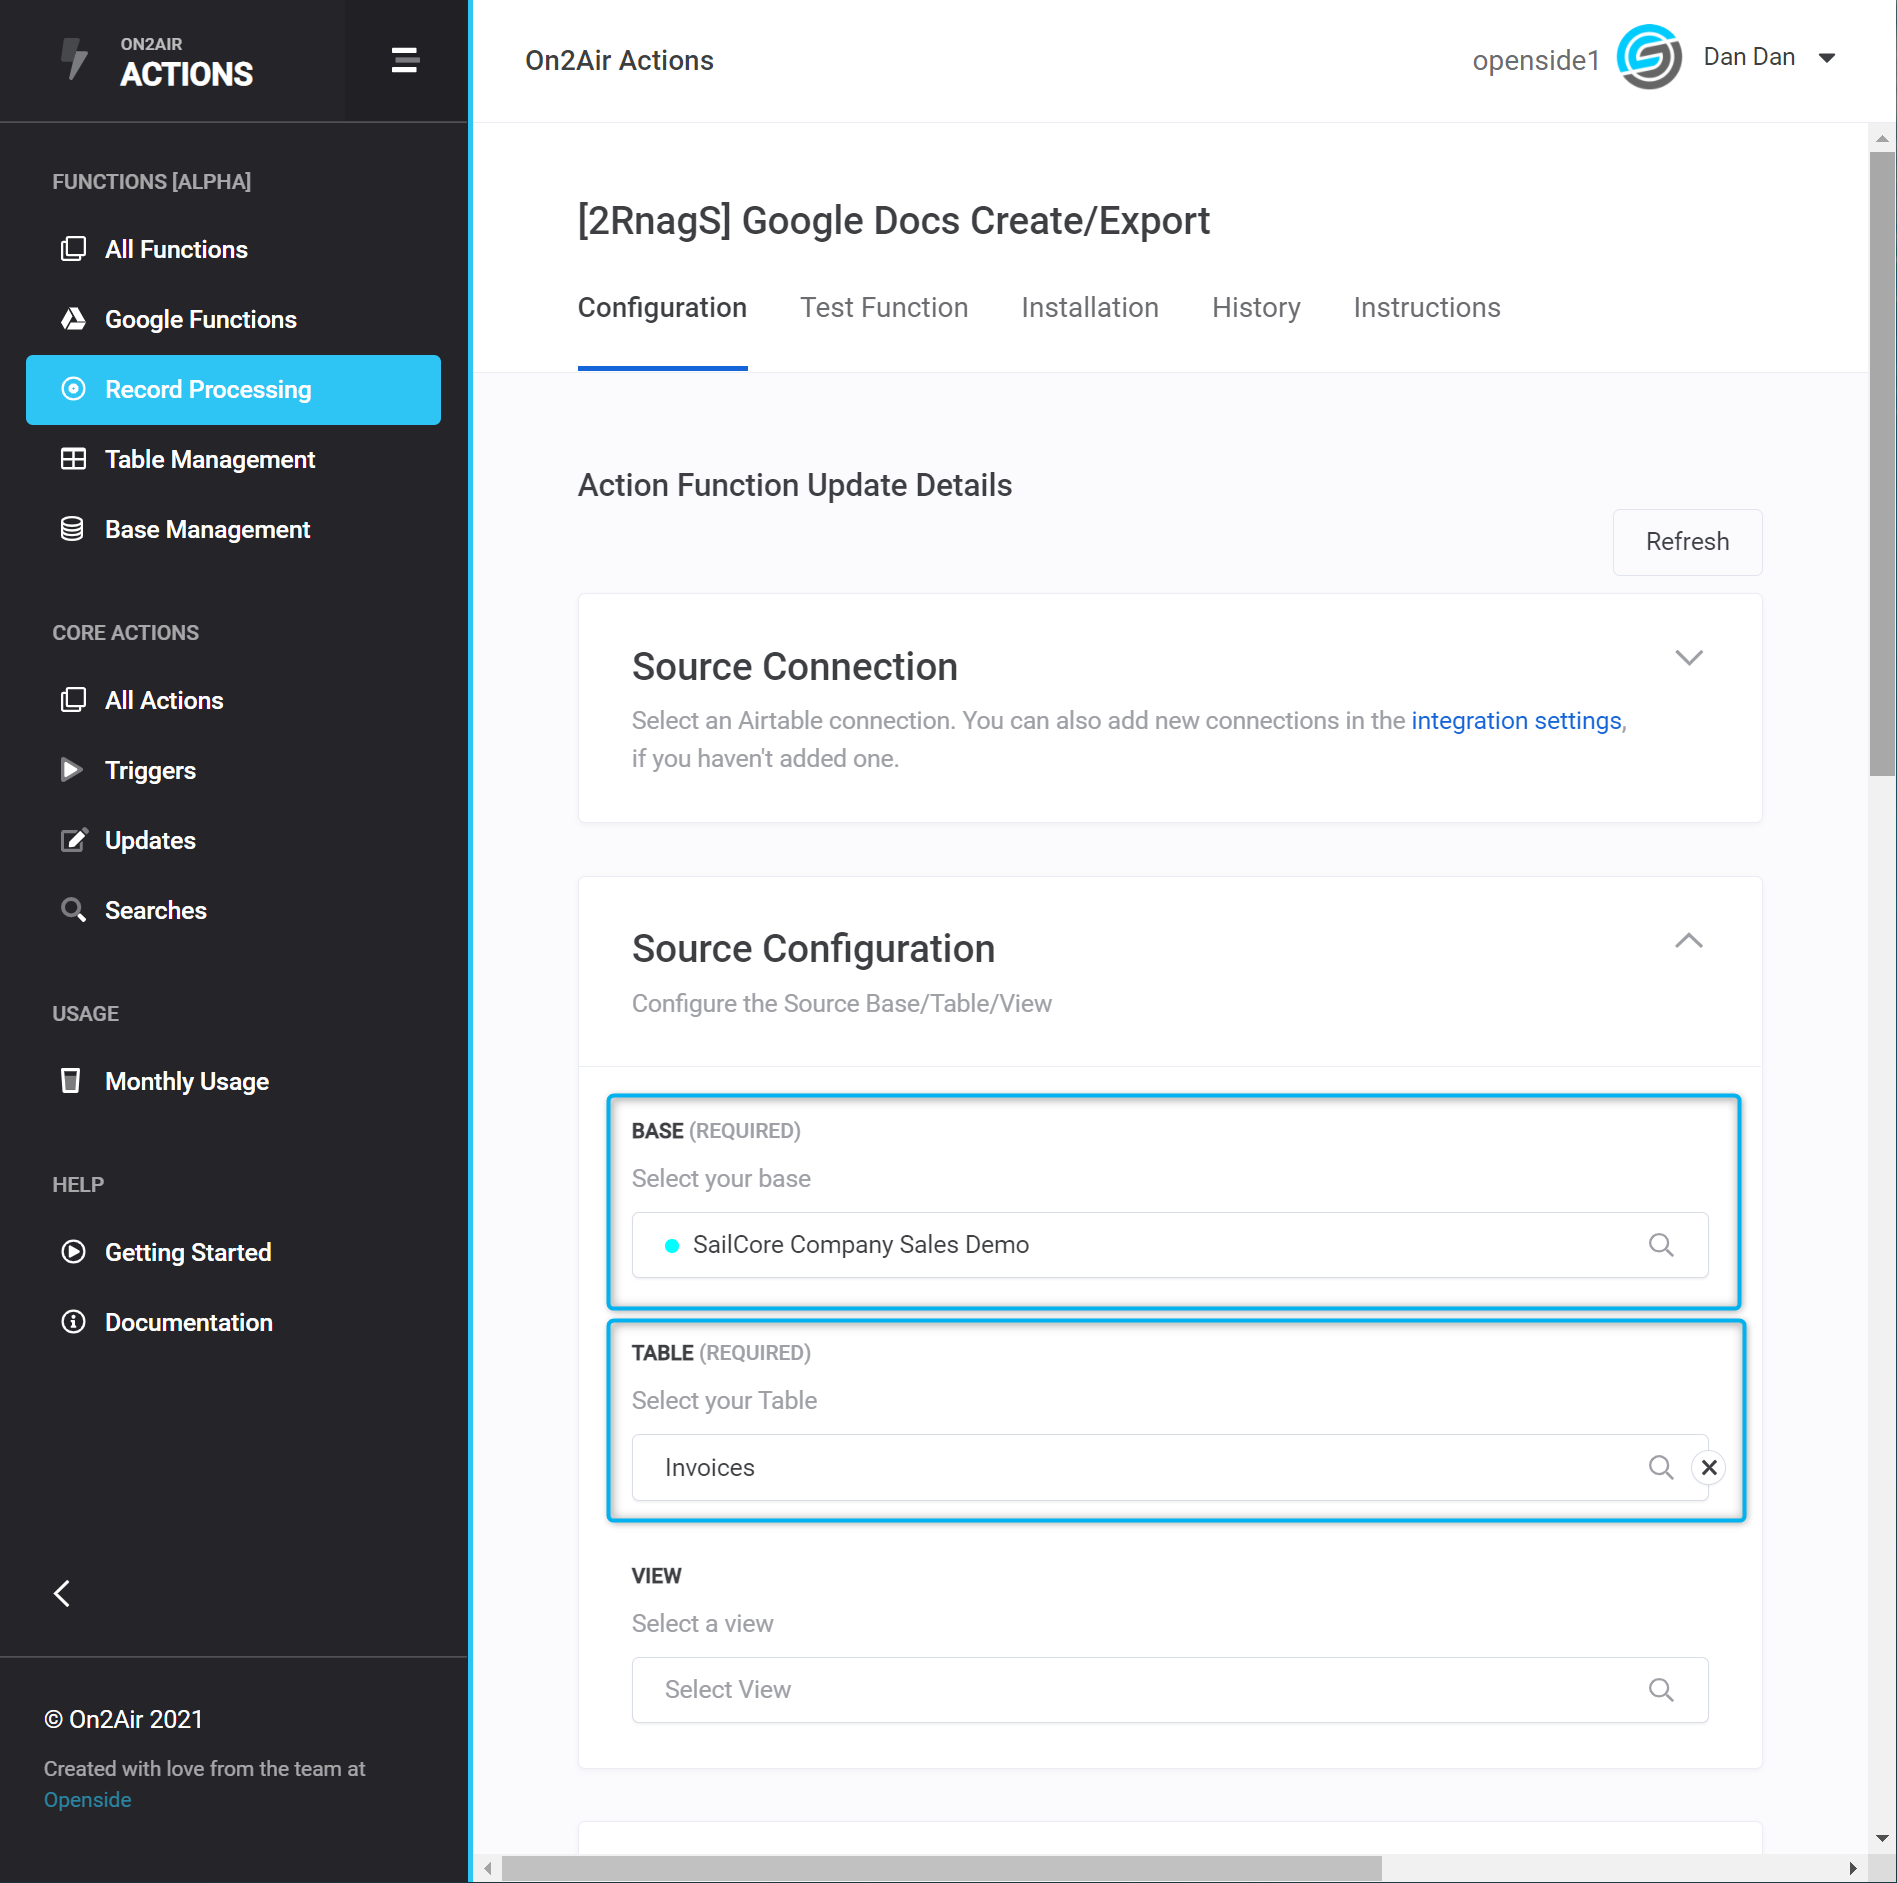
- Click Add Configuration, then choose your Airtable connection, your Airtable Base and Table
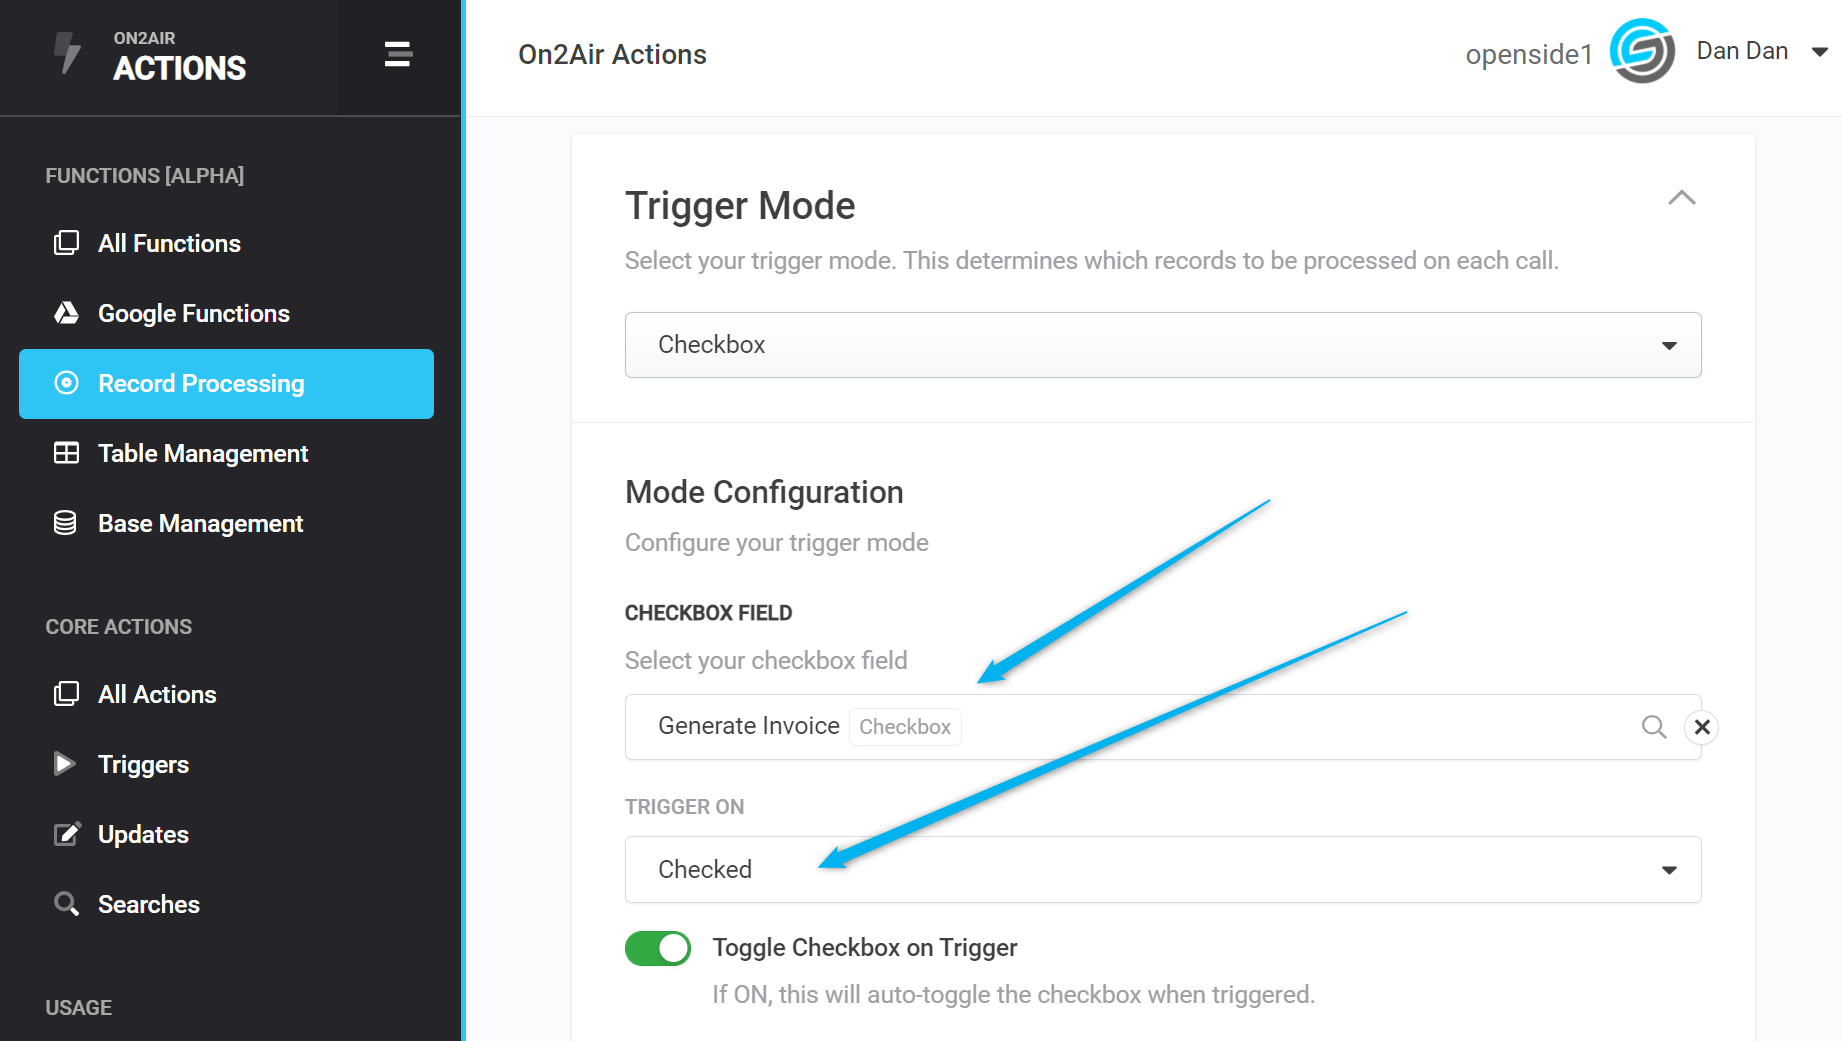
Then choose the following options:
Trigger Mode > Checkbox
Checkbox Field > Generate Invoice
Trigger On > Checked
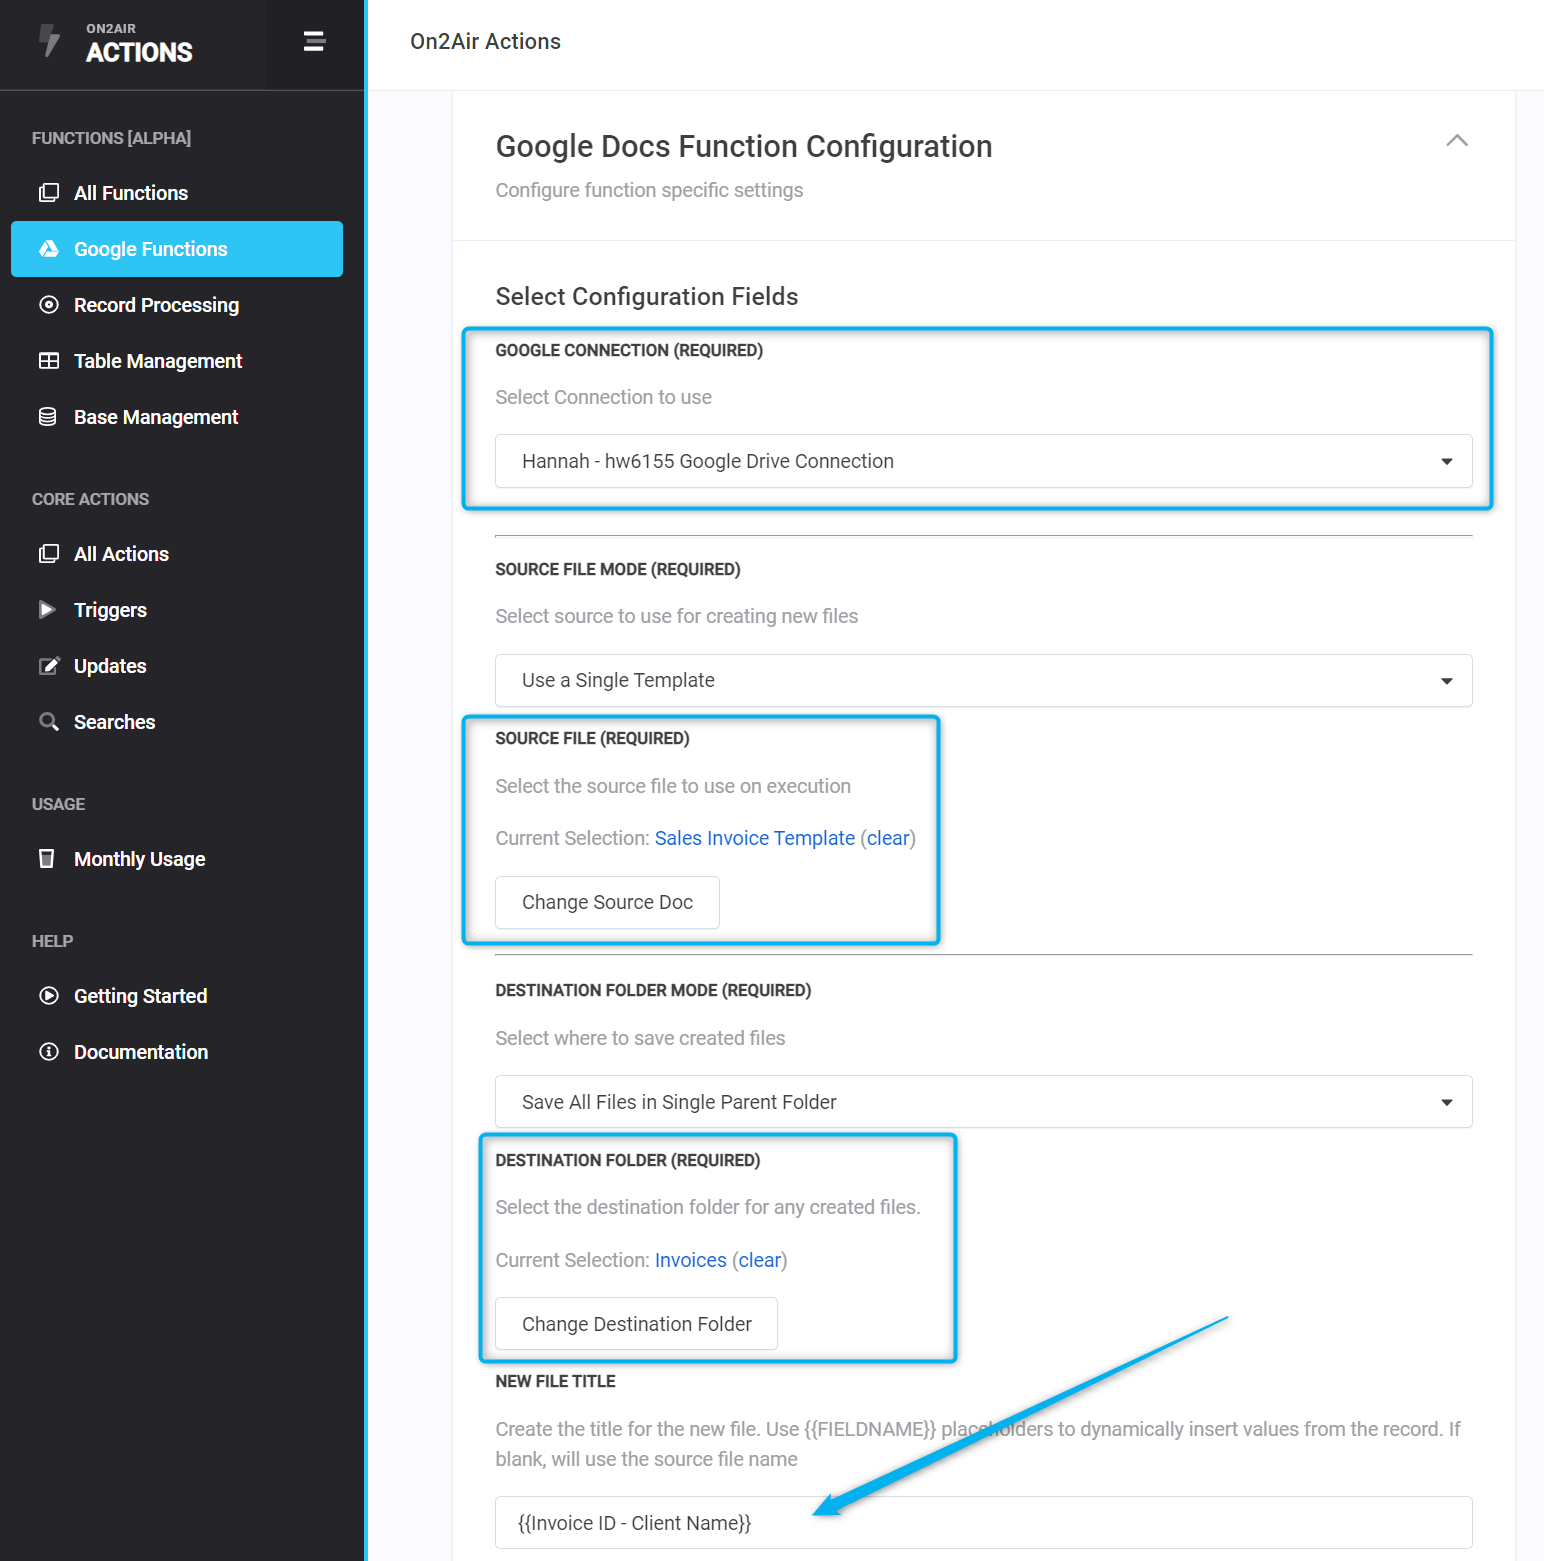
- In the Google Docs configuration, choose your Google connection – (here’s how to set it up in On2Air if you’ve never done it before)
Then choose the following options:
Source File Mode > Use a Single Template
Source File > Sales Invoice Template-Main (the Google Doc template you just added to your Drive)
Destination Folder Mode > Save All Files in Single Parent Folder
Destination Folder > Invoices (the folder you created earlier)
New File Title > {{Invoice ID – Client Name}}
Field Merge Output > Always Merge Fields
Merged Output URL Storage Field > Google Doc – Invoice URL (this is a URL field in Airtable. This setting saves the Google Doc URL of the newly created Invoice in your Airtable base – create a URL field in your table in Airtable if you don’t have one)
PDF Settings
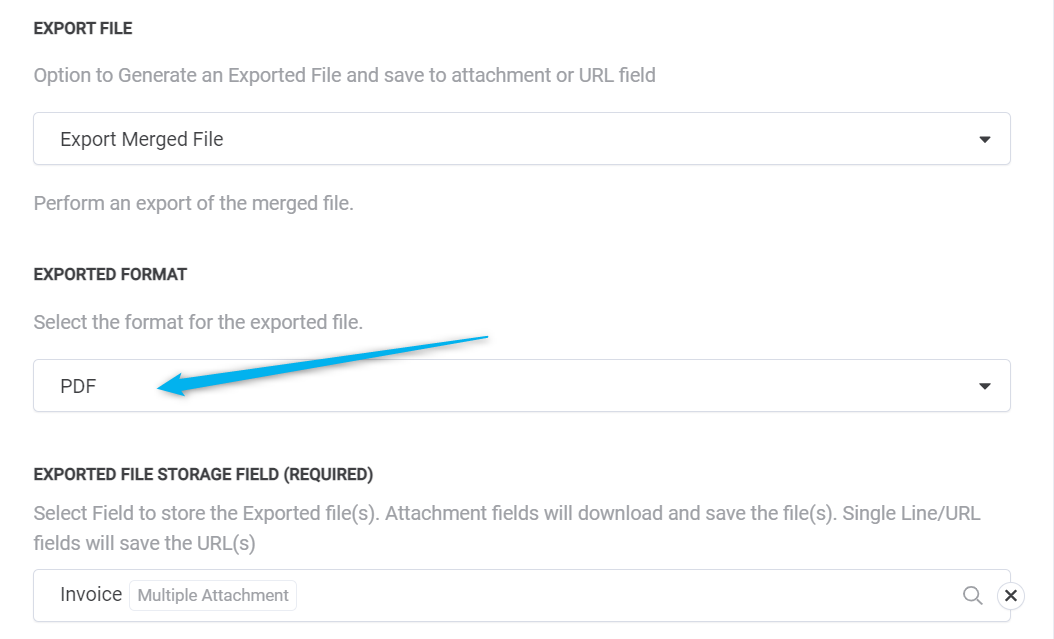
Now, let’s also generate a PDF file of the new invoice and add the file to your Airtable base.
Add the following settings:
Export File > Export Merged File
Exported Format > PDF
Exported File Storage Field > Invoice (attachment field for the PDF version of the Invoice)
- Click Save Action Function Details to save your automation
Test and Set the Automated Schedule
Now, you need to Test the Function to make sure it works.
Be sure all the fields from the first Airtable record in the selected table have data that matches the placeholders in your invoice.
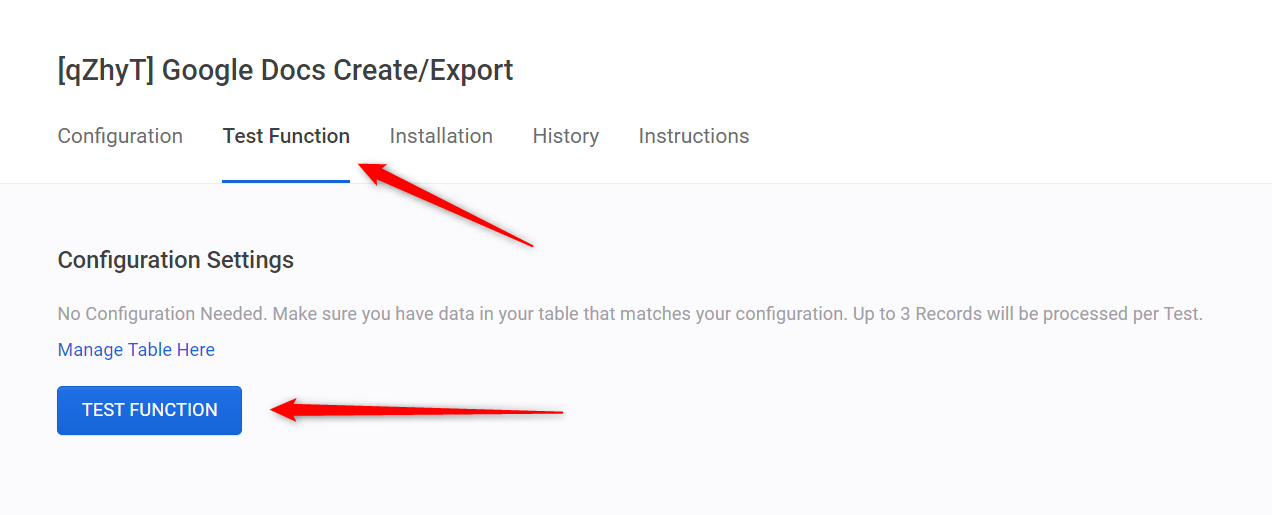
- Choose the Test Function tab
- Click the Generate Invoice checkbox in the first record in your table so it has a ✔️
- Click Test Function
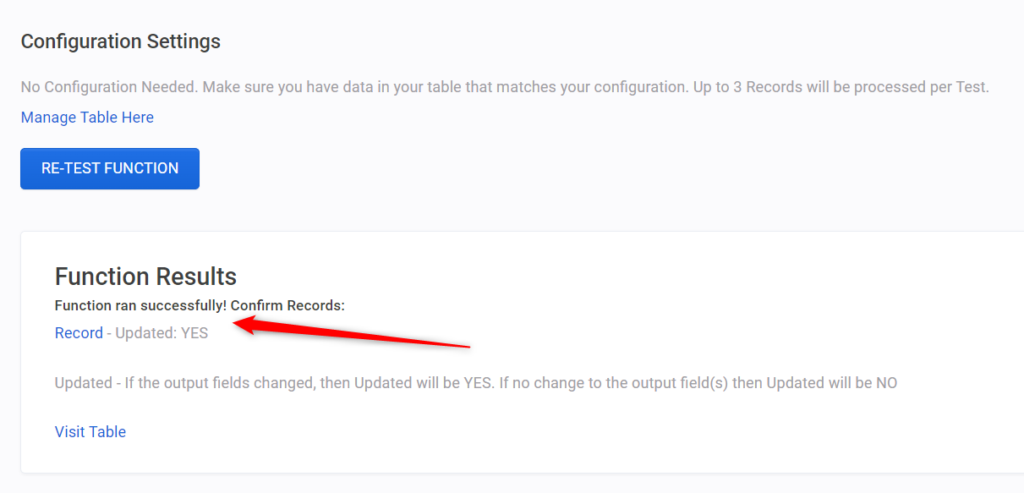
Once the test is complete, you’ll see Function ran successfully and a link to the Airtable records that was processed.
You should also see a PDF in your Airtable record and a Google Doc URL, plus a PDF in your Google Drive!

Now, you need to set up the automated schedule.
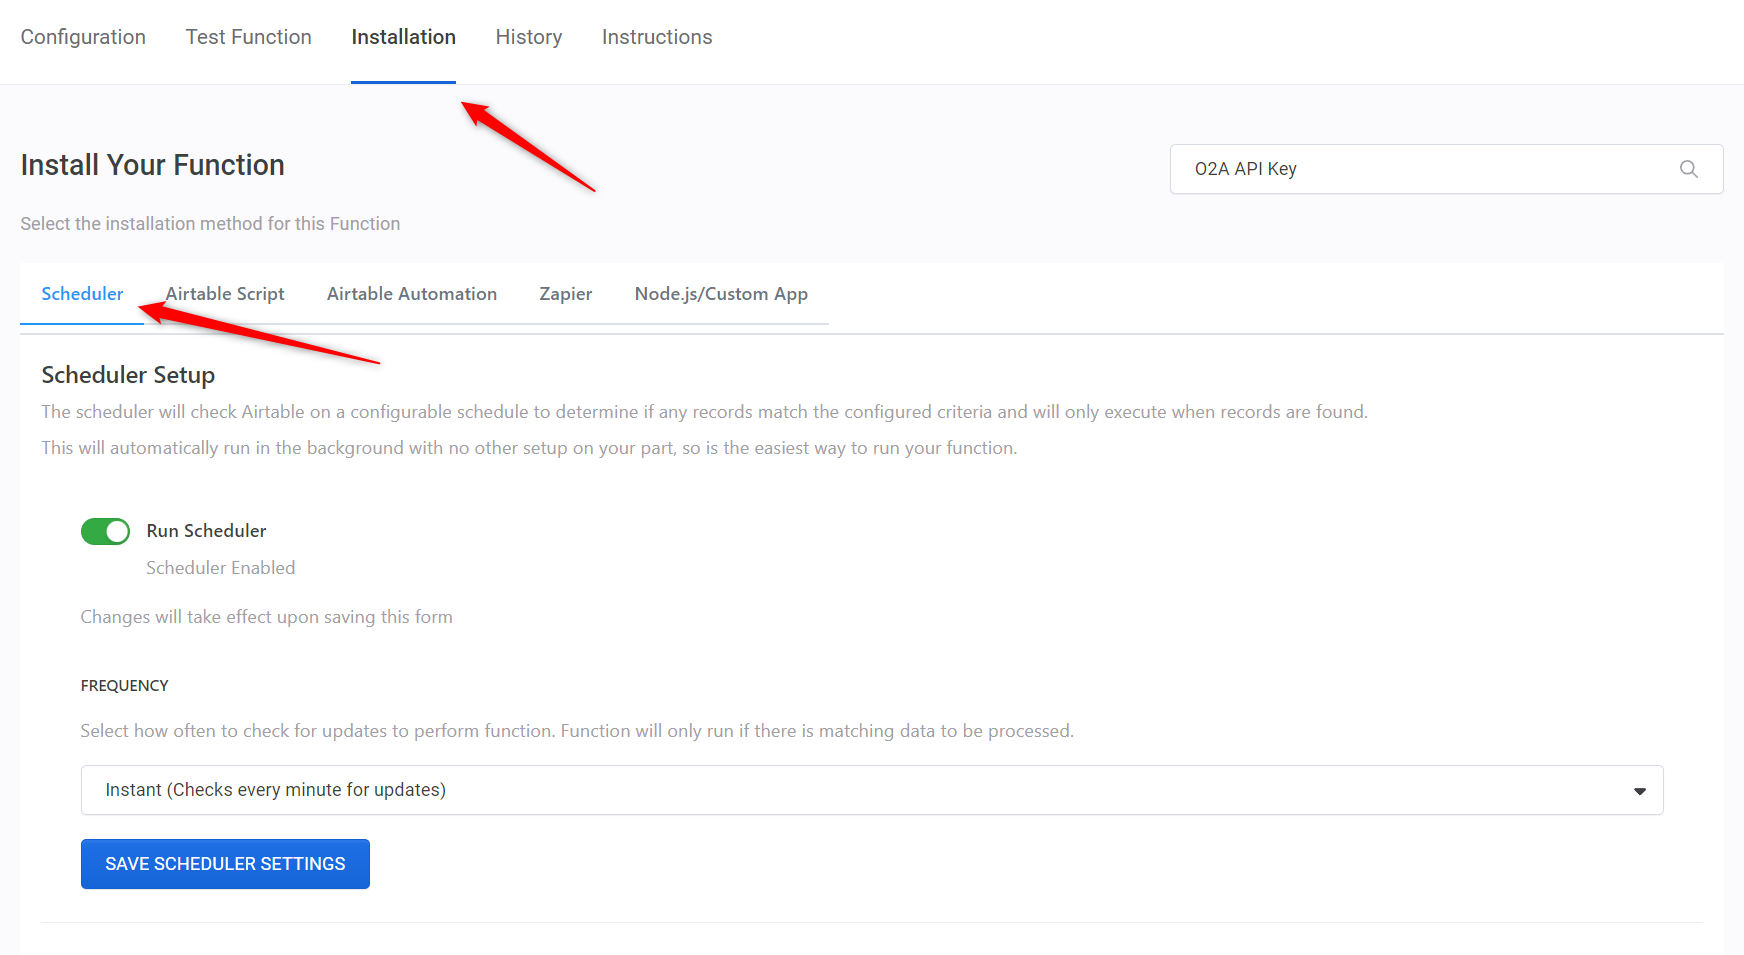
- Click Installation, then choose Scheduler
-
Enable Run Scheduler
-
For the Frequency, choose Instant (Checks every minute for updates)
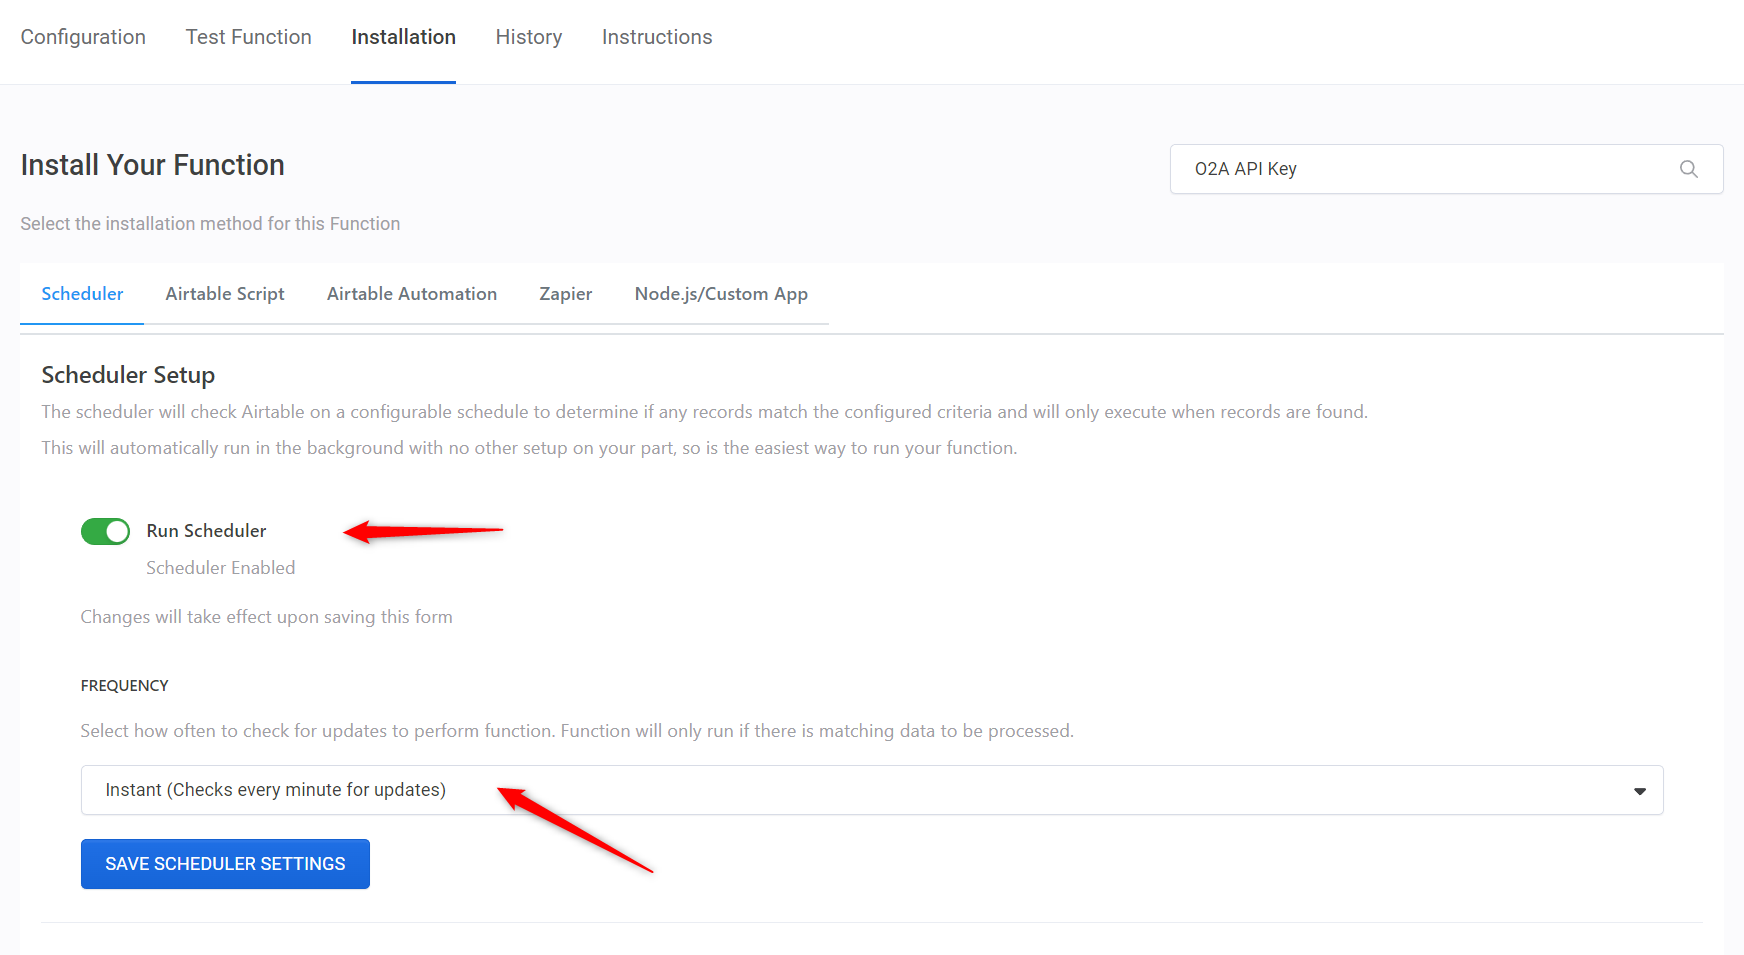
Your document automation is now set up in On2Air Docs and ready!
Automated PDF from Google Docs with a Single Click
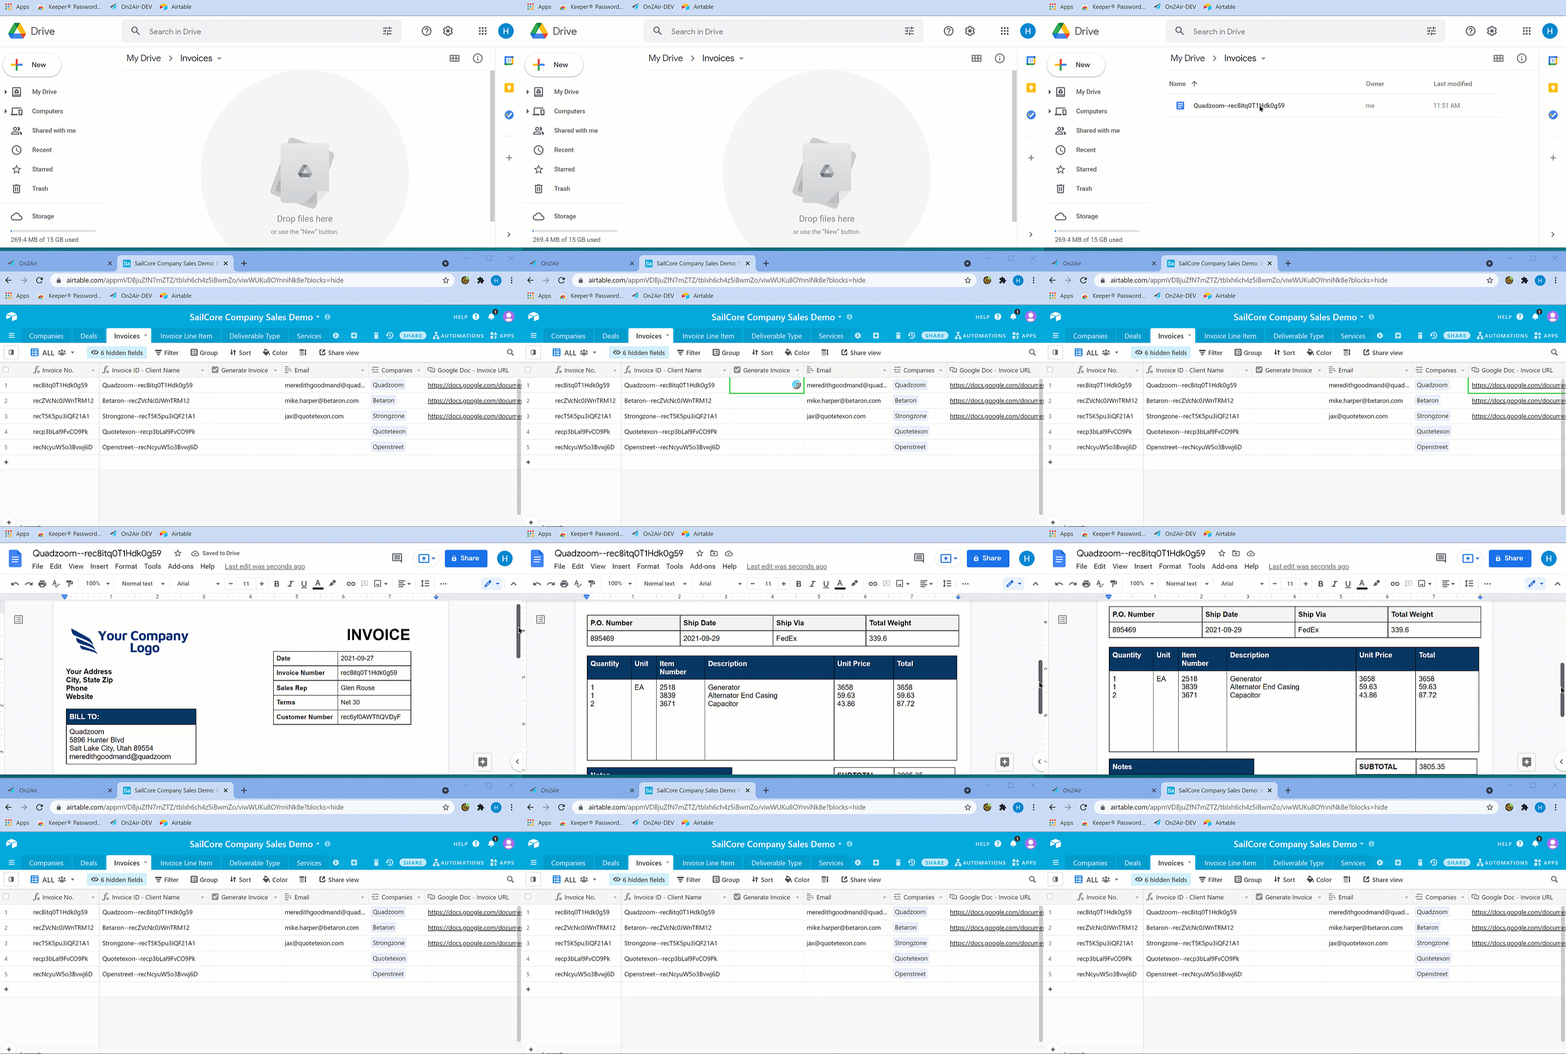
Now that you’ve set up, tested, and enabled the document automation, you can start automating any Invoice from your Airtable base. Simply enter the client company and invoice data in Airtable.
Once it’s added, click the Generate Invoice checkbox in your base, and within a few seconds, you’ll see your newly created invoice in your Google Drive and a PDF version in your attachments field in your Airtable base.
Start using On2Air Docs for Airtable
How to Send an Invoice through Google Docs
If you want the invoice to be automatically emailed after it’s created, learn How to Send an Email Automatically from Your Base Using Airtable Automations.
Final Thoughts
If you’re using Airtable, you can easily create invoices for your customers and save them in one location. With On2Air Docs, you automate your invoices or any other document and save time.

