START HERE - Get Started with On2Air Backups
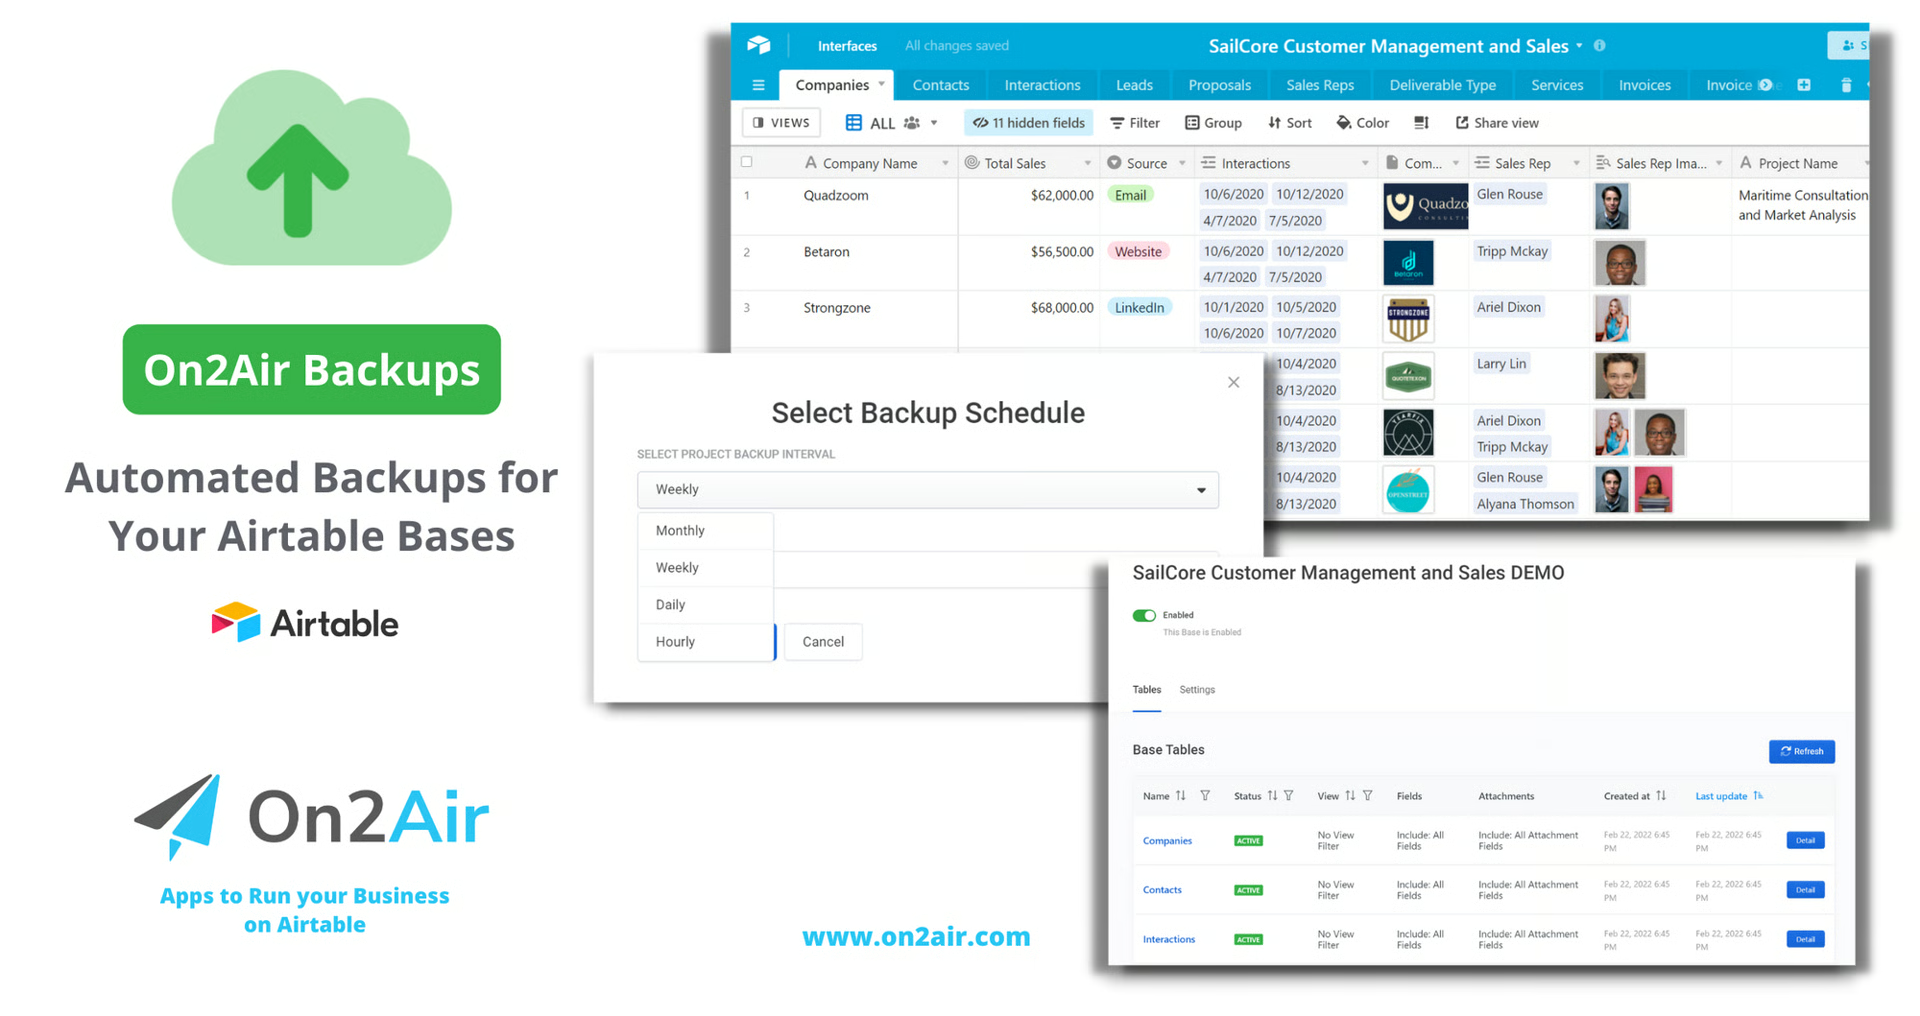
On2Air Backups is an automated backup app for your Airtable bases. Create scheduled backups of your critical business data stored in Airtable and export your information to Dropbox, Box, or Google Drive.
 On2Air Help Center >
  On2Air Backups Start a free trial
In this tutorial
-
On2Air Backups Trial Information
-
📽️ How to Get Started with On2Air Backups - 5 minute video tutorial
-
📝 Step-by-Step Tutorial
-
1. Install the On2Air Backups Airtable Extension OR Use App.On2Air.com
-
2. Connect Your Airtable Account
-
3. Connect Your Backup Location - Google Drive, Dropbox, or Box
-
4. Create a Backup Project
-
Choose your Airtable base(s)
-
Choose or create a folder in your storage drive
-
Enable the Trial Schedule
-
5. Click Start Backup
-
6. Upgrade for Automated Backups
-
7. Choose Your Backups Automation Schedule (Paid plan)
-
Customize Your Backup (Include/Exclude Fields, View, and Attachments)
-
Backups History Log
-
Backup Folder Structure and File Name Convention
-
Need Support?
On2Air Backups Trial Information
Section titled “On2Air Backups Trial Information”In the On2Air Backups Trial, it will back up:
1 Airtable Base
10 Tables in that base
100 Records per table
25 Attachments (total)
After the trial creates a backup to your storage drive, it deactivates.
💡
To enable automated backups, upgrade to a plan
Once you’ve upgraded, you’ll then need to set the Schedule and Reactivate the backup.
- Upgrade to a Backups Plan
⚙
 What We Backup and How It Works
📽️ How to Get Started with On2Air Backups - 5 minute video tutorial
Section titled “📽️ How to Get Started with On2Air Backups - 5 minute video tutorial”📝 Step-by-Step Tutorial
Section titled “📝 Step-by-Step Tutorial”1. Install the On2Air Backups Airtable Extension OR Use App.On2Air.com
Section titled “1. Install the On2Air Backups Airtable Extension OR Use App.On2Air.com”💡
You have 2 options to set up your Airtable backups with On2Air. 1. Install the On2Air Backups Extension inside your Airtable base(s) to create the backup automation. 2. Use the On2Air web app at app.on2air.com If you need to backup multiple Airtable bases, it’s best to use app.on2air.com. You can start at Step 2 if you use app.on2air.com
- First, open your Airtable base and click Extensions
⚙
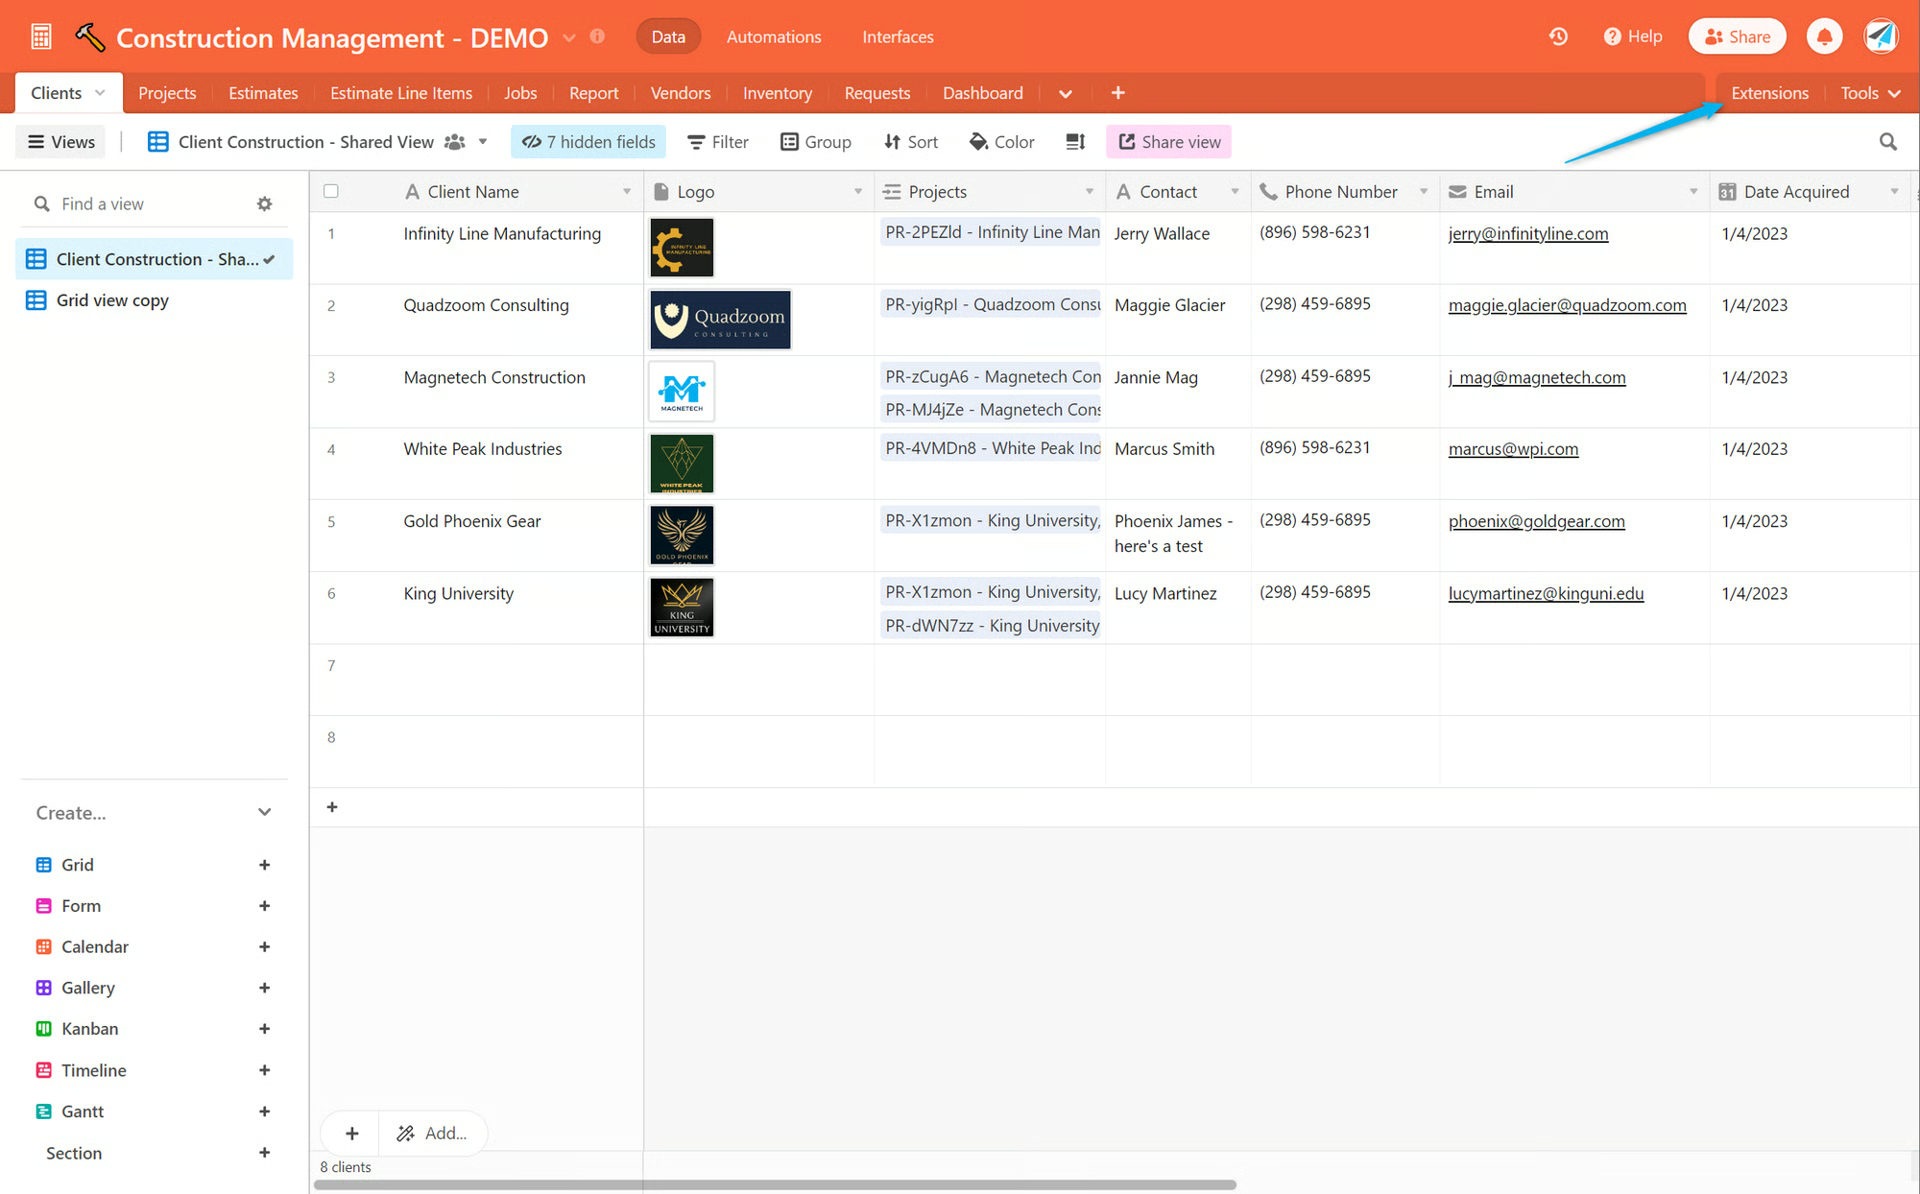
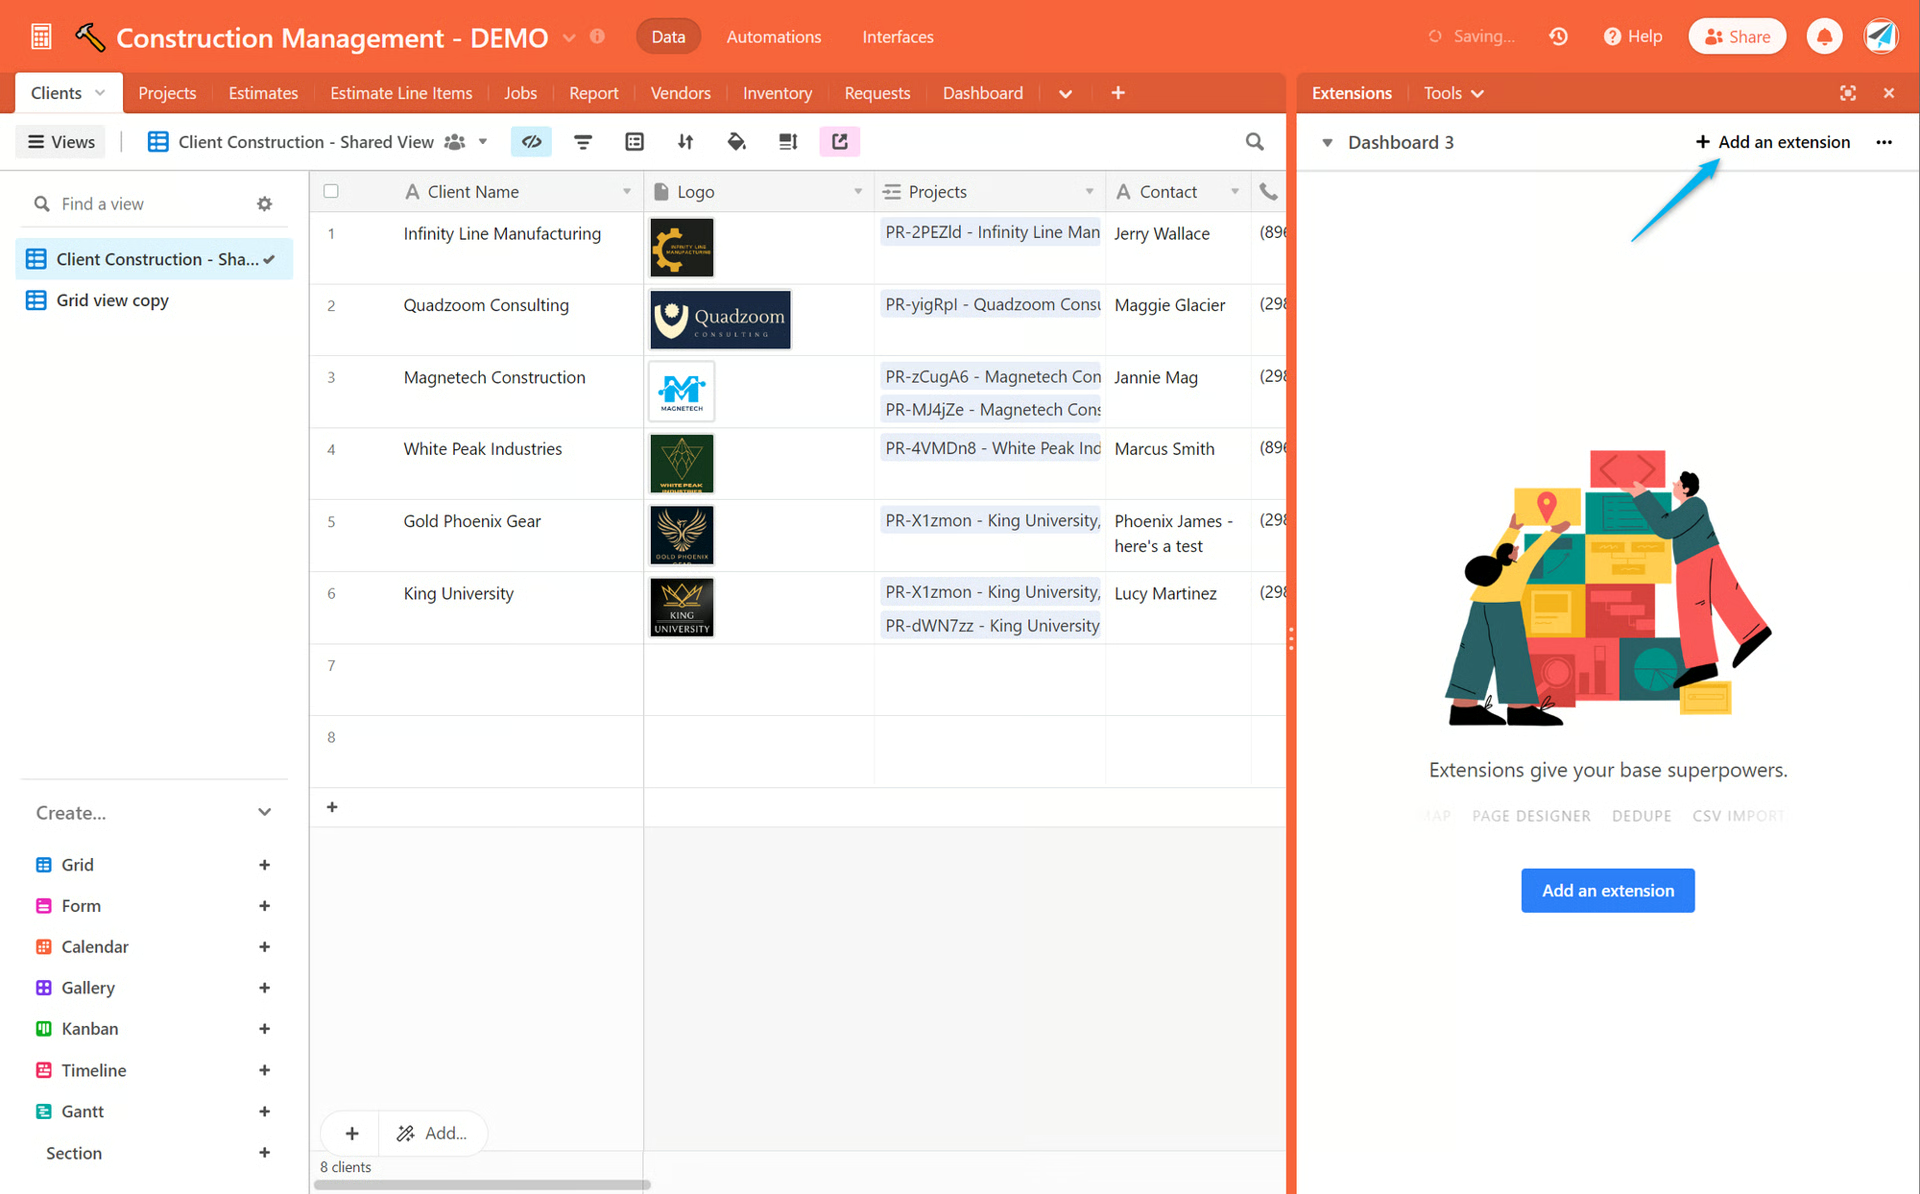
- Click Add an extension
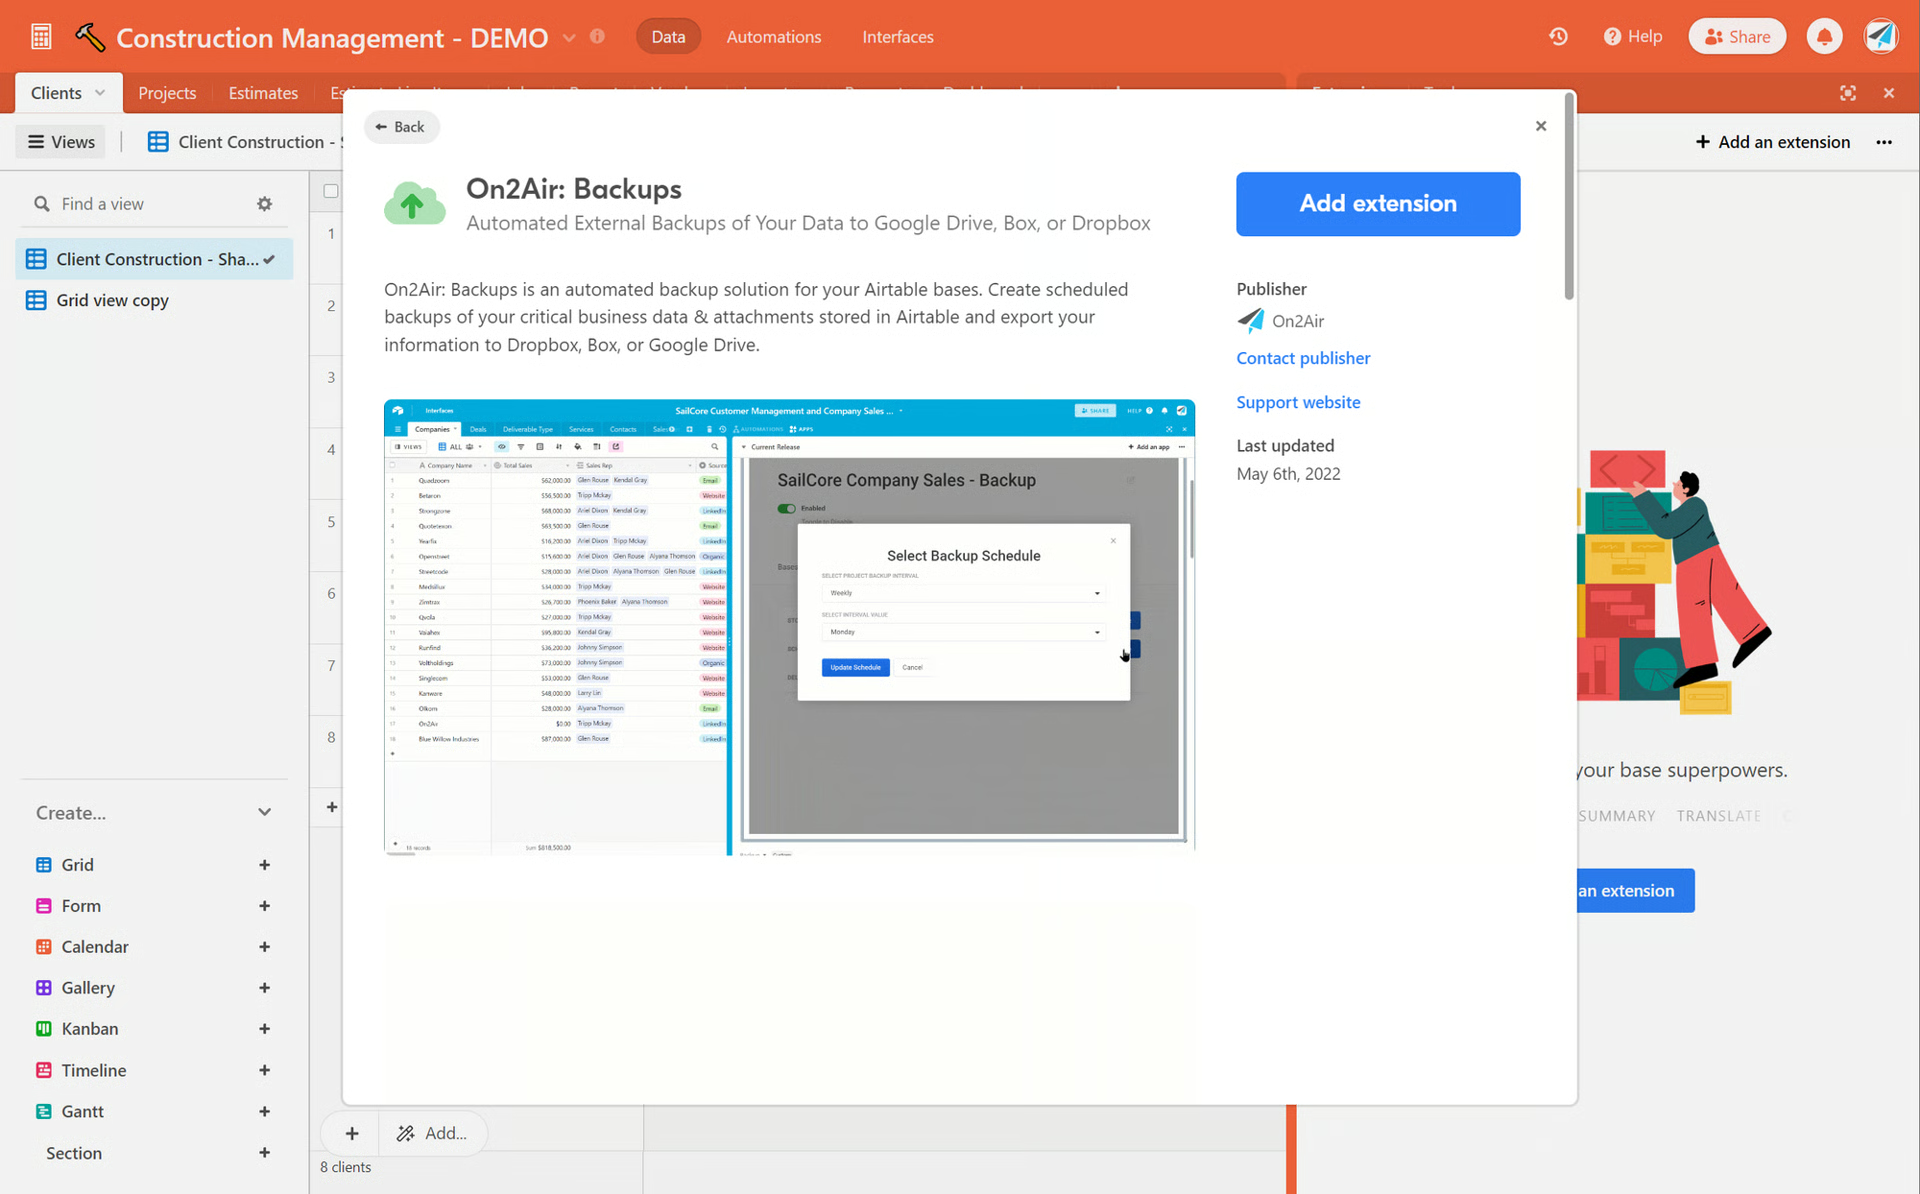
- Type On2Air in the search box and choose On2Air Backups

- Click Add Extension to add it to your Airtable base
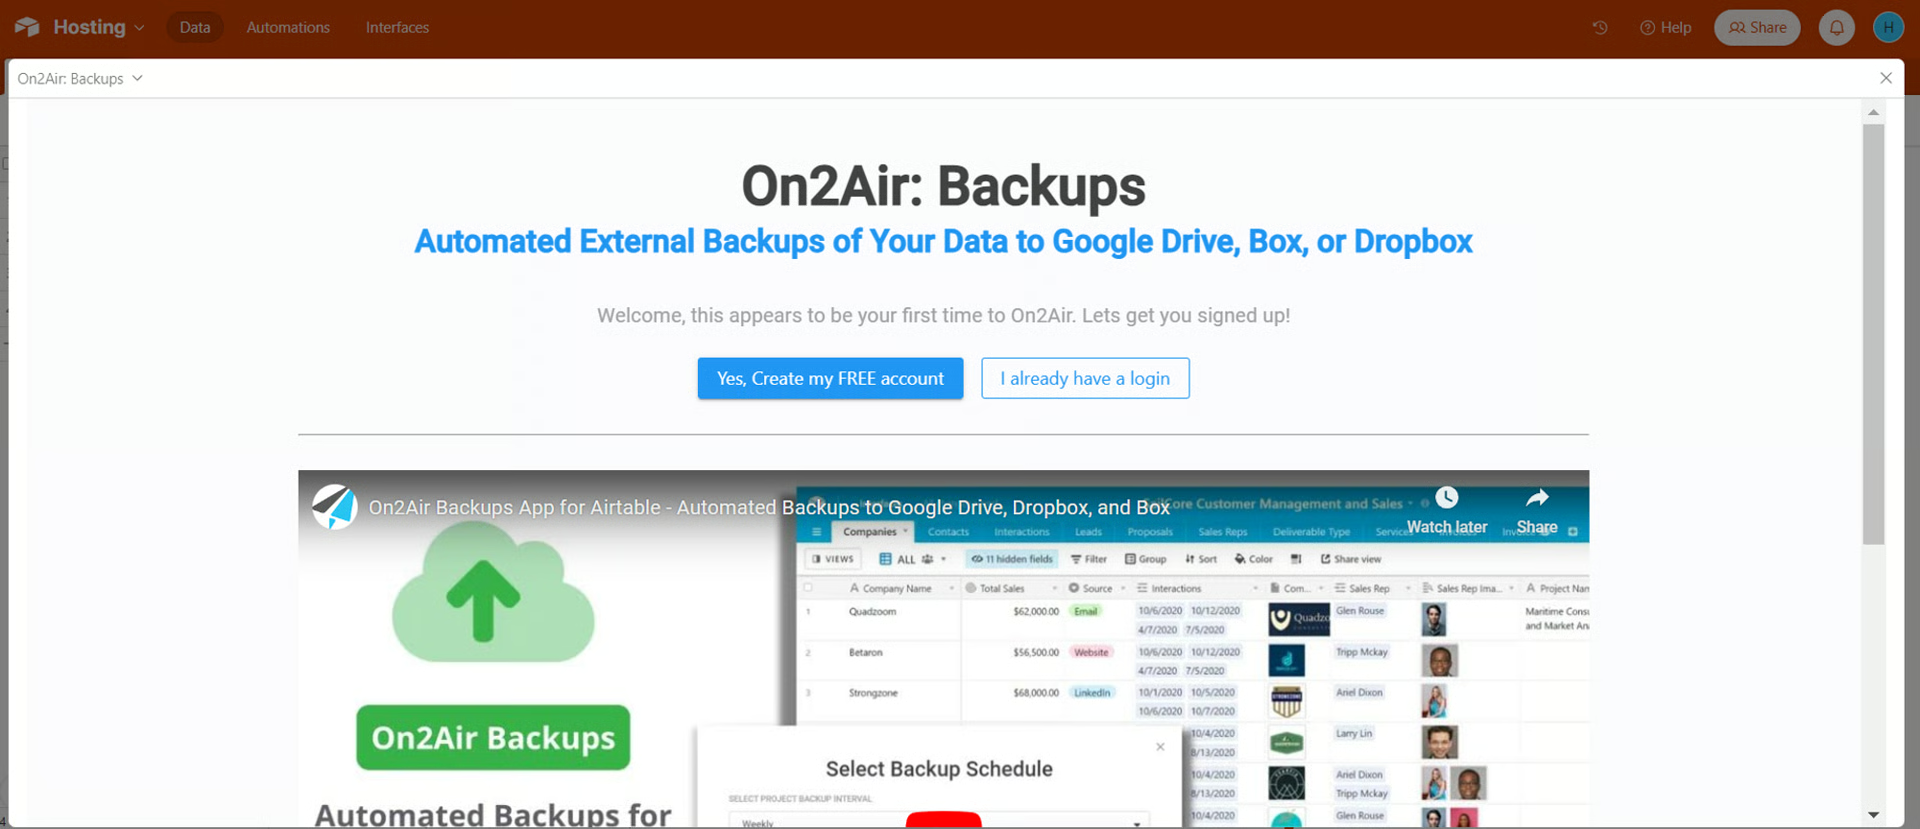
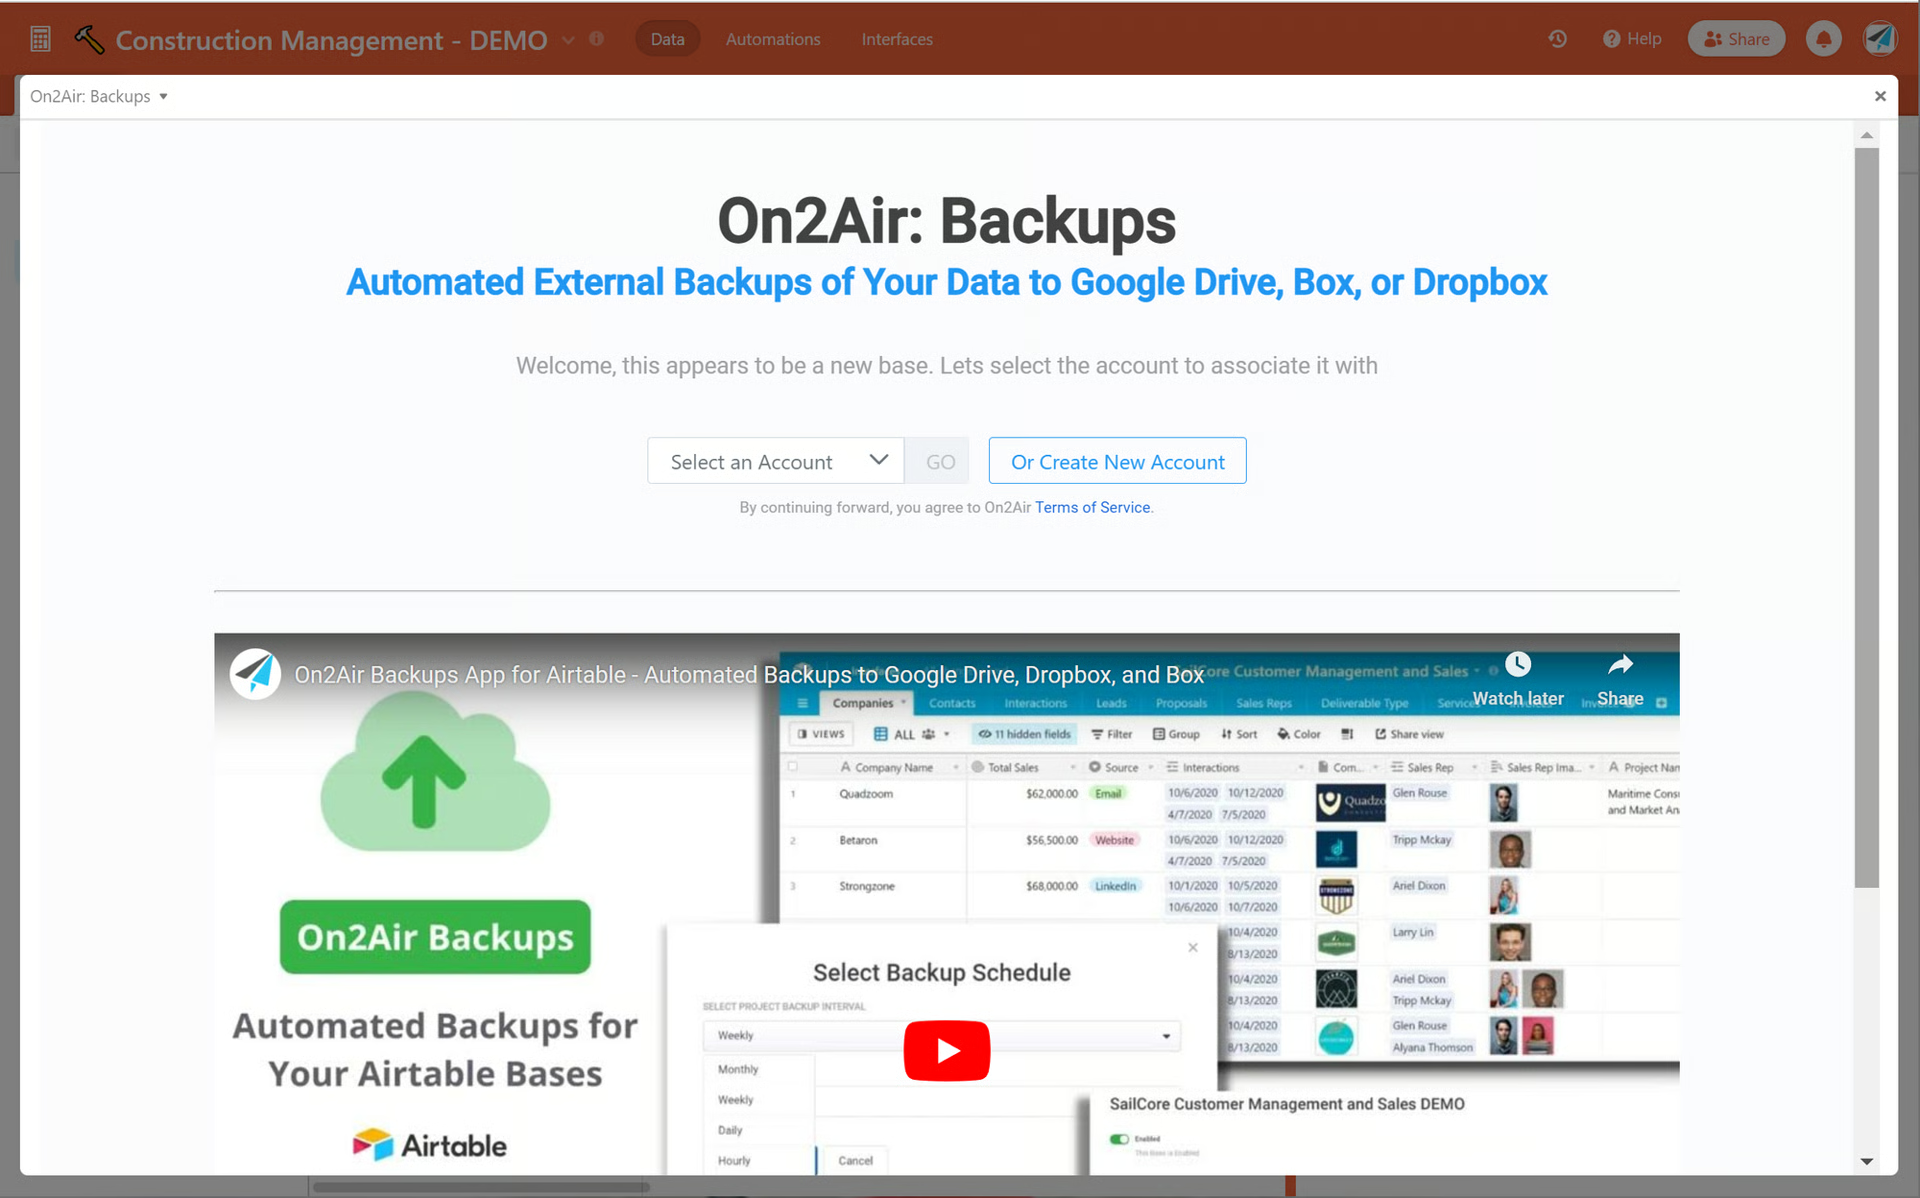
- You’ll now click Create New Account to create an On2Air account. You’ll go through the account creation process.
If you’ve ever added On2Air Backups to other bases in your Airtable workspace, Select your On2Air account.
2. Connect Your Airtable Account
Section titled “2. Connect Your Airtable Account”Now, you’ll need to connect your Airtable account via OAuth
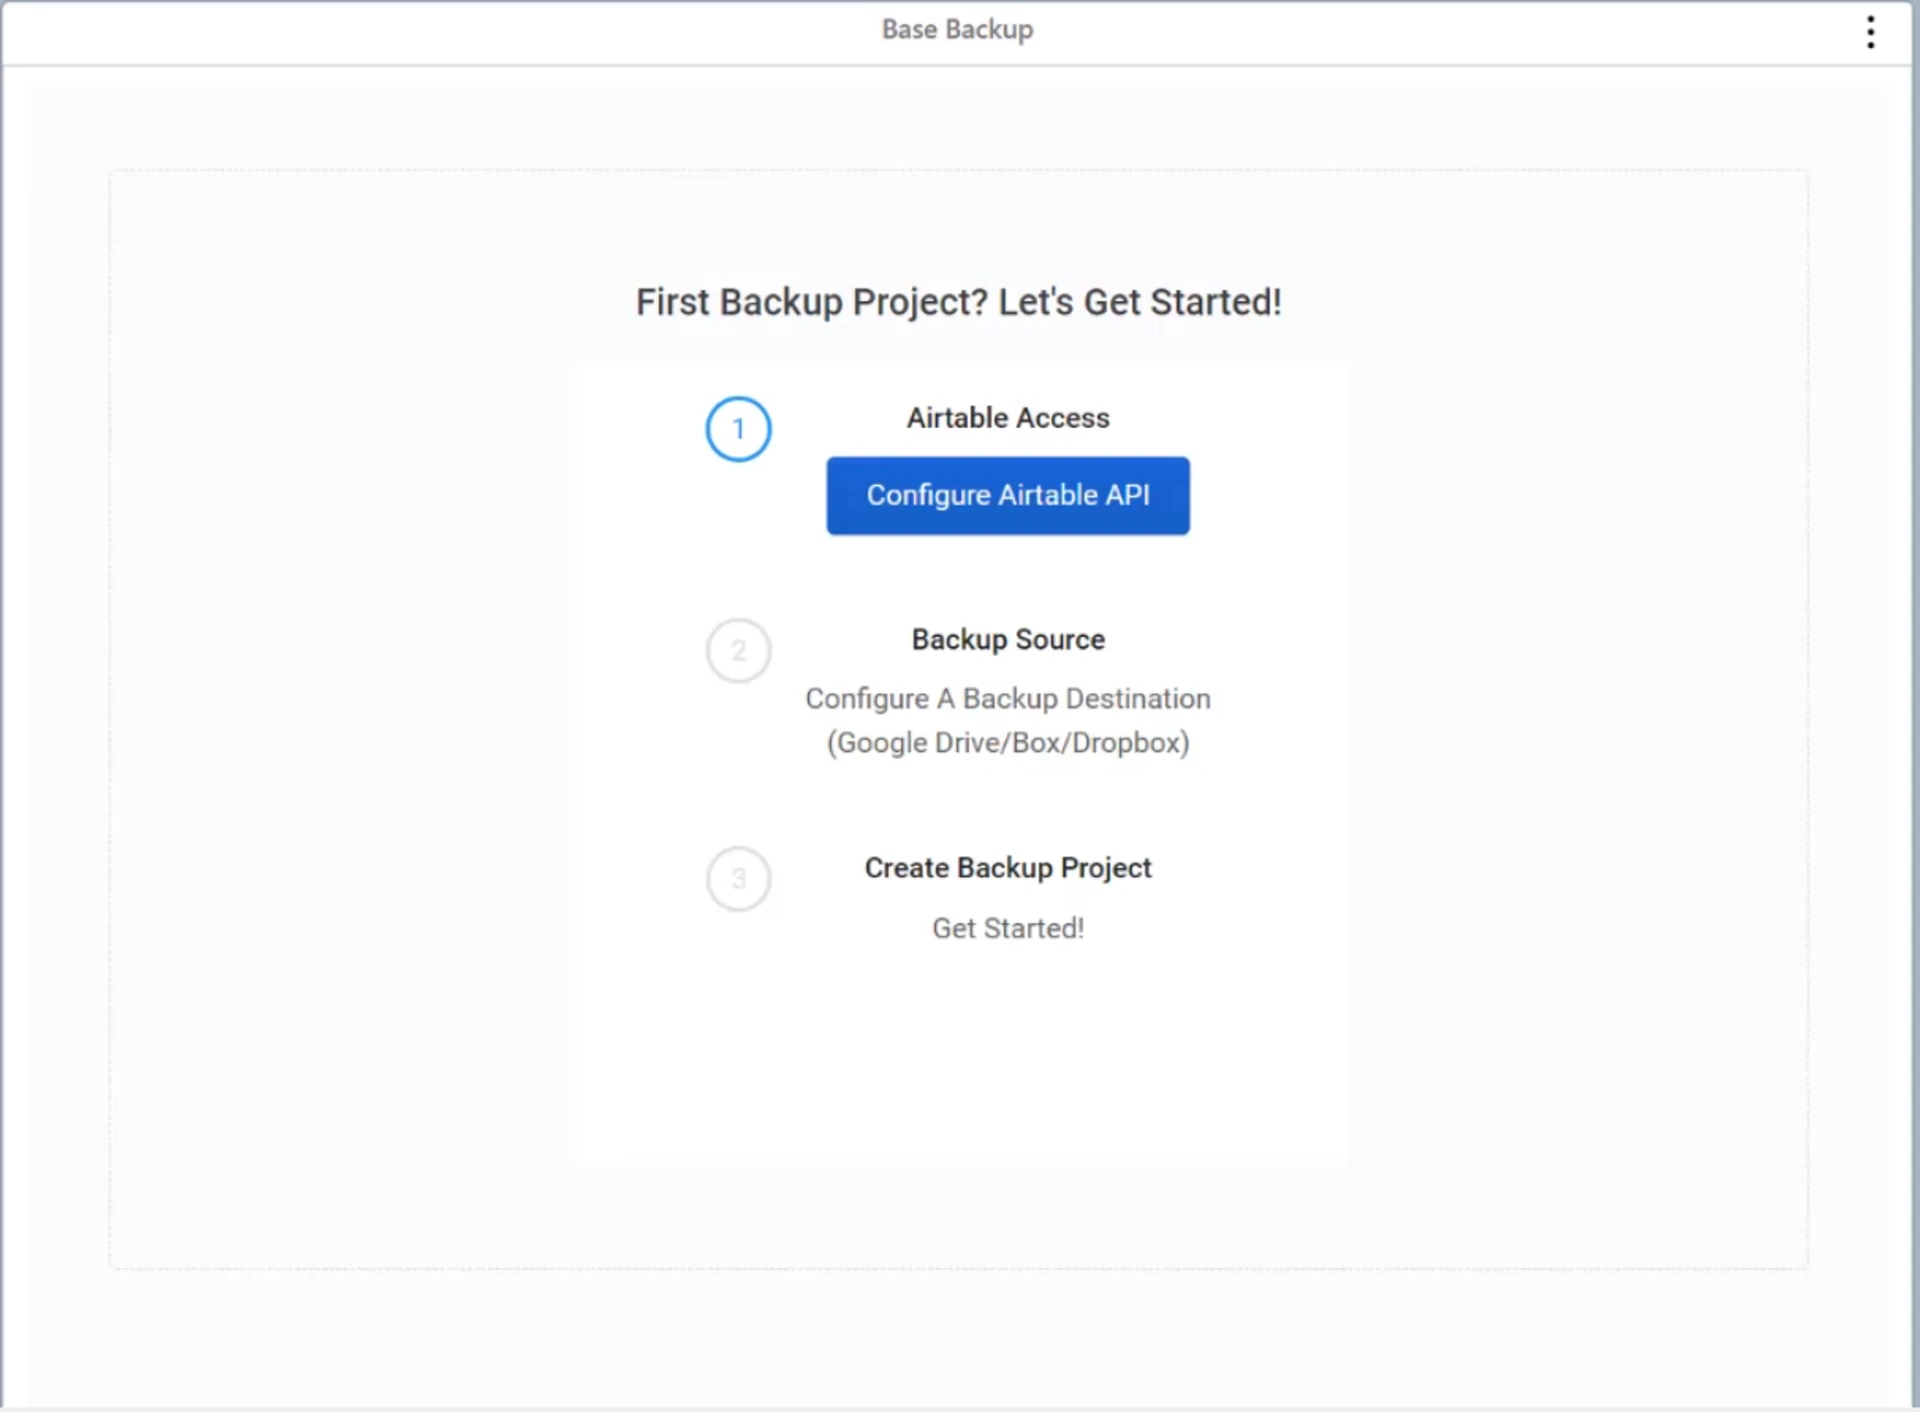
- Click the Configure Airtable API button
-
Go through the OAuth connection process
-
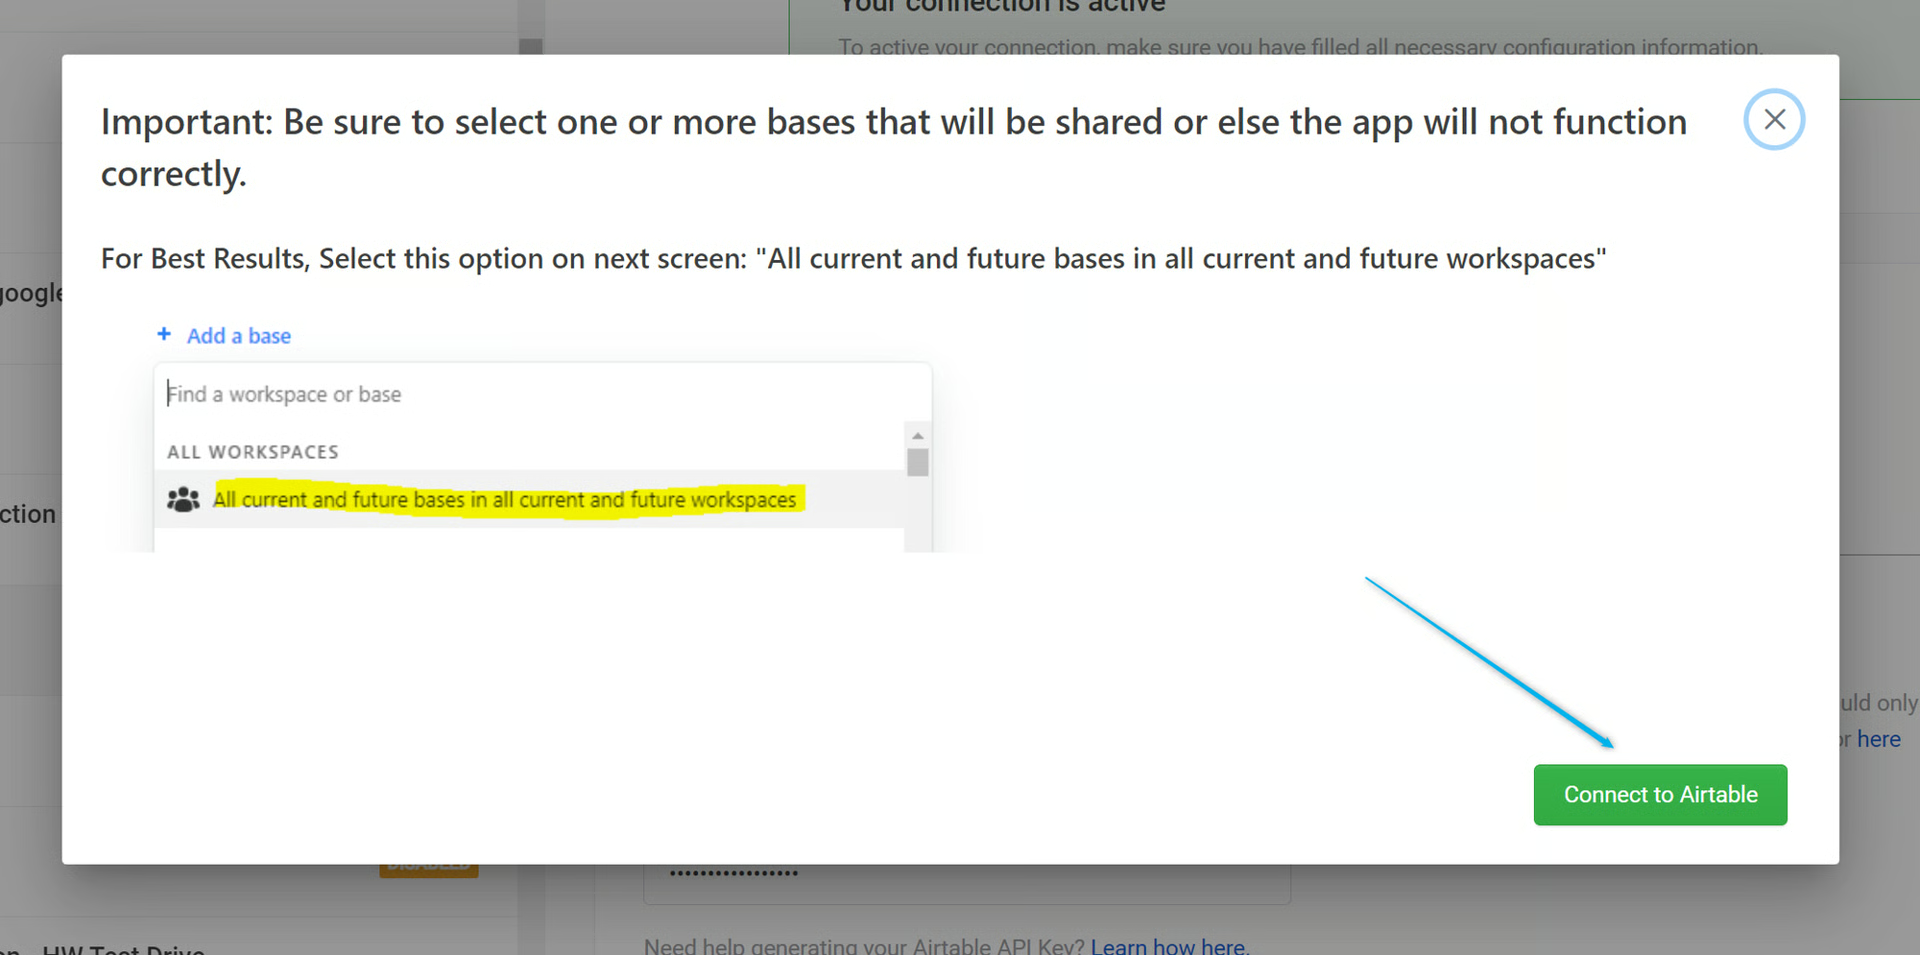
You’ll see an important message about being sure to choose All current and future bases in all current and future workspaces in the following OAuth settings window.
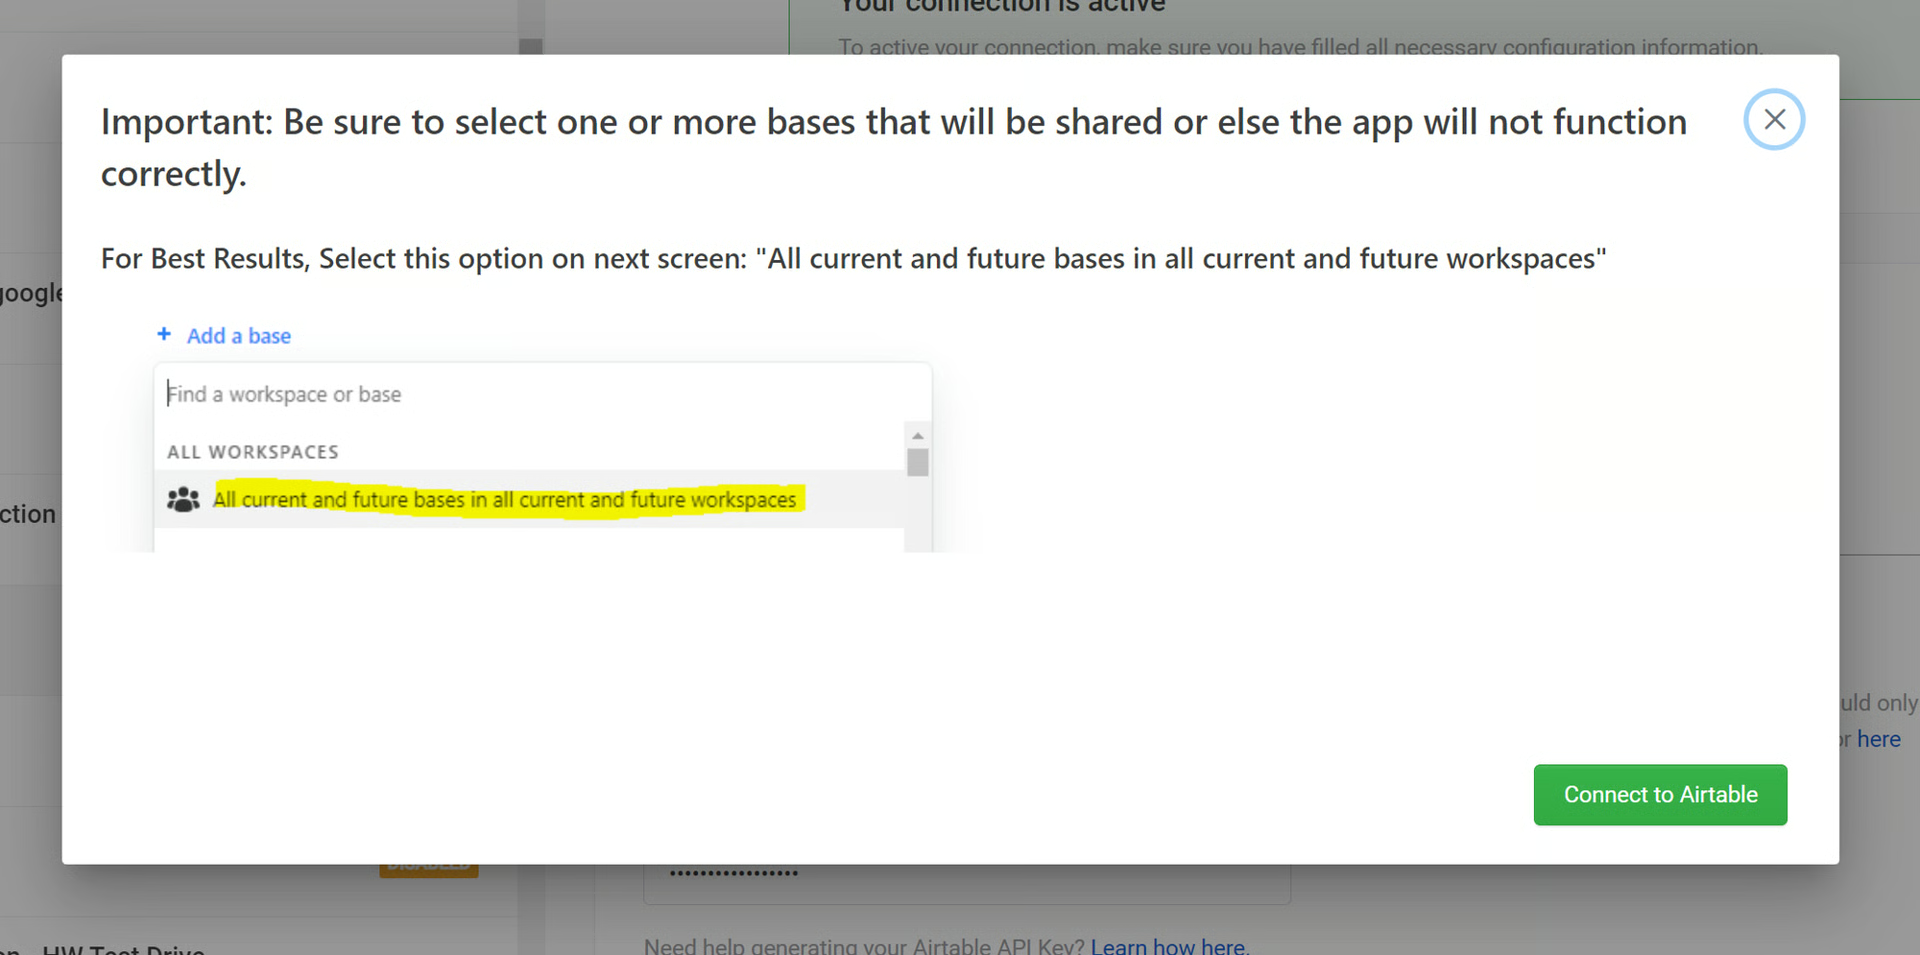
- Click Connect to Airtable
-
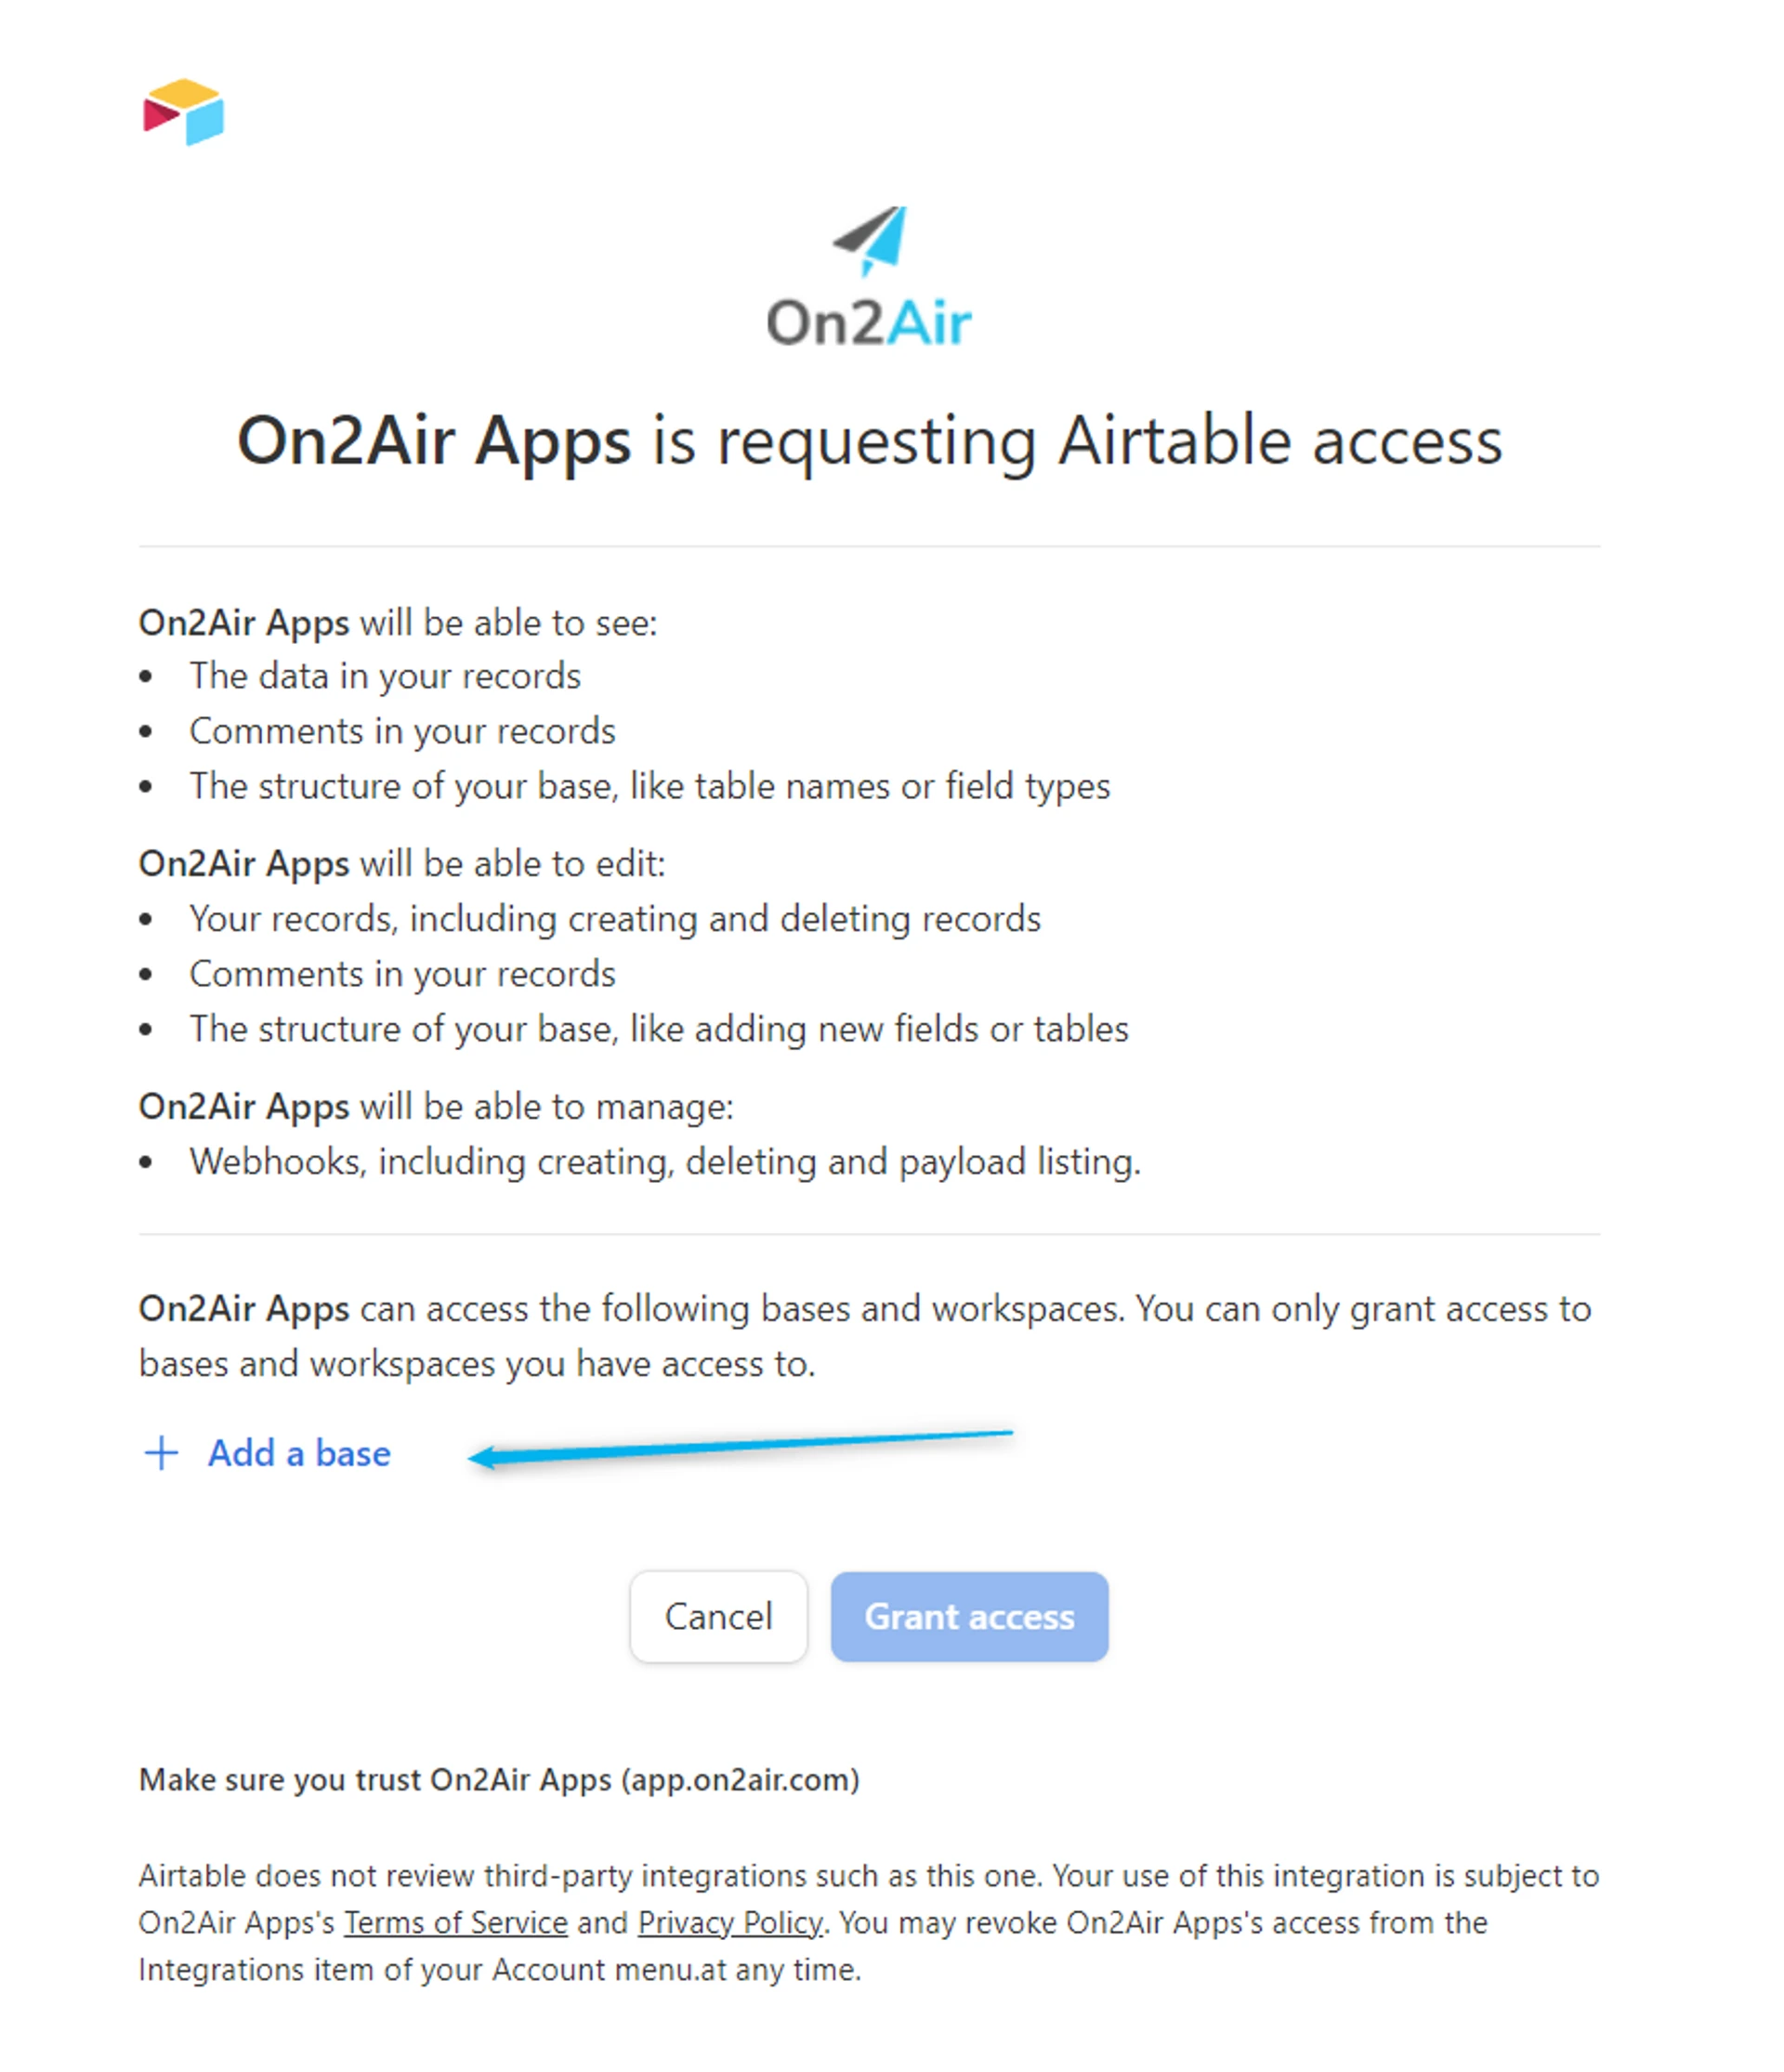
Next, you’ll see a page to authorize On2Air to connect to Airtable
-
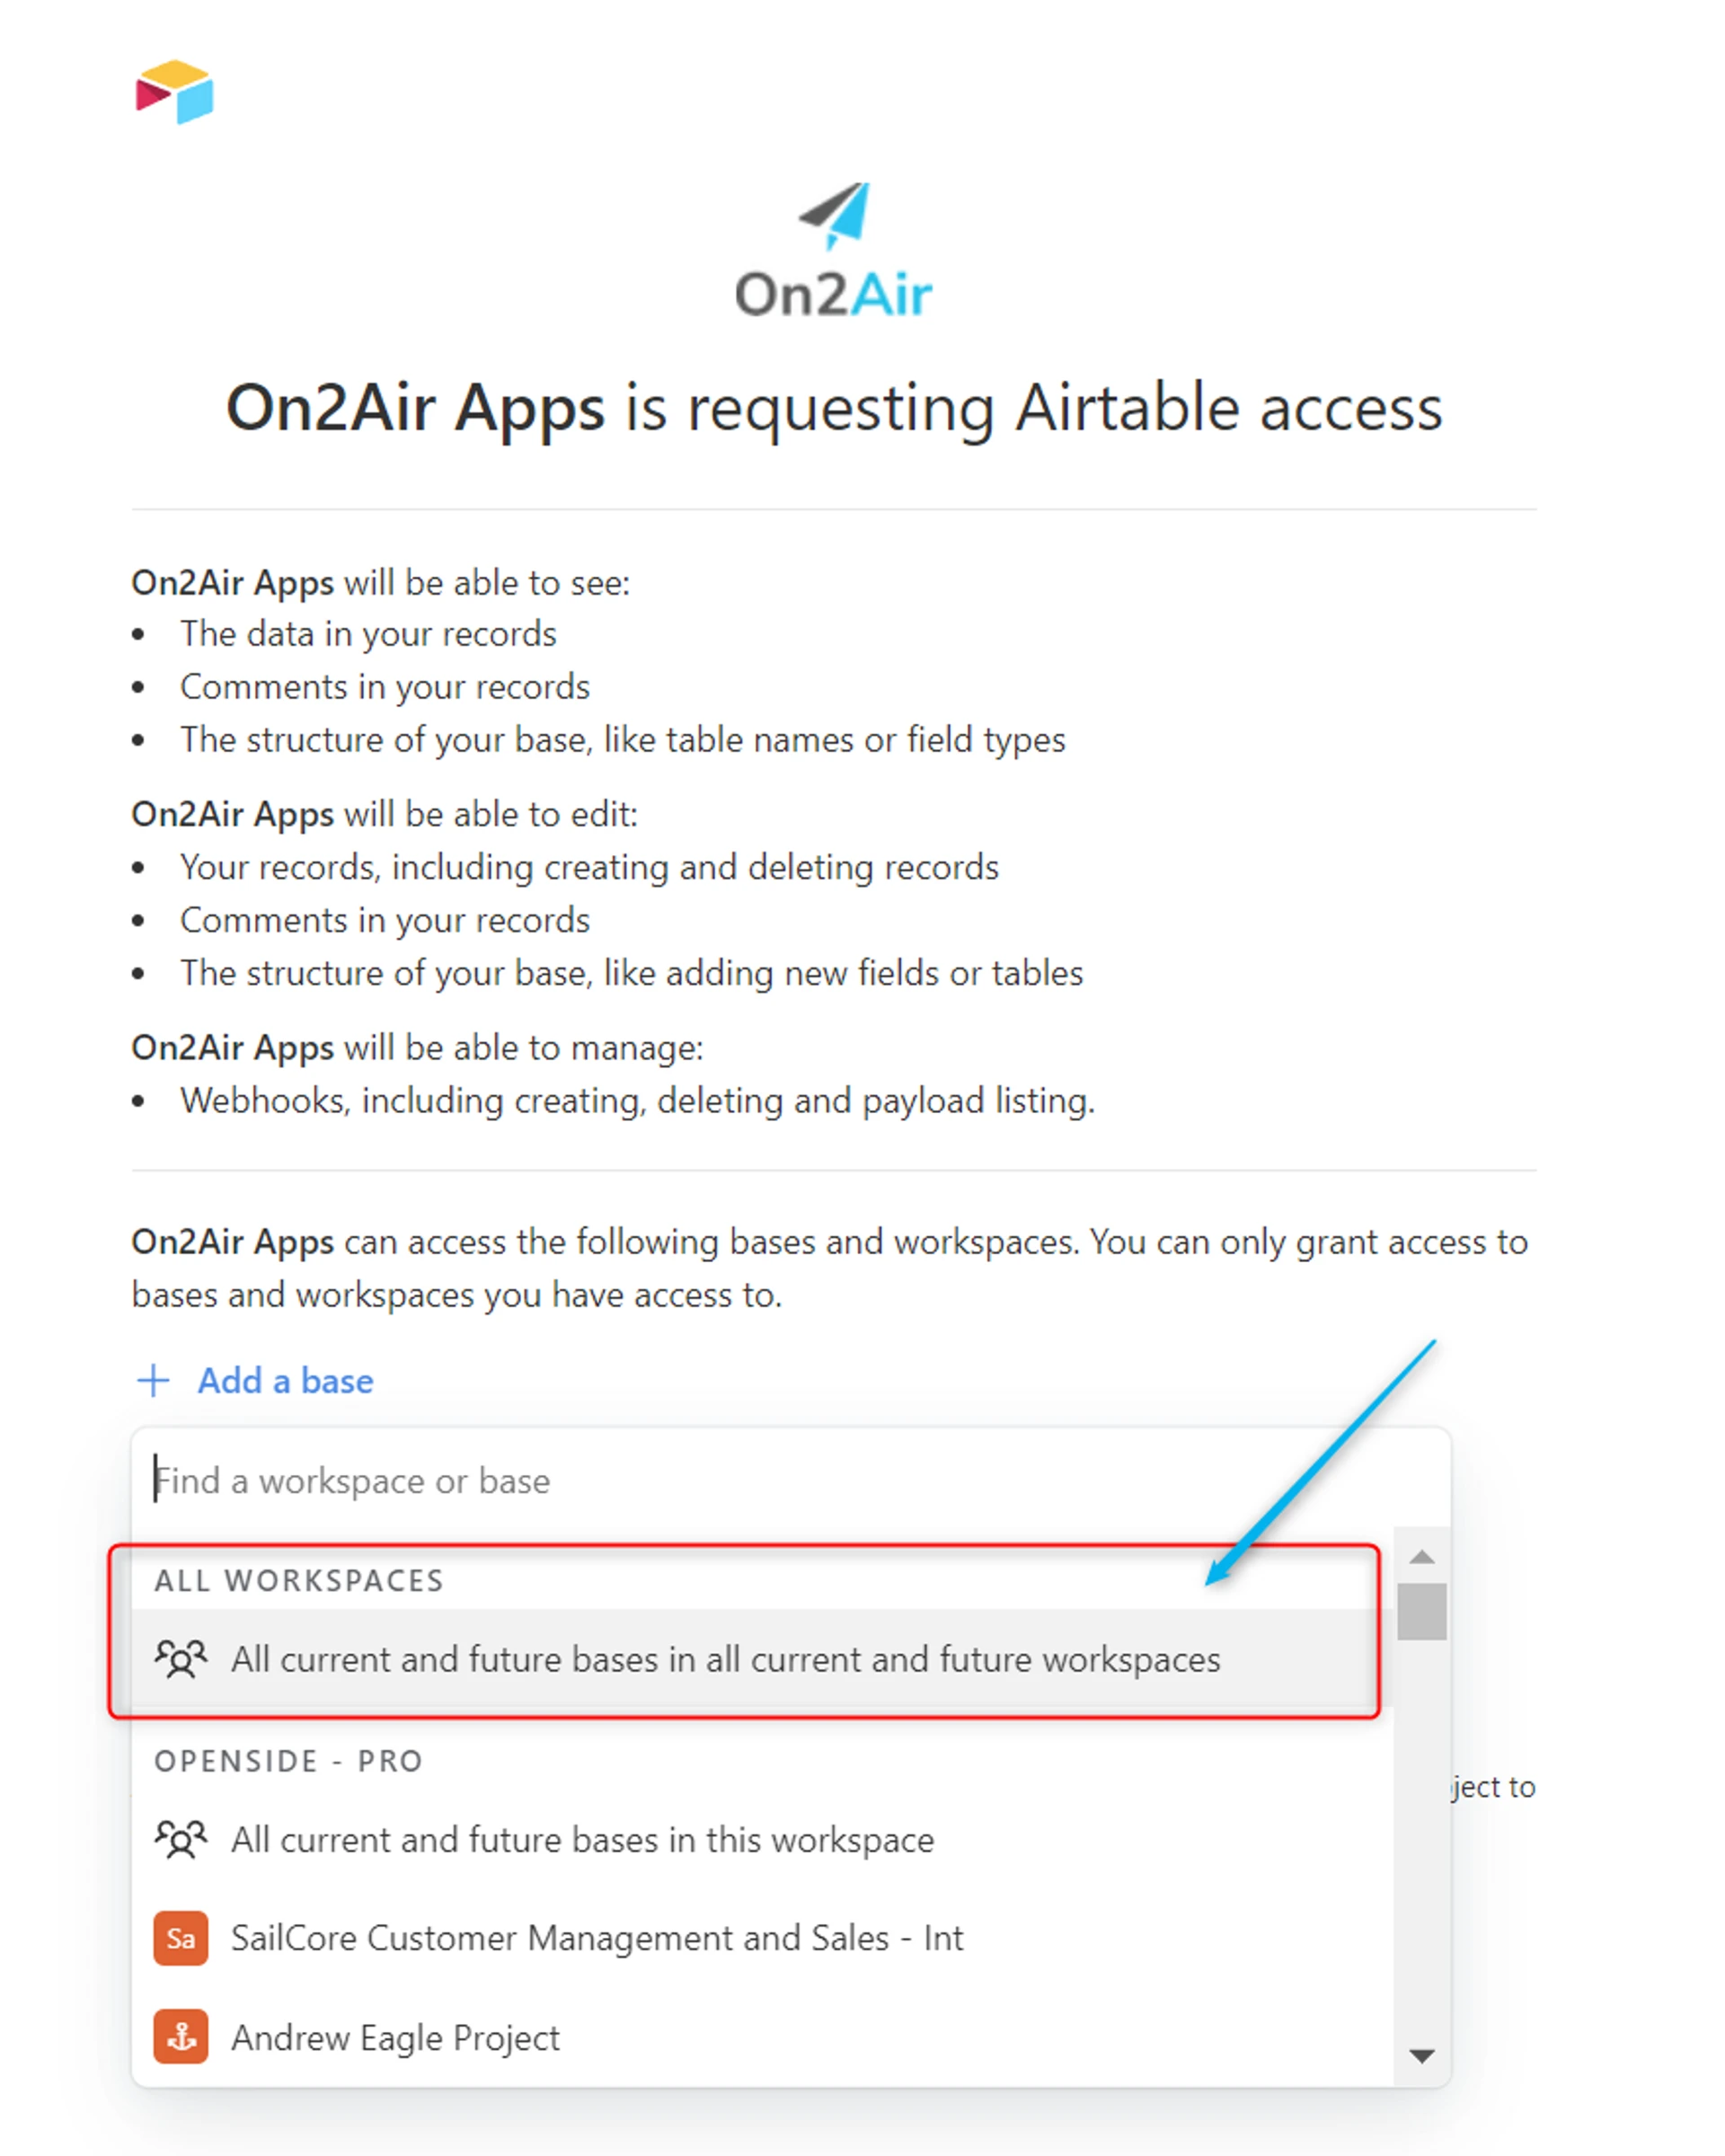
IMPORTANT: Click Add a base FIRST
- For best results, choose All current and future bases in all current and future workspaces.
-
While you can choose individuals bases or workspaces, you will need to continually create OAuth connection authentications to On2Air if you ever want to use more than a single workspace, base, or all bases in your Airtable workspace.
-
Click Grant access
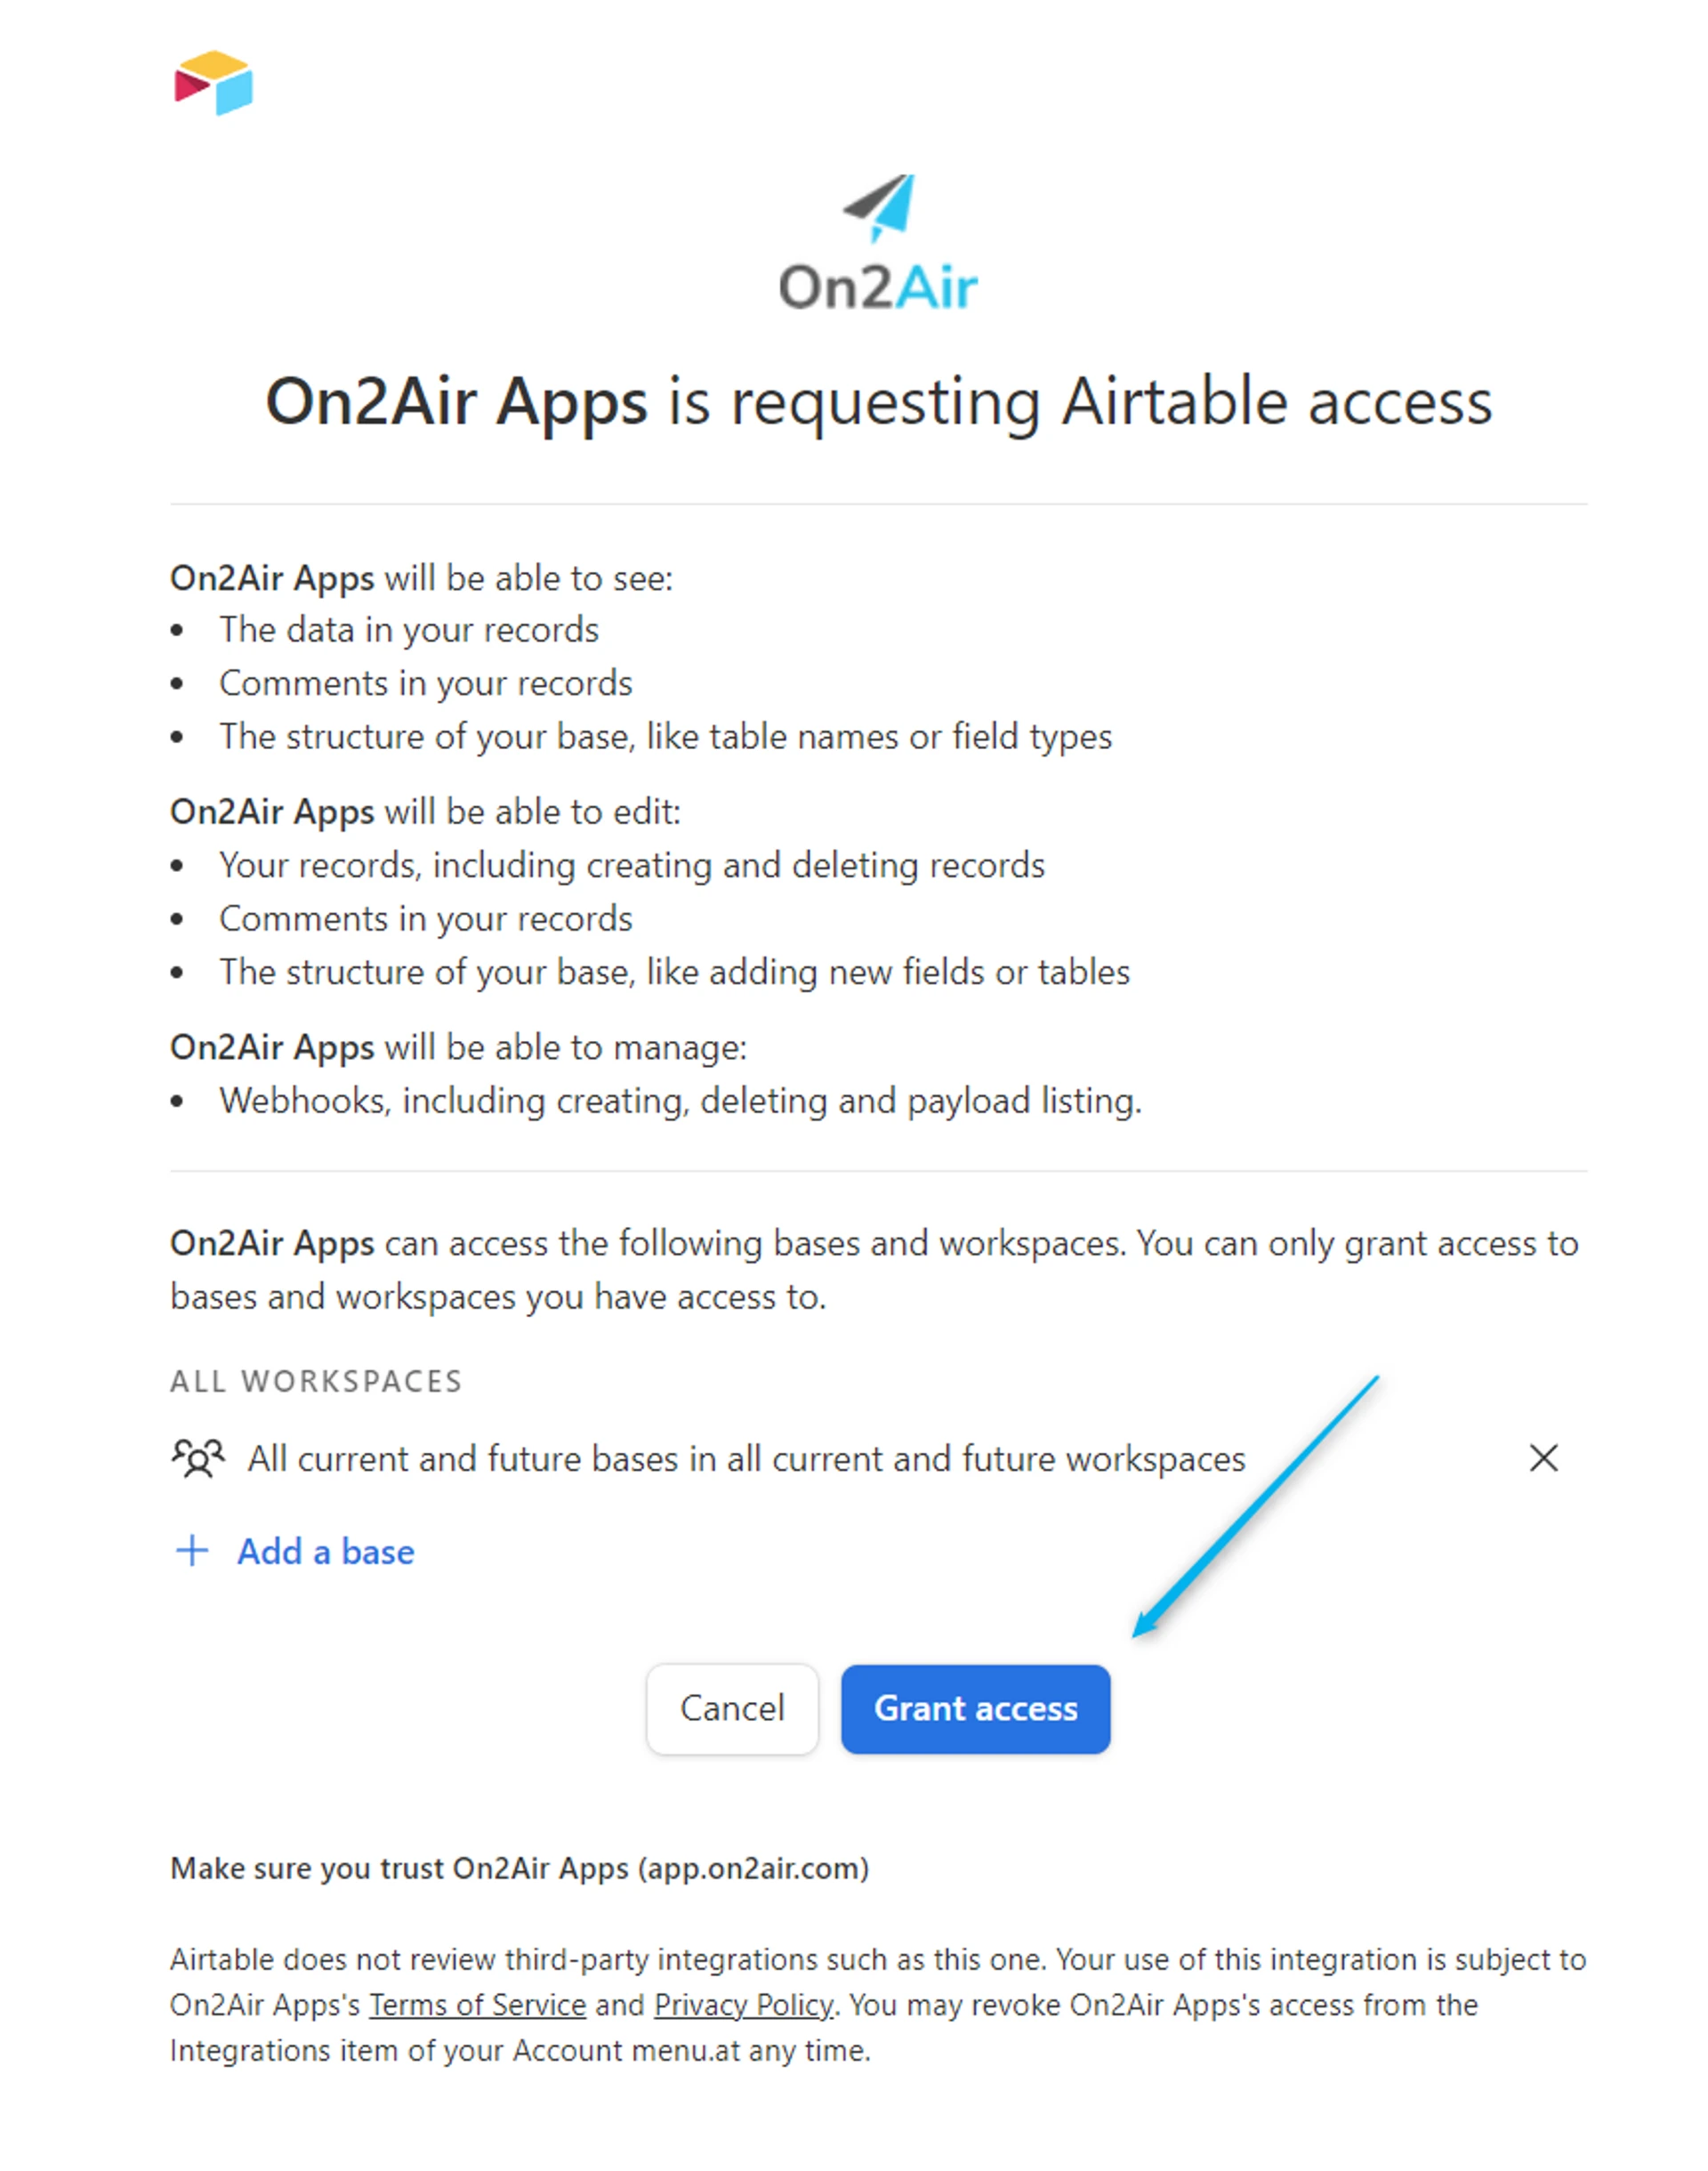
- Your page will reload and display an “Authenticating” message”
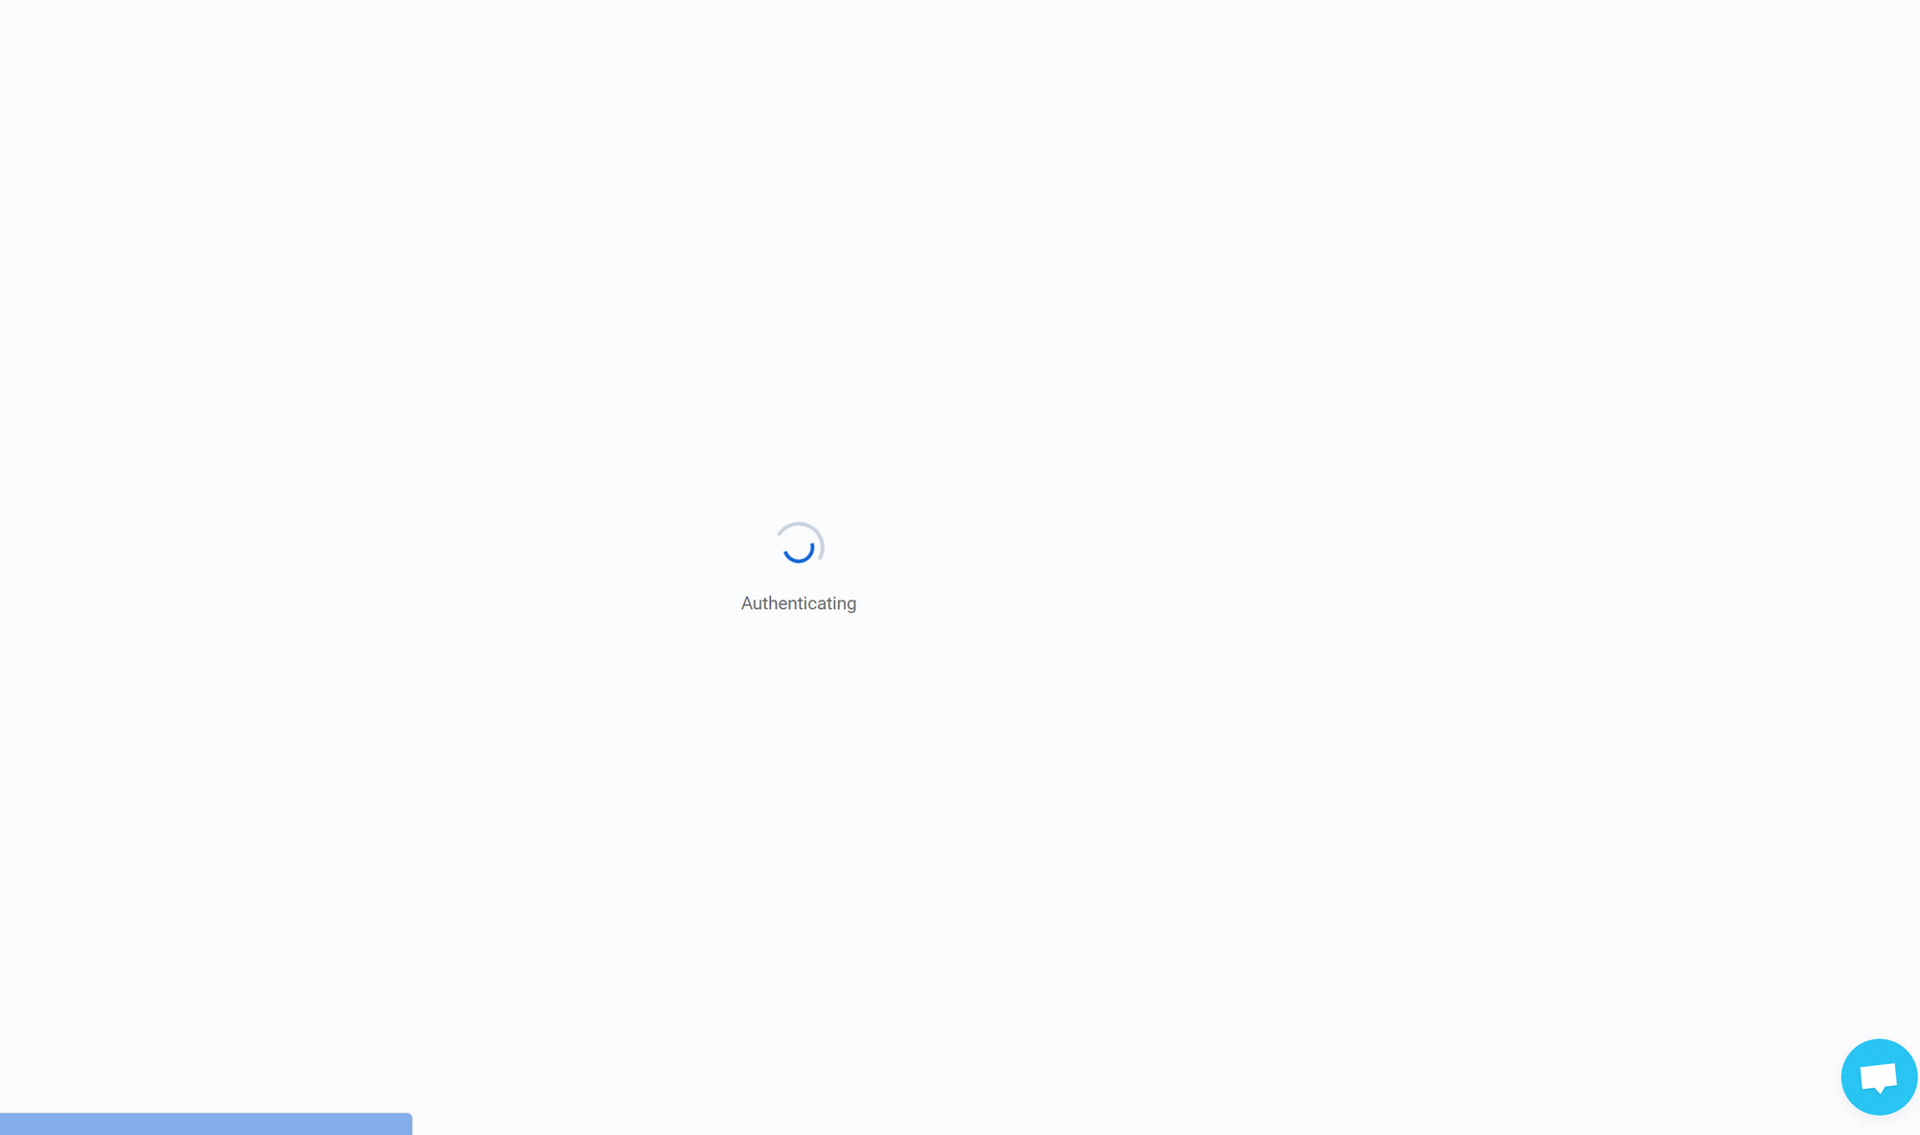
- You have now connected Airtable and On2Air!
Final
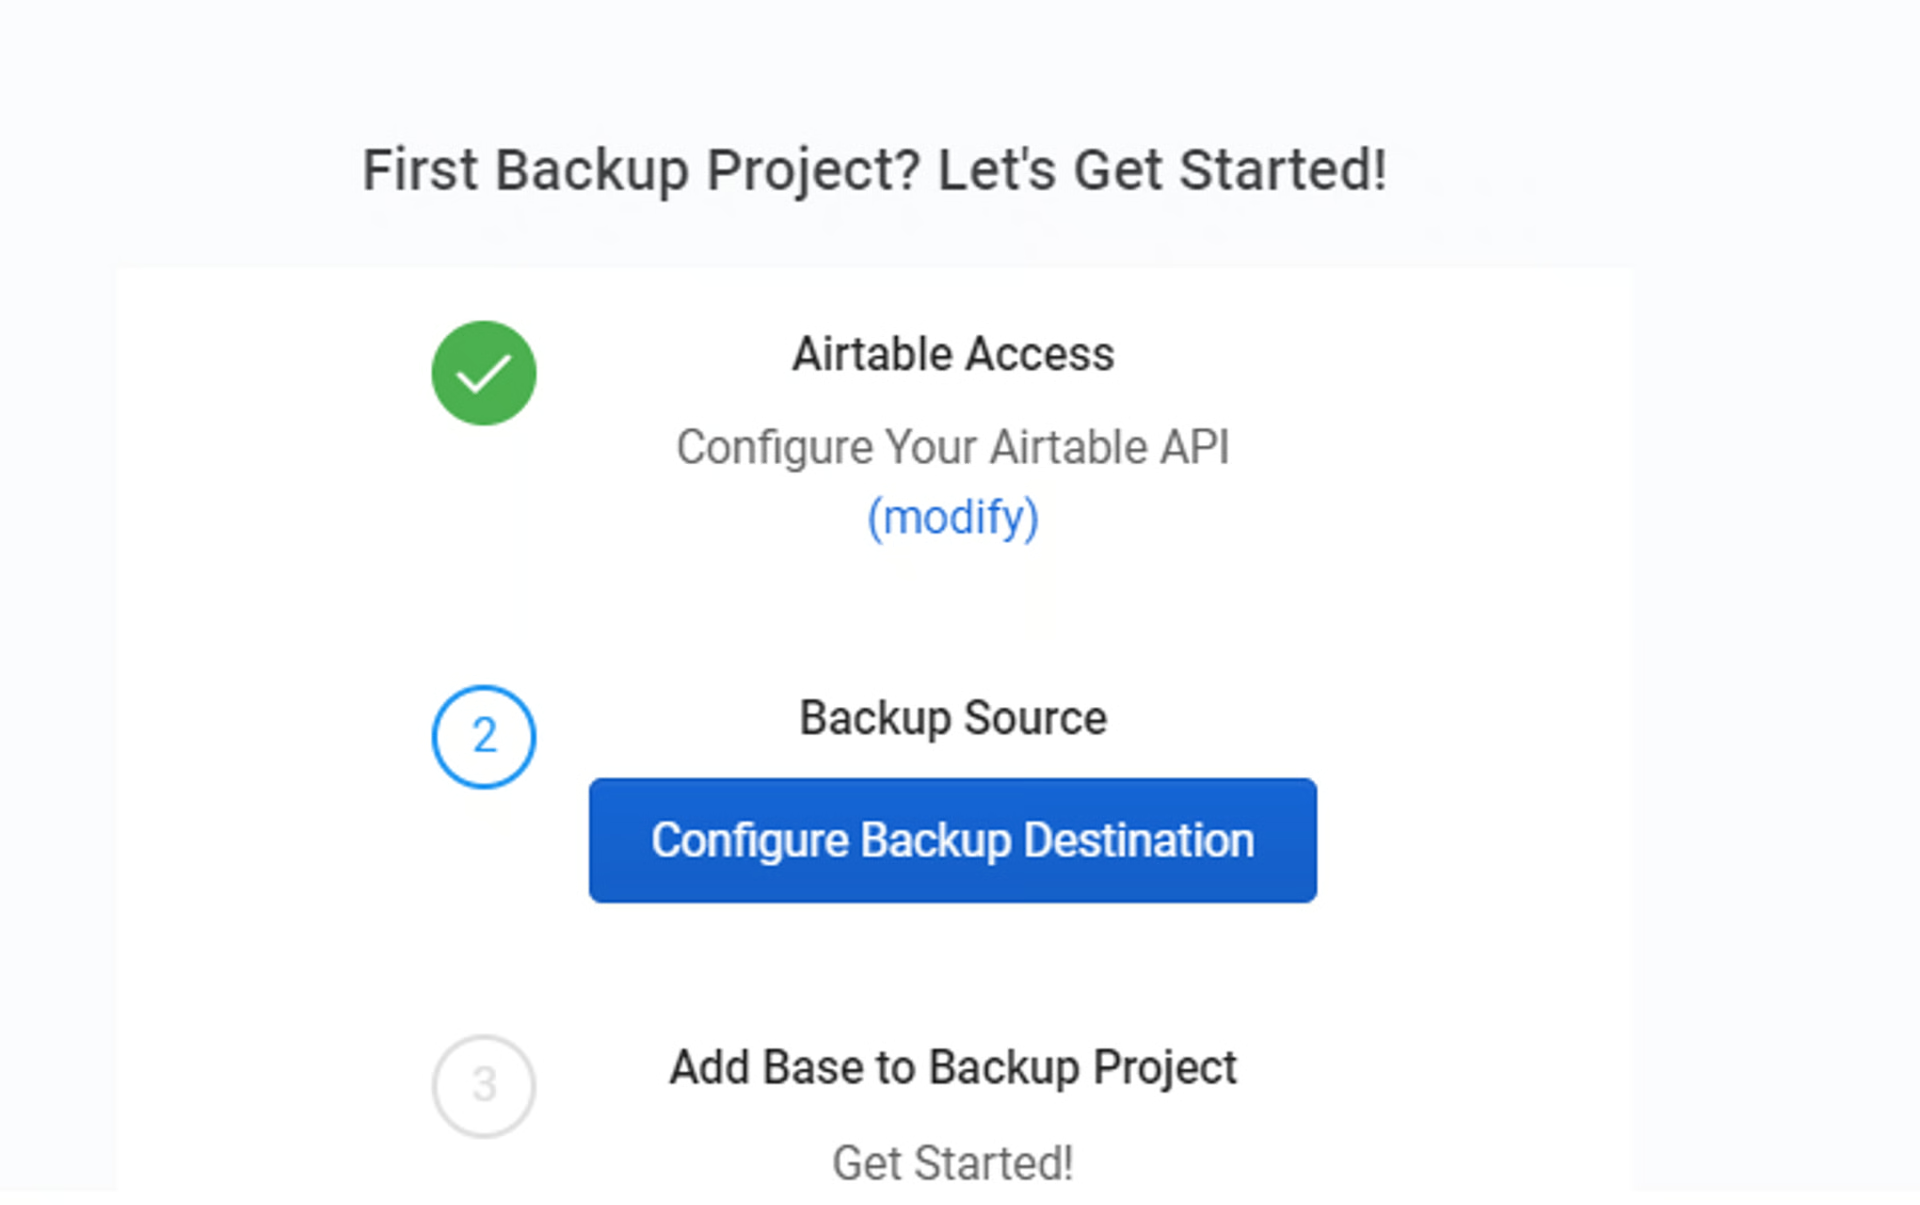
3. Connect Your Backup Location - Google Drive, Dropbox, or Box
Section titled “3. Connect Your Backup Location - Google Drive, Dropbox, or Box”Next, you’ll connect your cloud storage account in Google Drive, Dropbox, and Box.
- Click Configure Backup Destination
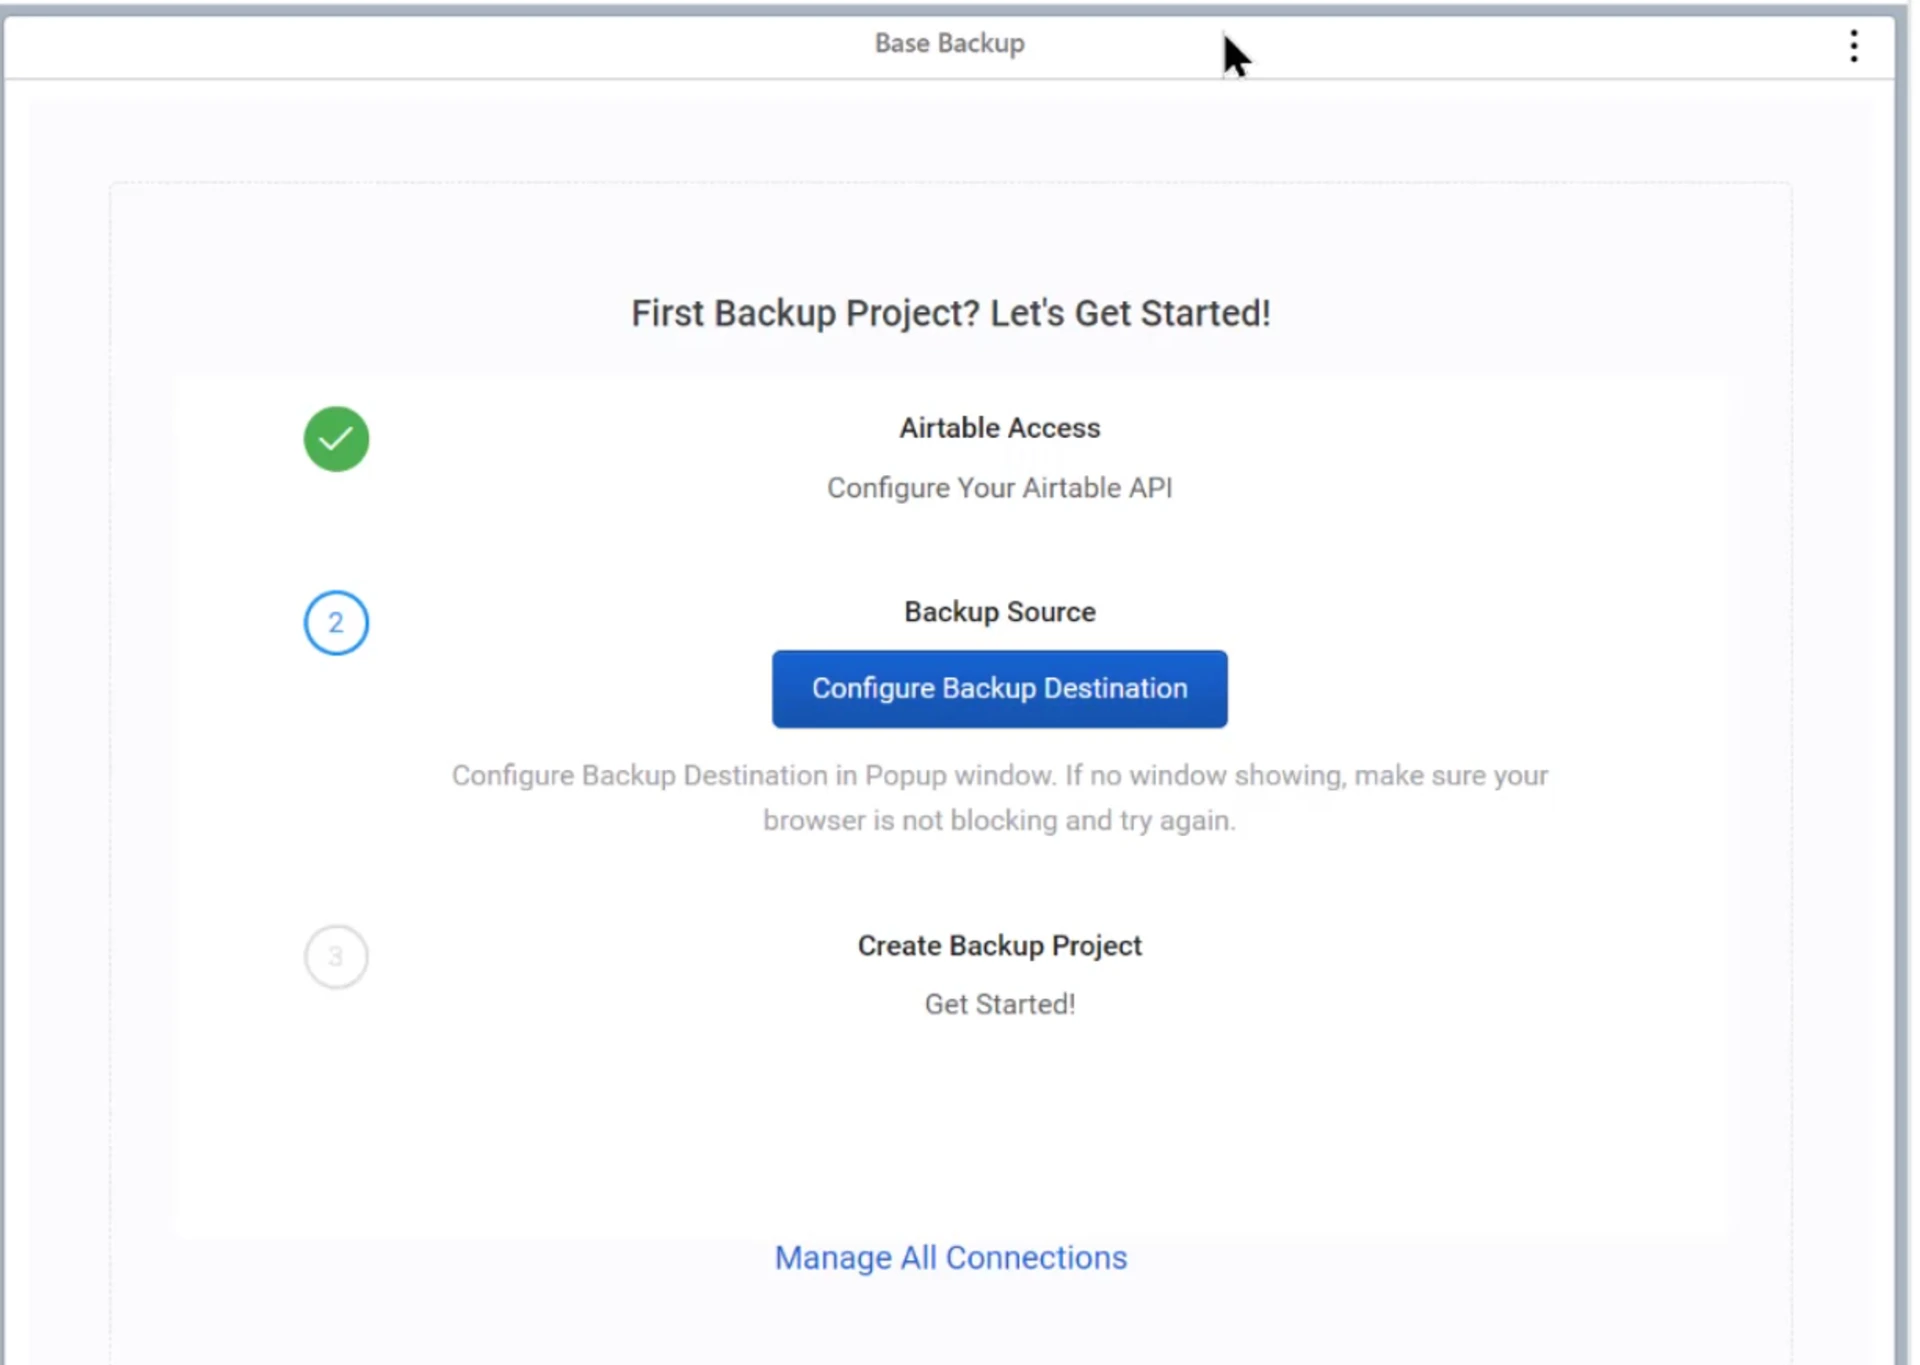
- Depending on your cloud storage option, the setup will look slightly different
You will need to accept the permissions that popup when connecting your storage drive to On2Air. Once you’ve accepted permissions and connected your account, you can now create a backup.
- How to Connect Your Google Drive Account
- How to Connect Your Dropbox Account
- How to Connect Your Box Account
- Once you’ve connected to Storage, click Configure Backup Destination again, close the popup, and On2Air Backups will refresh and connect
4. Create a Backup Project
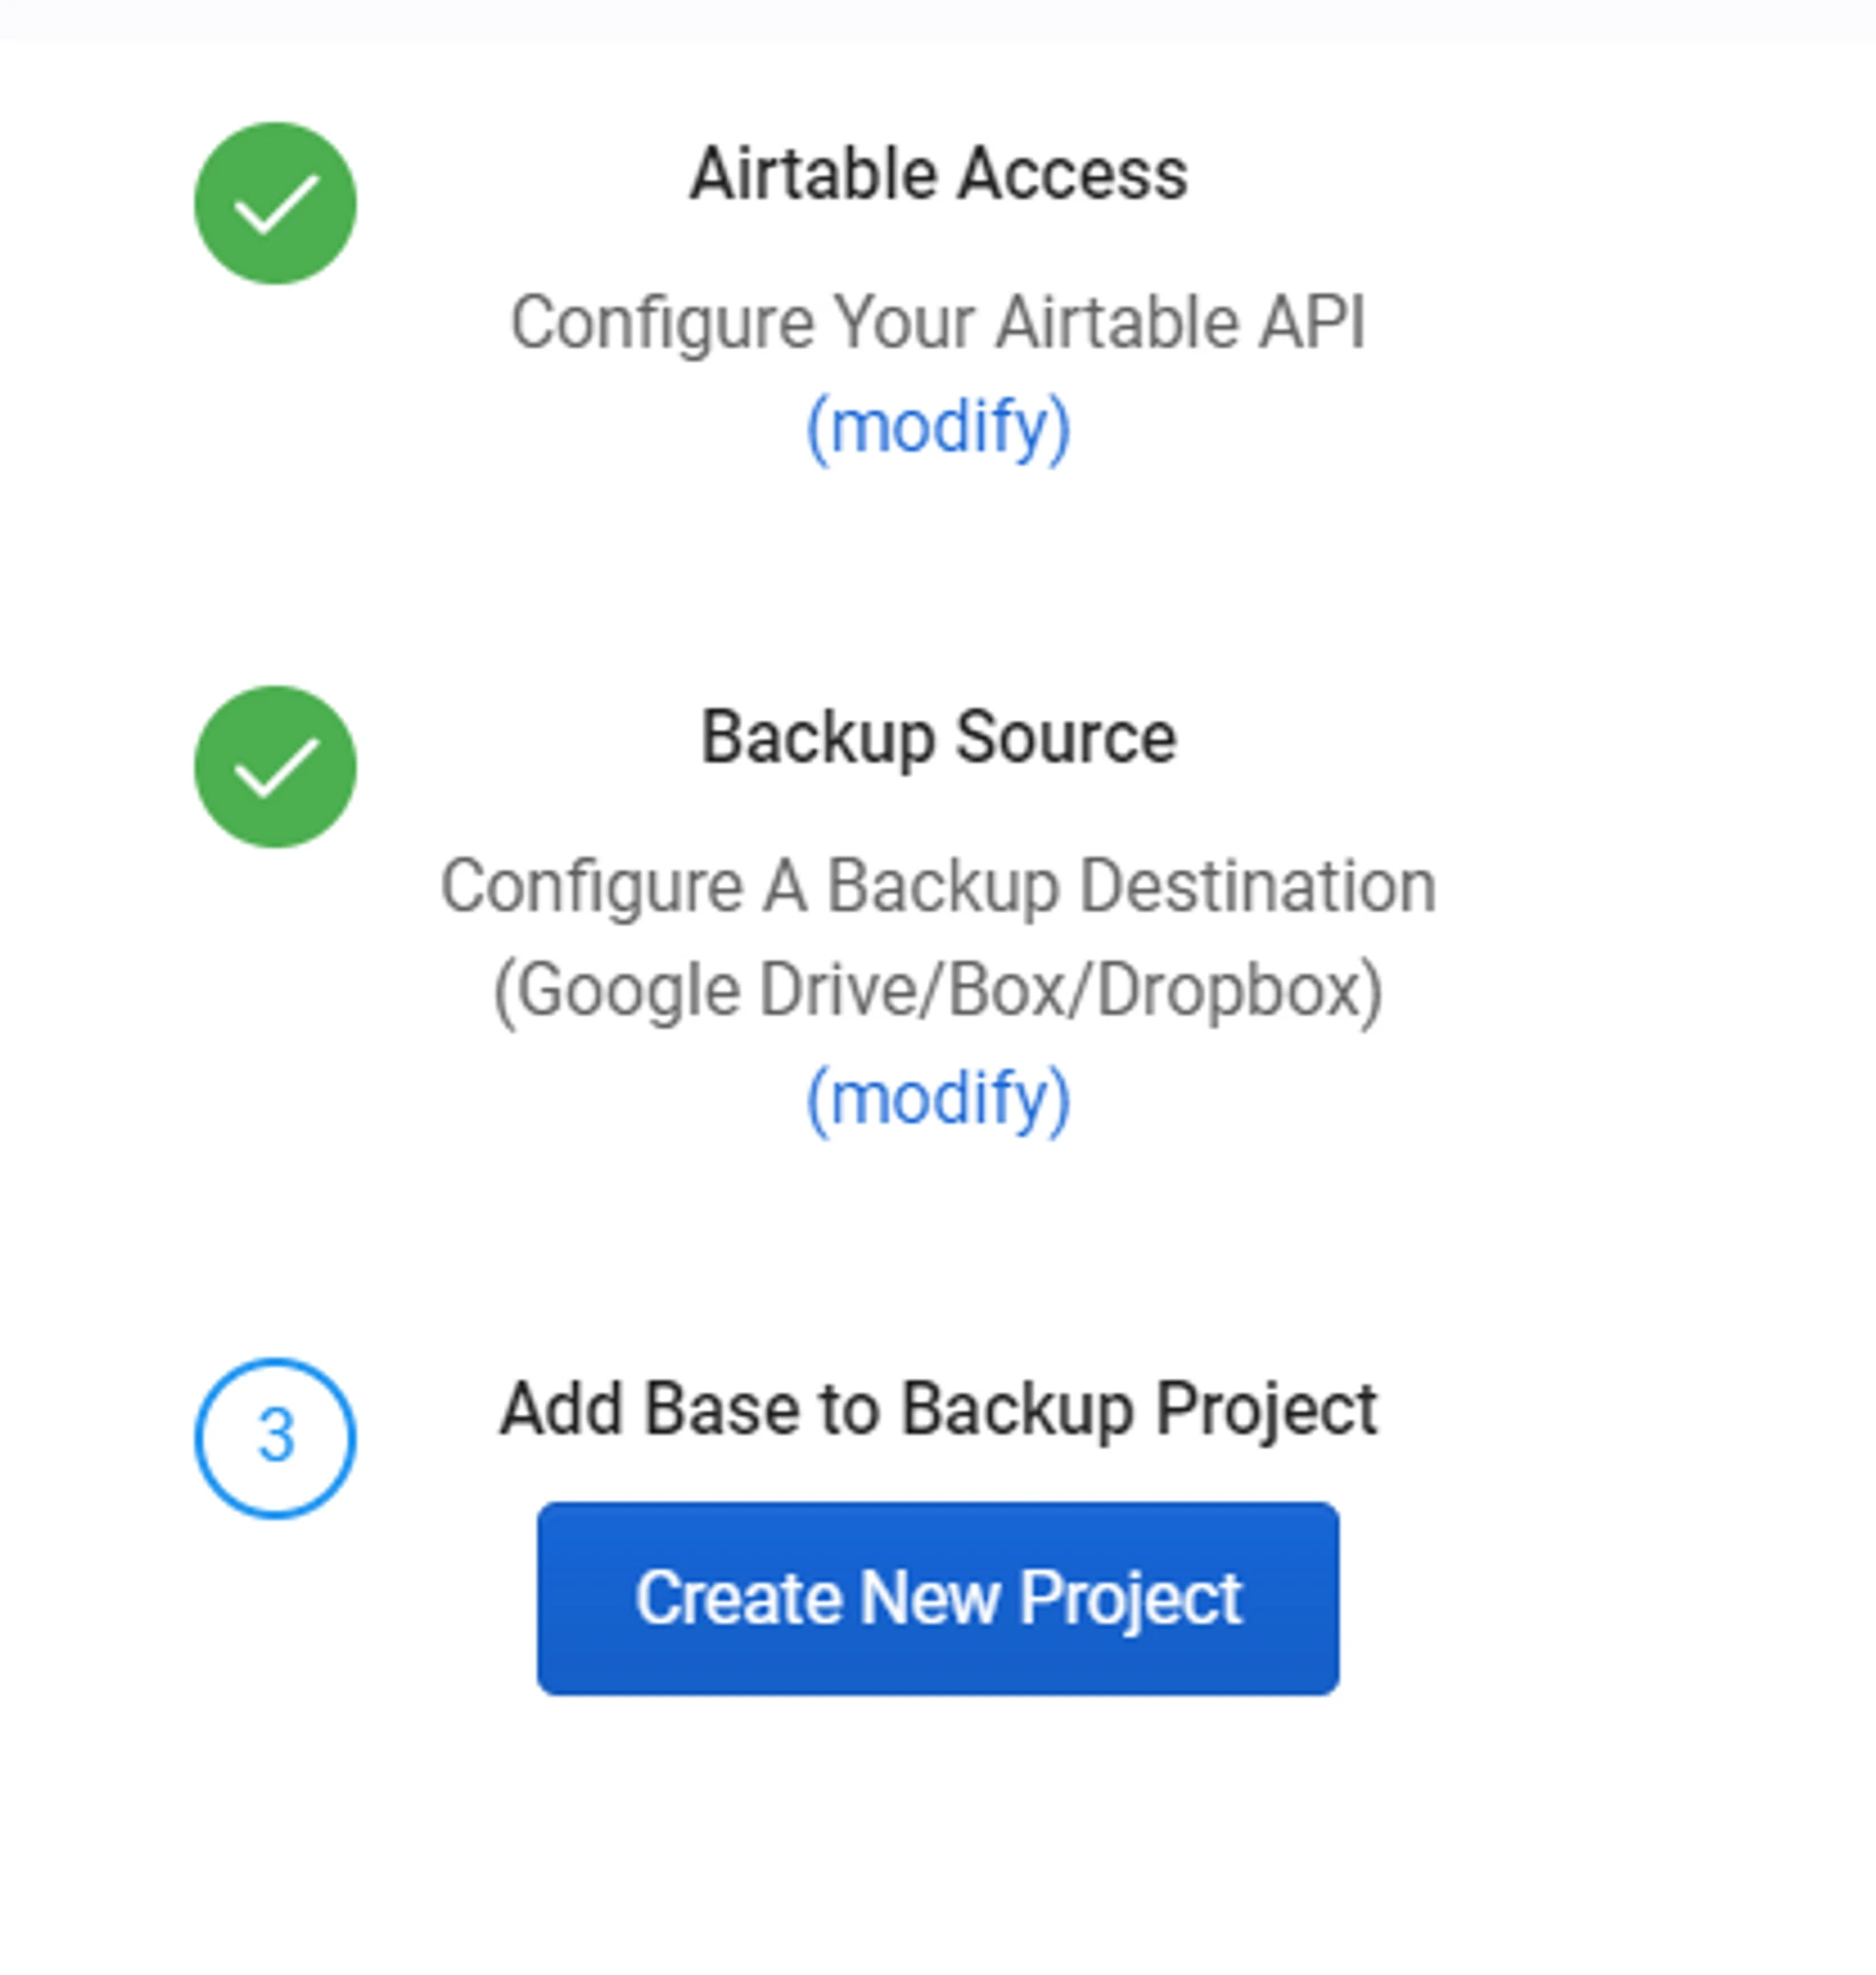
Section titled “4. Create a Backup Project”Once you’ve connected your storage drive, create your backup project
-
Click Create New Project
-
A Backups Project allows you to add 1 or multiple bases to a Project
Choose your Airtable base(s)
Section titled “Choose your Airtable base(s)”- If you’re using the Extension, On2Air Backups will automatically detect the Airtable base you’re in.
- Otherwise, choose your Airtable base
💡
If you see don’t see all of your Airtable bases, this likely means you only gave On2Air access to 1 Airtable base when setting up the OAuth connection. Go to the Accounts and Integrations page in your On2Air account. Choose your Airtable connection and click Reconnect to Airtable. This will go through the Airtable to On2Air connection process again. To allow us to access all Airtable bases and workspaces, choose ‘All current and future bases in all current and future workspaces”. You can also select specific bases if you prefer.
- Click Configure Settings
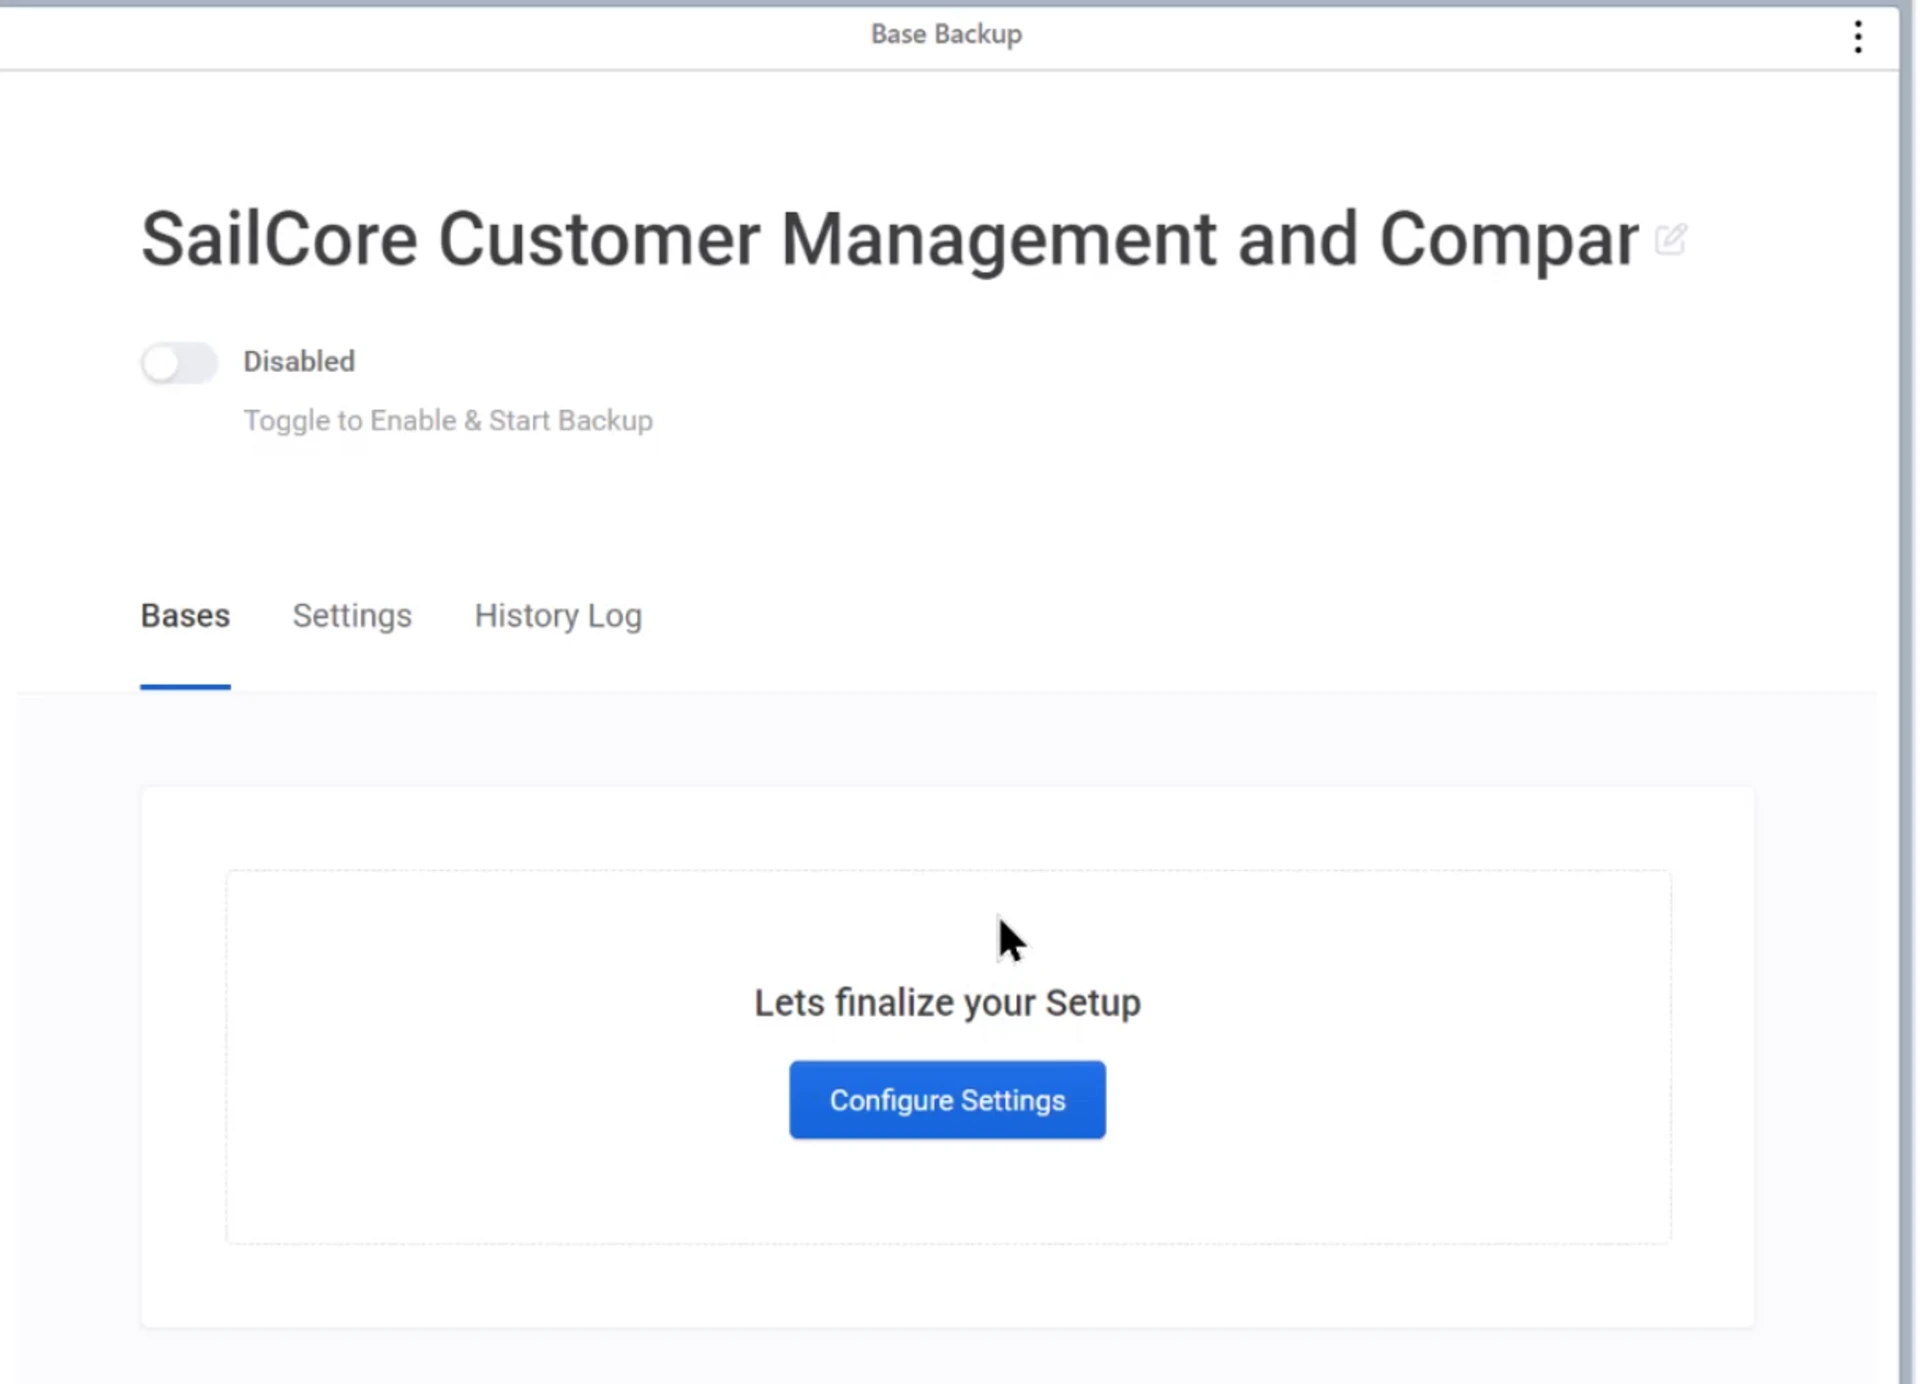
Choose or create a folder in your storage drive
Section titled “Choose or create a folder in your storage drive”-
Next to Storage Connection, choose Update
-
By default, we’ll add the backup to the root of your storage drive. You can change to a specific folder

- Now, you can Choose a folder from your storage drive or Create a New Folder where your backups will be sent
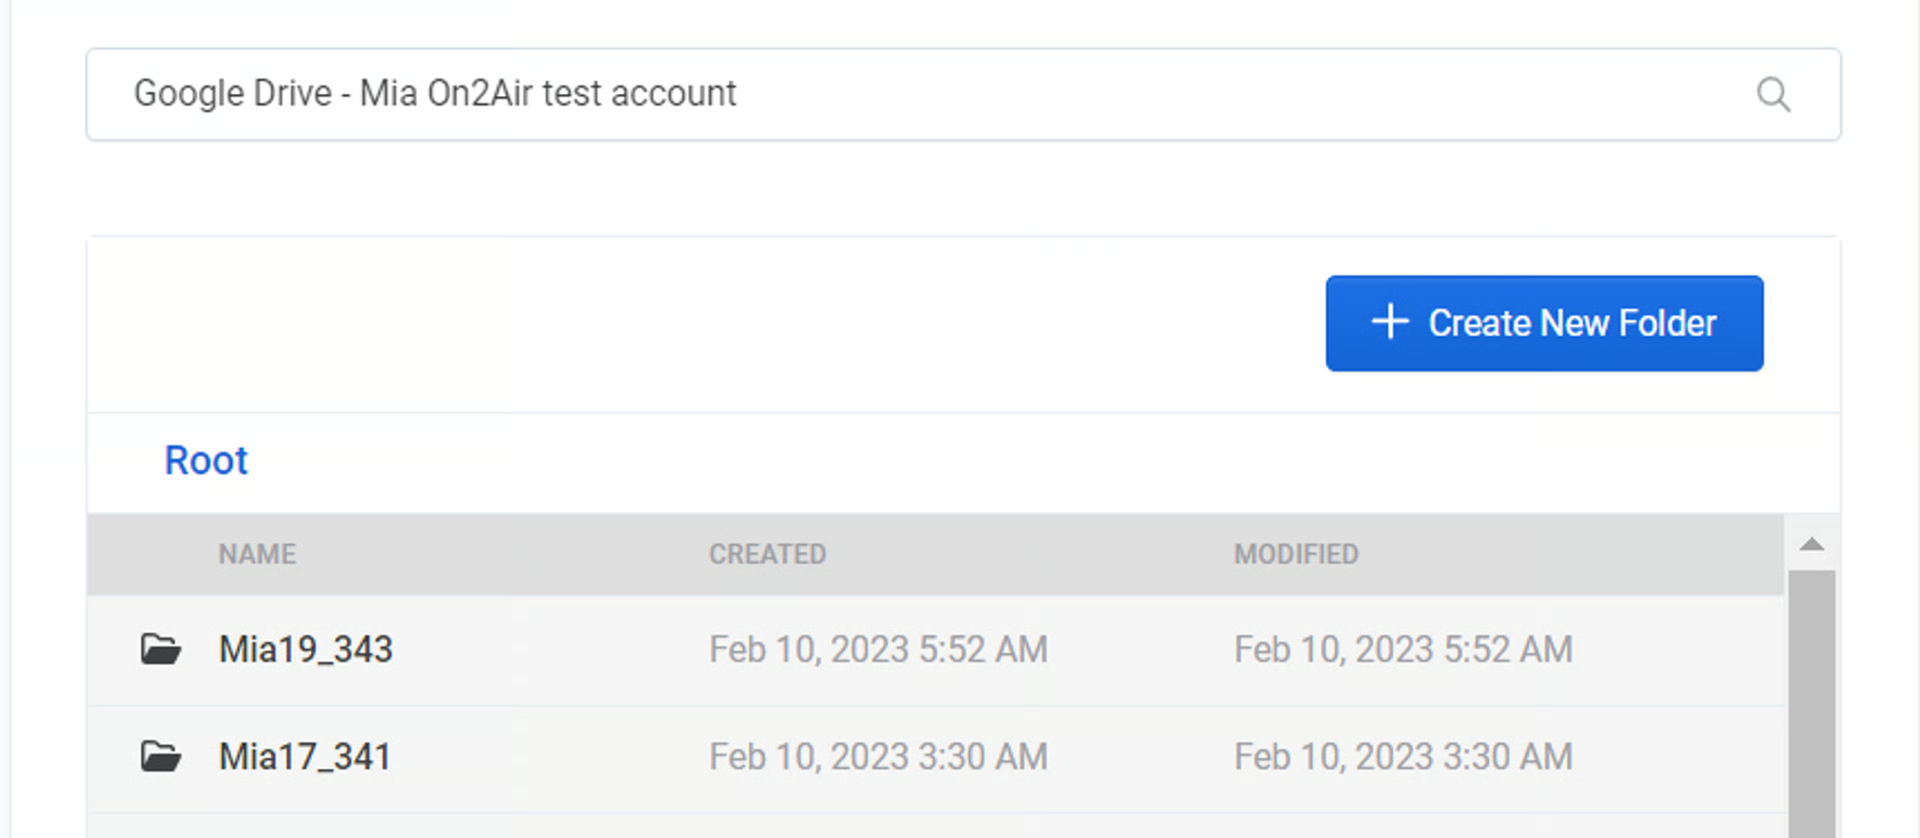
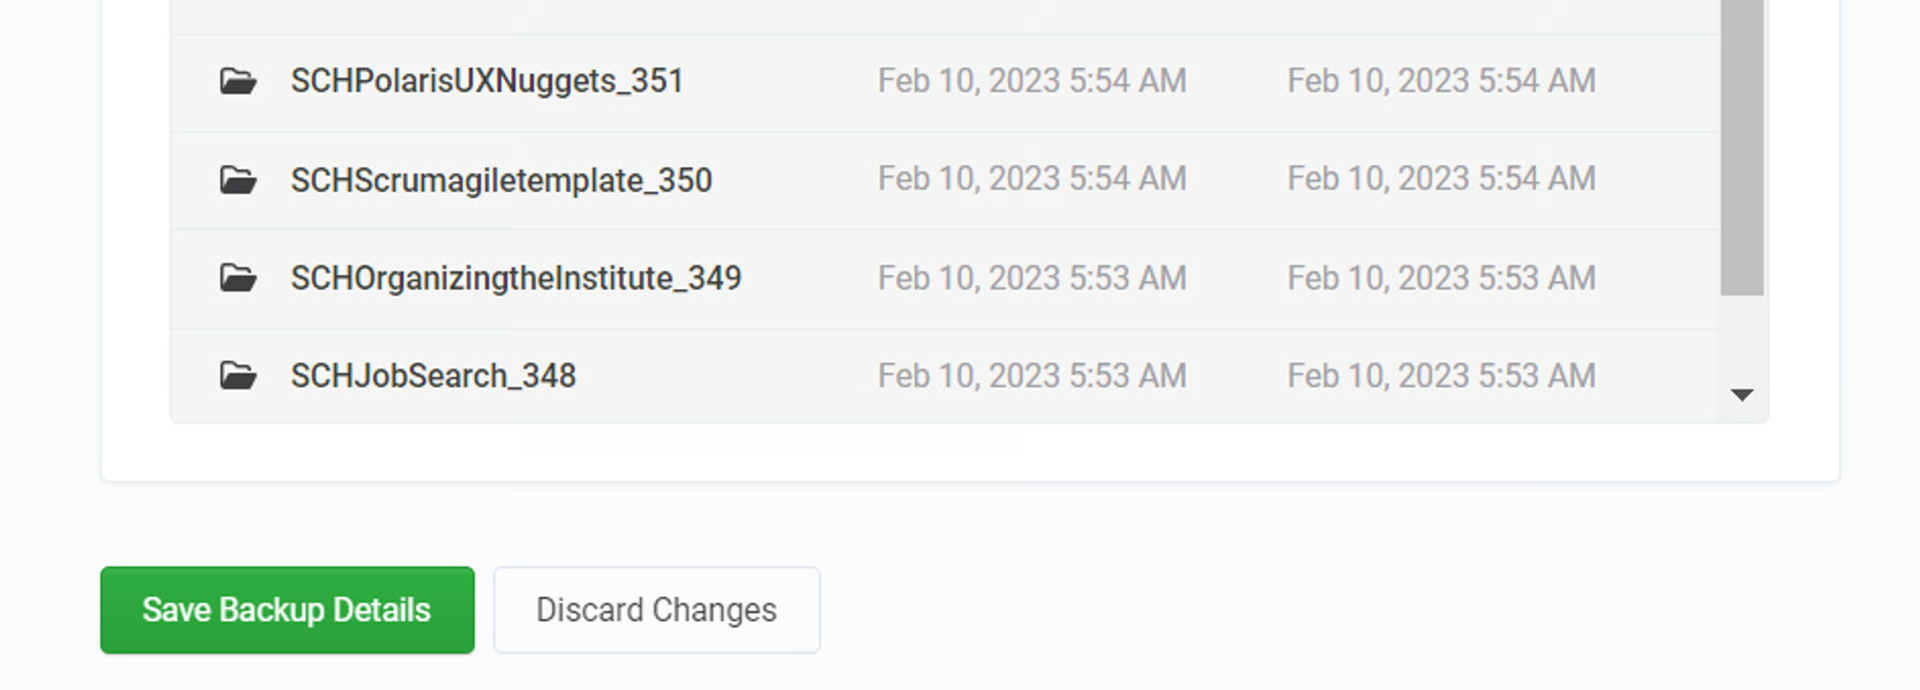
Then click Save Backups Details
Enable the Trial Schedule
Section titled “Enable the Trial Schedule”- Now that your folder is chosen, the Trial Schedule is automatically set to One-Time
- Click Create Schedule
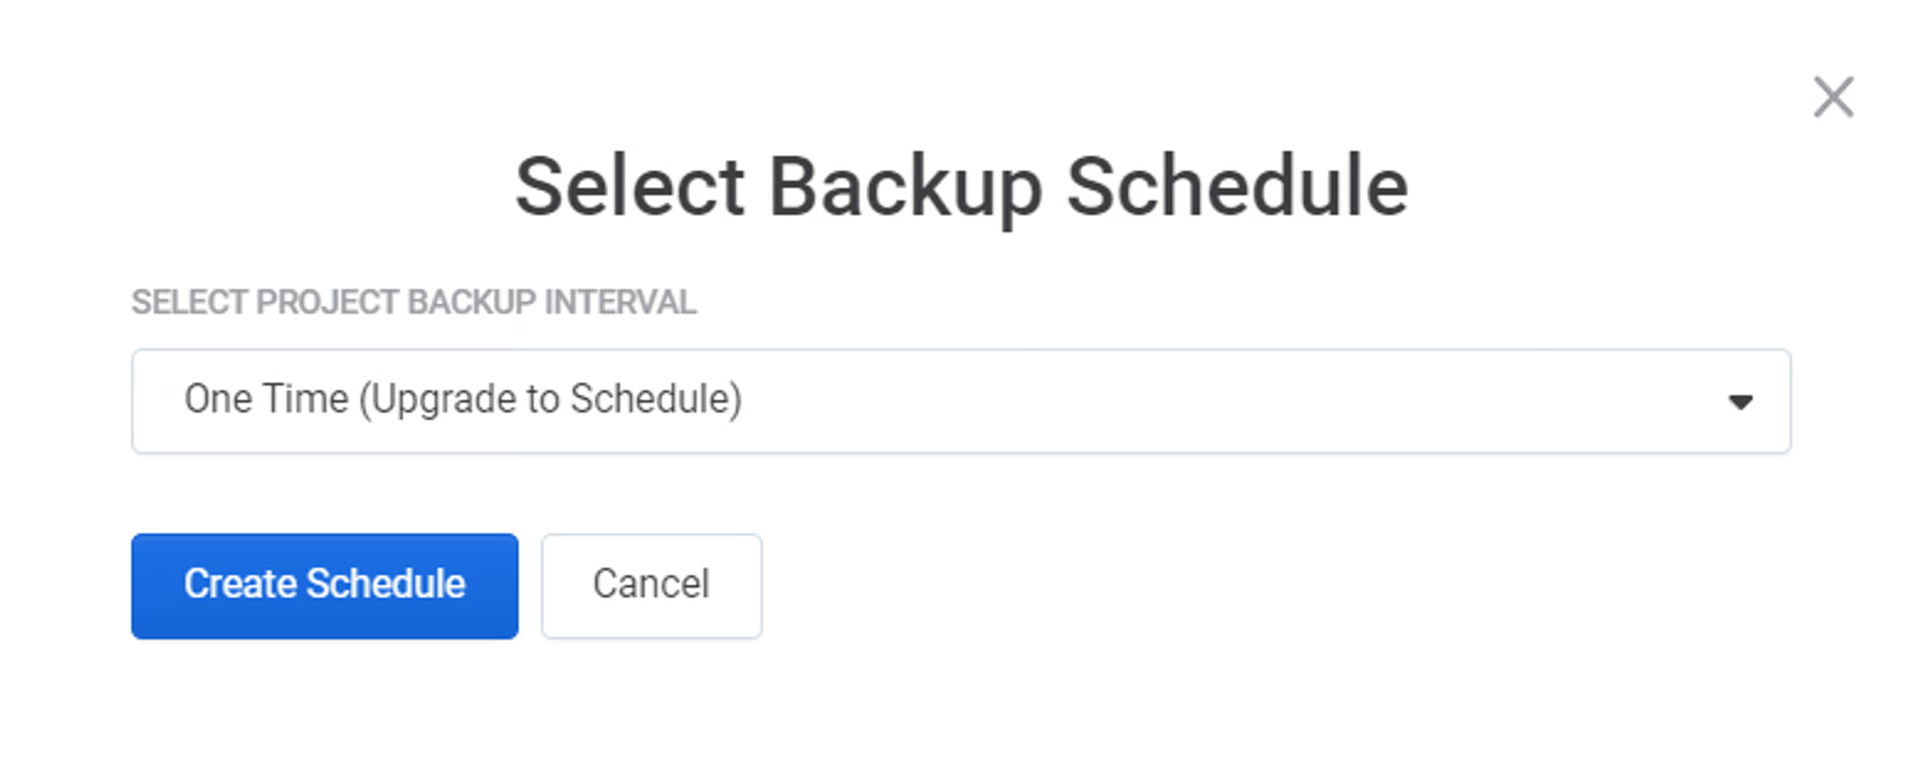
In the On2Air Backups Trial, we allow 1 Airtable Base, 10 Tables, 100 Records per table, and 25 Attachments (total). After the trial creates a backup to your storage drive, the backup project deactivates.
To enable an automated backup schedule, upgrade to a plan .
Once you’ve upgraded, you’ll then need to set the Schedule and Reactivate the backup.
- Upgrade to a Backups Plan
- Set the Backups Schedule (Upgraded Plans)
⚙
To enable full automated backups, upgrade to a plan - Learn about backup schedule options and plans
5. Click Start Backup
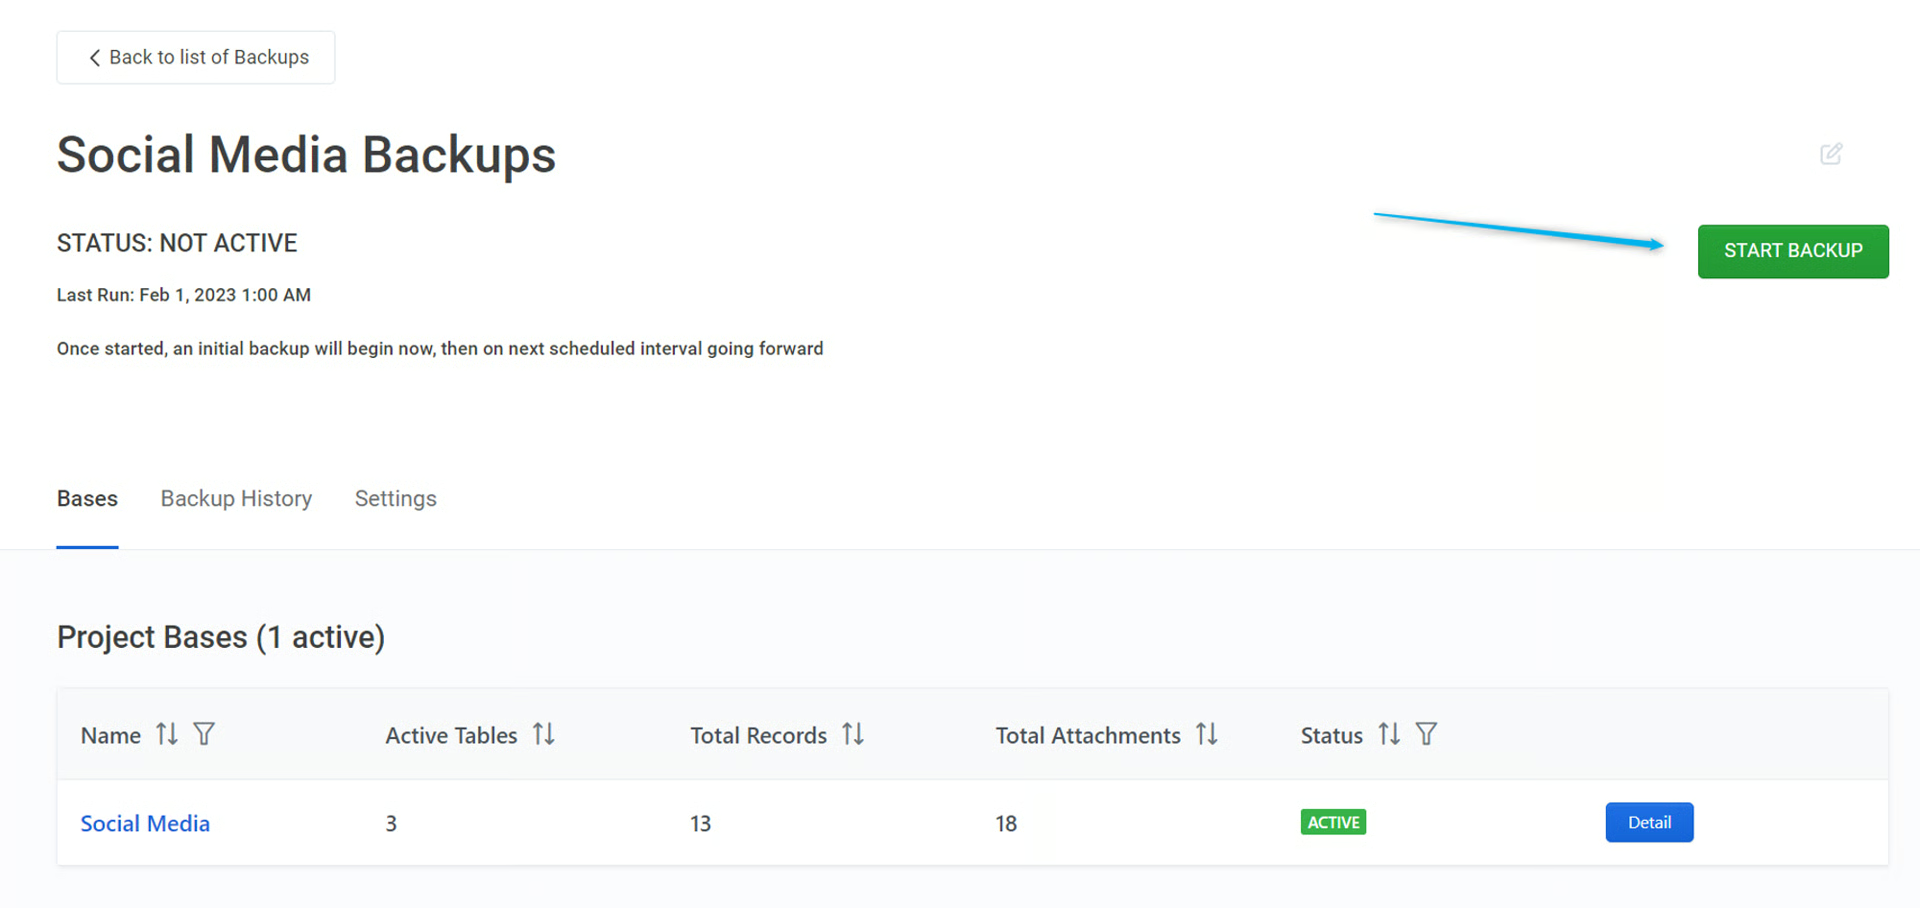
Section titled “5. Click Start Backup”- Click Start Backup to start your Backup

- The Status will change to Active while it creates a backup in your storage drive
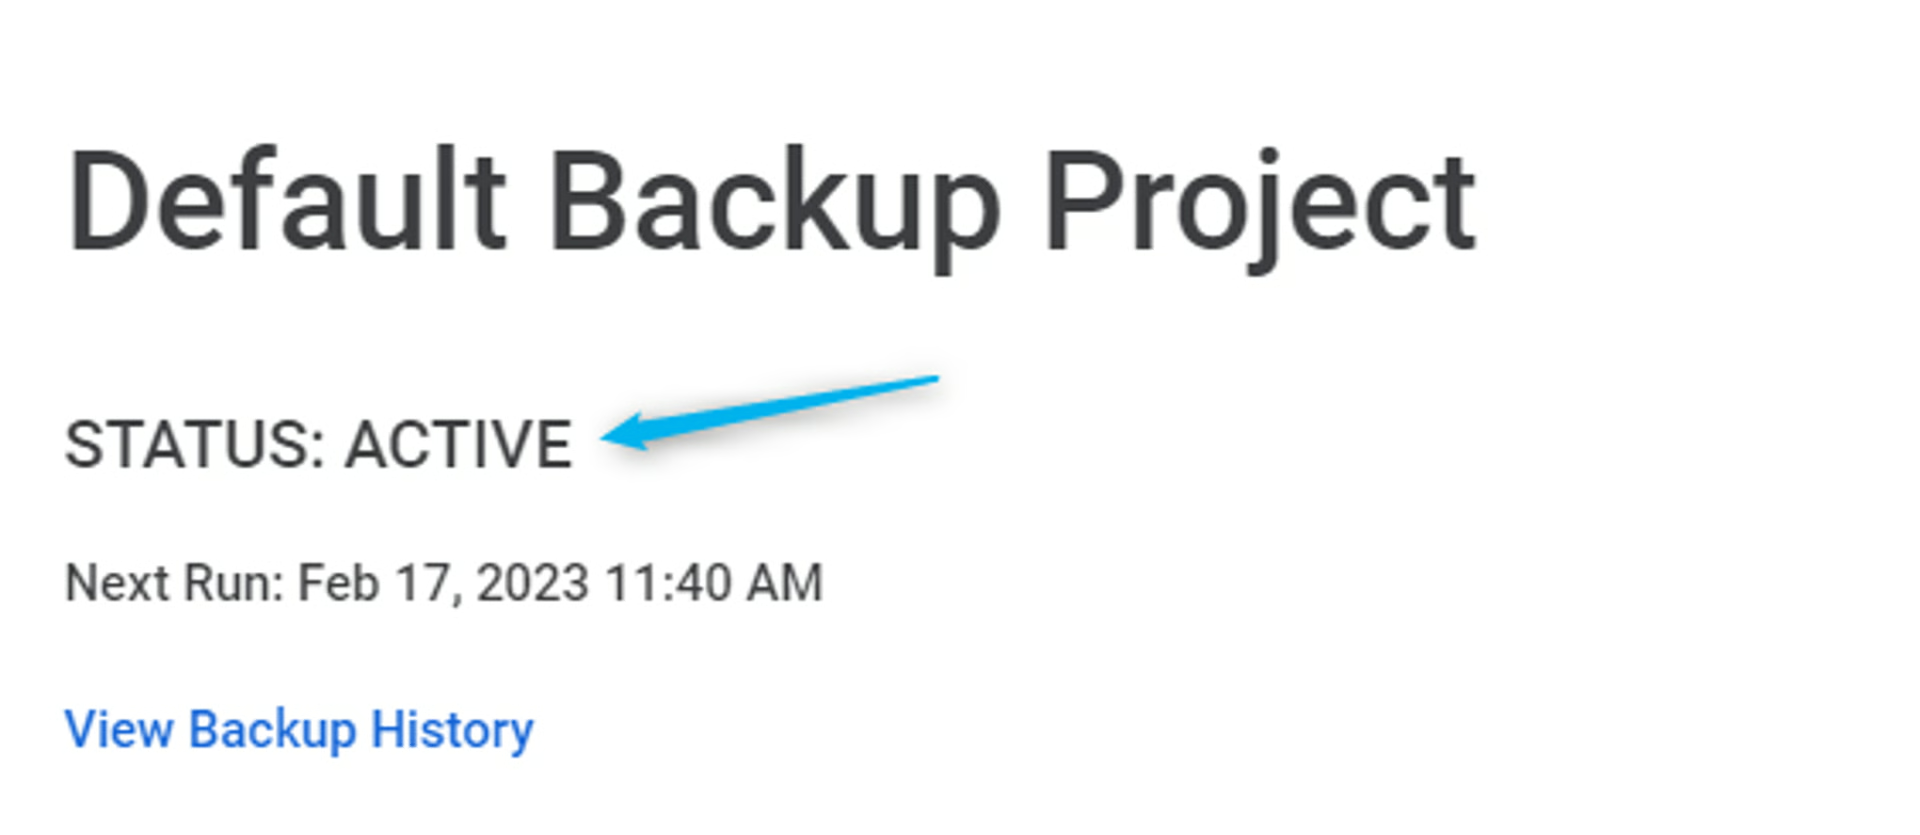
- Click Backup History to see the backups begin and when it’s done processing.
⭐
Backups will begin within approximately 1 minute. The initial backup takes time to complete the backup, depending on the number of records/fields in your Airtable base and the number of attachments. Subsequent backups will not take as long as we back up only the specific changes made.
- You can click Refresh on the Backup History page to watch the progress.

6. Upgrade for Automated Backups
Section titled “6. Upgrade for Automated Backups”To fully automate Airtable backups, upgrade to a Backups plan
On2Air Backups Plan
The Backup Schedule options available will depend on your plan
Available Plans and Schedules
STARTER - $9.99/month - UPGRADE 1 Airtable Base, 50,000 Records, 2,500 Attachments, Monthly Backup Schedule
ESSENTIALS - $29.99/month - UPGRADE 15 Airtable Bases, 250K Records, 25K Attachments, Monthly or Weekly Backup Schedule, Meta-Data Backups
PROFESSIONAL - $49.99/month - UPGRADE 50 Airtable Bases, 1 Million Records, 500K Attachments, Monthly, Weekly, or Daily Backup Schedule, Meta-Data Backups
PREMIUM -$79.99/month - UPGRADE 250 Airtable Bases, 5 Million Records, 1 Million Attachments - Monthly, Weekly, Daily, Hourly Backup Schedule, Meta-Data Backups
SCHEDULE OPTIONS
Monthly - Choose a day of the month Options are: * 1st day of month * Mid month (15th) * Last day of month
Weekly - Choose any day of the week
Daily - Choose a time of day * Choose a specific hour of the day * Toggle Yes to Include Weekends (Optional)
Hourly - Choose hourly * Toggle Yes to Include Weekends (Optional)
7. Choose Your Backups Automation Schedule (Paid plan)
Section titled “7. Choose Your Backups Automation Schedule (Paid plan)”- Once you’ve upgraded, you need to set your new automated Schedule
- In your Backups Project, click Settings, then click Schedule

- Choose your Backup Project Interval and Interval Value
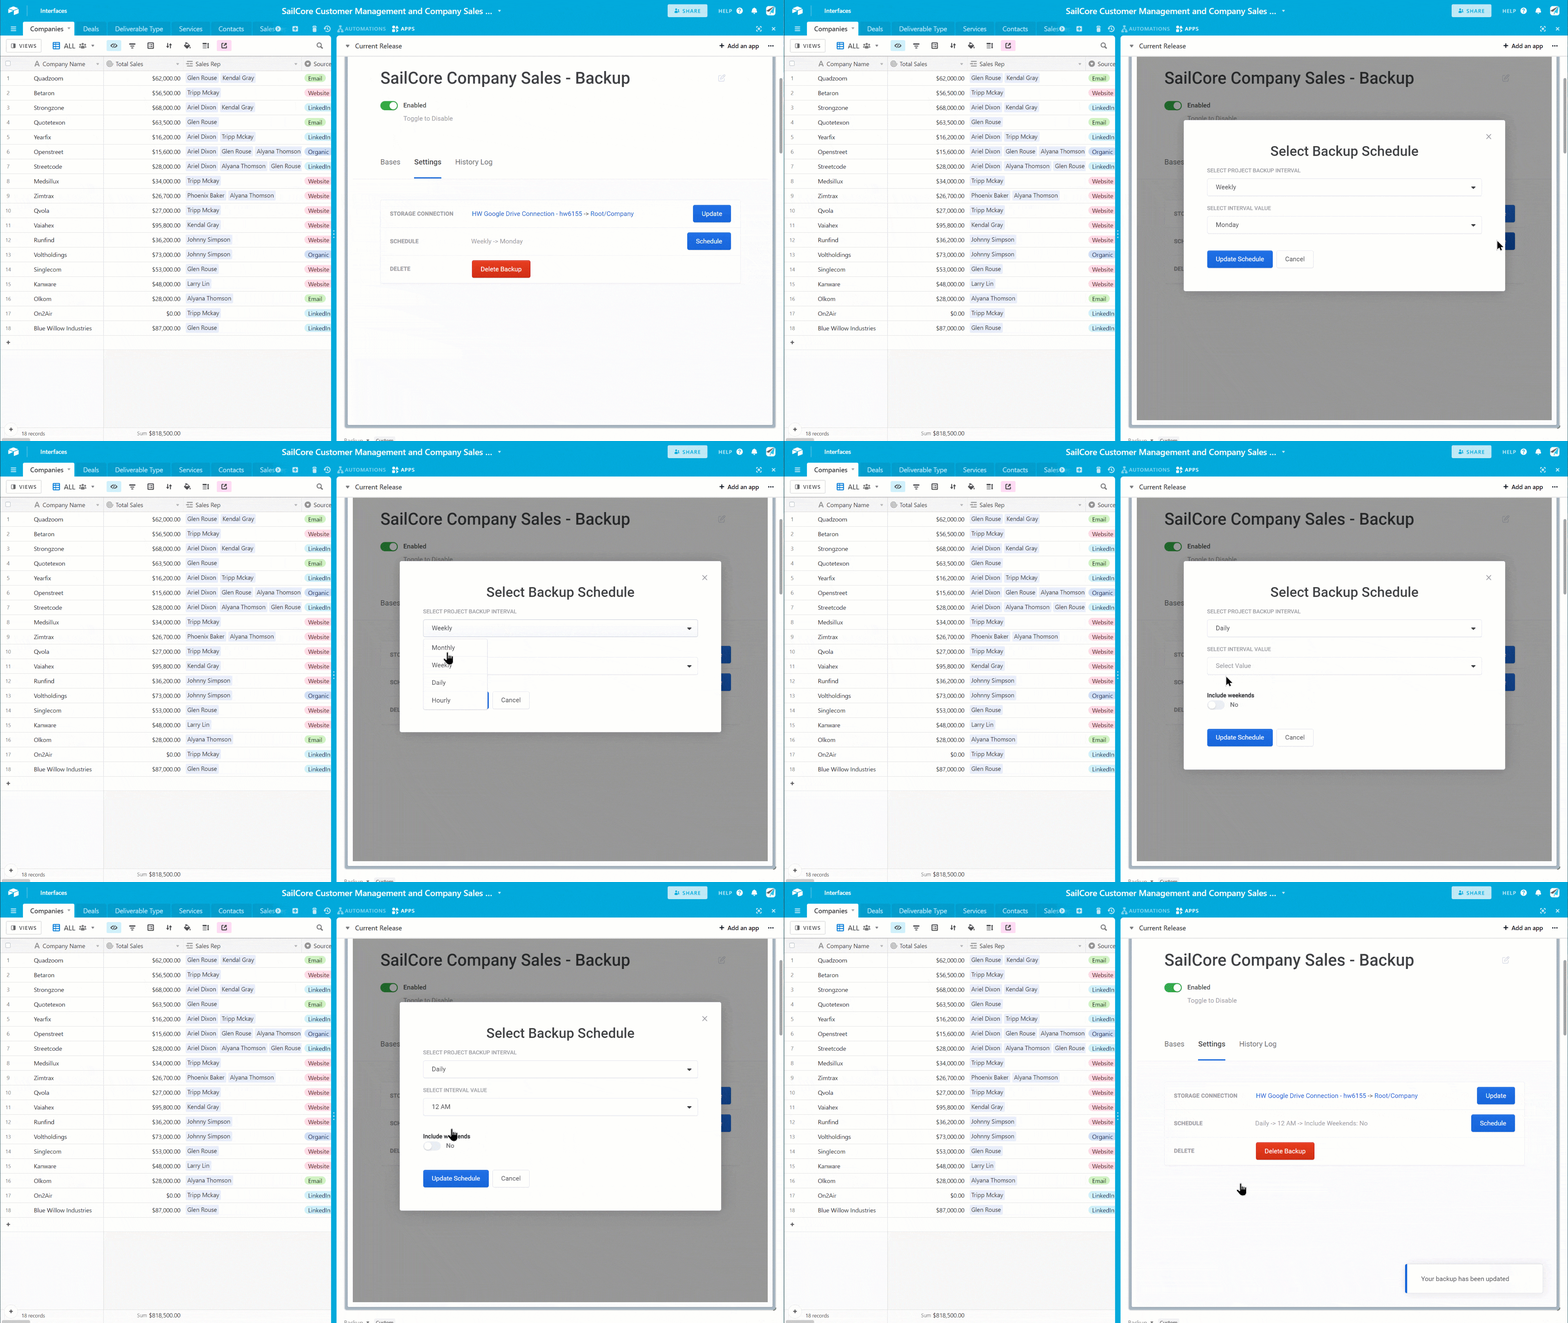
- Click Update Schedule
⚙
You can also Customize Your Base Backup (Include/Exclude Fields, View, and Attachments)
Enable Your Backup
Once you’ve set your backup schedule (paid plans), click Start Backup
Customize Your Backup (Include/Exclude Fields, View, and Attachments)
Section titled “Customize Your Backup (Include/Exclude Fields, View, and Attachments)”You can customize what’s included in your Airtable base backup, such as specific fields, views, or attachments.
 Customize Your Base Backup (Include/Exclude Fields, View, and Attachments)
Backups History Log
Section titled “Backups History Log”See how you can view all your backups details and history
 Backups History Log and Details
Backup Folder Structure and File Name Convention
Section titled “Backup Folder Structure and File Name Convention”Learn how we name the files and attachments in your storage drive
 Backup Folder Structure and File Name Convention in On2Air Backups
Need Support?
Section titled “Need Support?”Send us a message. If we’re online, we’ll get back to you as soon as possible. If not, we’ll follow up by email.
⚙
‣
Backup Folder Structure
‣
Previous Versions