Design the Submission Page
🔴 On2Air Forms has been shutdown to focus on our On2Air Backups Airtable app Learn more about automated Airtable backups - on2air.com
You can choose what happens after a form is submitted. You can display a page with both Airtable form data and static text, redirect to a URL, close the page or tab, or display the form again to create or update a record.
-
Label on the Submission Button
-
Page Submission Options
-
Show Page
-
Redirect URL
-
Close Page/Tab (Coming Soon)
-
Create New (Coming Soon - Use Show Page for Create New)
-
Continue Editing (Coming Soon)
-
Submission Page Message
-
Hide the Submission Button
-
Next: Share Your Form
-
More Design Tutorials
Label on the Submission Button
Section titled “Label on the Submission Button”You can change the text displayed on your submission button or hide the button completely.
To change the text on the Submission button
- Go to Designer > Page > Submission
- Under Submit Button, enter the text you want displayed on the button

Page Submission Options
Section titled “Page Submission Options”Show Page
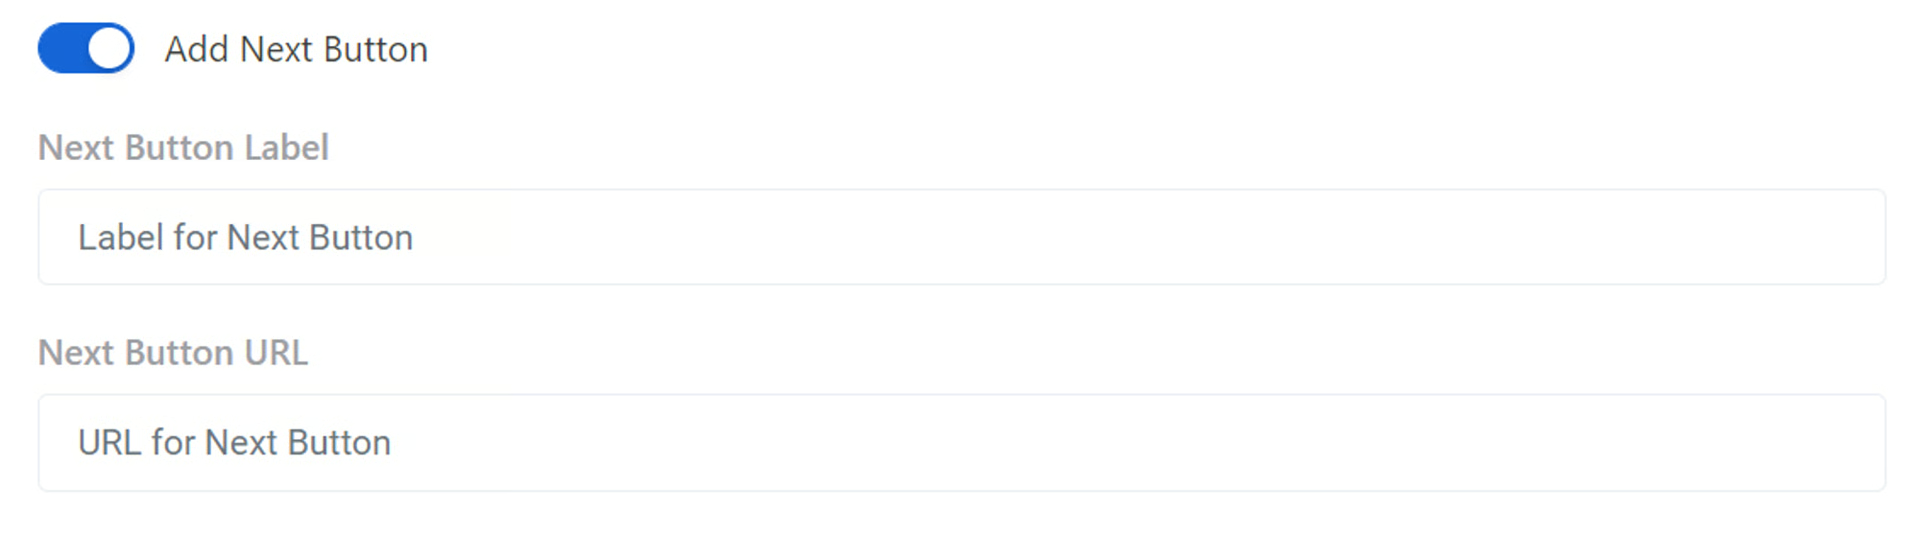
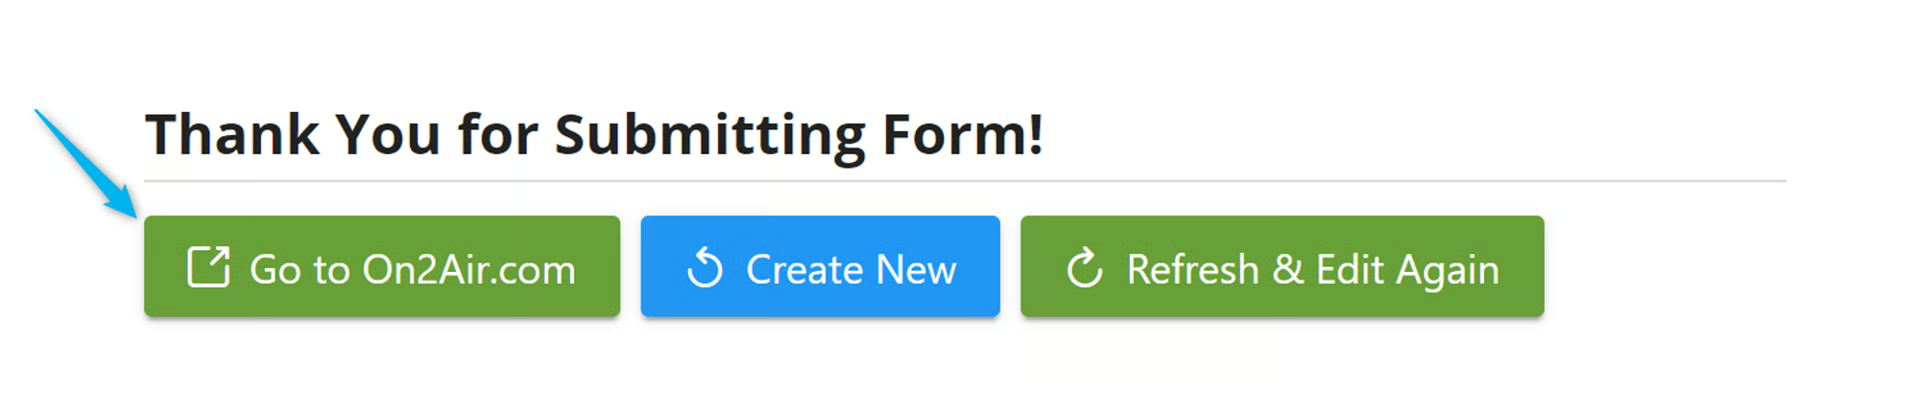
Section titled “Show Page”If your Page Submission option is Show Page, you can add buttons to the page to display after the form is submitted
Options:
Show Create New Button (On Create Only) - Display a button that will allow the user to click and create a new record


Show Refresh/Re-Edit Button (On Edit Only) - Display a button that allows the user to edit the form entry they just submitted


Add Next Button - - Display a button that allows the user to go to the a specific URL
Redirect URL
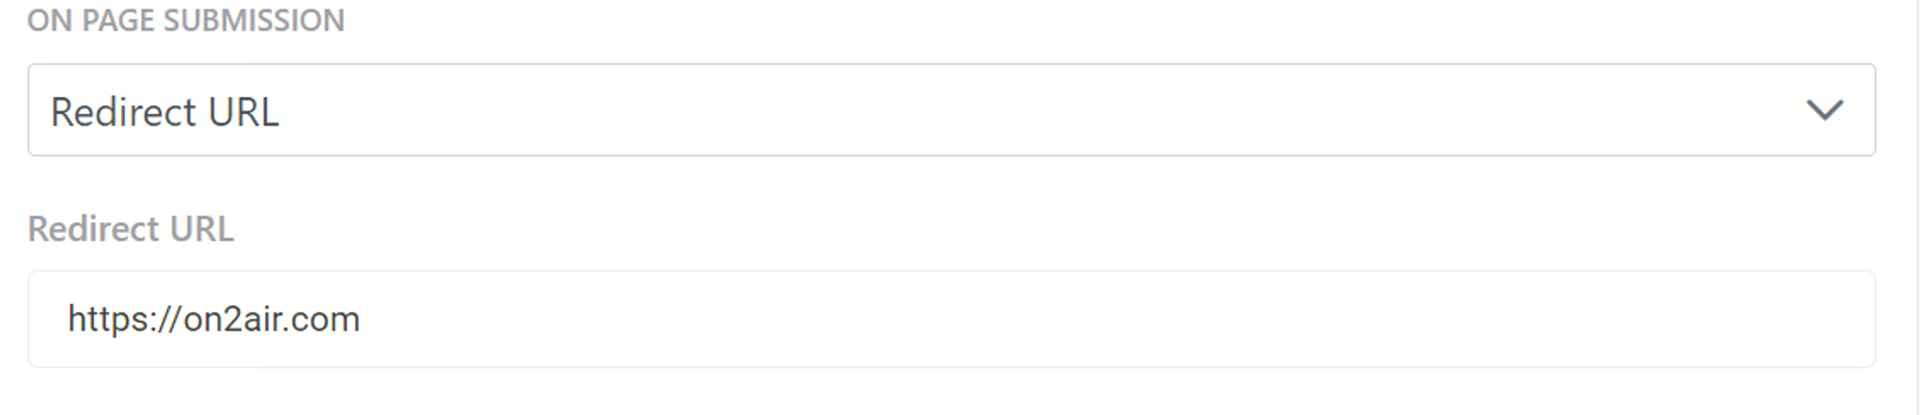
Section titled “Redirect URL”Once a form is submitted, you can redirect the user to a custom URL.
- Enter your custom URL in the field
Close Page/Tab (Coming Soon)
Section titled “Close Page/Tab (Coming Soon)”Create New (Coming Soon - Use Show Page for Create New)
Section titled “Create New (Coming Soon - Use Show Page for Create New)”Continue Editing (Coming Soon)
Section titled “Continue Editing (Coming Soon)”Submission Page Message
Section titled “Submission Page Message”You can customize your Submission page when using the Show Page option

- Click the icon next to Submission Page Message
You’ll be presented with an Editor to customize your submission page. You can add text, images, links, code, and Airtable field data from the form entry.
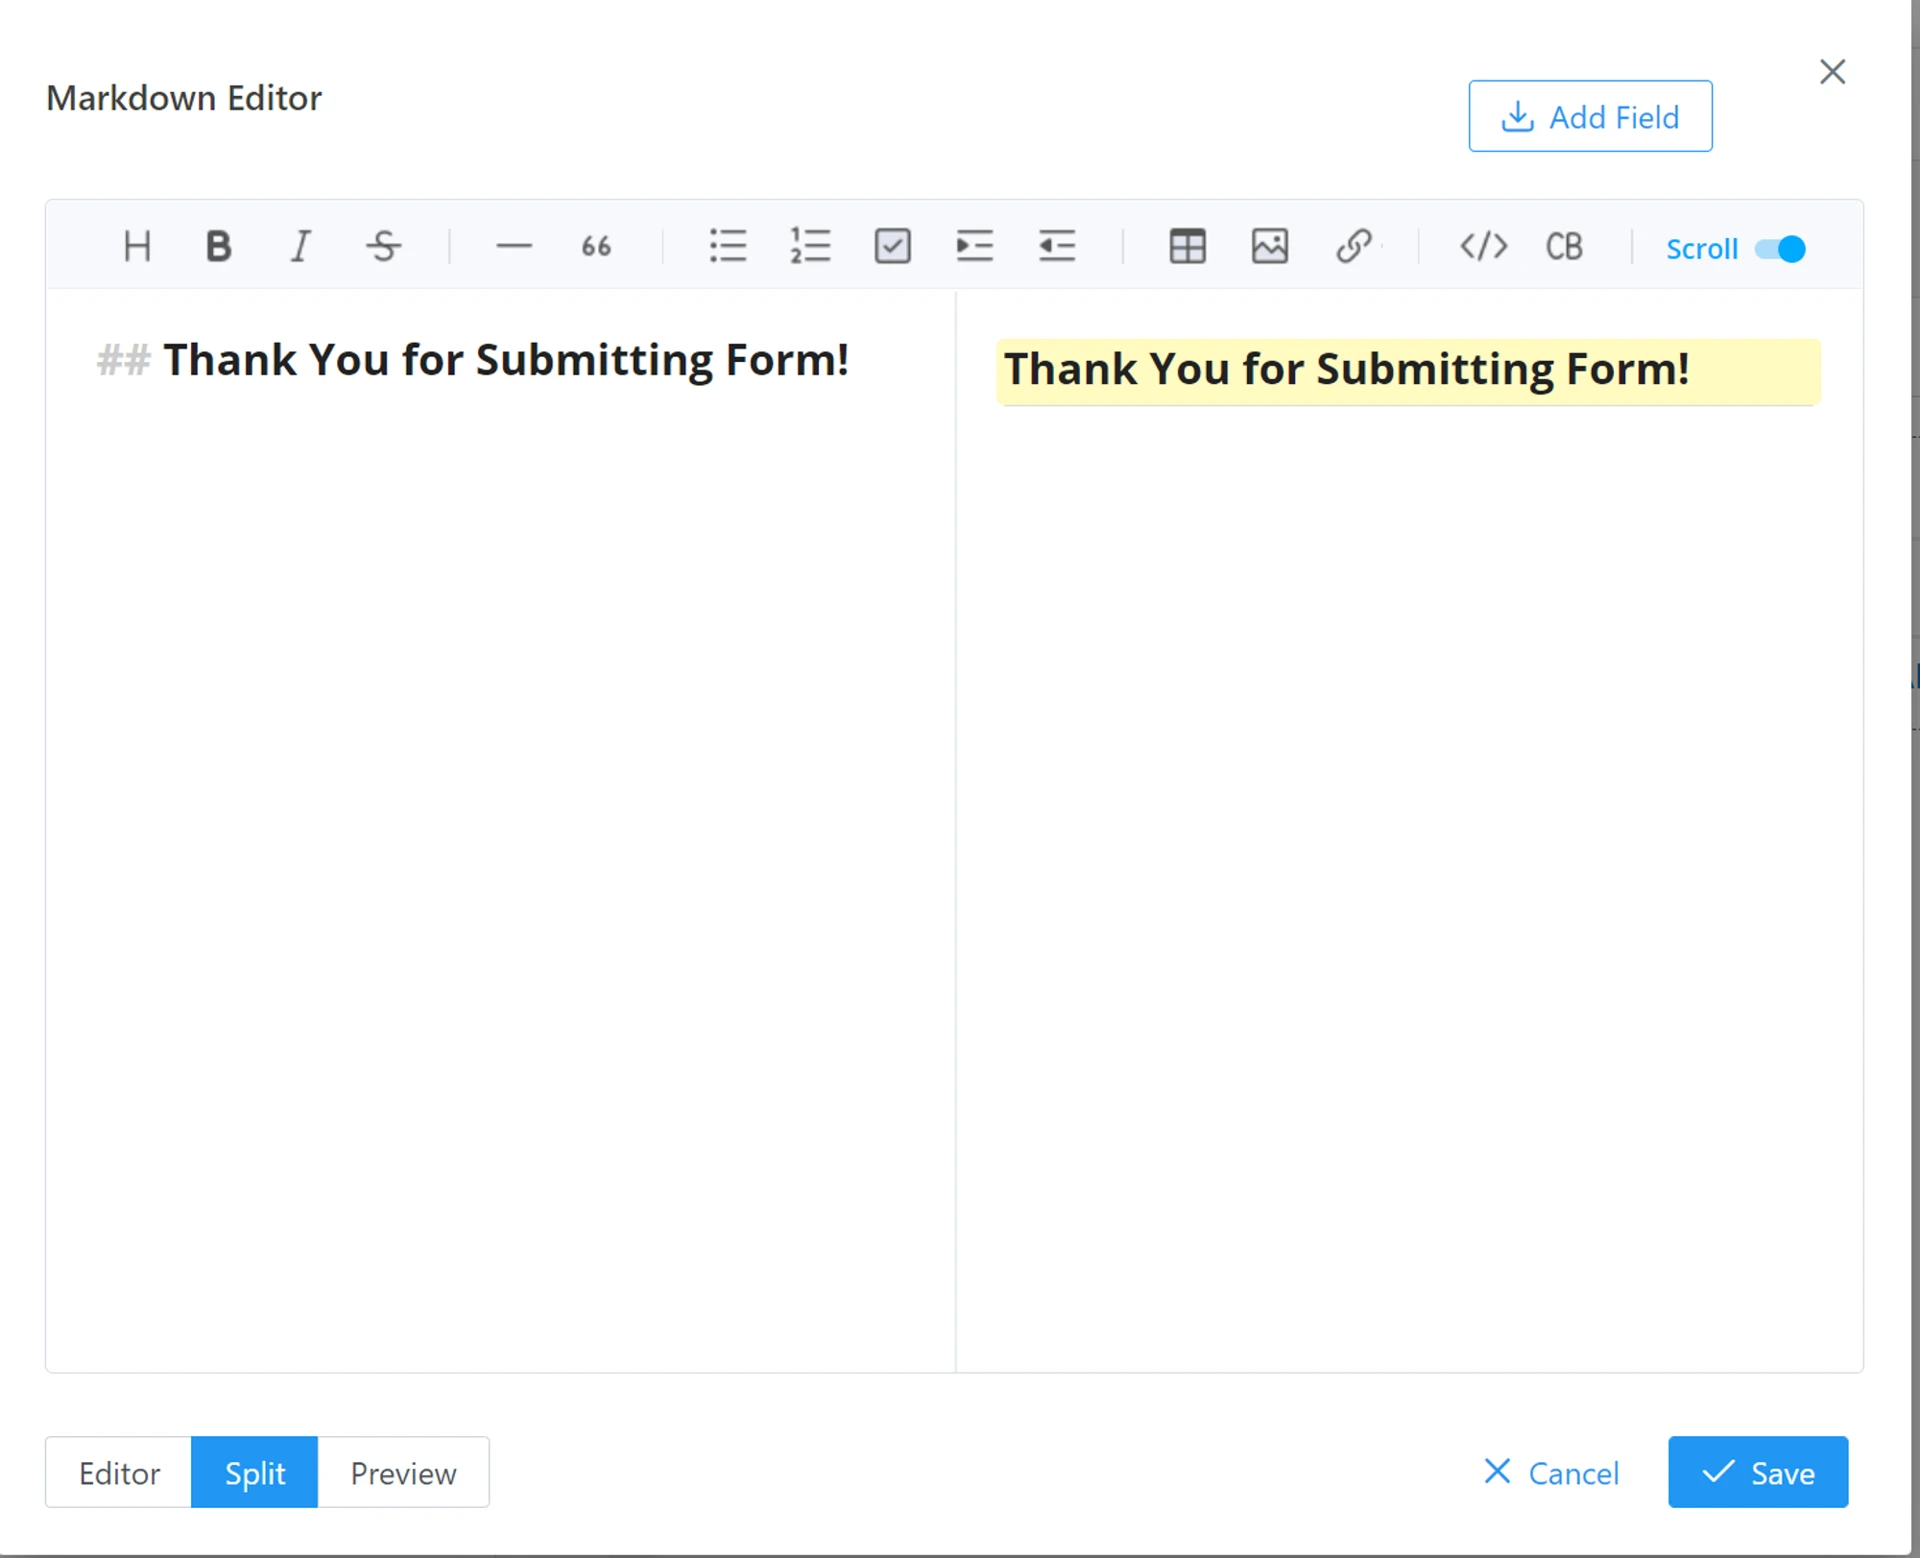
Use the Editor side to add information. You’ll see what it looks like in the Preview
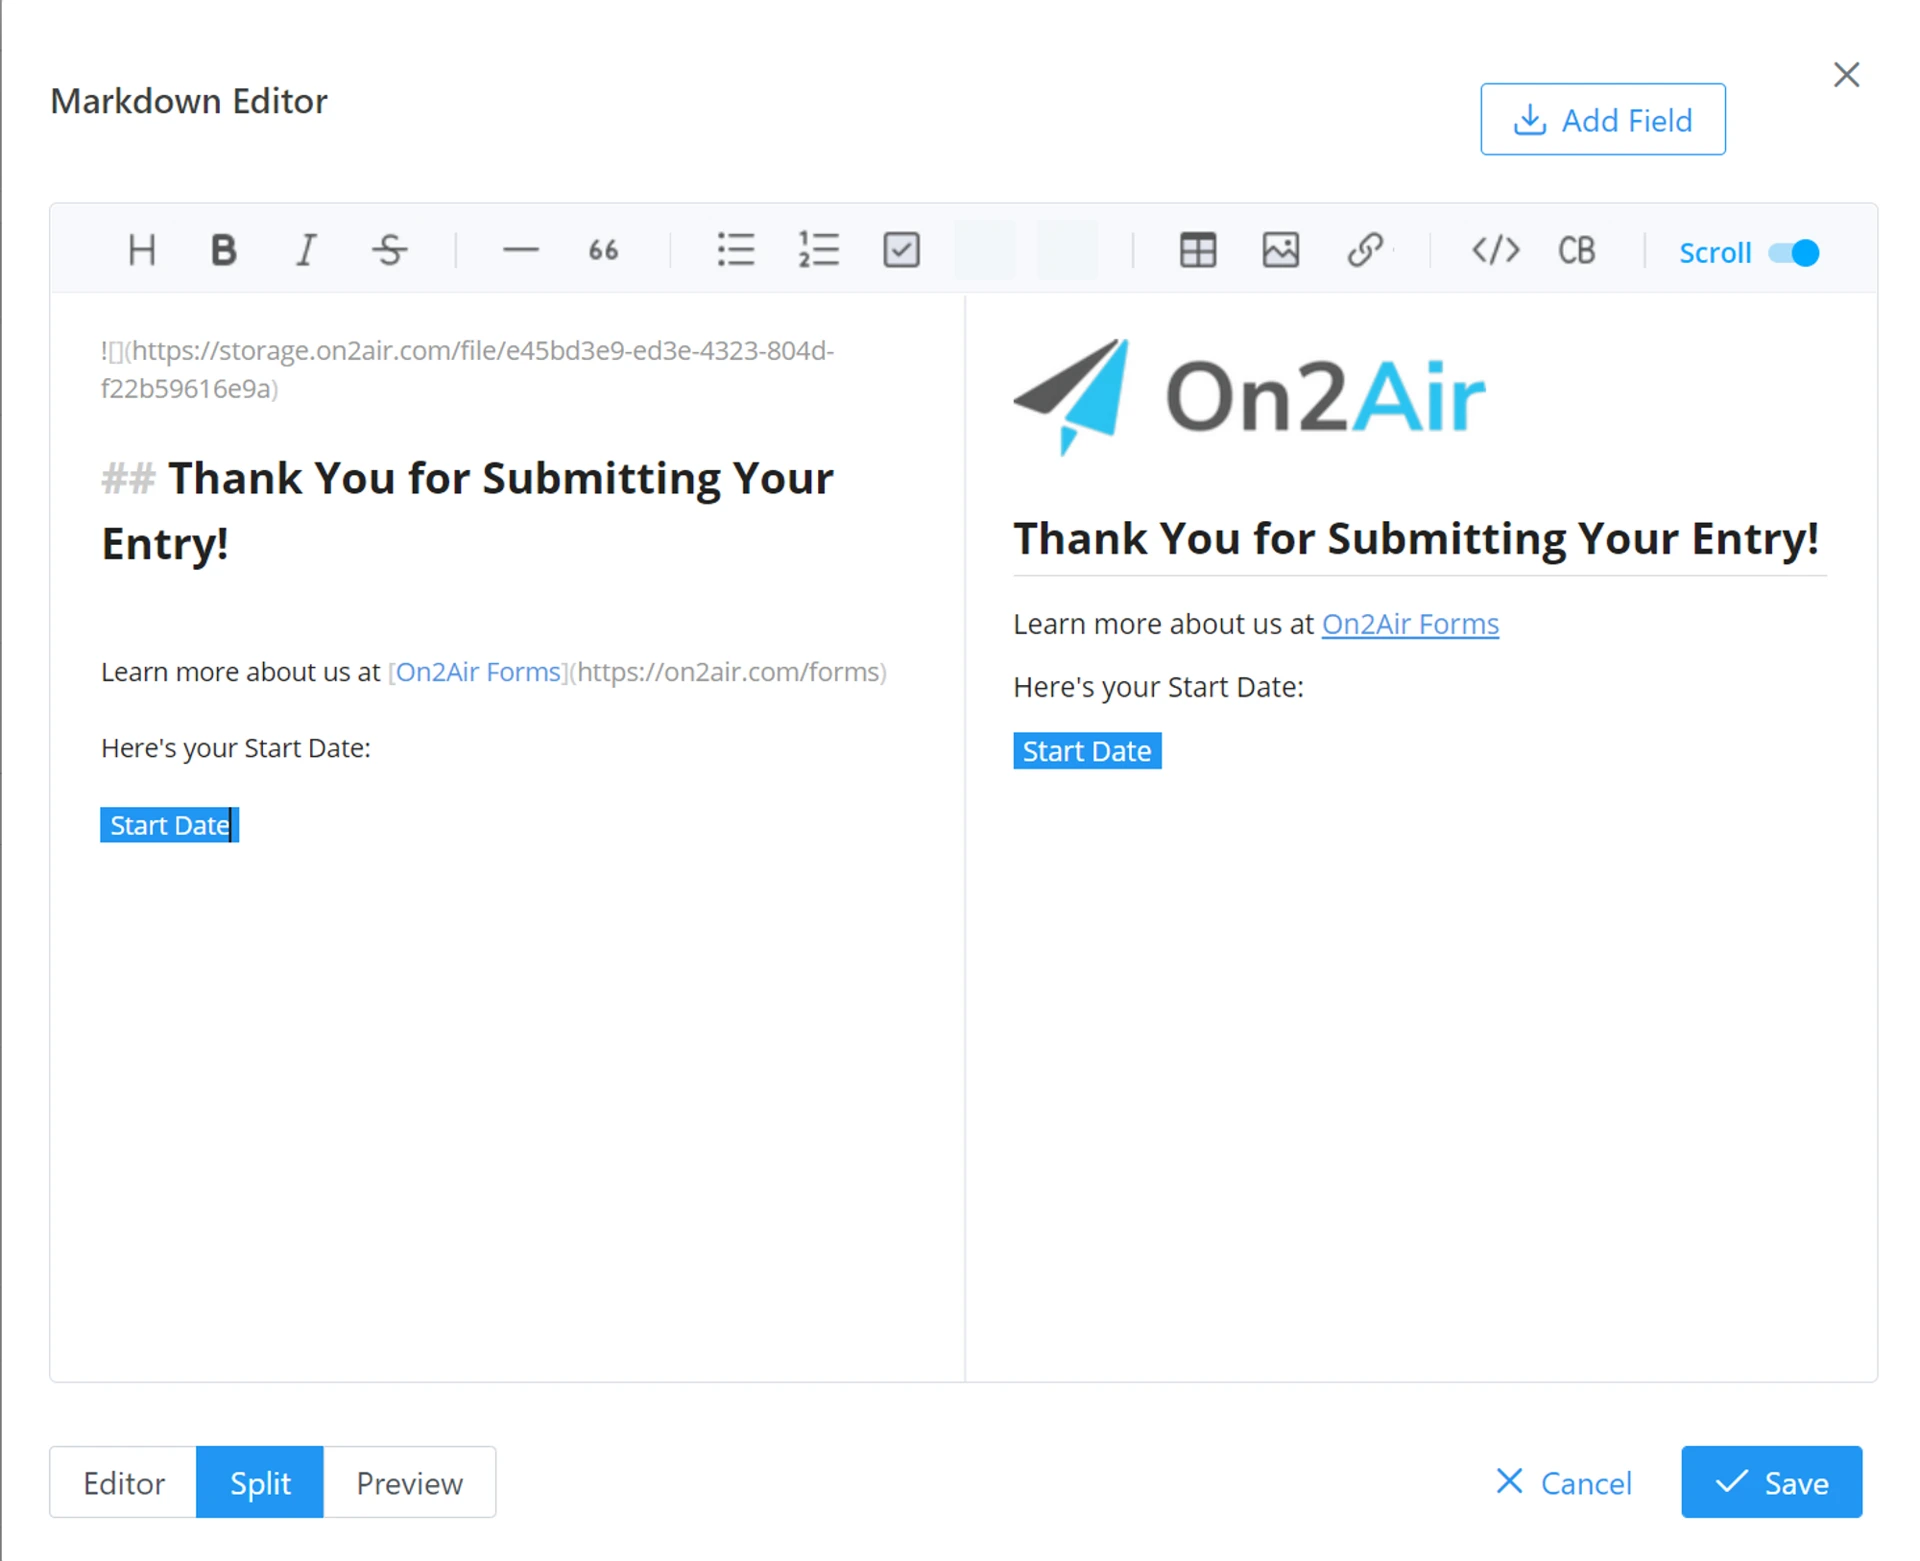
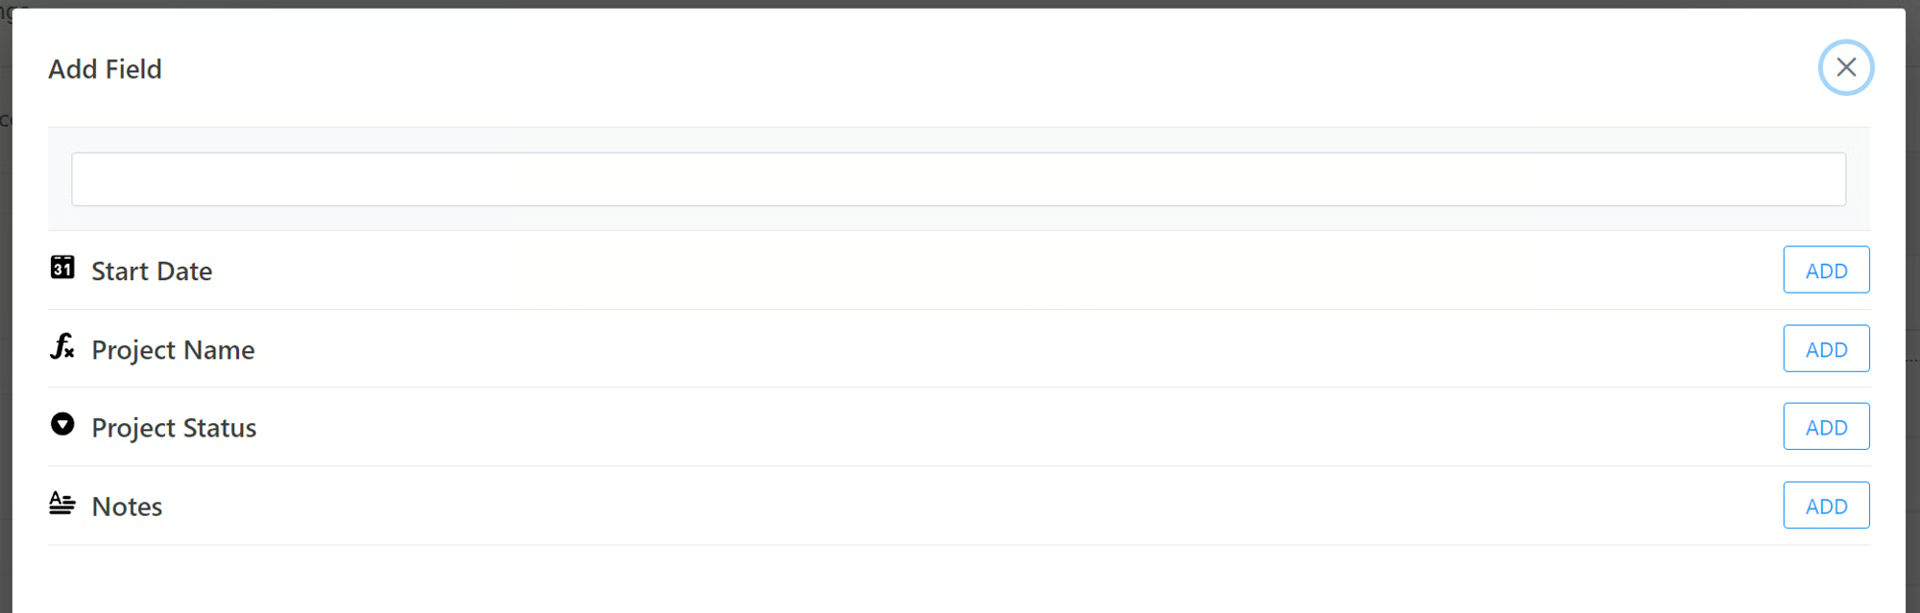
- To add Airtable data, add your cursor where you want the field and click Add Field
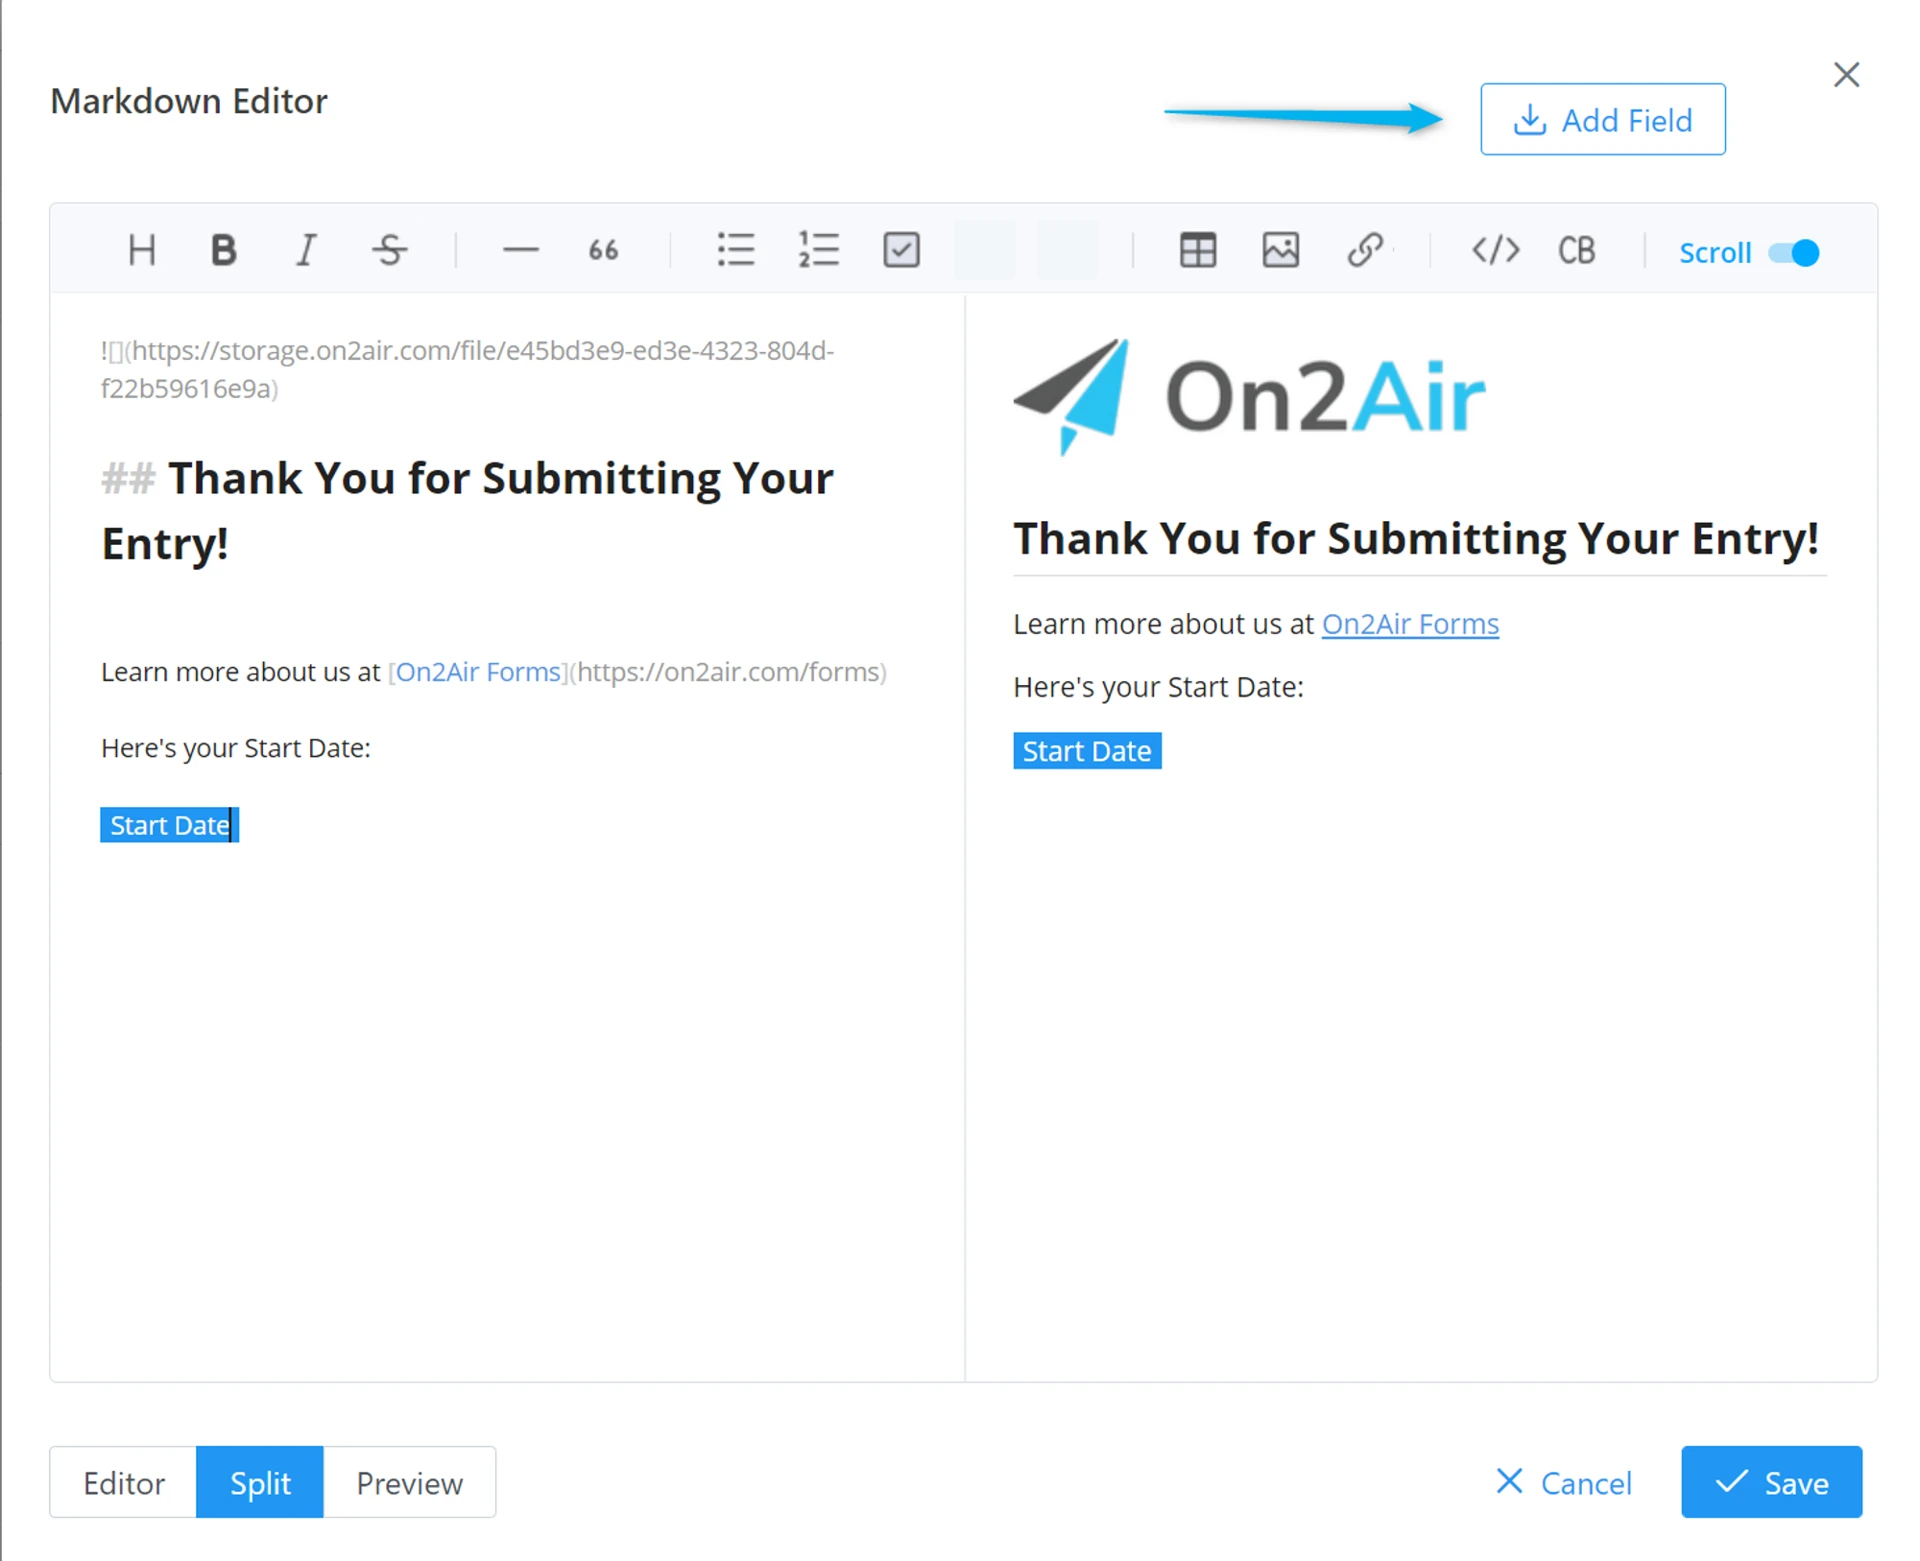
- Click Add next to the Airtable field data you want displayed on the form
- To use Linked Records as Dynamic fields, add an On2Air Formula on the form and use one of the following formulas. You can then add the field from the list of Airtable fields on your Submission page
Copy
JOIN(Field Name)CONCATENATE(Field Name)ARRAYUNIQUE(Field Name)- Your Airtable field will be displayed in blue
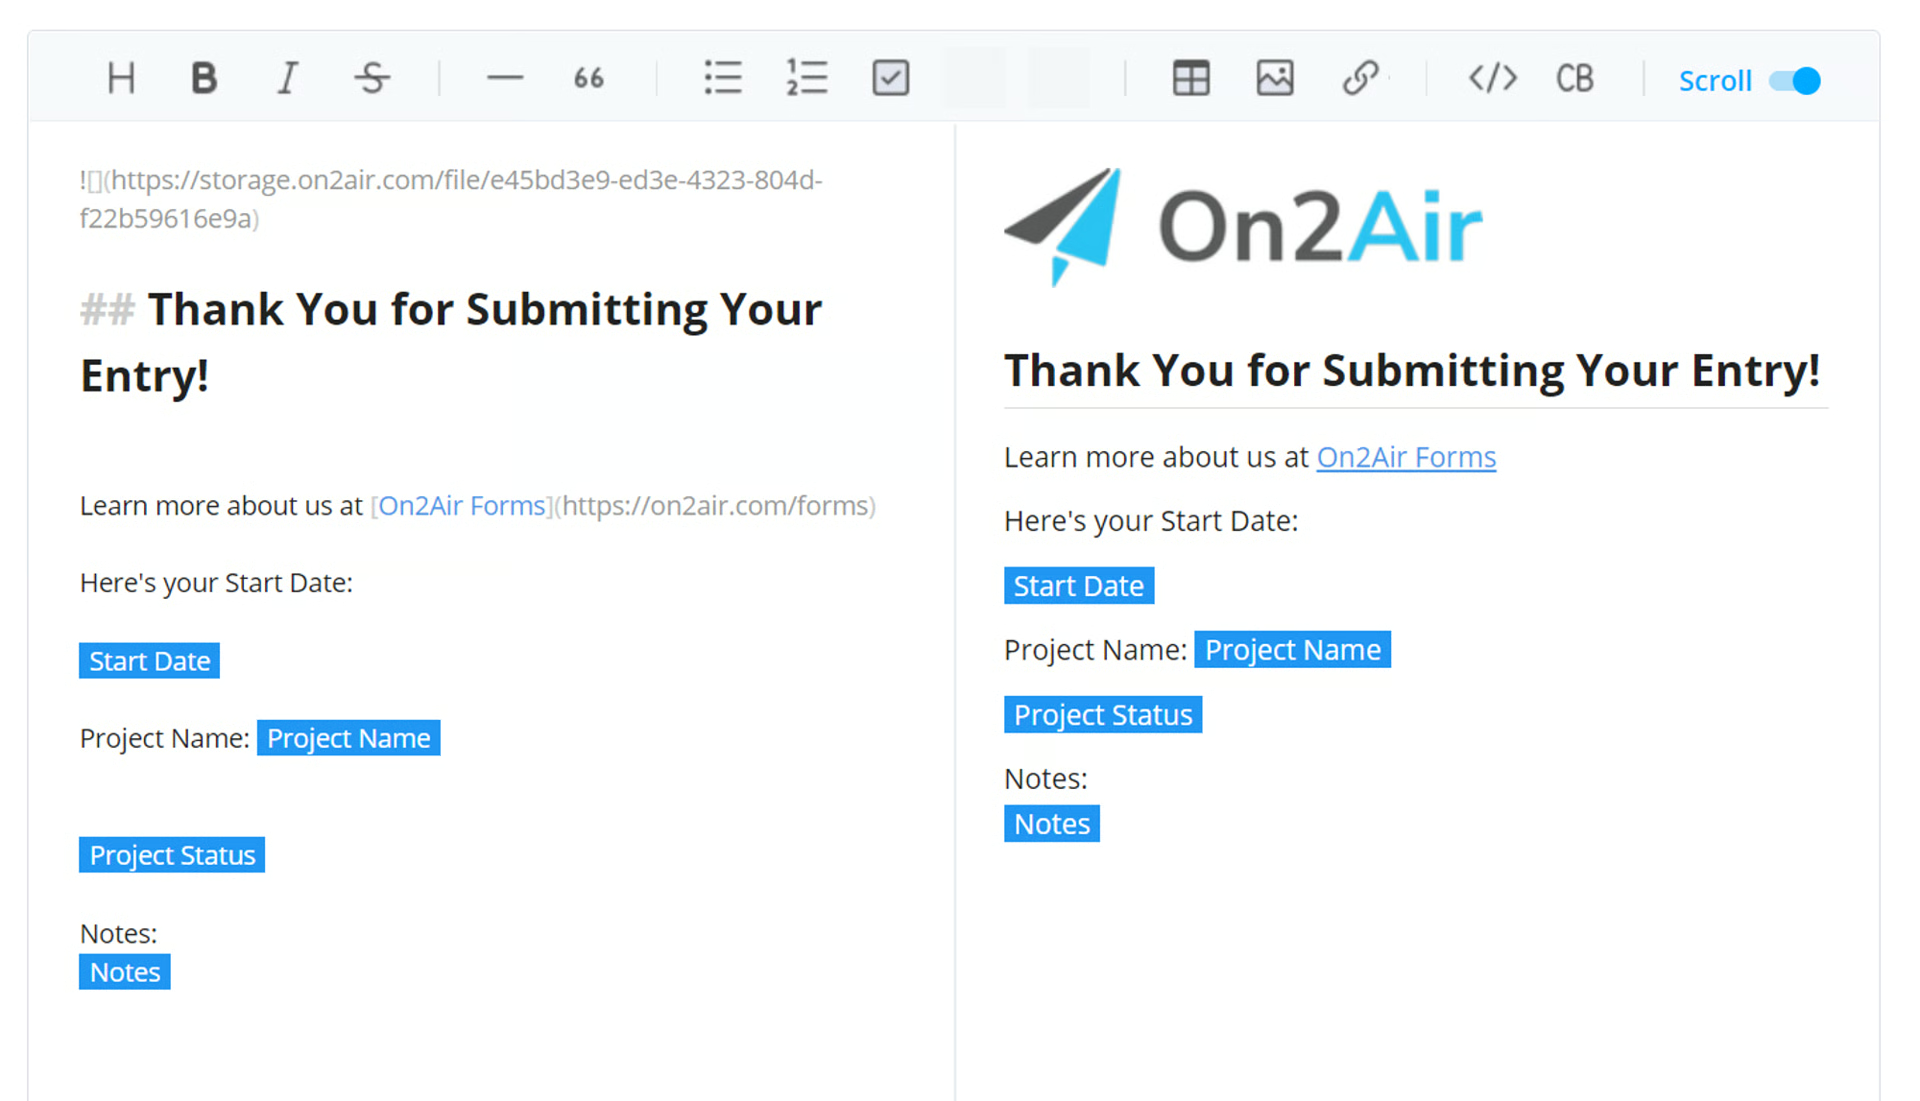
- You can add text before and after fields and you can add links to fields using [Airtable Field Name](URL or URL from Airtable field)
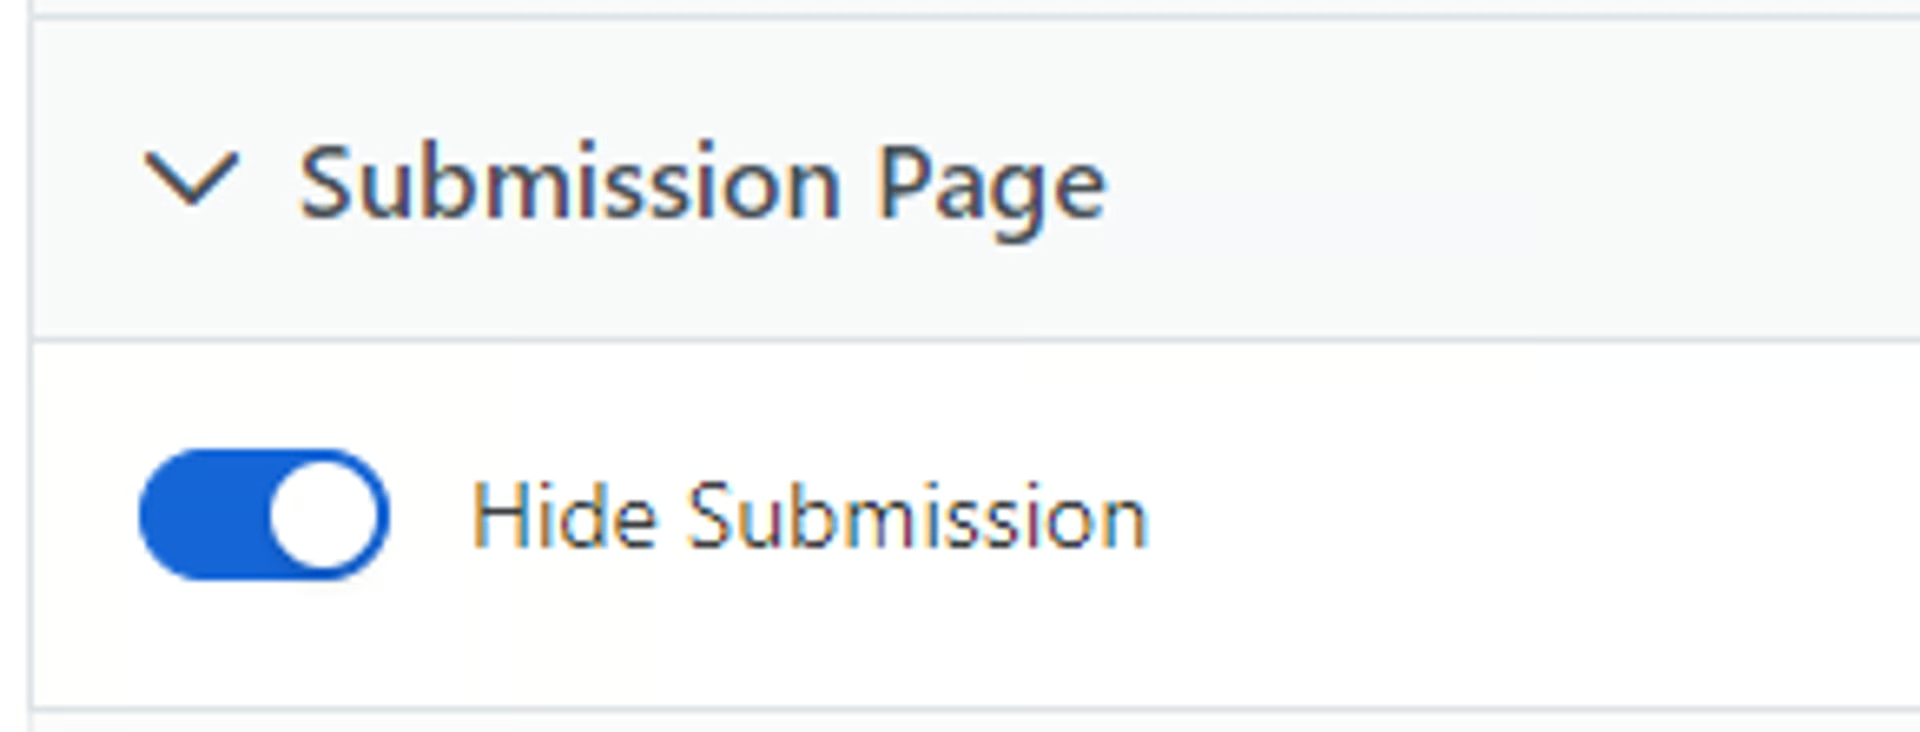
Hide the Submission Button
Section titled “Hide the Submission Button”If you want to use your Form Page to display information only and not allow submissions, you can hide the Submit button
To hide the submission button
- Go to Designer > Page > Submission
- Enable the Hide Submission toggle
Next: Share Your Form
Section titled “Next: Share Your Form”💡
Next:  Share Your Form
More Design Tutorials
Section titled “More Design Tutorials”
Use a Plain Text Editor in On2Air Forms
Design Your FormUser GuidesBuilding Forms

Use a JSON Editor in On2Air Forms
Design Your FormUser GuidesBuilding Forms

Use a Markdown Editor in On2Air Forms
Design Your FormUser GuidesBuilding Forms

Use an HTML Editor in On2Air Forms
Design Your FormUser GuidesBuilding Forms

Limit the Length of Field Characters
Design Your Form

Enable Save As Draft for Your Form
Design Your FormShare Your Form

Style Your Forms and Fields - CSS Class Styling
Calculations and FormulasDesign Your Form

Use Markdown with On2Air Forms
Design Your Form

Customize Your Form Styles and Buttons
Design Your FormUser Guides

Add or Remove On2Air Branding on Your Form
Design Your Form

Rearrange Fields in Your Form
Design Your Form

Design the Submission Page
Design Your FormUser Guides

Design the Form Header
Design Your FormUser Guides

Change the Layout of Your Form - Width and Multi-Column
Design Your FormUser Guides