

Imagine you woke up one day, sat at your computer to start working and realized you lost some or all of your valuable business data — customer details, project updates, financial records—gone.
One minute you’re creating linked records, tracking sales, talking to customers, and the next minute, your Airtable records have been deleted.
It’s a scenario no company wants to face and why creating Airtable backups is absolutely crucial.
Fortunately, there’s a solution: automatic backups.
In this article, we’ll guide you through the process of scheduling automatic backups for your Airtable data using the On2Air Backups extension. We’ll show you how to keep your information safe and secure, so you can focus on what matters most—running your business.
In this article
Creating a Backup Strategy for Your Data in Airtable
While Airtable is a powerful platform for data management, relying solely on it for storage can be risky. Unforeseen events like accidental deletions, system failures, rogue employees, or cyber threats can result in data loss. This is where regular backups come into play.
By implementing a reliable backup strategy, you can ensure you have a secure copy of your information, ready to be accessed whenever the unexpected happens.
Automated backups that run on a consistent schedule provide a simple way to avoid a major disaster.
With On2Air Backups for Airtable, you can set a schedule of Monthly, Weekly, Daily, or Hourly to send your data from Airtable into an external storage provider, like Google Drive, Dropbox, or Box.
Learn How Charm Industrial Backs Up Mission Critical Airtable Data with On2Air Backups
How to Create Automated Airtable Backups
Here’s a 📽️ quick video version of the guide or follow along below for the detailed written guide.
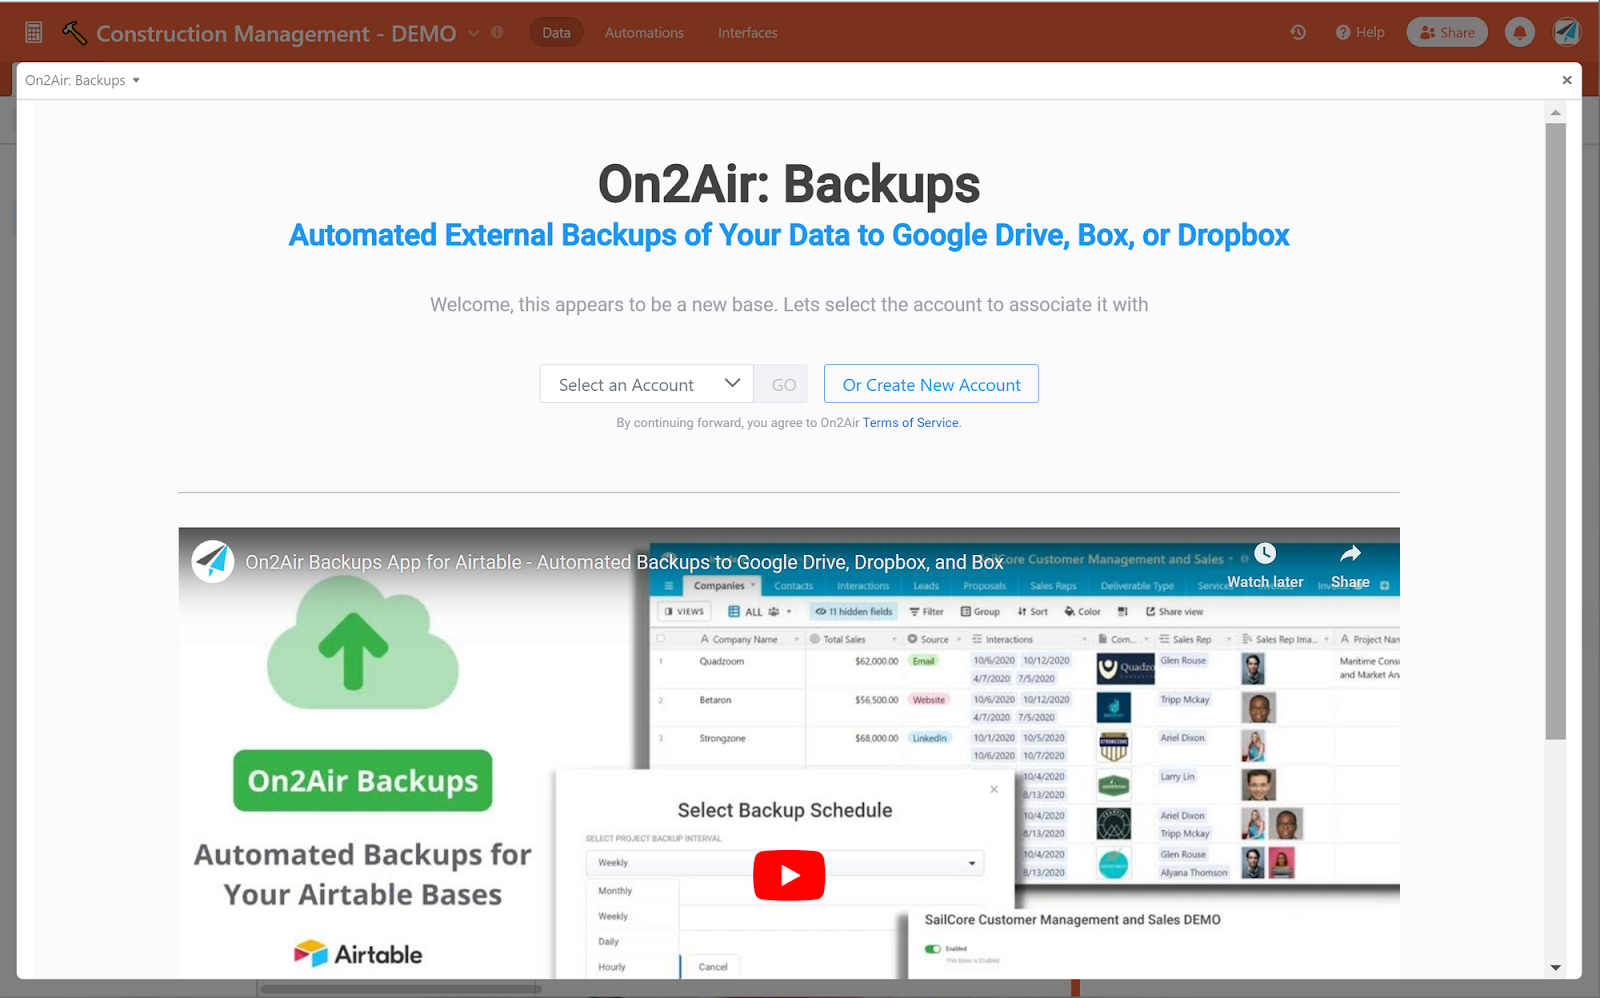
1. Install the On2Air Backups Extension in your Airtable Base
- First, open your Airtable base and click Extensions
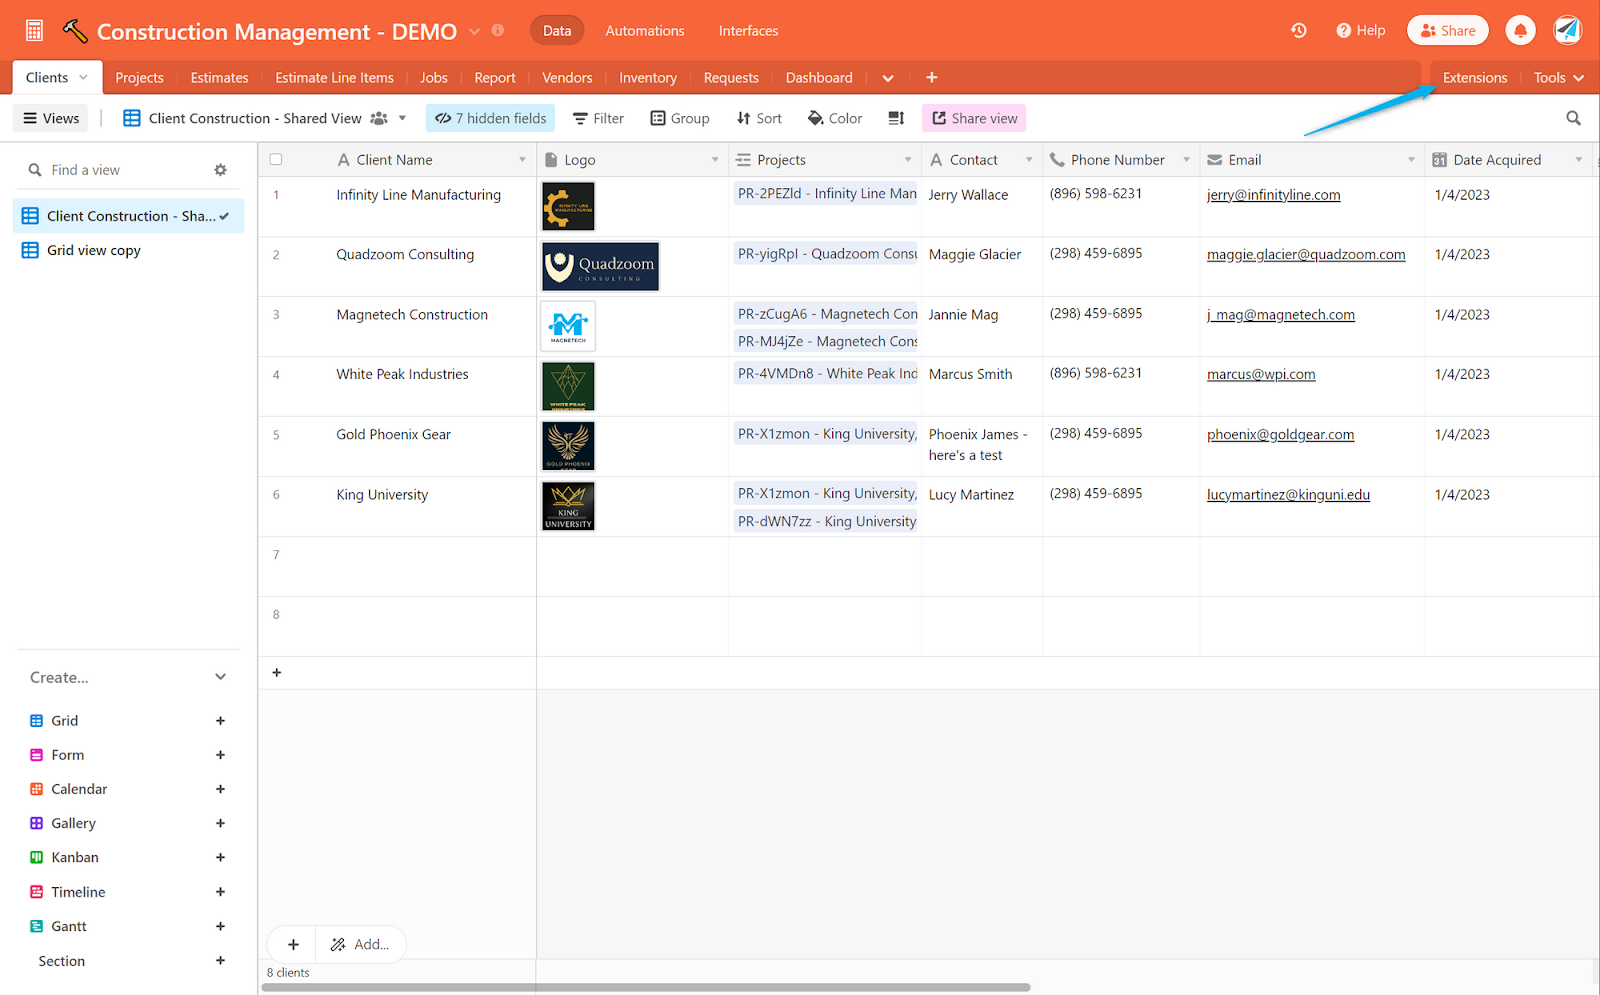
- Click Add an extension

- Type On2Air in the search box and choose On2Air Backups
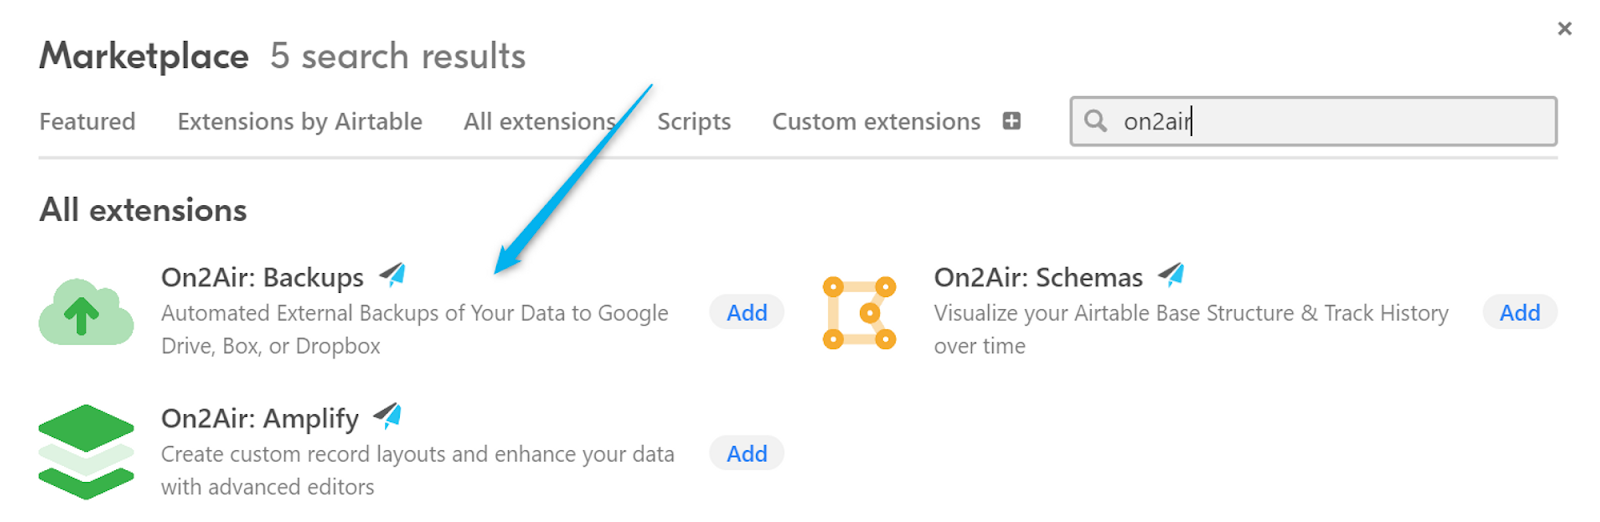
- Click Add Extension to add it to your Airtable base
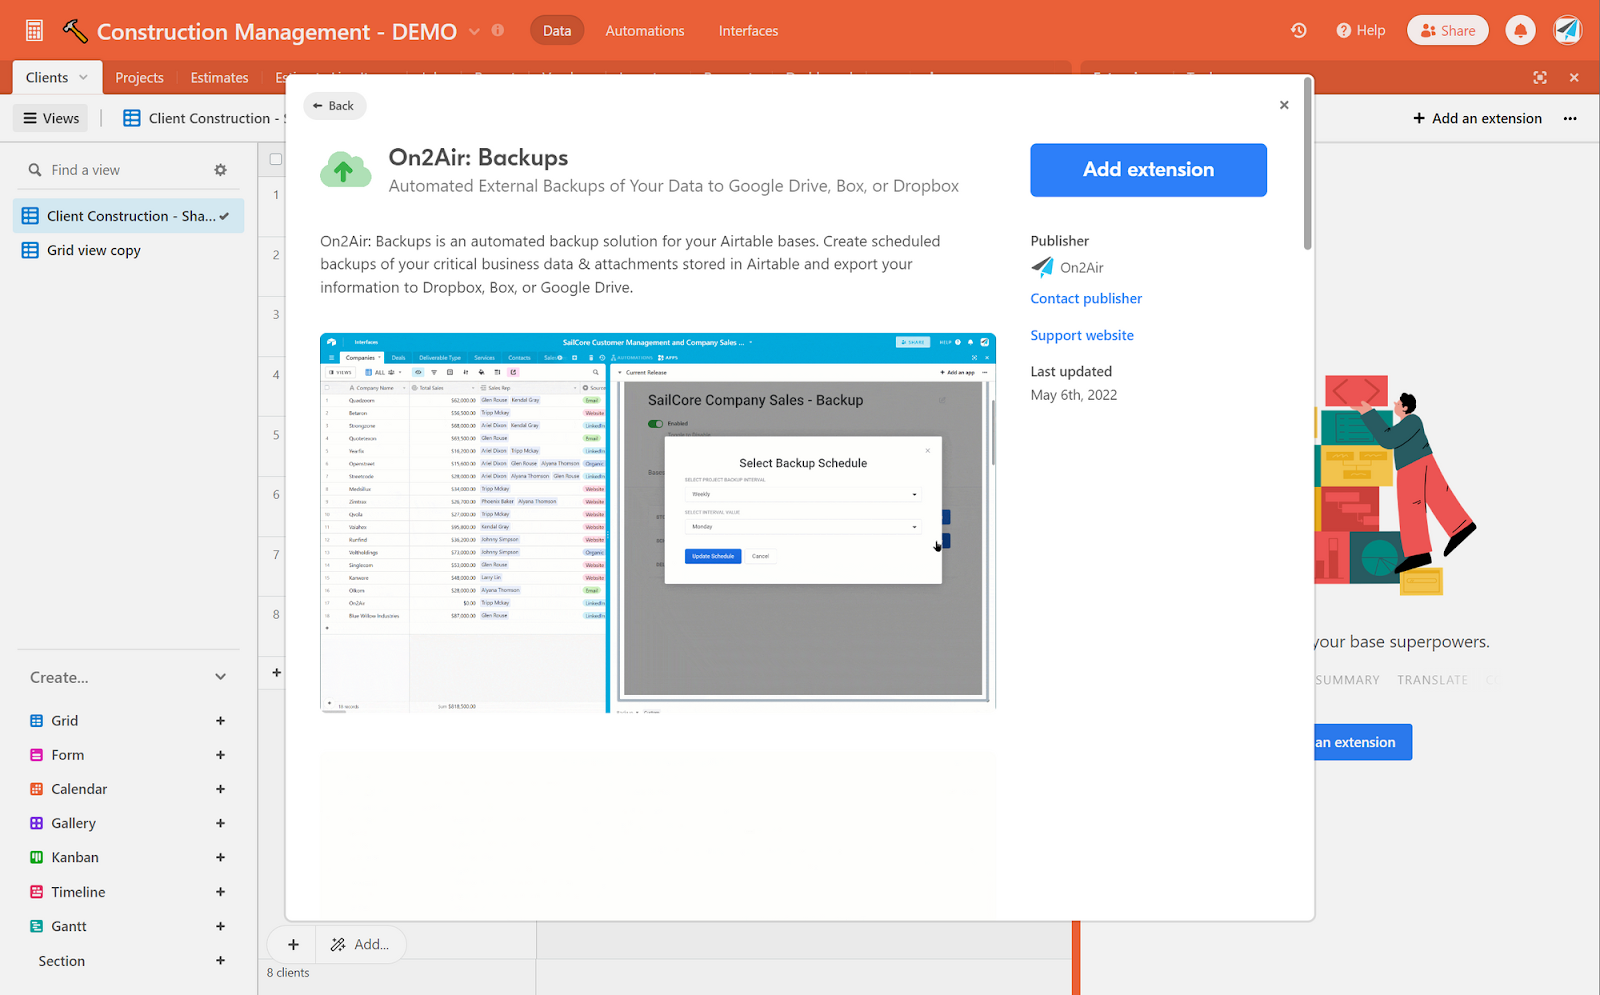
- You’ll now click Create New Account to create an On2Air account. You’ll go through the account creation process.
If you’ve ever added On2Air Backups to other bases in your Airtable workspace, Select your On2Air account.
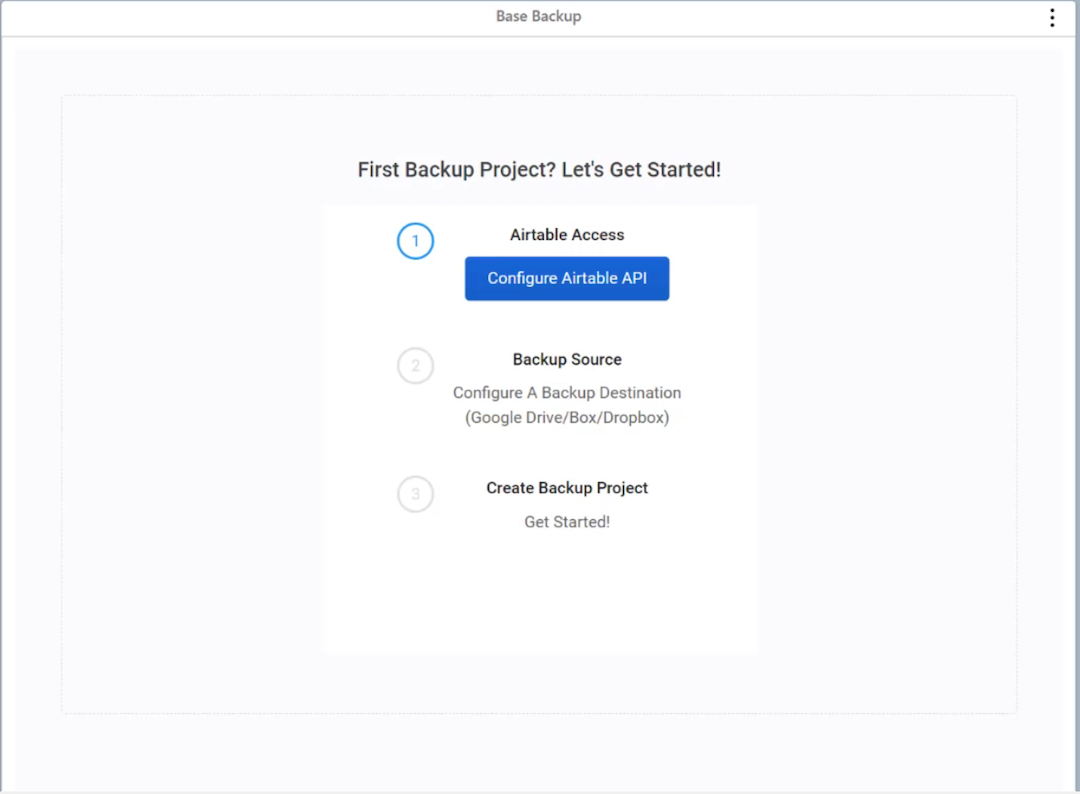
2. Connect Your Airtable Account
Now, you’ll need to connect your Airtable account
- First, copy your Airtable API Key – How to Find your Airtable API Key
- Note: We are transitioning to the new Airtable OAuth connection. You’ll be able to quickly upgrade the API Key to OAuth. Click the Configure Airtable API button
- Paste your Airtable API key into the On2Air Backups API Key field
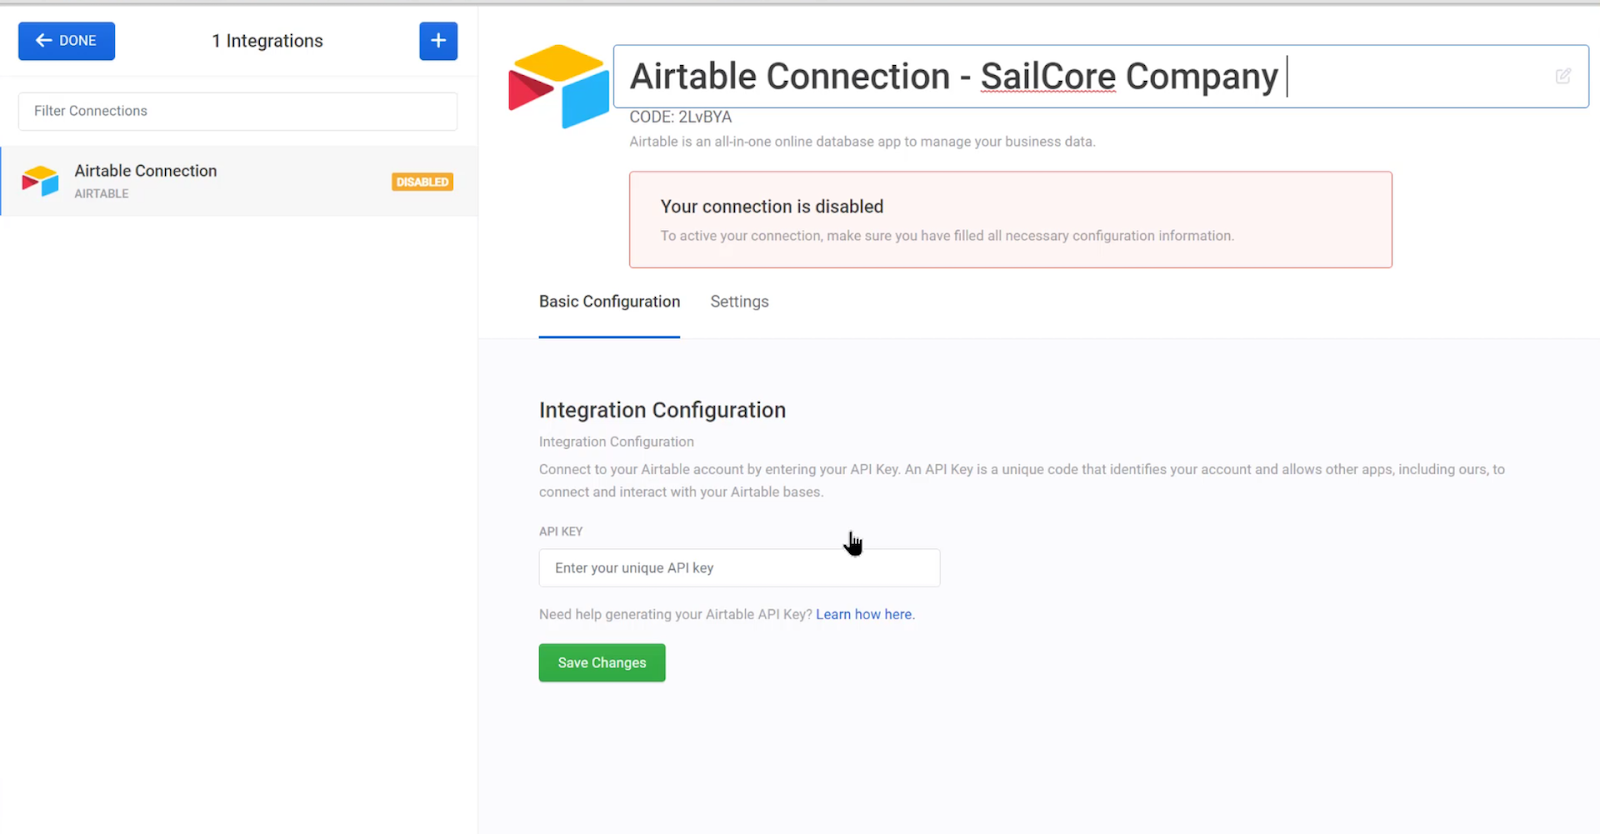
You can label the Connection whatever you would like
- Next, Activate the Airtable Connection toggle
- Click Save Changes
- Close out the popup and click the Configure Airtable API button again. This will refresh the app to accept your token.

- You’ll now see that you’ve connected On2Air and Airtable
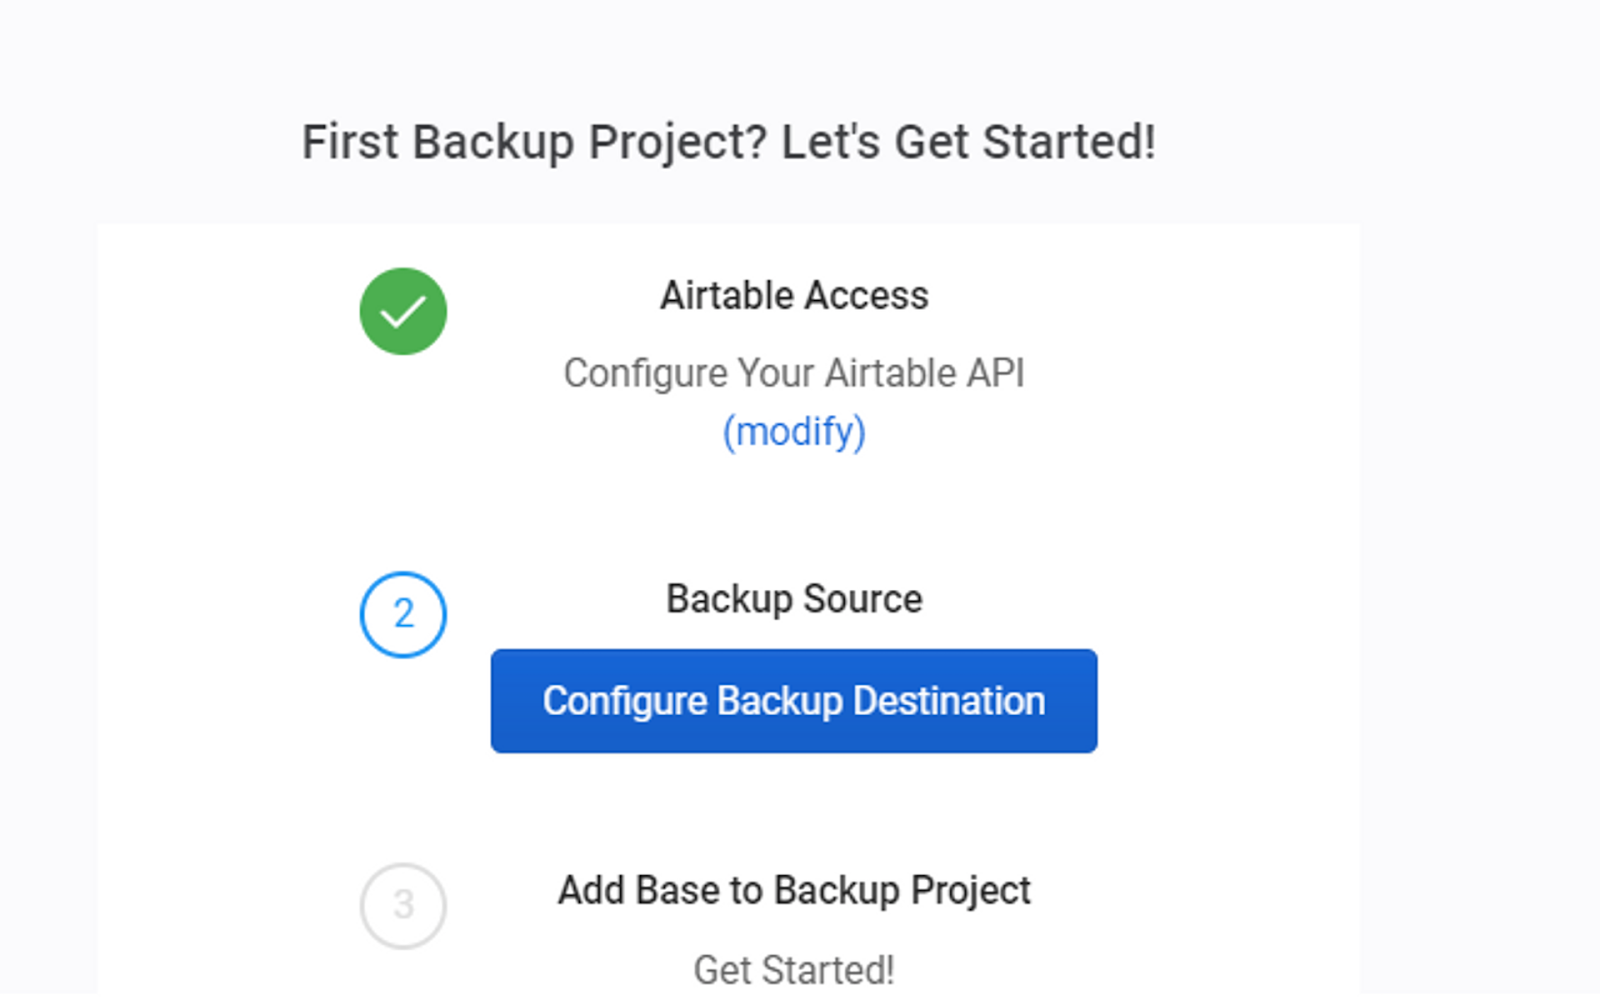
3. Connect Your Cloud Storage Account (Google Drive, Dropbox, or Box)
Next, you’ll connect your cloud storage account in Google Drive, Dropbox, and Box.
- Click Configure Backup Destination
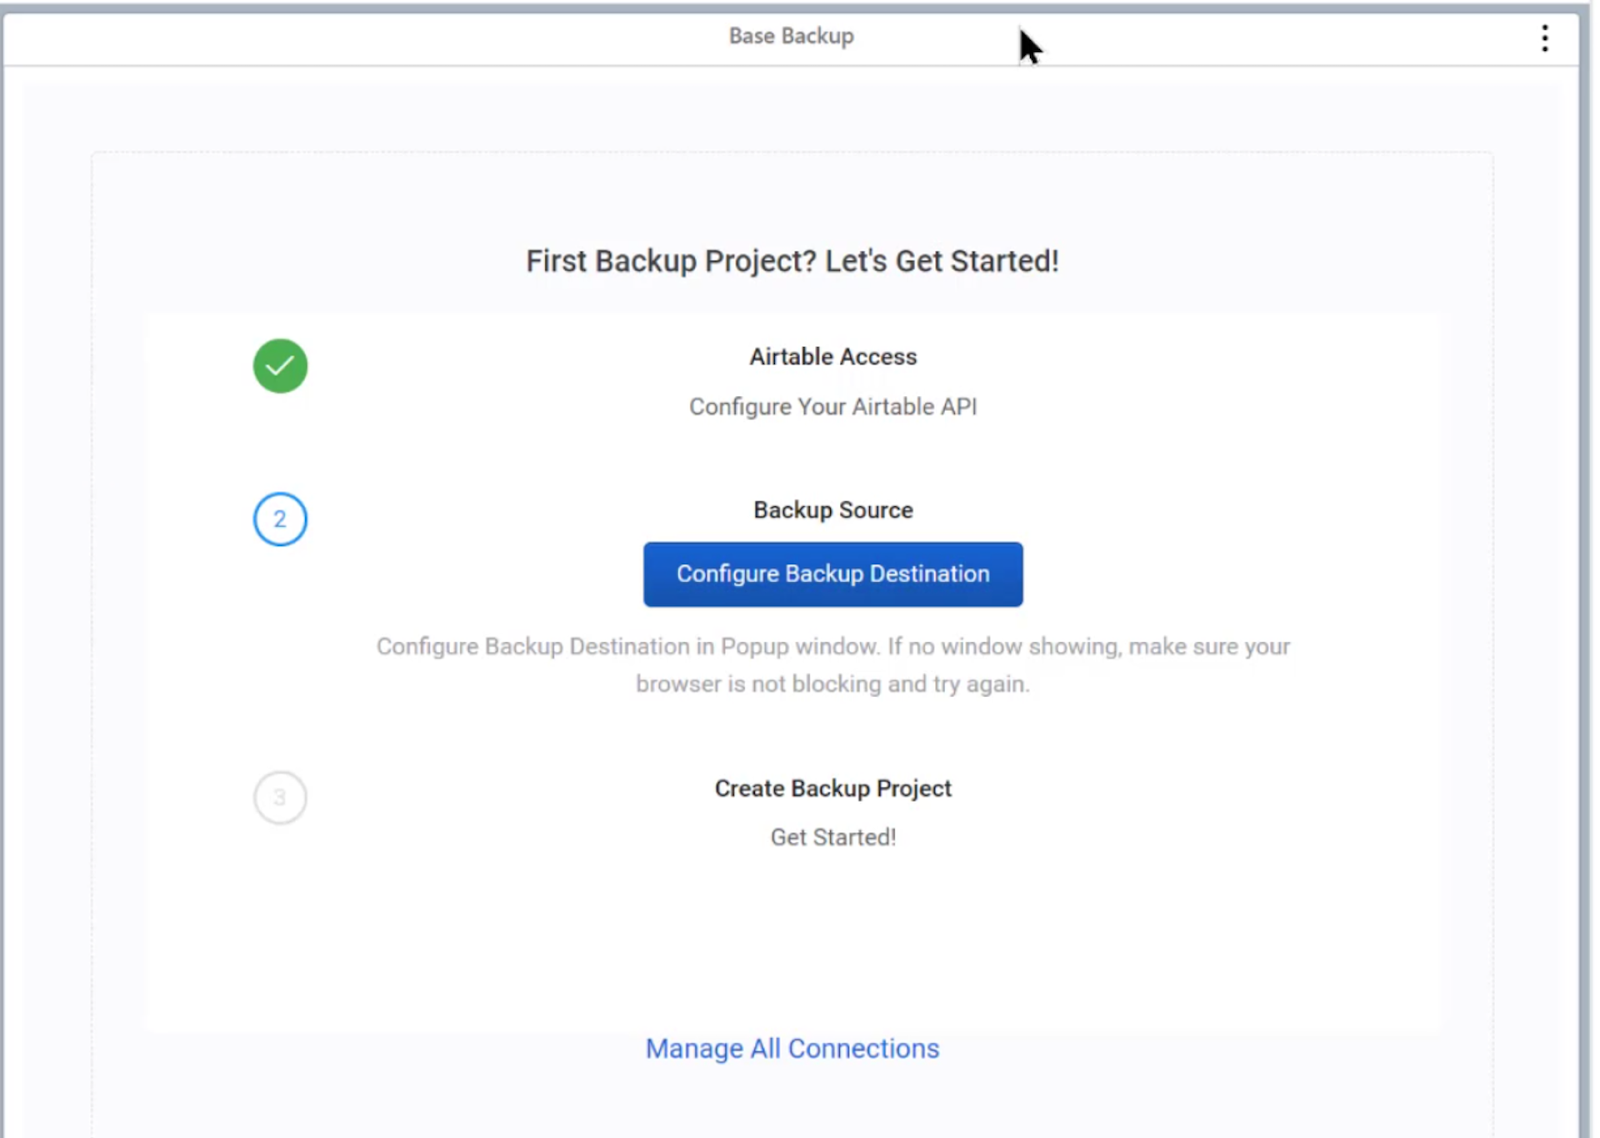
- Depending on your cloud storage option, the setup will look slightly different. Choose the storage instructions below to connect.
You will need to accept the permissions that pop up when connecting your storage drive to On2Air. Once you’ve accepted permissions and connected your account, you can now create a backup.
How to Connect Your Google Drive Account
How to Connect Your Dropbox Account
How to Connect Your Box Account
- Once you’ve connected to Storage, click Configure Backup Destination again, close the popup, and On2Air Backups will refresh and connect
4. Create a Backup Project
Once you’ve connected your storage drive, create a Backup Project. A backup project is like a folder to store the Airtable bases you want to back up. You can add one or multiple Airtable bases to a project and set them on the same schedule.
- Click Create New Project
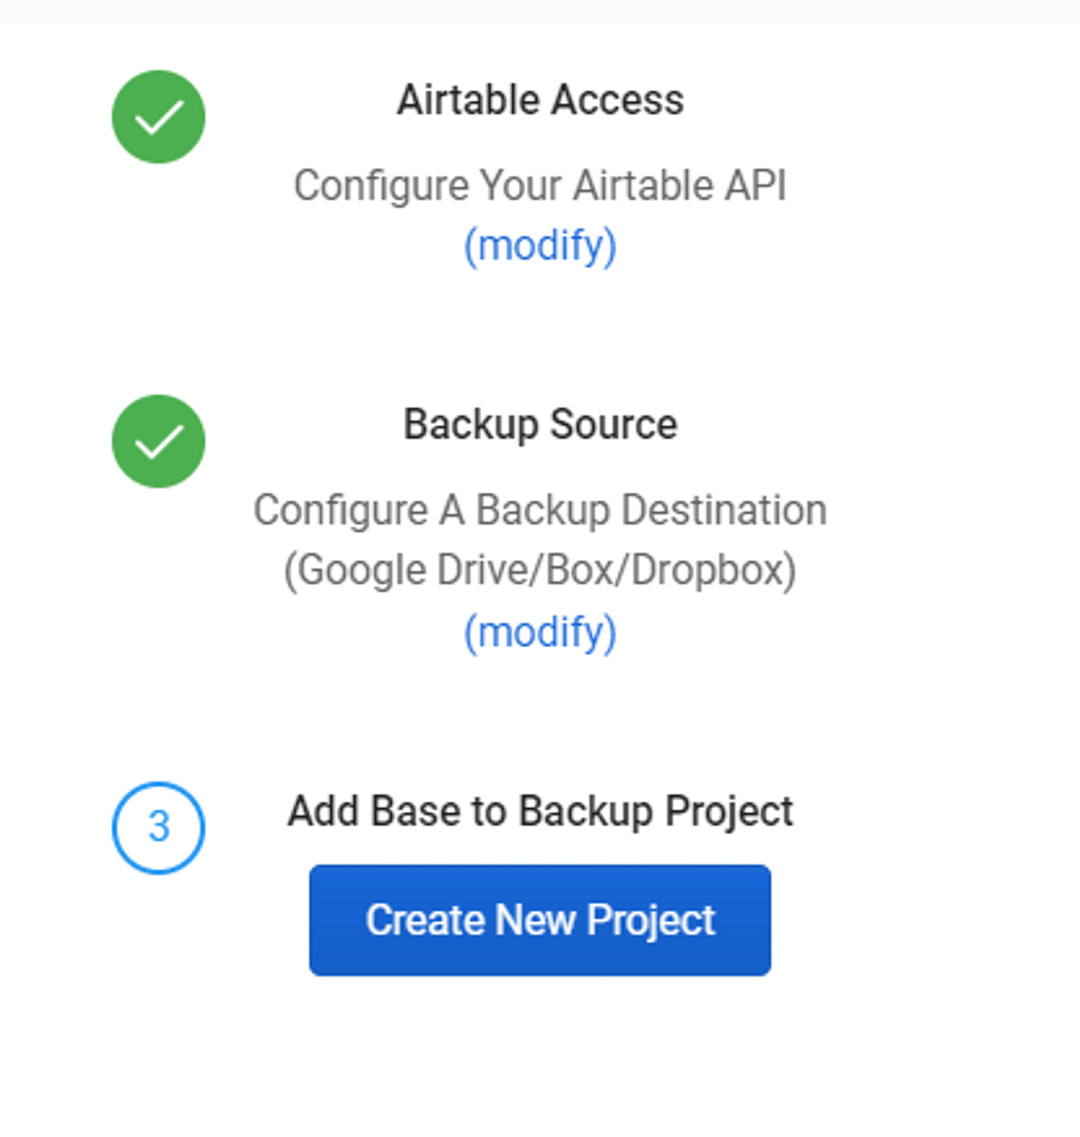
- On2Air Backups will automatically detect the Airtable base you’re in
- Click Configure Settings
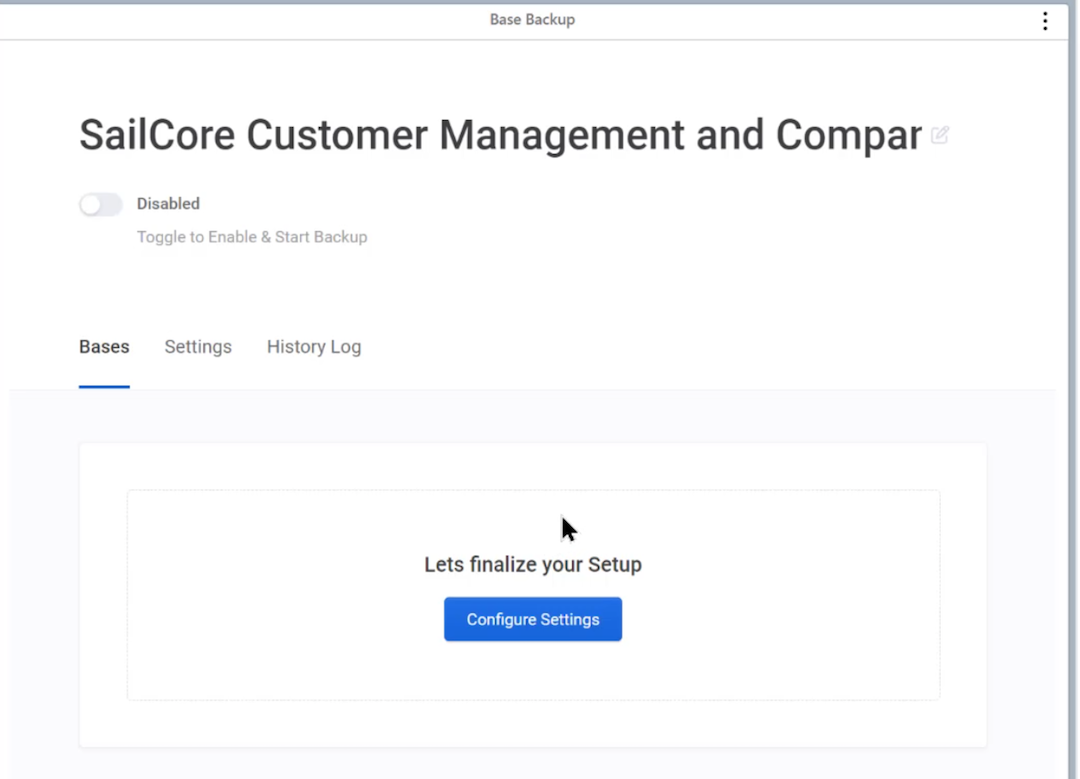
- Next to Storage Connection, choose Update
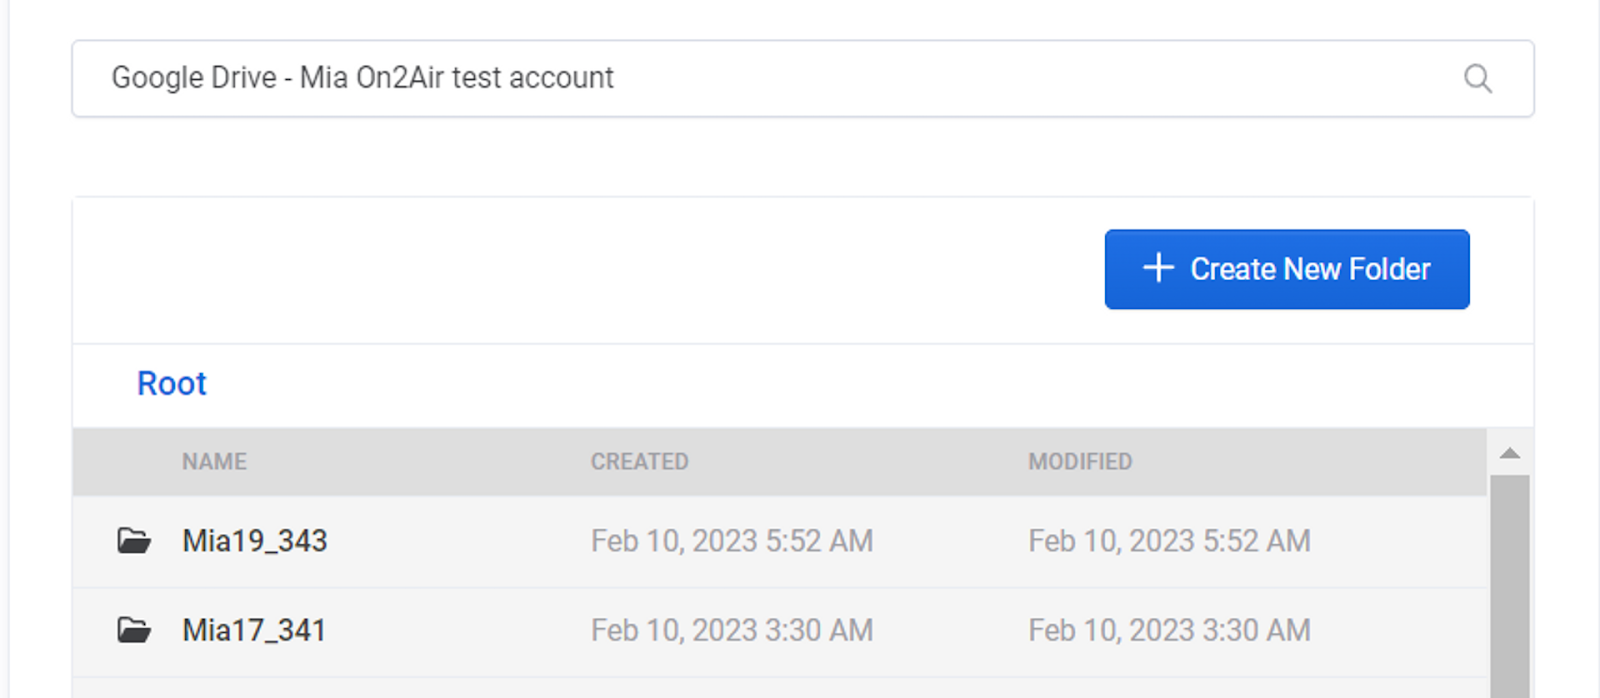
- By default, we’ll add the backup to the root of your storage drive. You can change to a specific folder or create a new folder to store your backups
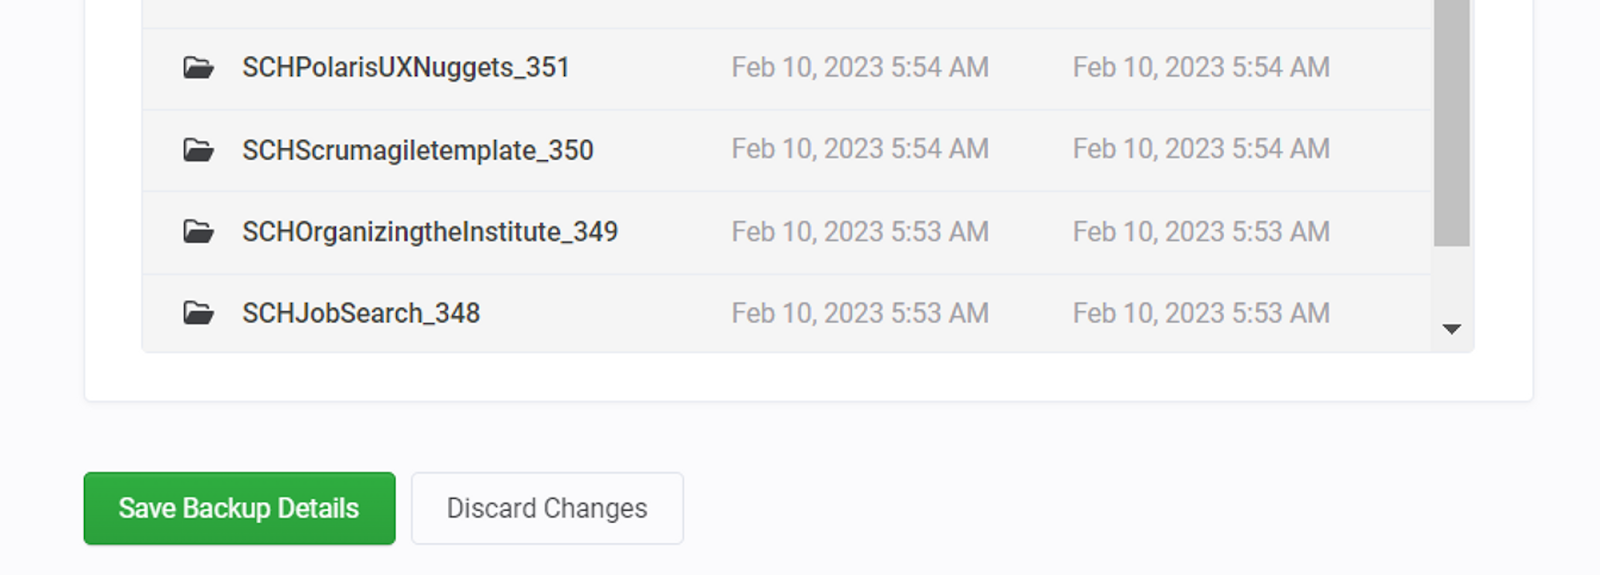
- Now, you can Choose a folder from your storage drive or Create a New Folder where your backups will be sent
- Then click Save Backups Details
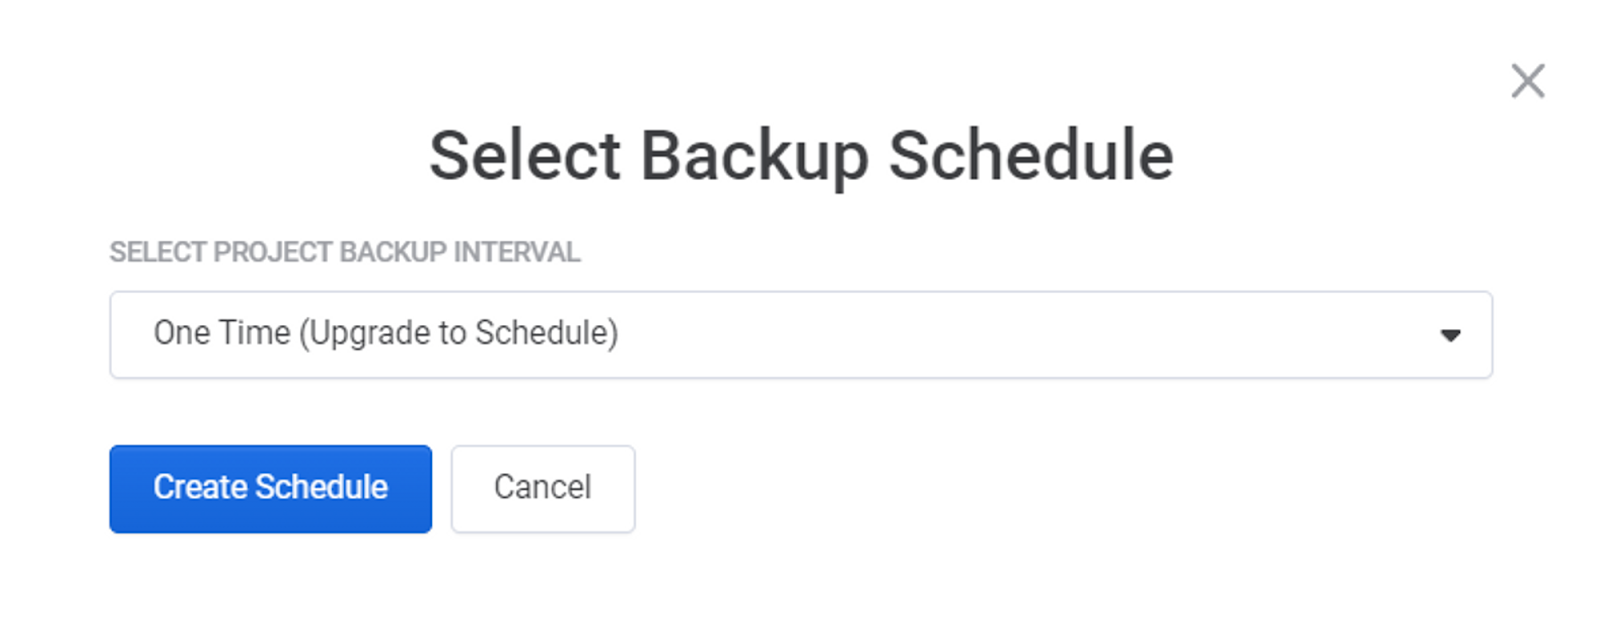
- Now that your folder is chosen, the Trial Schedule is automatically set to One-Time.
- In the free On2Air Backups Trial, we allow 1 Airtable Base, 10 Tables, 100 Records per table, and 25 Attachments (total) to backup to your storage drive.
After the trial creates a backup to your storage drive, the Backup Project deactivates.
To enable full automated Airtable backups, upgrade to an On2Air Backups plan
5. Click Start Backup
- Click Start Backup to start your Backup
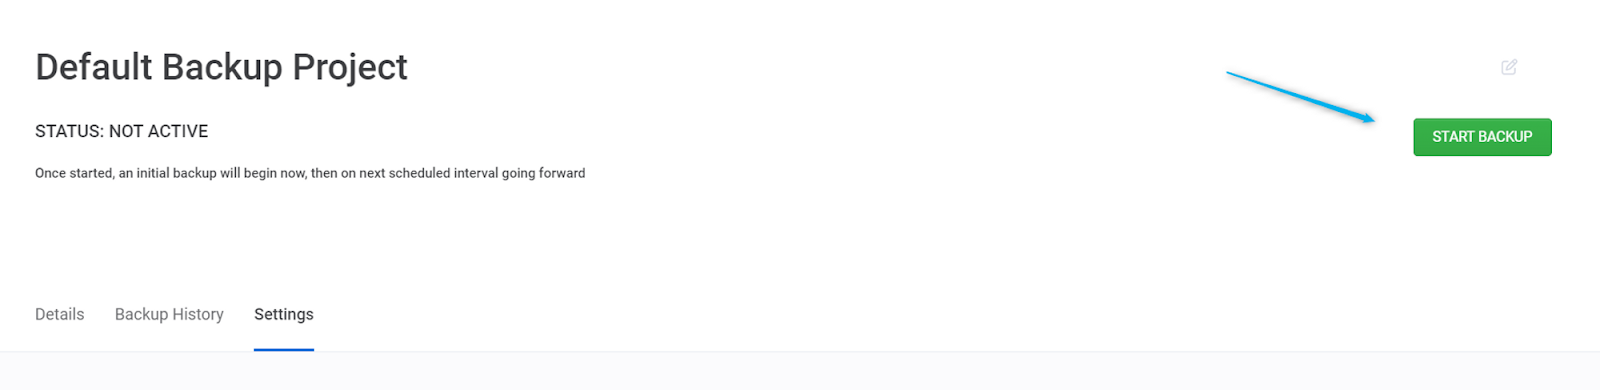
- The Status will change to Active while it creates a backup in your storage drive

- Click Backup History to see the backups begin and when it’s done processing.
⭐
Backups will begin within approximately 1 minute. The initial backup takes time to complete the backup, depending on the number of records/fields in your Airtable base and the number of attachments.
Subsequent backups will not take as long as we back up only the specific changes made.
You can click Refresh on the Backup History page to watch the progress.
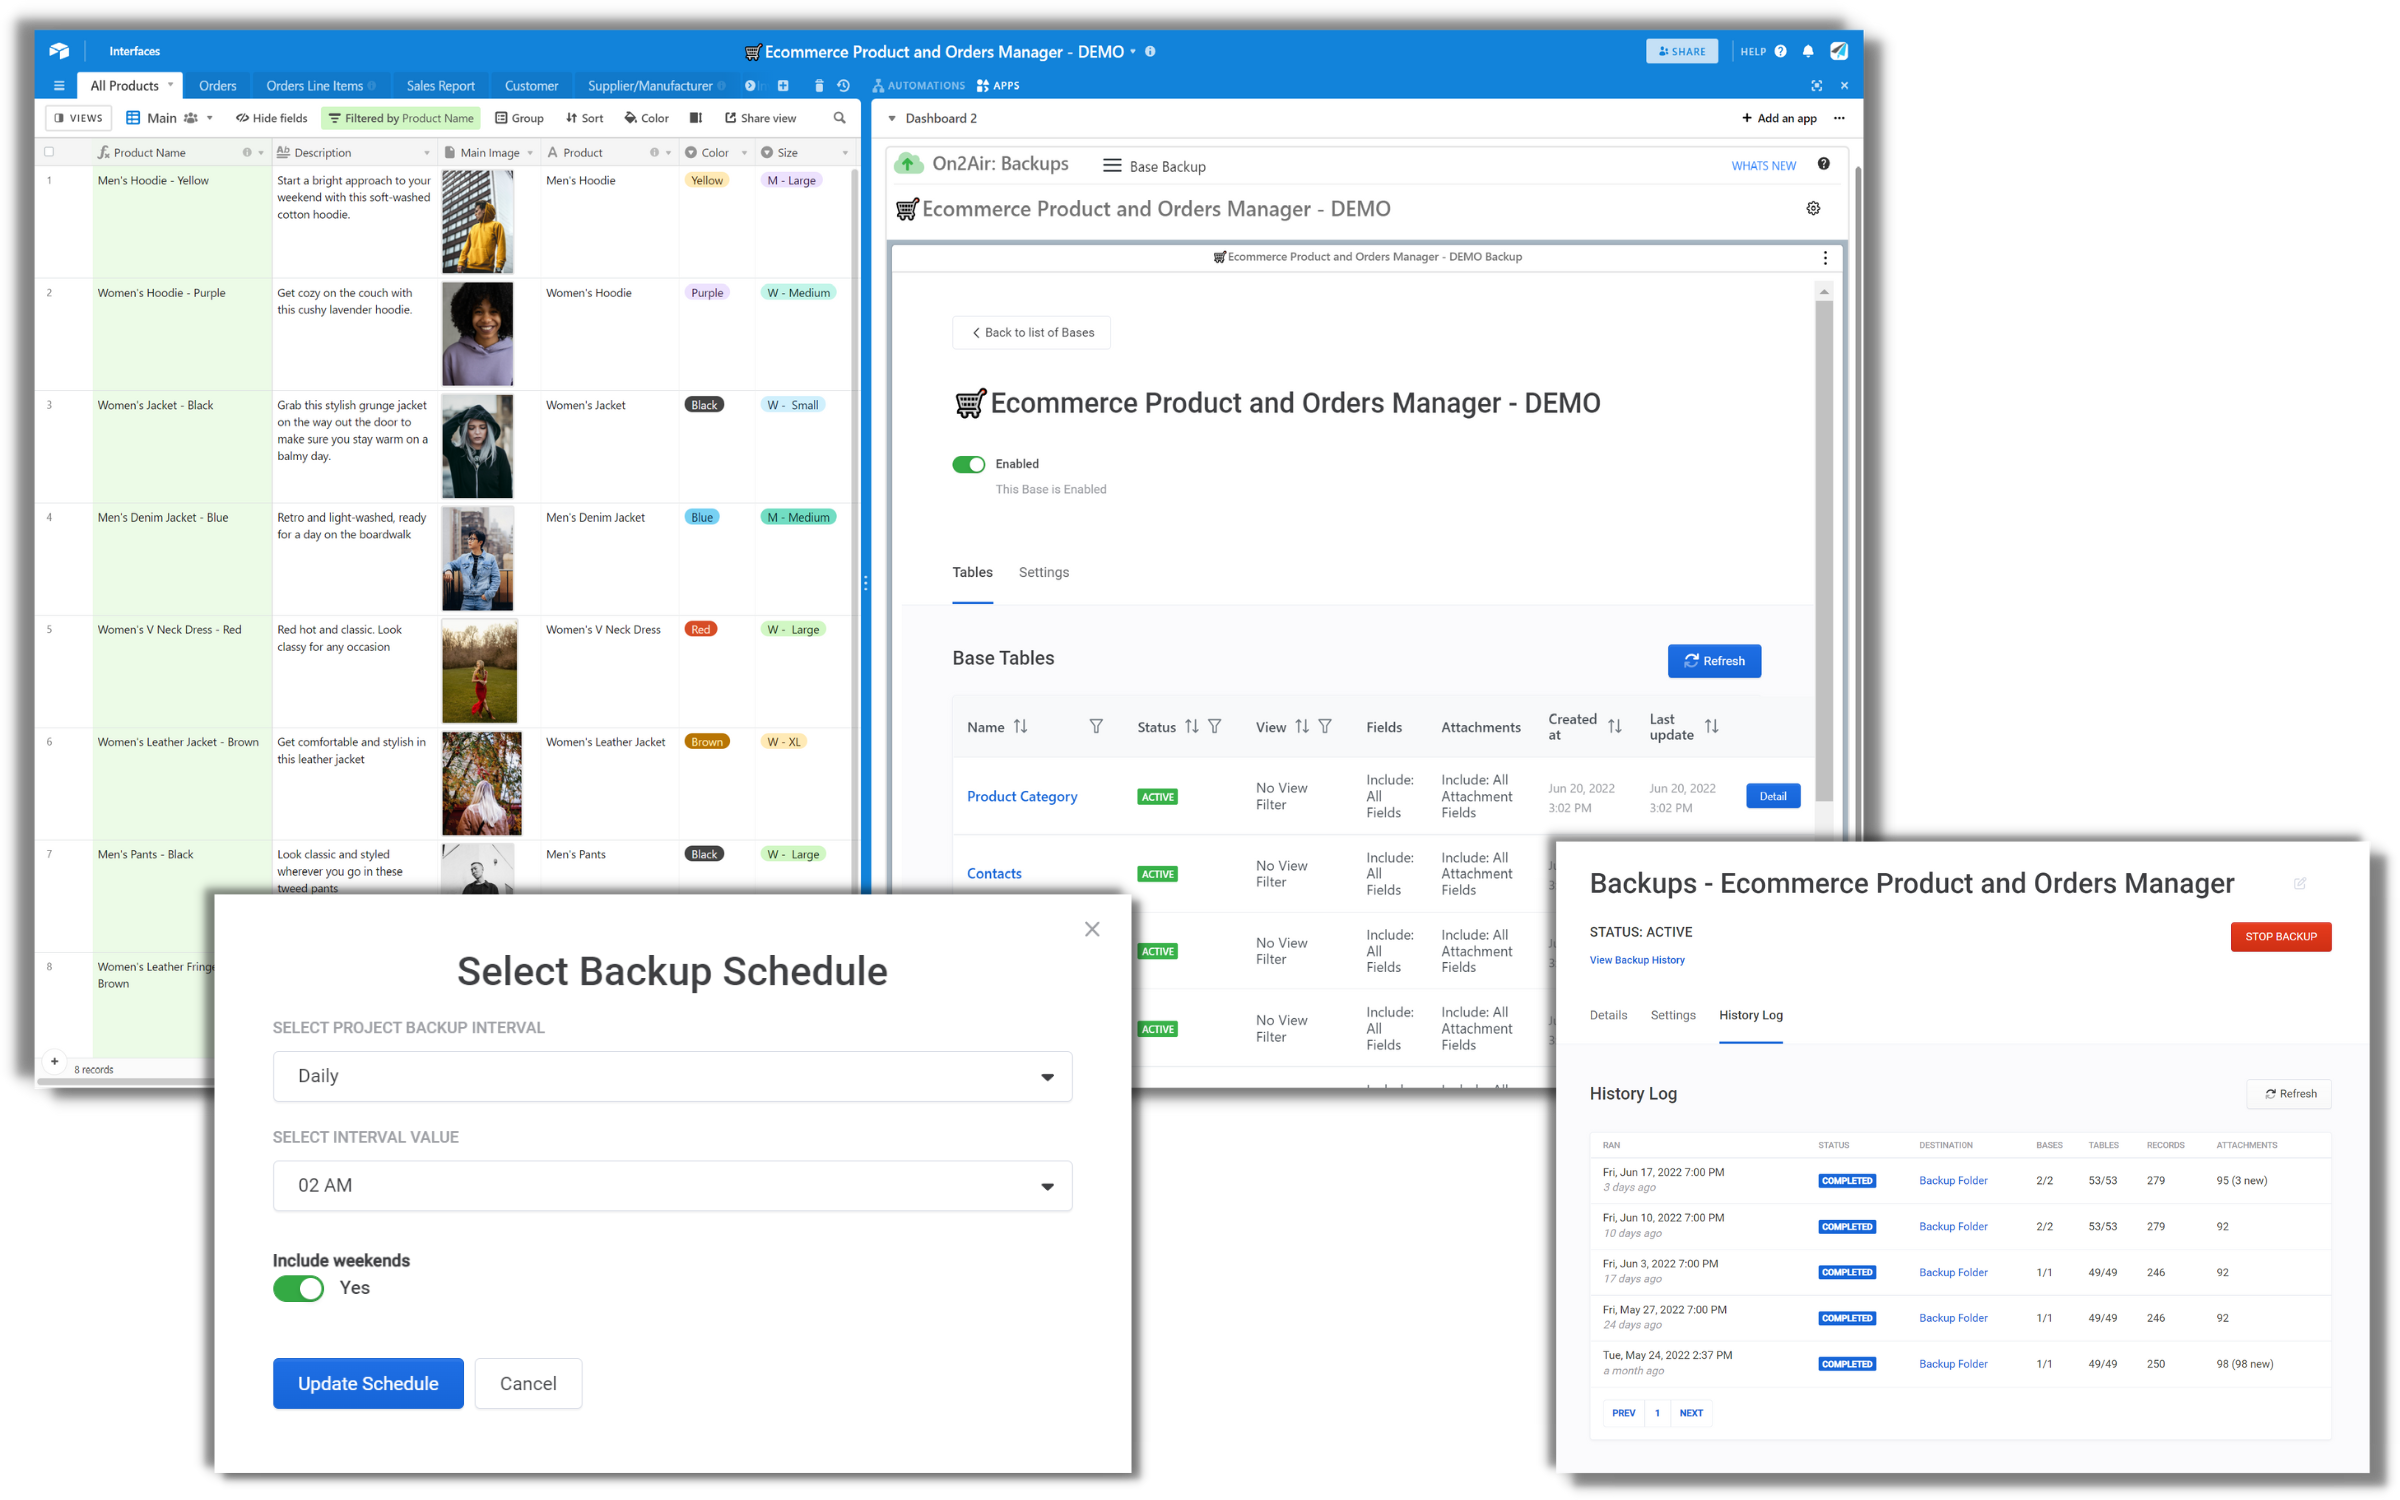
6. Upgrade and Choose Your Backup Schedule
To fully automate Airtable backups, upgrade to an On2Air Backups plan. Once you’ve upgraded, you’ll then need to set the Schedule and Reactivate the backup.
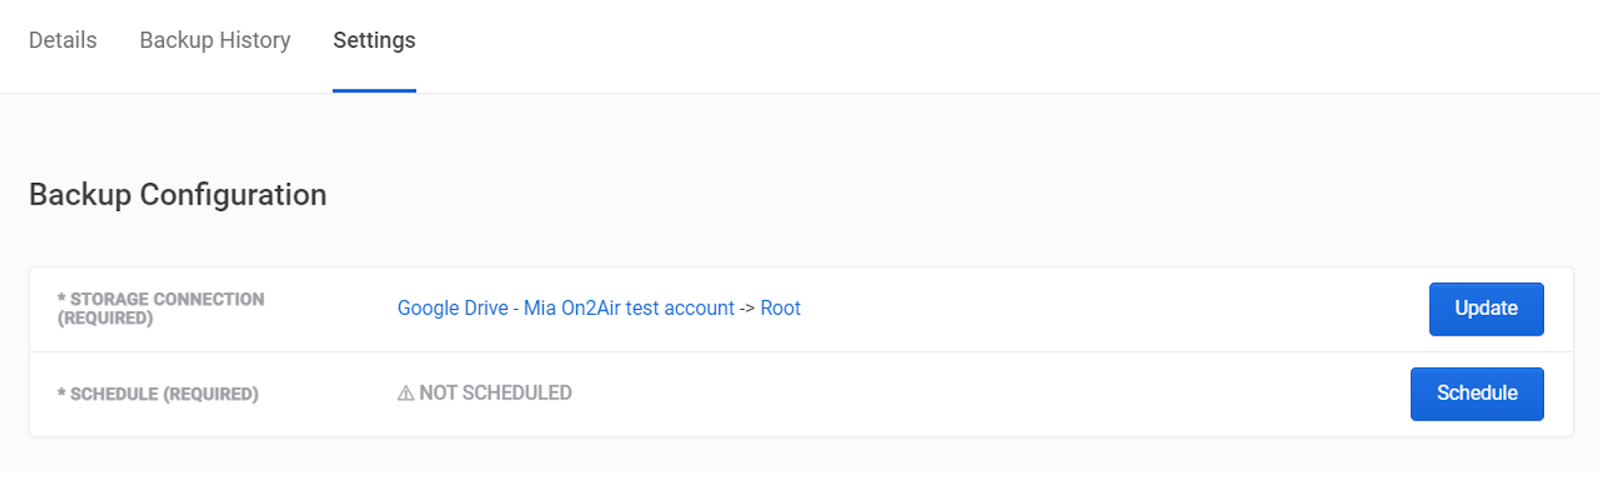
- Once you’ve upgraded, you need to set your new automated Schedule
- In your Backups Project, click Settings, then click Schedule
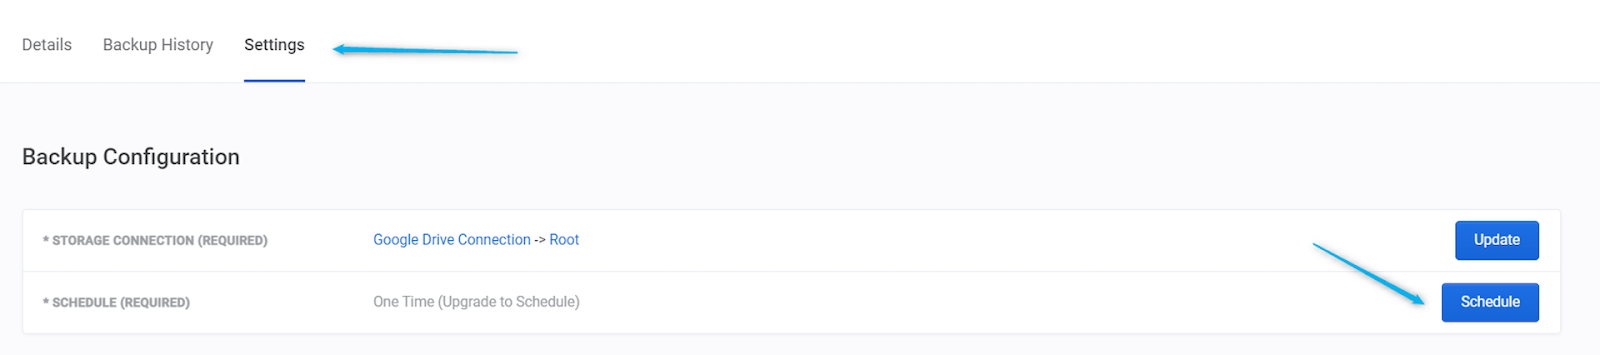
- Choose your Backup Project Interval and Interval Value
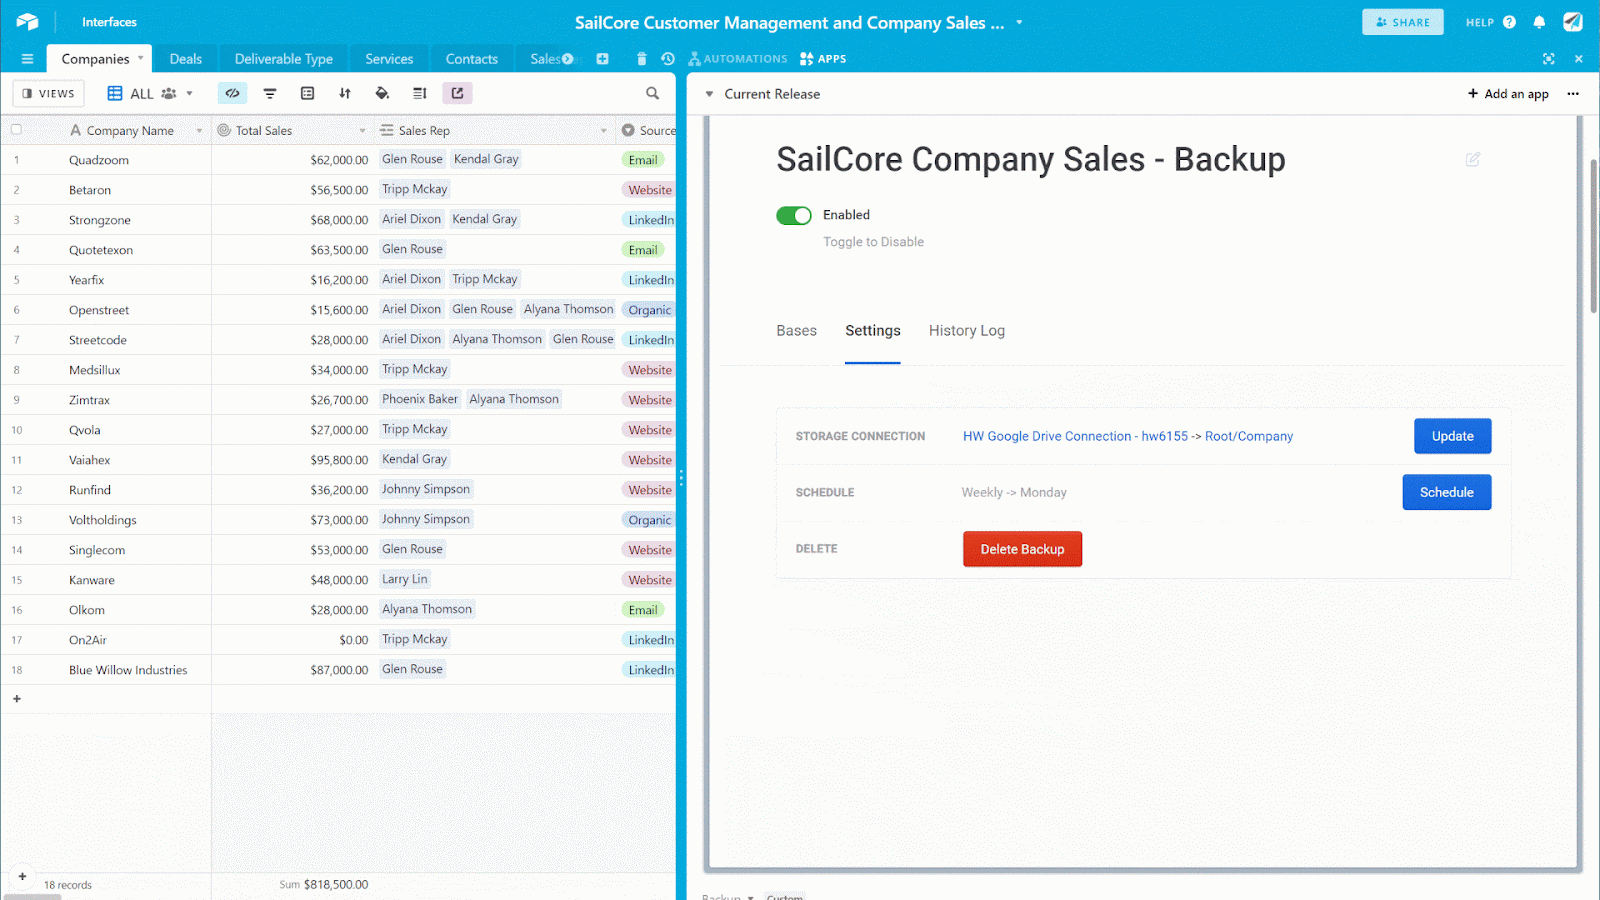
- Click Update Schedule
Enable Your Scheduled Backup
- Once you’ve set your backup schedule (paid plans), click Start Backup

Data Security for Airtable with On2Air Backups
Data loss can have severe consequences for businesses, impacting operations, productivity, and reputation. By proactively implementing a backup solution, you safeguard your data against potential risks like data corruption and deletions.
Scheduling automatic backups for your Airtable data using the On2Air Backups is a crucial step in ensuring the safety and security of your valuable information. You can establish a reliable backup strategy that protects your data from unforeseen events and potential loss.